Weather | Buy&Sell | Forums |  |
Weather | Buy & Sell | Gallery | Forums | |
I got the Paulownia blank for my Alaia's from this place
surfinggreen.com.au/
Hope that helps

Okay,
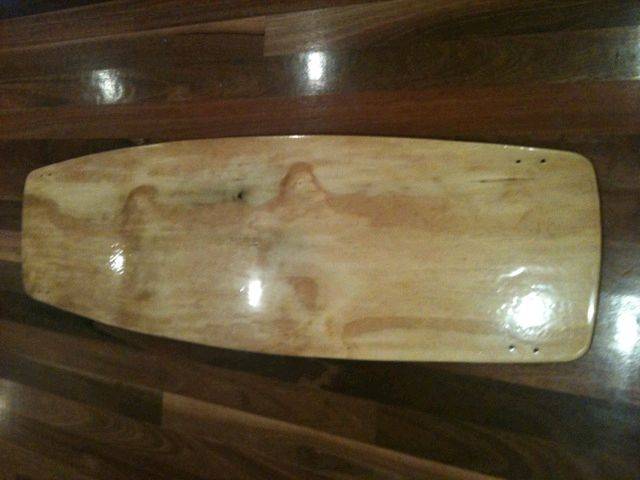
I have applied 2x coats of epoxy to thedeck, and have just finished 1 coat on e bottom. I am very happy with the progress, though are small minor imperfections in the deck. Would i be best to sand the deck, with a fine sandpaper, and apply another coat, or can i sand it slightly prior toadding a paint finish.
Looking good, and will post more photos tomorrow, after i get the second coat on the bottom done.
Also, how long should i wait for the epoxy to cure prior to painting it up.
Thanks
KR![]()
I had email contact with Brokite and asked them what they use for top & bottom sheets?
Their reply was:
"We use a clear vinyl material called 60/40 that is silkscreened on the down side so graphics will not wear off. It has superior UV protection and since a scratch would have to go all the way thought the 60/40 to get to the graphics, that never happens."
Does anyone have further info on this "epoxy friendly" 60/40 vinyl, e.g. Aust suppliers?
Fossil
Huddy, a tip on laying out epoxy.
I followed the instructions on the back of the tin, for how much rto mix for about 1/2 m2, approximate size of my twin tip. As i am not using cloth to lay out, on my first mixing, i mixed up allmost 3 times the amount actually used. So my tip is:
Mix enough mixture to make up about 100-125ml of mixed epoxy, per side and per coat.
I bought a 500ml resin, and 250ml hardener. Which theoretically i could of Got close to 3 coats per side of board.
kr![]()
Help with board shape
I am 80 kgs riding in chop to flat i dont jump anymore (broke heel ) so i
am trying to build a board to suit me
how much rocker . do i put a concave in it iam thinking of a foam middle with 2 layers of 6 oz uni directional
Some people have comment that i should just have a small rocker say 30mm at tips with a flat center .
I would like your opions
More rocker =
Concave =
very flexytips =
Please help i just mow the grass and cut up wind. dont jump and iam still getting over broken heel
Epoxy Coating x 2 top and bottom.
I have just sanded the top of the board, and applied a 3rd layer, which will be my last.
Rumblefish,
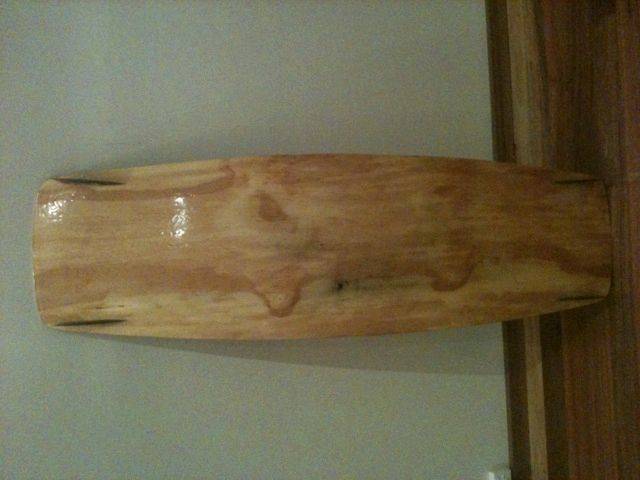
I have. Finished my epoxy coating, and am happy with the finish. I will probably leave the board clear with no paint. I have read that epoxy generally doesnt have good UV properties, and will start to turn a whitish colour. What would you recommend to prevent this from happening. I am using Norglass Epoxy.
Ta
KR![]()
Hey DR Funk sorry didnt reply. Thanks for the link on Paulownia Wood. I have looked at their site, and it looks like a goer.
Ta
KR![]()
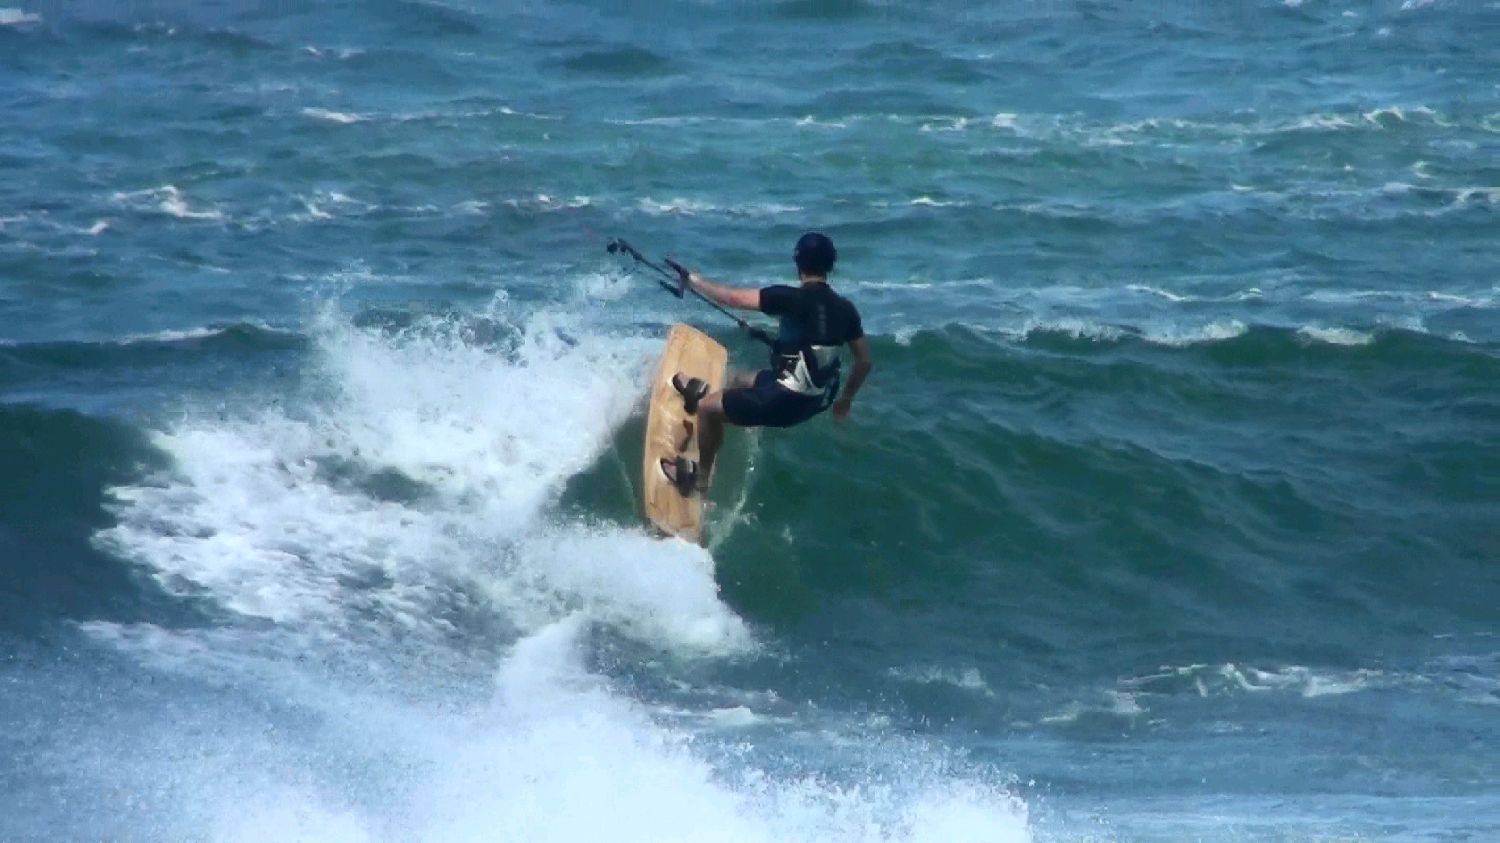
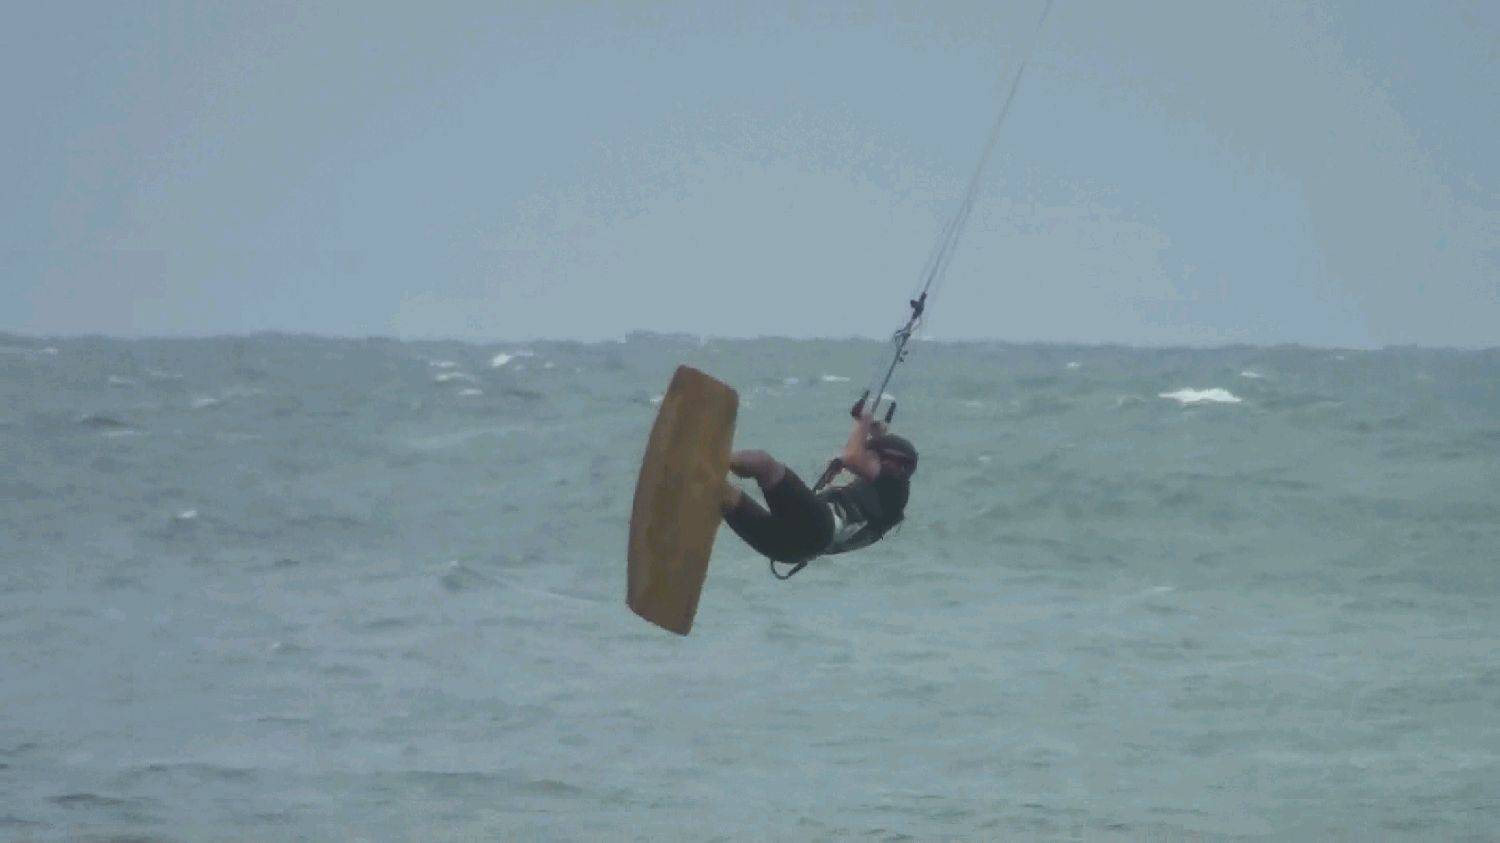
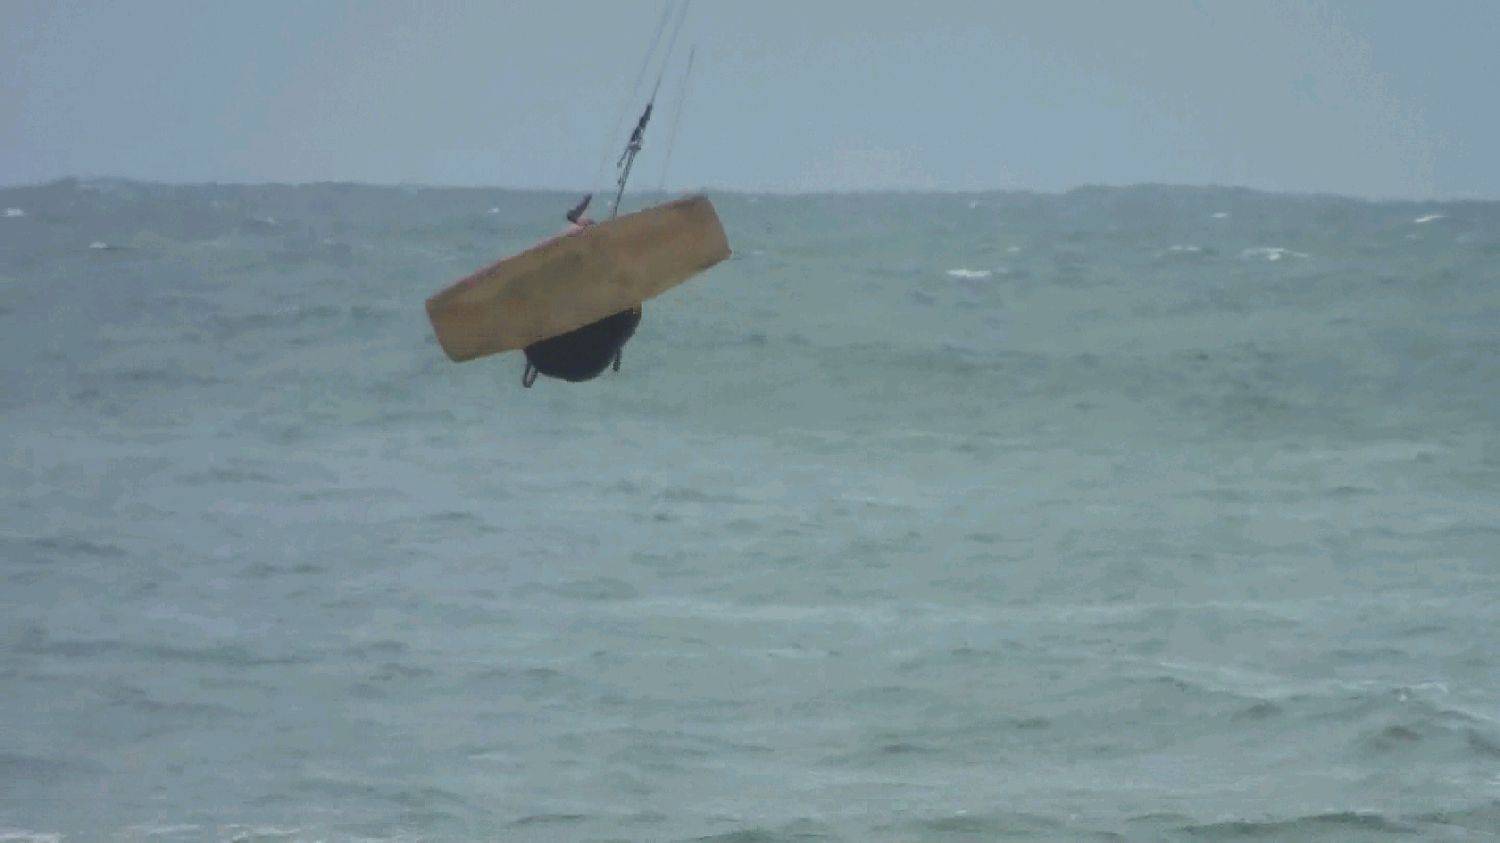
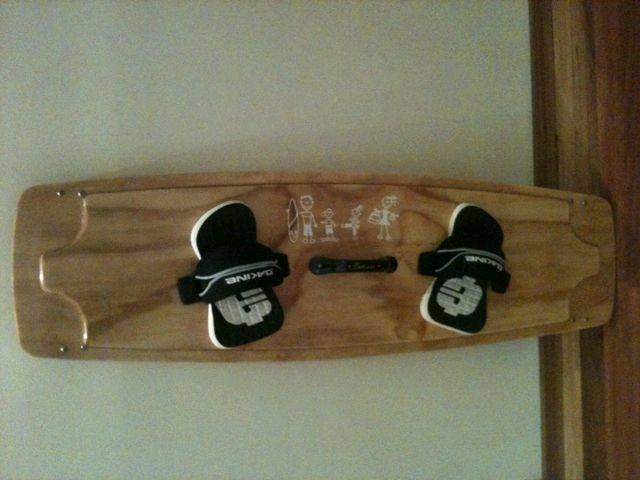
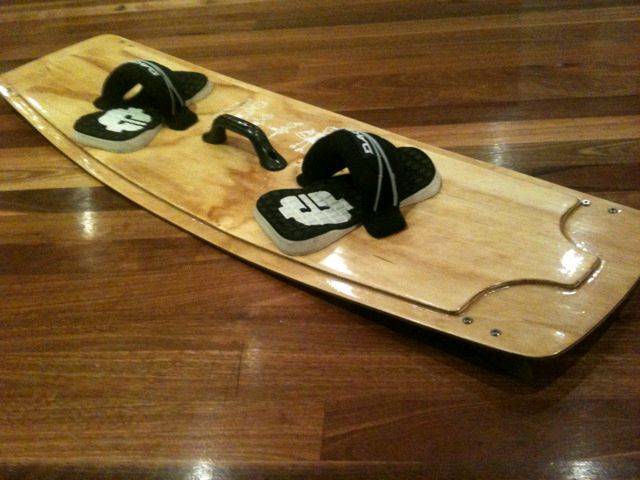
Board finished. After the final coat i decided to definately keep it unpainted. I held a competition last week for the kids to colour in, and design some graphics. The winner may have their entry on the board itself. Little Andrew came up with a picture of our family, and the slogan - My Family Rules. So i bought some stickers which alot of people have been putting on their cars, and he is pretty stocked, it chose his entry.
I will try and get my next photos on the board. We will see, that means getting my wife to the beach, not a very easy task.
KR![]()
Looks like an Awesome board mate, Bring it by WSS when your next in the area. Id love to see it.
Thanks for the comments.
I Will pop in wheni go through the area. Though i dont get up that way too much.
KR![]()
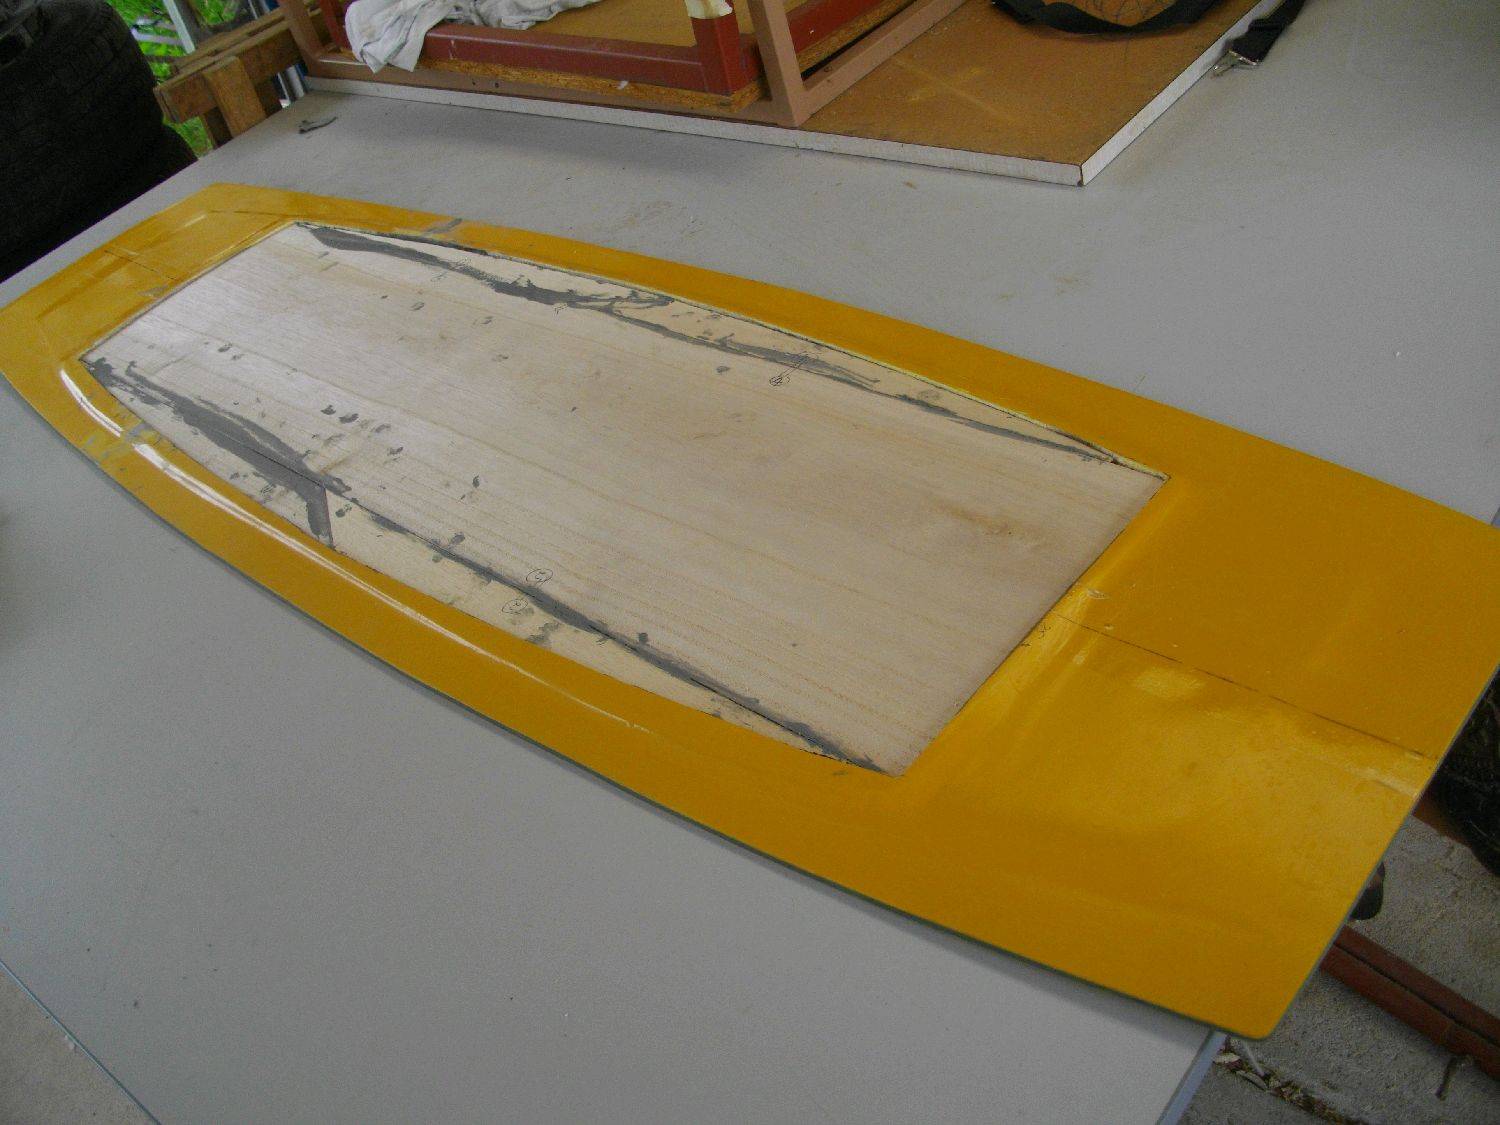
Hi board builders,
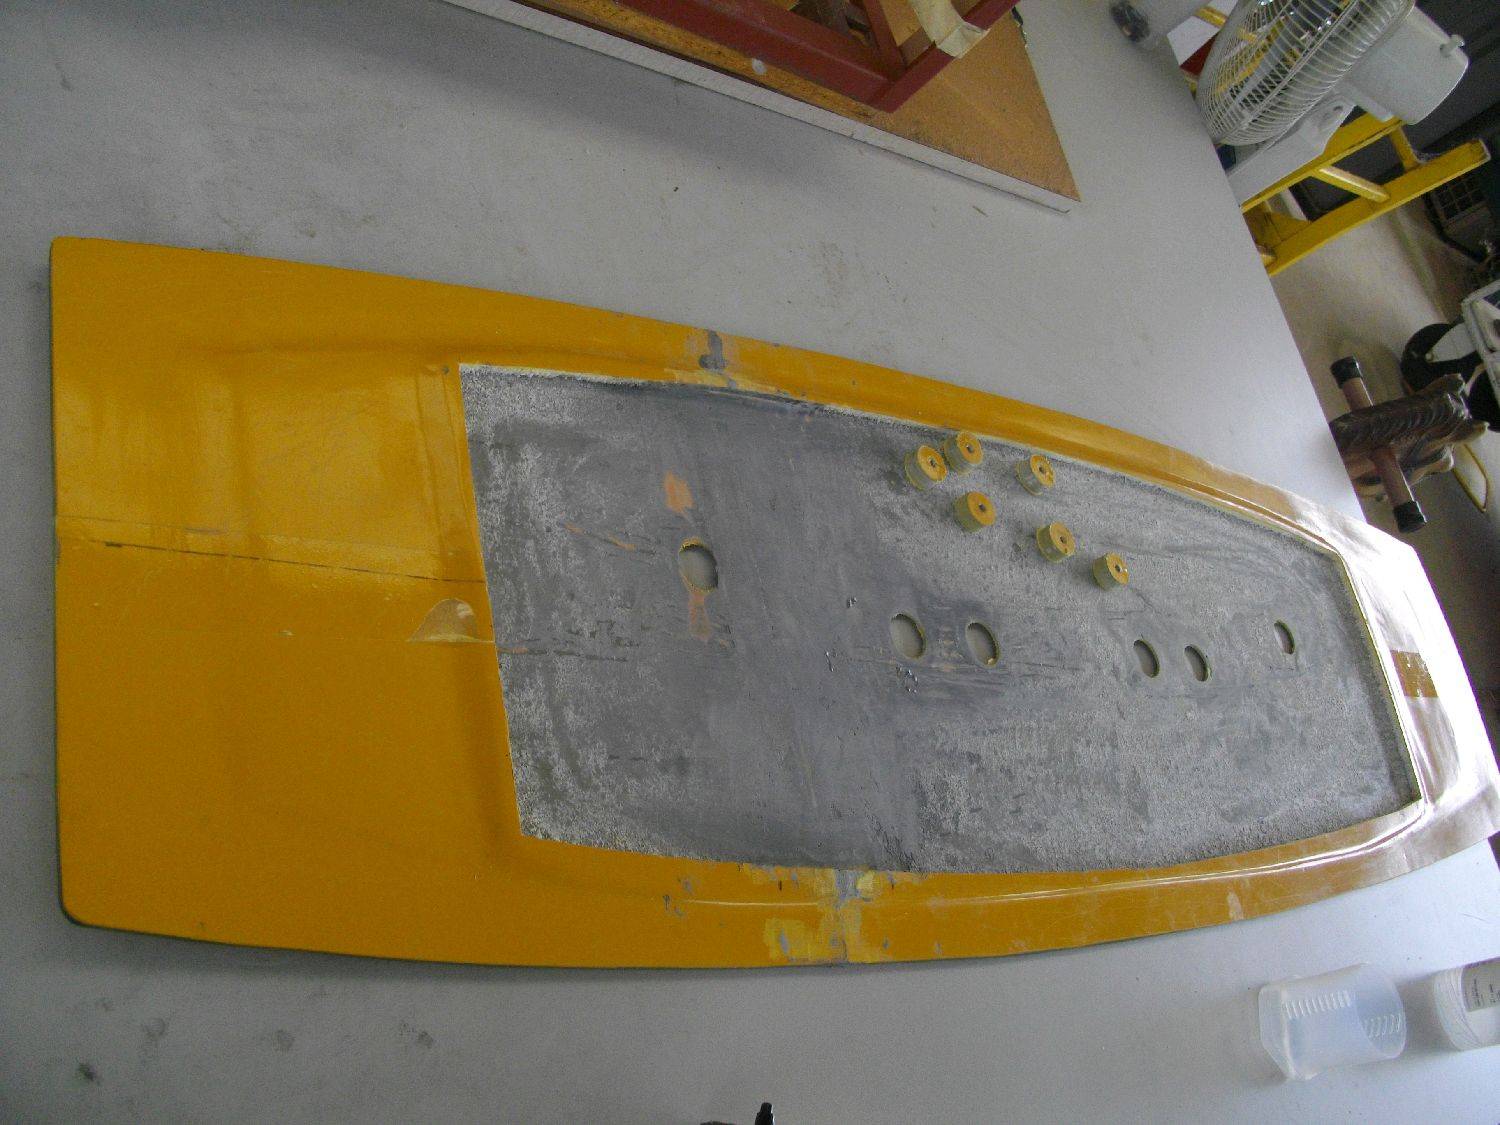
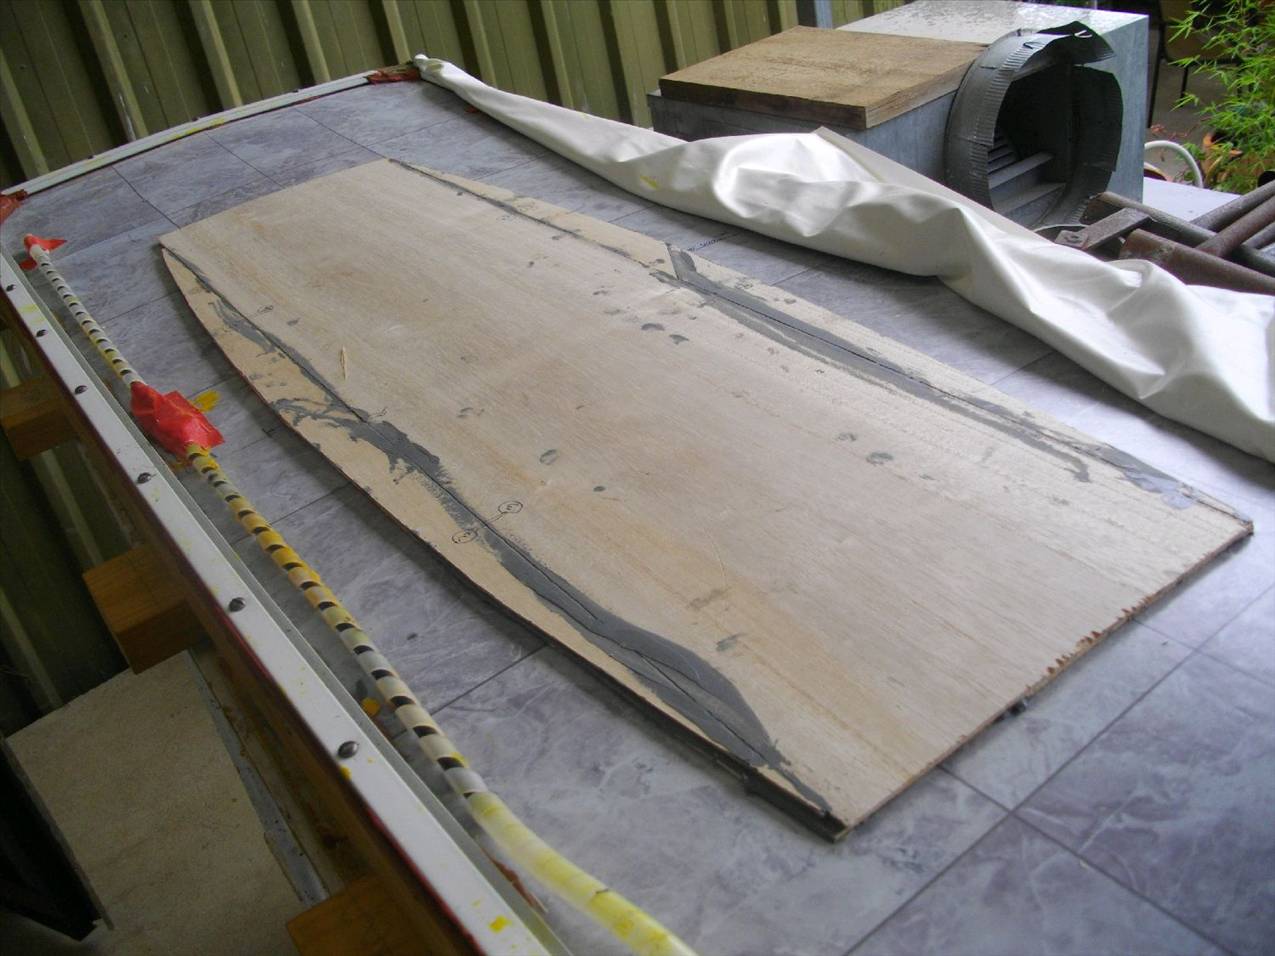
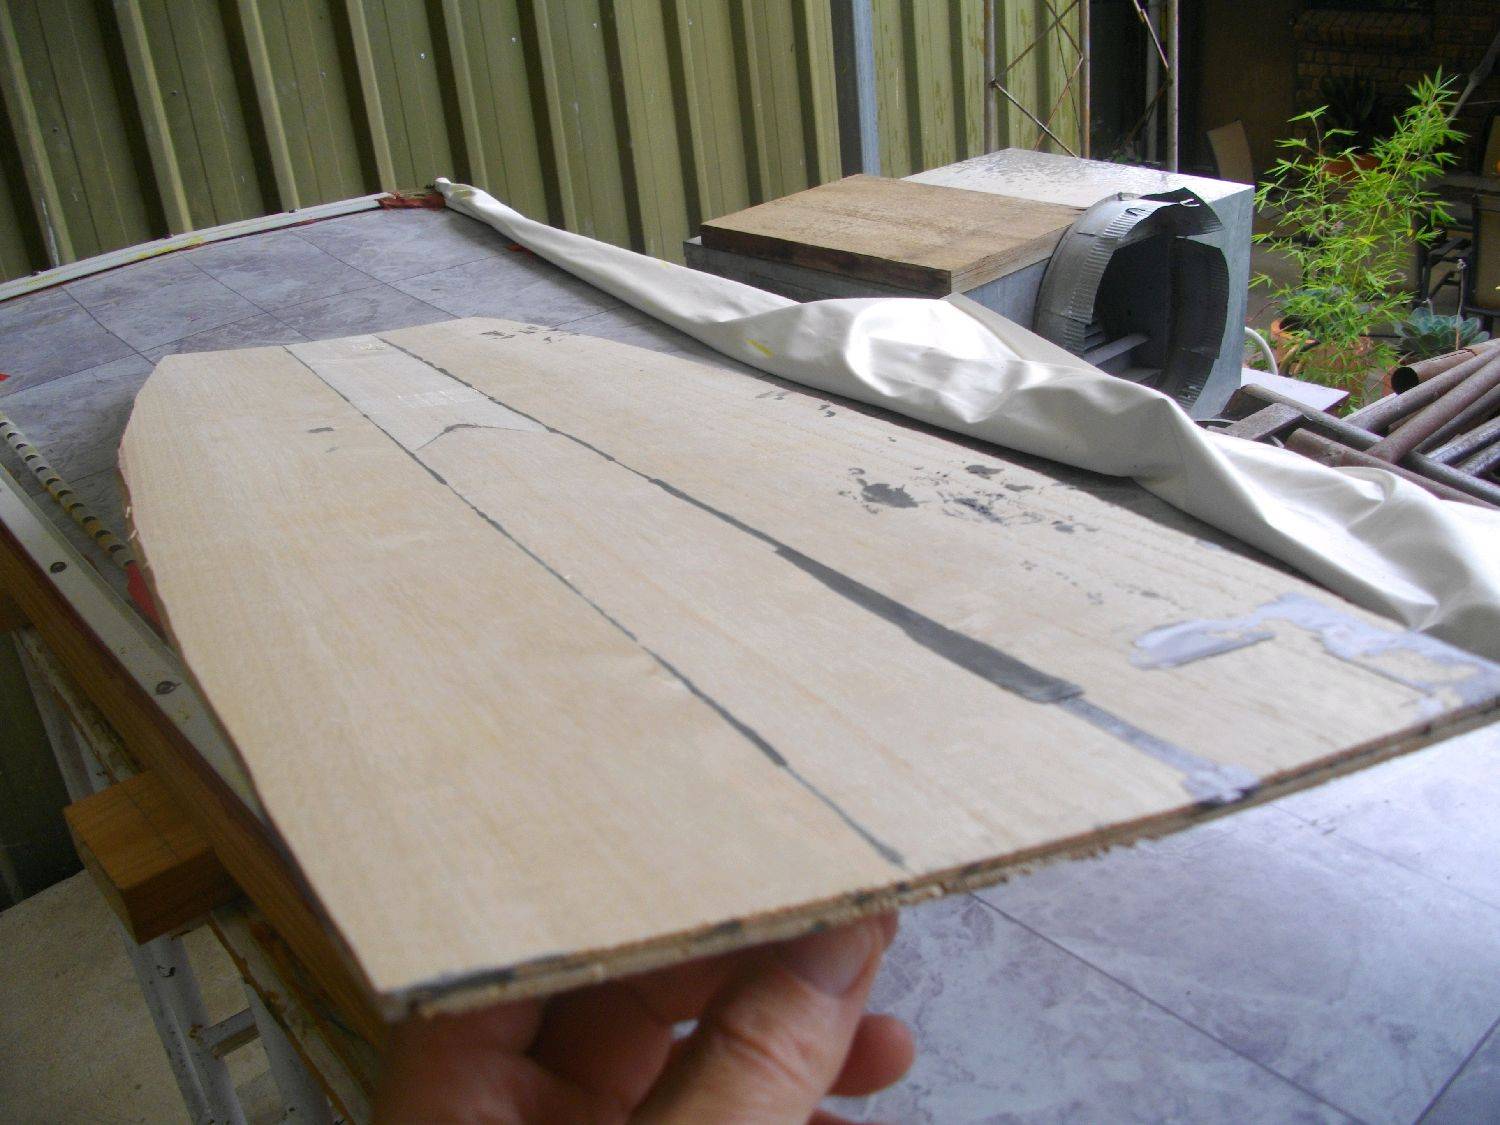
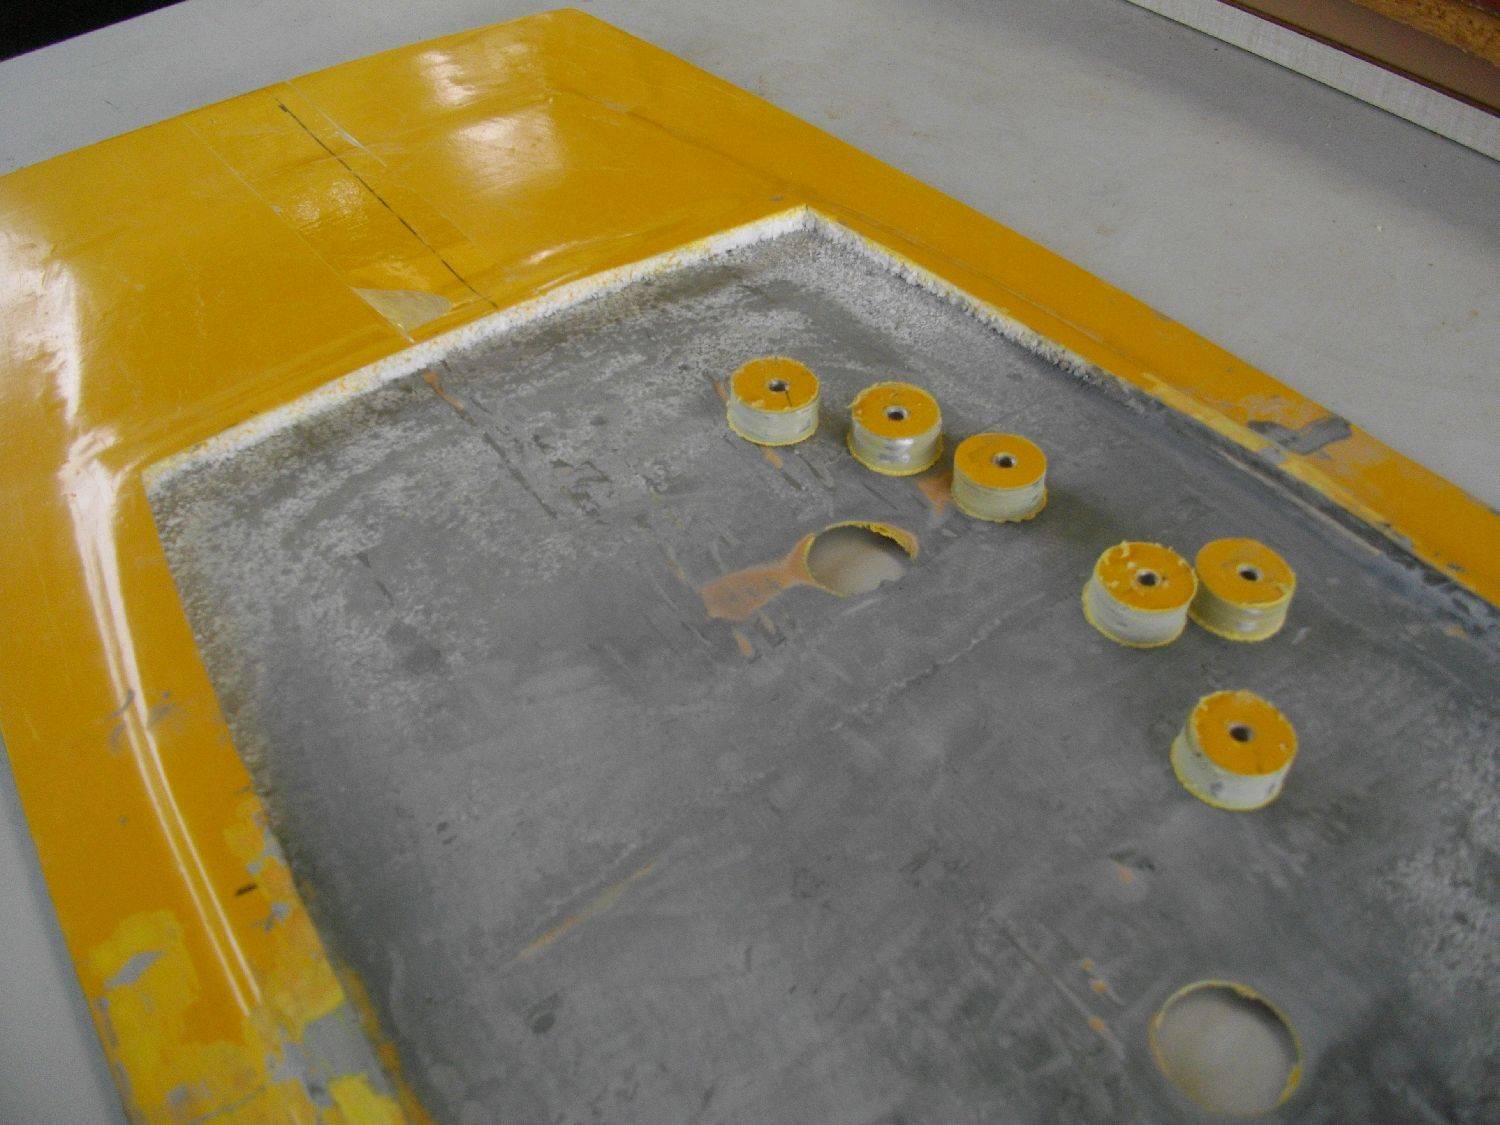
Just a few pics of progress of a repair/rebuild of a DIY board.
These show the area that the foam core was removed.
The round plugs are threaded aluminium blocks which were originally set in the foam core. I bored them out as part of the repair process hence the holes.
The only paulownia I had was 2.5mm thick so I prepared a new core by laminating with epoxy paste mixed with Q cells.
The intent is to cut the core, length wise into 4 strips and wrap them as per the Brokite method.
Fossil
Hi Sbray,
Board Looking good for a rebuild.
Just a few questions.
1. Why did you need to rebuild the board?
2. Did it delaminate or other reason?
3. Like the look of your rocker tanle. What are you using as a surface?
4 What did you use to laminate the Paulownia wood?
ta ![]() KR
KR
Instead of a separate blog I thought I might post some of the Ideas I used, while building DIY boards.
Some I would use again, some not. Perhaps others can build, embellish and recommend mods to my ideas.
Inserts:
The woodworking tools mentioned by Charl dv "one of those wide bladed drill bits (forgot the name)" is either a;
Spade bit
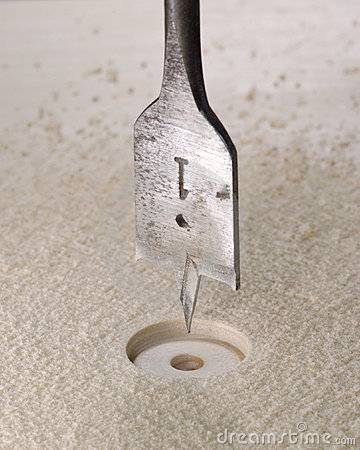
Or a Forstner bit

Be careful with either as they can chew wood at a great rate.
As for inserts in glassed boards, I use 30mm x 30mm x 6mm threaded aluminium blocks, epoxied into the core.
I already had the taps and dies for 6mm dia threads but figured the cost of a full set of metric & imperial Taps & dies,
from Fleabay gave me more flexibility for further projects. Tools are a worthwhile investment!
The aluminium was from a "backing plate" that I scrounged somewhere in my past and squirreled away in Fossil's magic cave.
The snowboard inserts look like a great idea unless you want to have multiple threaded inserts close together (for adjustment).
you could also use the barbed "T" nuts.
I vac glass the top & bottom sheets over the inserts & core.
To prevent the epoxy from entering the holes I use a grubscrew covered with a small circle of "contact".
I create the contact circles with a normal paper hole punch.
After the epoxy is cured I find the insert locations (using a perspex template)
and clear the holes carefully using a countersink bit & hand drill.
If you require something stronger, or strip a thread, then use stainless helicoil thread insets as well.
I loctite all of my hardware to prevent loosening and/or thread movement.
Cheers
Fossil
Good to see everyone having a crack at making a board.
Very satisfying process to design make and then ride your board.
Got a background in making and repairing surfboards, and some cabinet making skills.
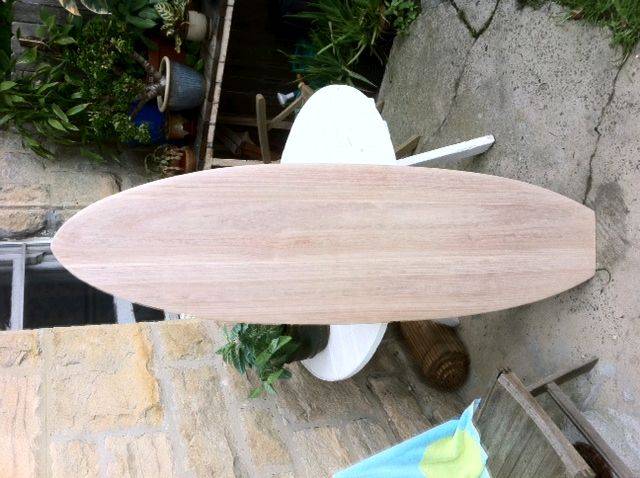
Started a project a few weeks ago making a directional kiteboard similar outline to a shinn twinn.
Used a PAULOWNIA timber blank delivered to my door for $150 from
surfinggreen.com.au/collections/boards/
Comes in a 8ft x 20 inch wide 3/4 inch thick slab.
Managed to get a bit of nose and tail lift, using an electric plane.
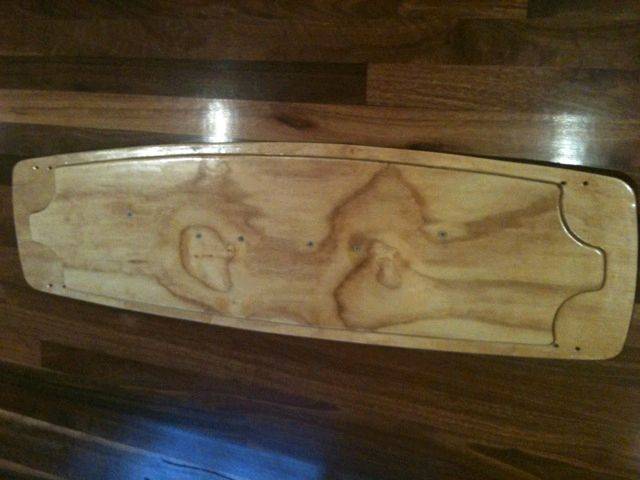
Planning on setting nylock nuts into the deck with epoxy for strap mounts,
looked into using the t nuts but were very expensive.
Going to finish the board with one layer of 4 oz cloth and epoxy resin.
Fins and straps of a spare board.
All up think it will cost around $200, a few 6 packs and a few complaints about the dust and fumes.
I used the Boat Cote Aquacote products when I made ply boards. It's water based so you don't have to mess around with solvents and thinners. Just add water.
You can apply it with the blue gloss rollers from Bunnings. They're cheap enough and work ok.
Initially I used sanders for fine shaping but that takes ages and the dust is appalling. A cheap electric plane can be had for $40 and that is fine.
I did the laminating thing for rocker. Just put a piece of wood under each end to set the height then a heap of heavy stuff in the middle.
Cheap self-tapping screws make good clamps to get rid of voids around the edge. You cut those bits off anyway.
For light wind boards I just used 12mm ply. No laminating, no rocker. The natural flex in the ply gives it just the right amount of rocker when you ride it.
Eventually I got tired of the weight of ply boards (and the dust and messing around making them). I got Cardboards to make a copy of my lightwind ply TT and that is still my favourite and most used board. It will beat anything upwind except for a raceboard.
It's a touch ironic that production boards now all have wood cores and are quite heavy compared to the foamies.