Hello Seabreezers,
I live in Sparks, Nevada, USA and have been camping out on the dry lake beds in northern Nevada for quite a while during which time I've been plotting a way to harness our ample wind. After collecting parts and searching the internet for a few years, I finally stumbled onto the Seabreeze forum. I've been chewing through a great many of the threads, and have finally been inspired to start building.
I'd like to say thank you to Landyacht and all the regular (and irregular) posters on this site for plans, ideas, inspiration, and a bit of wry wit.
Below are some pictures of the work I've got going so far on the body. I'm starting to get the hang of working with a measuring system that divides things into thousands. I must say that before I cut the rear axle parts, I didn't have a good idea of just how "mini" these boats are! I'm going to have to build a heavy duty seat to be able to strap my ample carcass to this thing.
Enough jabber, here's some pics:
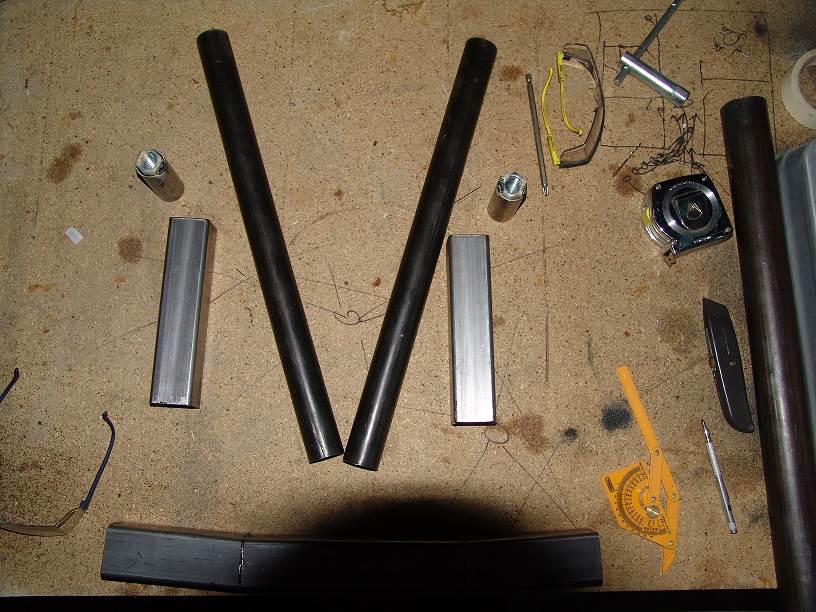
First cuts were for the rear axle. I'm using 1 3/4" (44.5mm) by 1/8" (3mm) square tubing for the stubs, which nest pretty snugly into the the 2" (51mm) x 1/8" (3mm) square tubing of the central part of the rear axle. A little bigger than the plans called for, but readily available, and the whole set nested together nicely. Set into the square portion of the stub axles I've got 1 1/2" (38mm) x 1/8" (3mm) DOM tubing, then nested into that some "gapper" 1 1/4" (32mm) x 1/16" (1.5mm) tubing that I've already welded the 3/4" connector nuts for the axle bolts into. You might notice I accidentally made the two bending cuts 100mm from the center instead of 100mm from each other. Didn't catch that until I tried fitting the axles with the tires and the center part of the axle was 6" (152mm) from the floor. Recut in the proper place and that came down to 4" (101mm). Is that about normal?
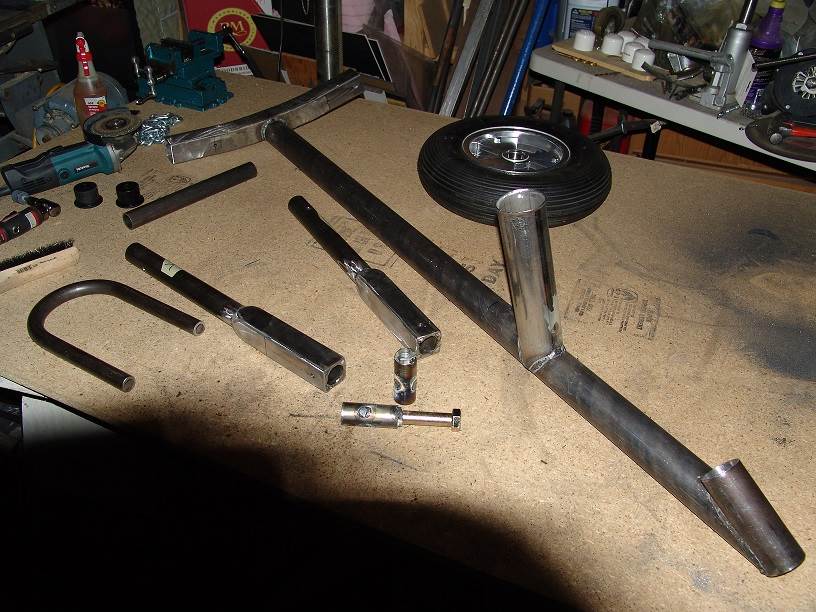
In this pick are the more specialty cuts for the body. For the main tube I used 2 1/4" (57mm) x 1/8" (3mm) DOM tubing. I debated the wall thickness, and decided to go thicker. Compared to how much I weigh, even ten pounds added to the frame isn't going to be that big a deal. I cut that with my tubing notcher, but I couldn't get all the way through with such an obtuse angle (30 deg) without running into the clamping system. I finished the cut with a cut of wheel and grinder, and didn't do too bad of a job. On the left is the gooseneck that will fit into that notch which is 2" (51mm) x 1/8" (3mm) DOM. It turned out to be just a bit too snug for the polyurethane bushings (leaf spring eye bushings) I'm using, so I had to grind it out. This took MUCH longer than anticipated, but I've got them fitting fairly nicely now. If I did it again, I'd shave down the bushings. I think I saw somebody post up a clever process for doing this involving a center bolt, two guide bolts and a very sharp knife stolen from the kitchen. Will have to give that a go. The mast step is in the center and is 2 1/2" (63.5) x 3/32" (2.38mm) tubing. I managed to get a little bell shape into the top with some pounding, and the tubing notcher did a fine job on the bottom.
Let's take a break and see how this is looking.
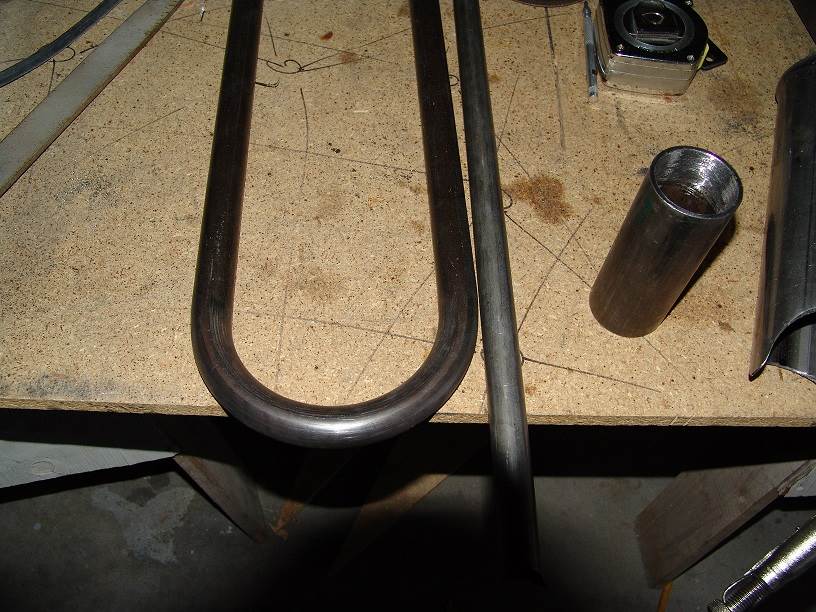
I bent some 1" (25.4mm) x 1/8" (3mm) DOM for the forks, and there's 7/8" (22.2mm) x 1/8" (3mm) DOM for the inner gooseneck. That's the biggest I could find the bushings, so that's what I went with. I'll flatten a groove on the top side of that, so that the pedal bracket has a bit more to bite onto. But putting these two together is still a ways off.
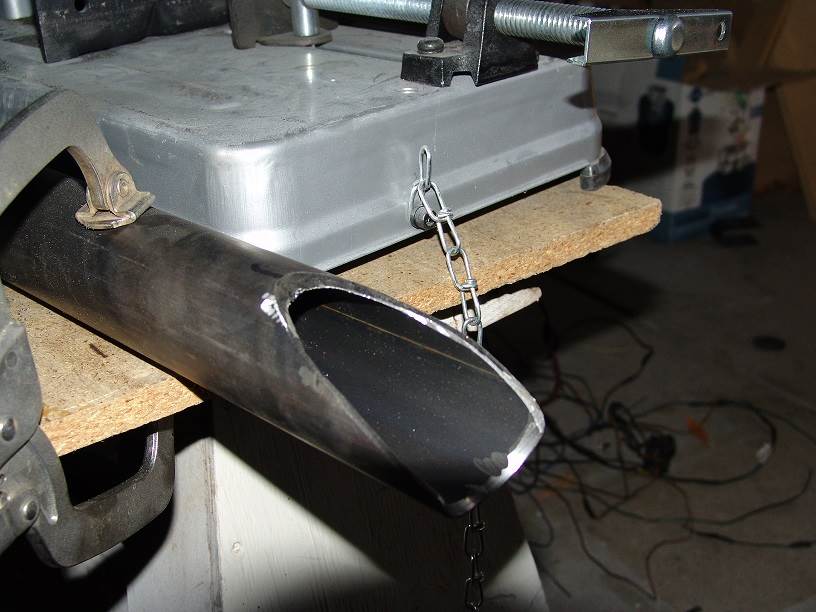
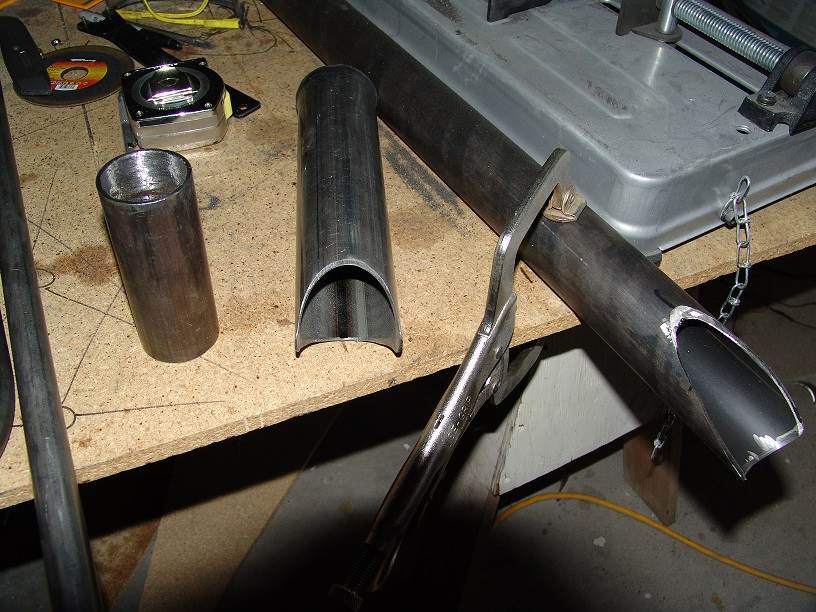
Here's a closer look at the front cut. To do it again, I'll take the guide off the tubing notcher and build a bracket to mount it directly onto the tubing to get a straight shot at the cut. Still the angle grinder finished this off pretty well.
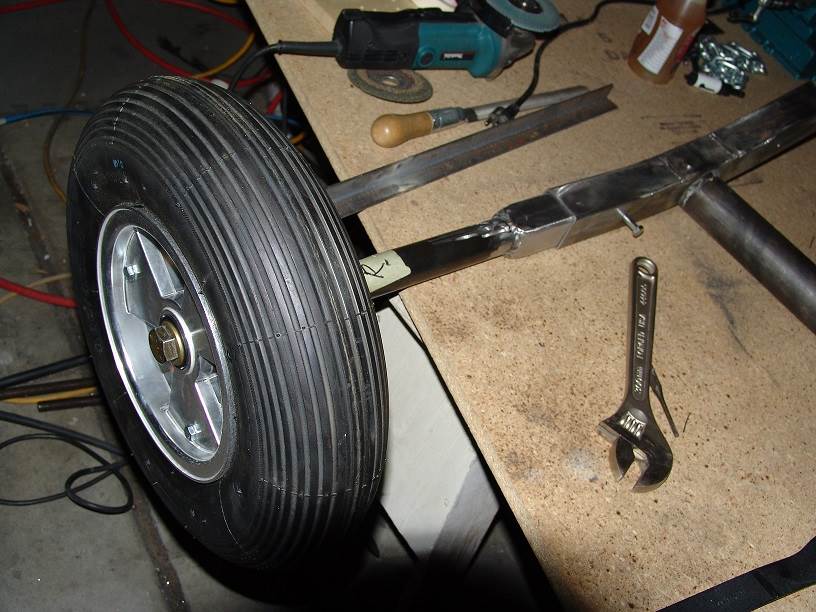
A couple of work days later, and it's starting to take shape. I've cut down the forks to size, welded the rear axle, mast step and gooseneck to the main tube, and welded the main parts of the stub axles together. I threw in one of the wheels for some scale.
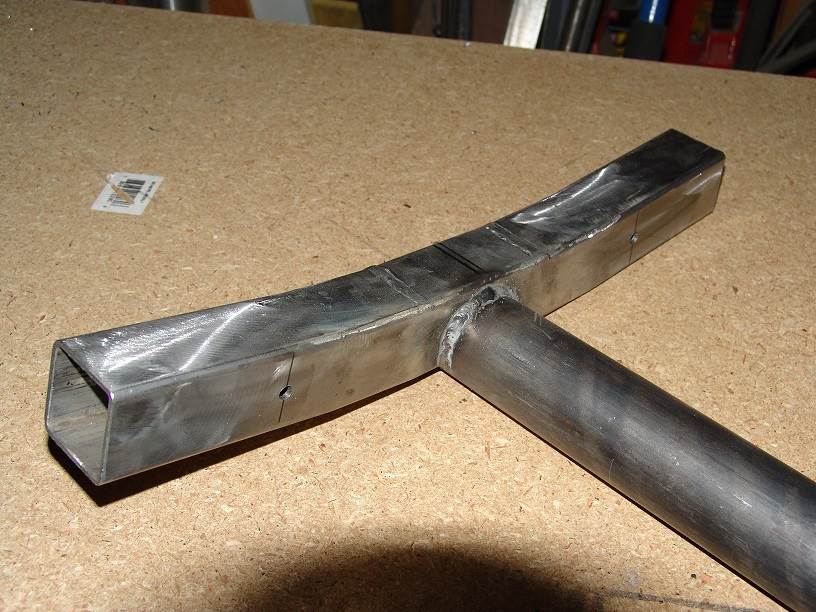
Here's a closer look at the rear axle connection. I dropped the main tube a bit to get it a little lower. The places I'll be sailing are dead flat playas, so clearance shouldn't be a problem.
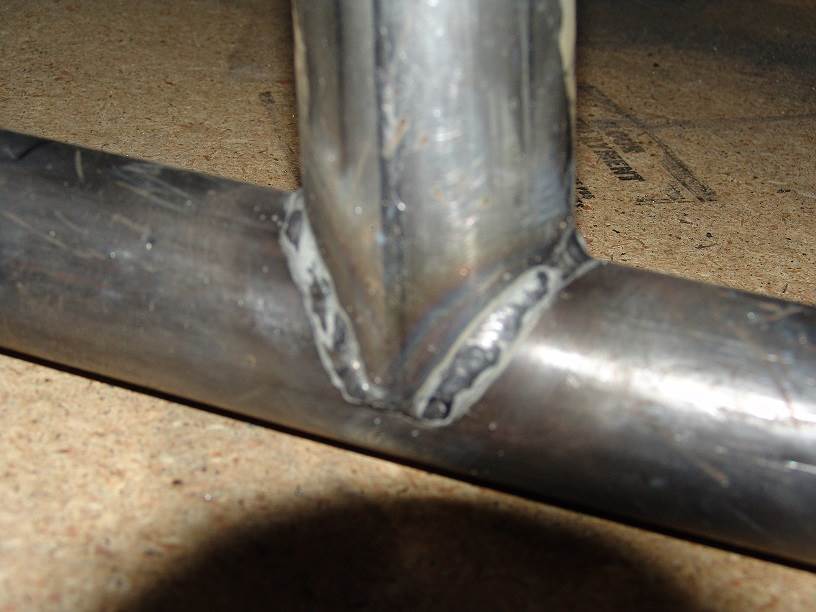
The mast step connection. I've got to grind down the very bottom of the weld a bit before I can weld on the reinforcing strap. We're still doing that extra bit for mast step strength right?
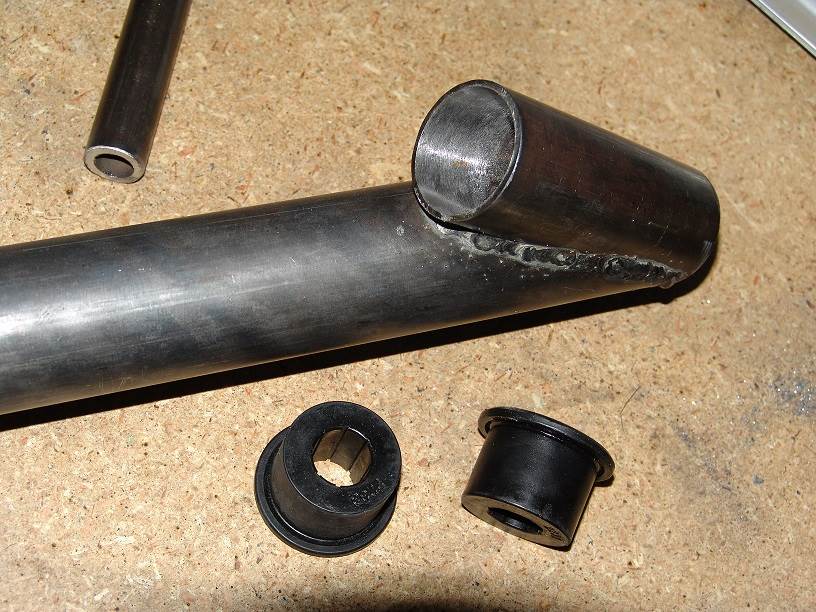
And here's the gooseneck in place with the bushings.
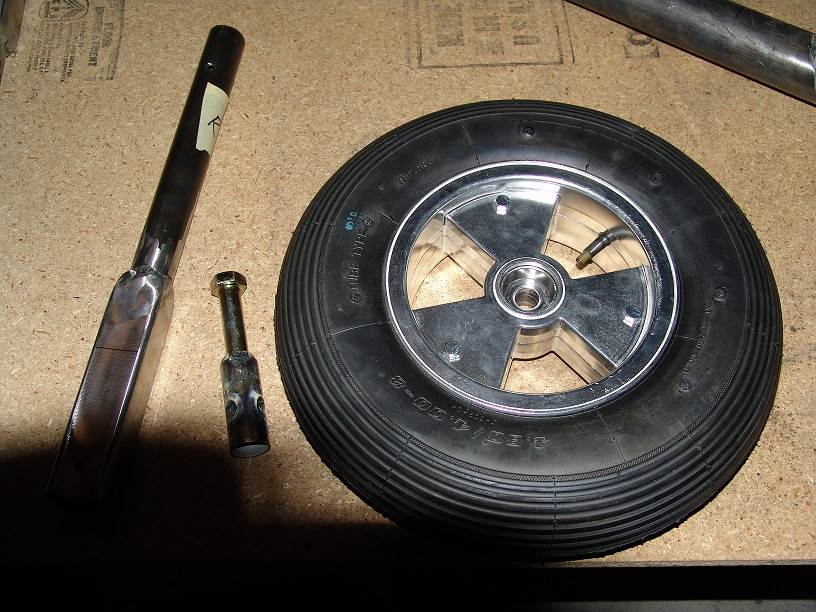
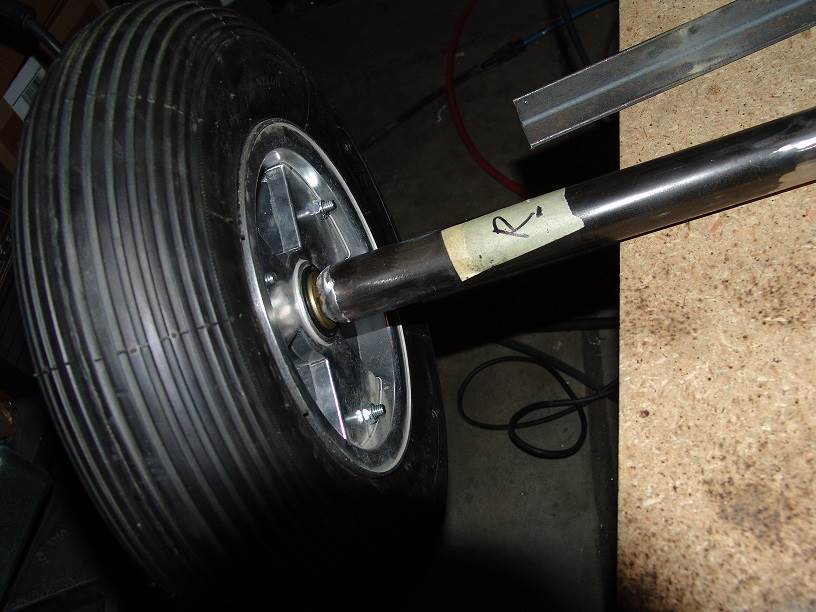
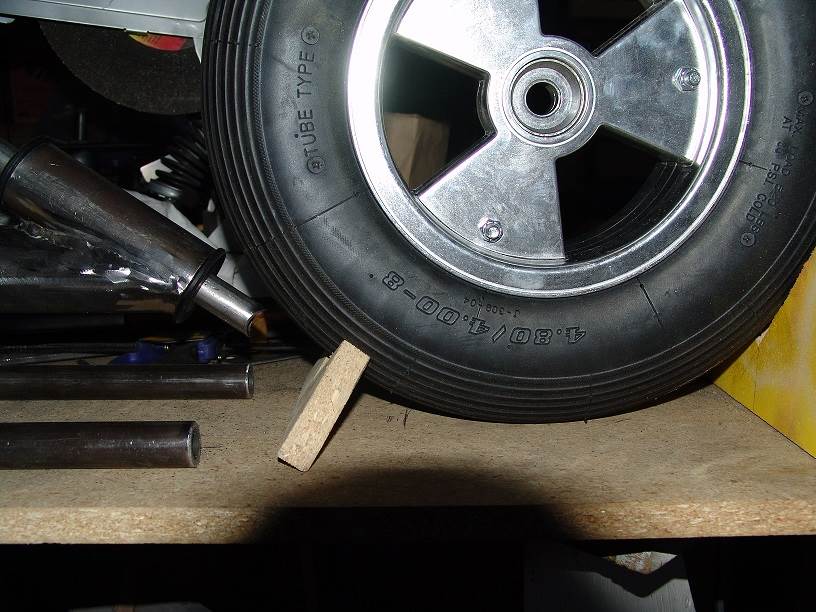
Here's a stub axle assembly. I drilled out a fat 1/4" (7mm) of the thread on the connector nuts and reworked the threads with a tap. I was following a thread that suggested this idea to keep the point of maximum stress off the weakest part of the bolt (the end of the threading). We'll see if this keeps the wheels attached. That wheel is from Asuza, and is the standard wheel barrow size: 4.80/4.00-8.
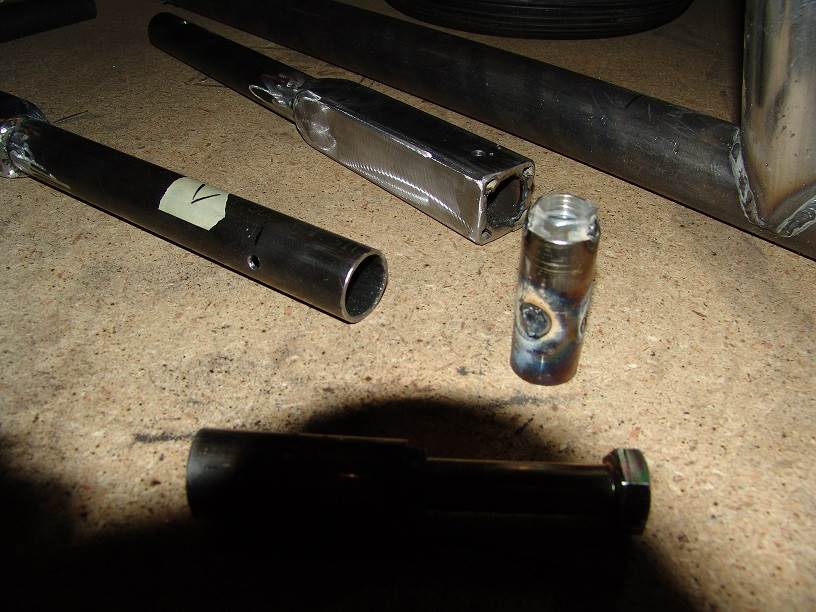
My next step is to grind down the filler welds on the axle nuts, and weld them into place on the axle stubs. Then I can assemble the whole rear end and get the front steering geometry dialed in.
looking good there, good cutting, good to very good welding, no WA bird droppings there ![]()
![]()
you are on the money....welcome to the forum ![]()
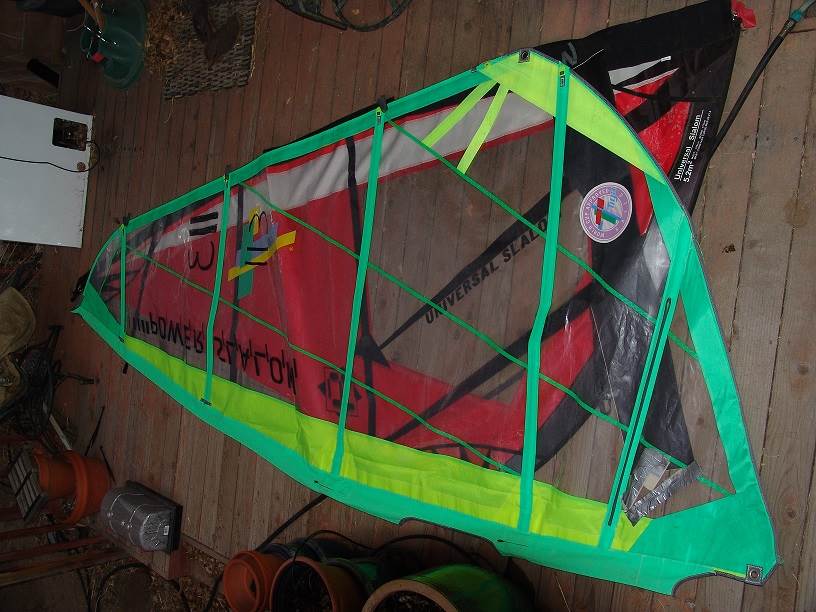
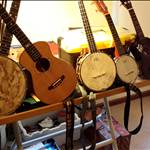
Jumping ahead, this is my most likely sail. It'll take some cutting to get it down from 6 sqm, so I might experiment a bit with some older sails I've found first. Once I get the whole body assembled, I can start playing around with the mast length, sail size, boom and such.
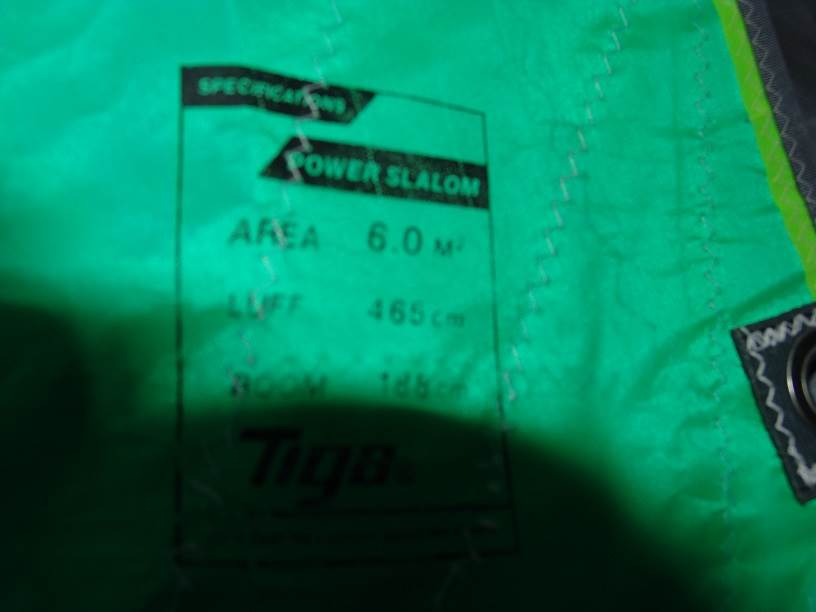
Here's the specs on the sail.
Hey really nice work there!!!!!!![]()
![]()
![]()
Being a cammed 6m2, I reckon that this sail looks to have a fairly straight luff and will require no cutting at all to fit.![]()
I have been lucky with a few bigger cammed sails and they fit perfectly with only the bottom angled batten removed and the mast extended to around 5250mm.
If you a really fussy you could add a triangle at the rear, just so the foot of the sail remains 50mm below the centre of the boom in the sailing postion fully sheeted in.
This is only for looks as it will sail well without it.
At only 188cm with windsurfer boom, it's well within the parameters for a LLMini as well.
LOTS of downhaul when it's rigged so as to get the cams working and she will be a simple low wind outfit. ![]()
Oh and make sure there is a spacer tube between the bearings in your wheels, as this is needed with bolts retaining them.
weld a U shaped strap under the chassis tube and up onto the mast step. 3mmx25mm is fine. it simply stops the mast step weld from starting to crack .
Chook,
Thanks for the advice on the sail. Sounds like I might have gotten lucky. I've read a few threads where people pull the cams out. Is there a reason for that? Maybe it doesn't fit class restrictions or something. I'm happy to leave them in. If you look closely that bottom panel has a down home fix it job on it, so I was thinking of clipping the bottom off. I had thought about slicing the clew off in a small triangle and flipping it round to sew onto the bottom, as I've seen a few on here do. That or if I'm understanding what you're saying about the triangle add a bit to drop the clew down more even with the tack.
I'm planning on using a 4:1 down haul, and rigging like Landyacht has Little Stig's new boat set up. So I should get plenty of downhaul.
I've got tapered roller bearings on the wheels (the inner race is just visible in one of the pics above), so I should be good to go with the bolt system. I'll just add a little mild thread locker and just enough torque to snug 'em on without restricting.
Landyacht,
Will do with the strap. I ground the bottom of the weld down tonight to make a nice smooth transition for the strap.
A little bit of progress tonight. Mostly grinding and flap wheel work, but I finished up the stub axles.
I managed to find just the right size washers to fit the bearings.
Fitting together nicely. Next step: the front steering.
Select to expand quoteUrsaMajor said..
I'm understanding what you're saying about the triangle add a bit to drop the clew down more even with the tack.
Yeh, that's what I meant.![]()
![]()
If the cams were removed you would need to fit material for the battens to push on, so a lot of work (if the pocket doesn't need recutting) when the cams already do this well, with a lot of downhaul to make this smooth.
Most of my sails are just plastic cams with some webbing as a wear surface and also a couple of sails with rollers cams.
I find the cams change sides easier in lighter winds. On big "light wind" sails (with big bellies) I find without cams, sometimes I have to sheet in much harder to get the battens to the other side of the mast. With the cams they just pop over the other side when tacking, without the extra tension of the sheet rope.
Personal taste I guess. I know Landyacht hates them with a passion ![]()
![]() and flicks cammed sails down to me.
and flicks cammed sails down to me.
I started off with a 5.6 m2 cammed sail I recut. It was heaved down really tight and it still works really well. It's has sailed over 2000 kms (and looks like it now) but is still a favourite for 2 wheel cruising and lighter wind days.
I'll show my students the pics of your yacht, as we are covering/practicing, "plug welding" at the moment and your axles look first class.![]()
A gasless MIG??????![]()
Select to expand quoteUrsaMajor said..
I've read a few threads where people pull the cams out. Is there a reason for that? Maybe it doesn't fit class restrictions or something. I'm happy to leave them in. .
It was a class rule thing but as I understand it the "International 5.6 mini class rule" does not rule out sail/batten cams. If it fits into the 5.6m rope loop with the footprint of the tyres and the tyres are 8" dia x 4" width, basically anything else goes. If that is not the case, I stand corrected.
The thing is with land yachts, due to the speed they usually achieve, the sail needs to be quite flat in comparison to other (slower) yachts. If the cams put about a 60 to 80 degree curve into the sail at the first 200mm of it and the rest is relatively flat, you should have a very fast sail.
My figures are off the top of my head based on my experience so could be off a bit. If you are not interested in class racing, just build the fastest yacht you can.
Speed thrills and can kill. It always thrills but rarely kills in a land yacht.![]()
Edit:- I love the quality of your work.
Chook,
Thanks again for the sail advice. It sounds like with just a little tweaking I'll have a great light wind sail. What an honor to have my welds shown in your classroom. I've read through some of your threads, and it looks like you've got a great program going! Yes, it's a little 110v MIG that I run gasless. Picked it up about 3 years ago and have been teaching myself to weld with various fun projects since then. I'm doing pretty well, but probably need to take a class to really bring it home.
Harleyd,
Yes, in fact I was out there for a Friday night sail last month hoping to run into you, or another mini driver, but it was all Mantas. Still, very nice folks, and even in light wind I managed to get a borrowed Manta up to speed. Very fun! I doubt I'll be done with the yacht for next week's sail, but I'll definitely be coming down throughout the summer. See you there!
Cisco,
Thanks for the info on the class details and the sail shape. I'll definitely be keeping this within rules (easy enough with the mini rules). Not sure if I'll race, but I'd like to keep the option open.
Thanks Yank, will do!
Ran into a problem: my steering angle needs adjusting. Even with the wheel tucked in until it almost touches the top of the gooseneck, the contact patch is still about 2" (50mm) infront of the point where the steering angle hits the ground. I need to raise the gooseneck up. The bottom of my main tube is 3" (76mm) from the ground. Is that lower than normal? I did drop the tube about a half inch on the rear axle. I didn't think it would make that much difference, but it seems to have. I guess I'll have to cut off the tube and make a bracket that will raise the gooseneck up a ways. Any other ideas?
Looks like I've got a little room to play with raising the front end. My "careful" measuring of the gooseneck angle left it a little more acute than planned. So I'm propping it up a bit in the front to push the steering angle's contact point out further, then I'll set up the forks.
As long as the steering angle's contact point matches the contact point of the wheel, is there any difference made by the angle that the forks sit at?
Doh!![]()
Excellent welding job for a 110v gassless unit!
Sorry I can't comment expertly on the fork angle but suspect any differences are 2nd order. There was a thread about it in the past but you got it right, the contact points are the important factors.
It's not easy to get everything to come out right. I did my truncated layout on a small piece of cardboard because I could only fit the rear wheel elevation and front wheel angle/elevation on it (the body tube is assumed level). I ended up using the Chook2 school method of bent body tube to angle and elevate the steering tube. It's not welded yet because my mig is undergoing some repair changes.
keep up the good work!
I think this is the thread I was recalling:
www.seabreeze.com.au/forums/Land-Yacht-Sailing/Construction/Just-working-out-a-build/?page=9
One way to convince oneself that fork angle is essentially not important is to blake52's side view with the wheel axle hole and the steering knuckle fixed. For discussion imagine an oversized square plate joins those 2 items and we are convinced the steering works out fine the only job is now to lighten the plate. One puts it on a waterjet and reduces it the top sideview in blake52's drawing, while another creates the lower profile. They all steer the same having started out from the same initial configuration. Hope that's clear enough and helpful. The 2nd order differences I was thinking of was springiness or ability to take a pothole, but they all steer the same.
Select to expand quoteUrsaMajor said..
As long as the steering angle's contact point matches the contact point of the wheel, is there any difference made by the angle that the forks sit at?
No not at all, it seems that the rise and fall of the chassis is greater with less angle though. They still steer well.
I had the same problem as you and all my minis are joined behind the pivot to get the angle correct.
I make this bit by wrapping a cardboard template round the pipe, marking it out and doing a double fishmouth, welding the steering head on and then It is welded to the 1230mm long spine in the jig.
On my first one, I just went in from the top of the chassis with 2, 3mm wide cuts with the cut off saw, almost all the way through the pipe (leaving the bottom joined) and bent it up till the angle was correct. I then made the fork to suit.
There are some pics of the jigs here. Oh and it turns out my first sail with cams.
www.seabreeze.com.au/forums/Land-Yacht-Sailing/General/hello-from-cape-arid/?page=1![]()
going flatter than 30degrees is a bad thing as the wheel will skate over the surface and not bite.
a bit steeper is great, alot steeper,say 40degrees has all sorts of consequences related to twitchiness,
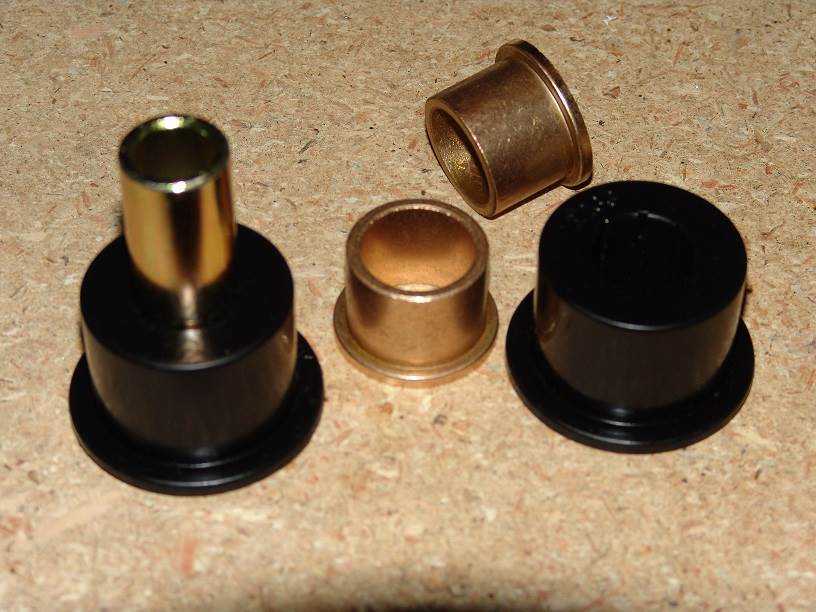
I hvae noticed that your bushes seem to rubber suspension bushes?
sadly they will be too soft and will grip the shaft and lock up the steering.
they will need to be made from a harder plastic,or even brass. Ive tried steel![]() aluminium
aluminium![]() polyeurathane
polyeurathane![]()
nylon was best
Junksmith,
Thanks for the information and the comments. That link helped picture how the angle of the forks doesn't matter.
Chook,
Thanks again for all the information, and the reassurance that folks have been down this path before. That is quite a production line you've got going there. I'm going to have to spend more time making jigs. Most of the time my alignment is rough and held together with magnets and gravity. I need to do better.
Landyacht,
As it sits now the angle is about 35 deg, so I've got some room to raise it up without dropping below 30. The bushings are polyurethane, but it sounds like you have had bad luck with them. I notice that the stem is very hard to slip in and out of the bushings and was hoping that with some grease that would get easier. Now I'm thinking maybe I should use bronze bushings. Once upon a time that was my plan, and I even picked some up. Now that I'm looking at them though, they're way too small. I think I'll pick up some 1" ID, so I can use thicker material for the stem, and I'll cut off that 2" gooseneck, and set a 1 1/2" one on a bracket to get a better angle.
Next steps, add the braces and brackets for the seat, and start work on the seat while waiting for the bushings and new steel for the gooseneck.
Thanks again guys!
There have been times where the easiest fix for the spindle/tyre patch line is to bend the keel tube![]()
Let me know when you are going to misfits again and I will try to join you!
Try checking out my build. New sailor in northern ca.on sea breeze
Kiwi,
If I hadn't decided to change out the gooseneck and use bronze bushings, that's definitely what i would have done. Thank you for the input!
Harleyd,
Hopefully I'll have this thing ready to go by the July 12 Mistfits Friday. I'll keep you posted. And yes, I've been all through your build post. I was hoping to see Holey Moley at Mistfits when I went. I'll see him soon!
You could drill our those bushes to a thin stainless steel tube size as a spacer/washer to reduce the friction and still get a bit of shock absorption from it. Saves waiting for new stuff.
Clem,
These bushings actually came with a sleeve like I think you're talking about (like the one in the bushing on the right). The problem with the originals if I used them would be a very skinny stem, but you're right, I might be able to bore it out and use a larger sleeve. The bronze bushings are already here, so then the question is: could I bore out the polyurethane bushings to fit the bronze ones? Having a little shock absorption would be nice. My problem with boring out the polyurethane bushings is I would need to get a 1 1/4" drill bit, then make sure I was drilling it out right in the center. Maybe I'll give it a shot, and if it works, I'll use the bronze inside the polyurethane bushings, if not I'll just get a smaller tube for the gooseneck and use the bronze ones by themselves.
What do we think of that? Many thanks to everyone for the input.
I have heard that freezing the polyurethane before drilling makes them easier to drill![]()
![]()