Select to expand quotelandyacht said..
they will need to be made from a harder plastic,or even brass. Ive tried steel![]() aluminium
aluminium![]() polyeurathane
polyeurathane![]()
nylon was best
As far as plastics goes, Acetal is the go!. It is basically a self lubricating plastic, and machines fantastically, (Stinks though!).
I am lucky enough to have access to quite a few bar ends at work, (for a little while longer at least), so i don't know what it costs.
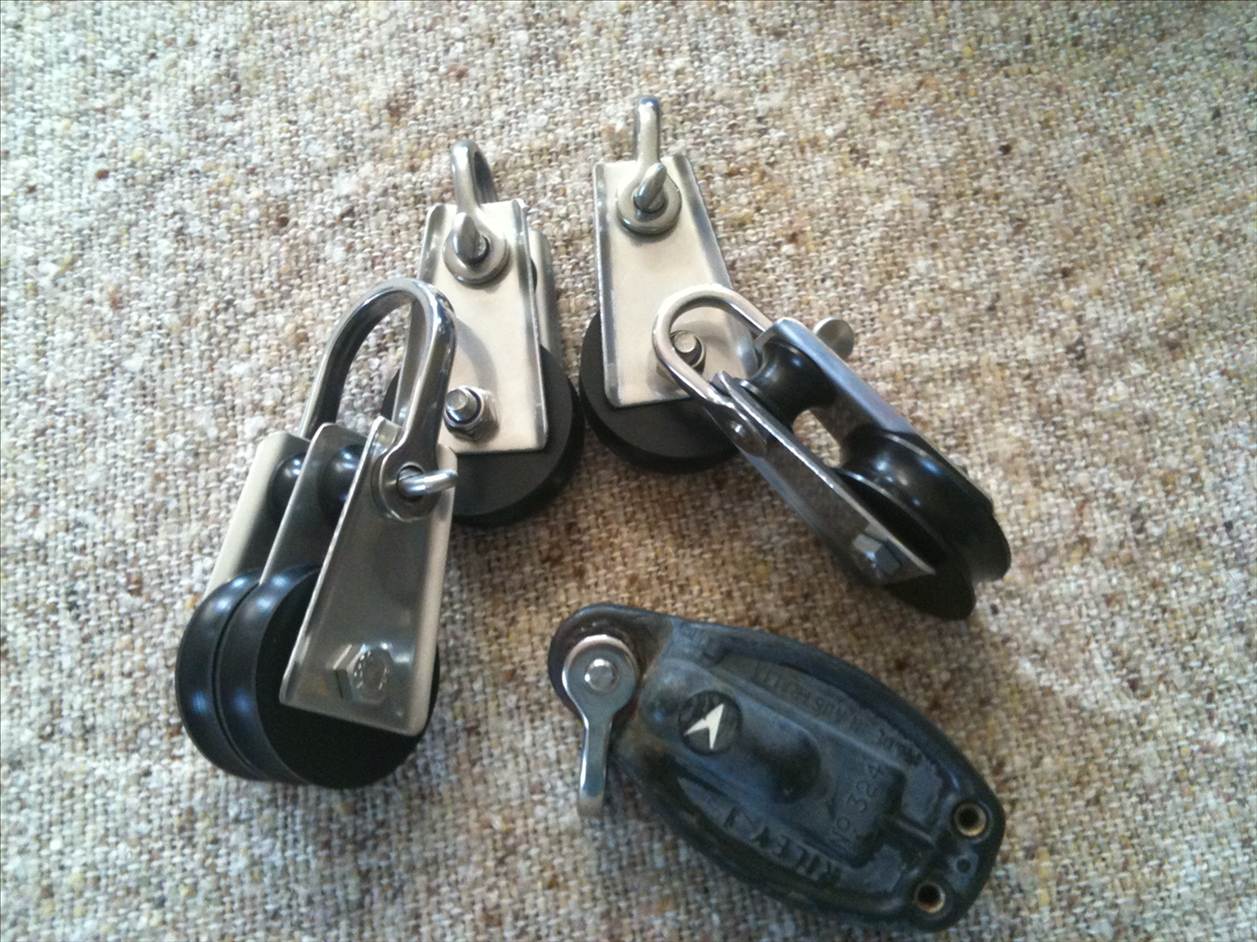
I've used it for the steering bushed in the couple of builds that i really should get back to, and it is what the blocks i built are made from. (also convinced by dad to use it in one of his rocking horses and he hasn't looked back!)
Where's a good place to stay near misfit flats? Need to get down there before I get to old to drive.![]()
OK guys, the bushings are in the freezer next to some bean soup. I won't be able to give them a try for a couple of days (so many social engagements, so little time).
Grlynch,
Thanks for the tip on Acetal. I'll have to check it out. Those blocks look great! Did you put up a thread about making those?
Windcrazy,
Sent you an email regarding places to stay.
UrsaMajor
Did not received your e-mail on places to stay near misfit flats. Have a freind that has driven by there many times. We go to
ivanpah twice a year with people from all over the usa. Got to start checking out other places for the group.![]()
Sorry Windcrazy, that was my first attempt at sending mail through Seabreeze.
Breezers, if I click on Windcrazy's name then the "Send email to member" link, will that go to his regular email, or show up under his "my messages" link at the top right of the Seabreeze web page?
Thanks!
For some reason the e-mail part of this is not working. My e-mail mrnmrsb2@msn.com
Thanks
Select to expand quote
Thanks for the tip on Acetal. I'll have to check it out. Those blocks look great! Did you put up a thread about making those?
I don't think i went into detail in my build thread, however i'm pretty sure i have photo's of them in stages. I'll have a squizz.
I reworked the gooseneck and drilled out the polyurethane bushings to take the bronze bushings. I think it's working rather well so far.
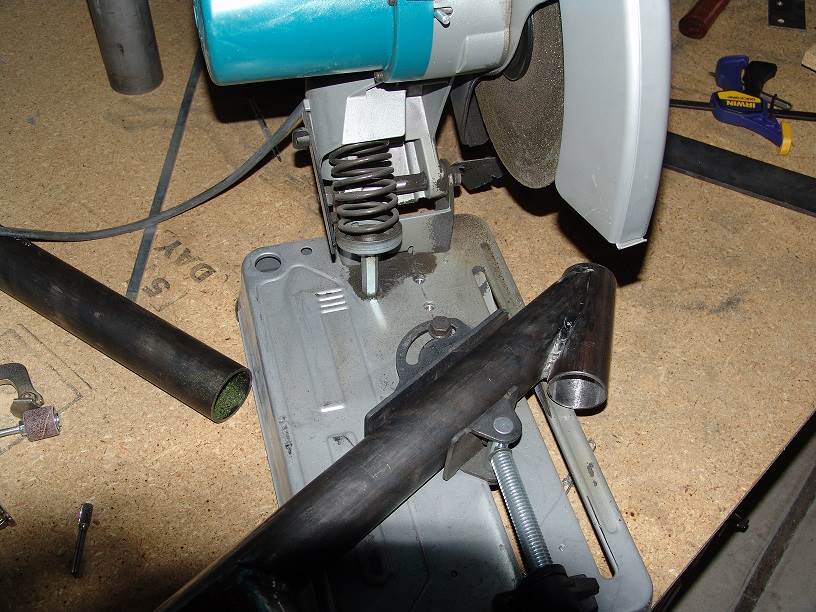
This doesn't feel like progress: the gooseneck is in the guillotine.
I cut the neck off at a 30 degree angle. Then mocked up the steering to figure out how much I needed to raise the gooseneck. I notched the new bracket for the gooseneck, then cut it also at a 30 degree angle. Matching those two thirties together I get what is essentially a 60 degree bend in the main tube. I'll fit the new gooseneck into the notch in the bracket at 90 degrees to the bracket to put it at a 30 degree angle to the mail tube.
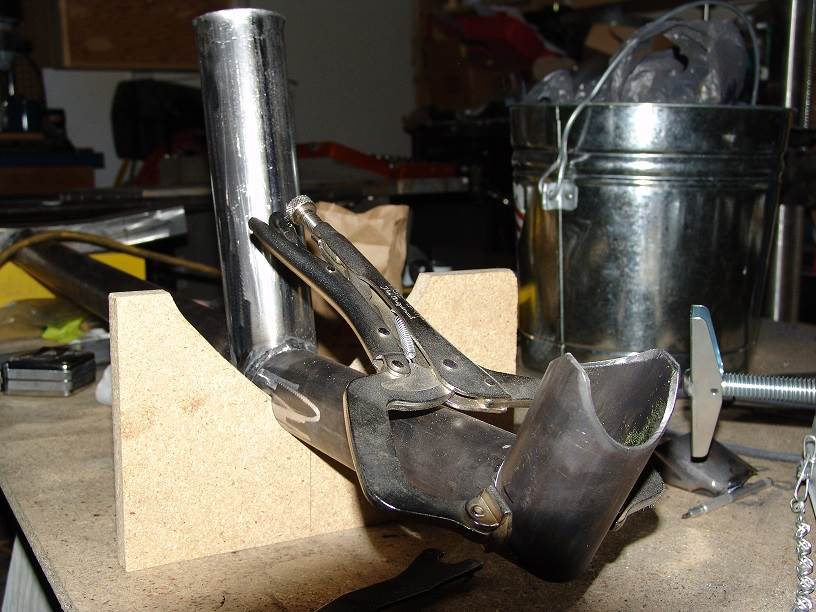
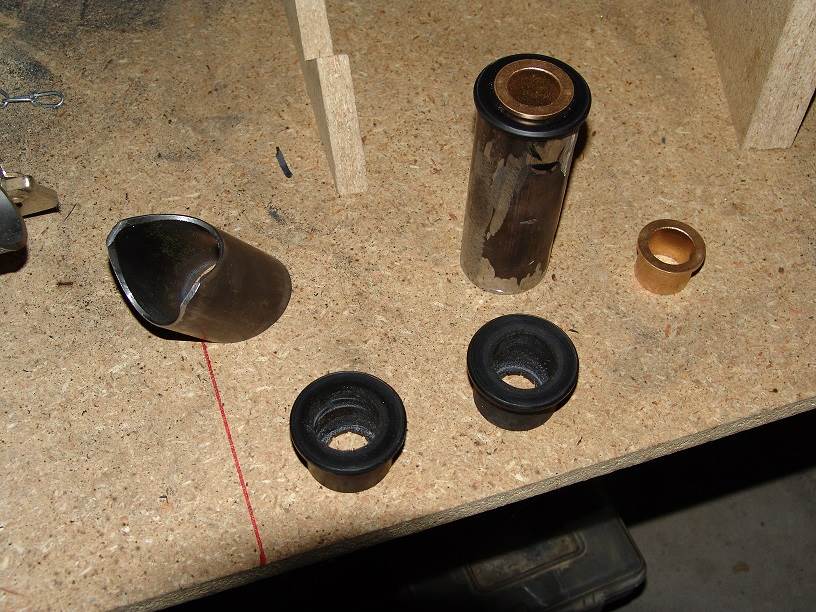
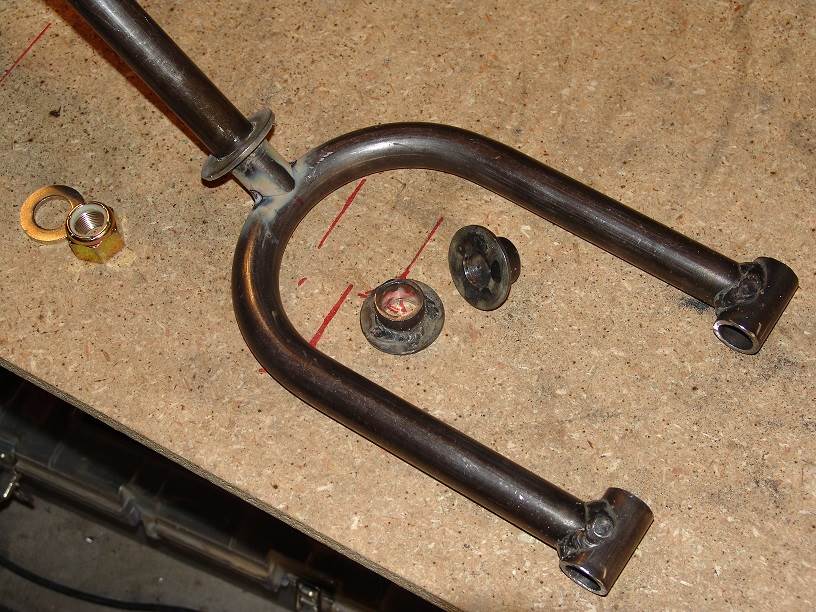
Here's the bushings, bracket, and gooseneck. Freezing the bushings definitely helped with being able to put the bushing in the vice, and not having it distort. I'm not sure if it actually cut better, as I didn't try one without freezing, but it went very smoothly. Thanks for the tip! I used a forstner bit in my drill press to bore out the polyurethane to accept the 1 1/4" (32mm) bronze bushings. Below you can see the bracket, the bored out bushings, and the bushings installed in the gooseneck. I cut three polyurethane bushings, because my first one was a bit off center.
Here's the whole assembly very loosely mocked up.
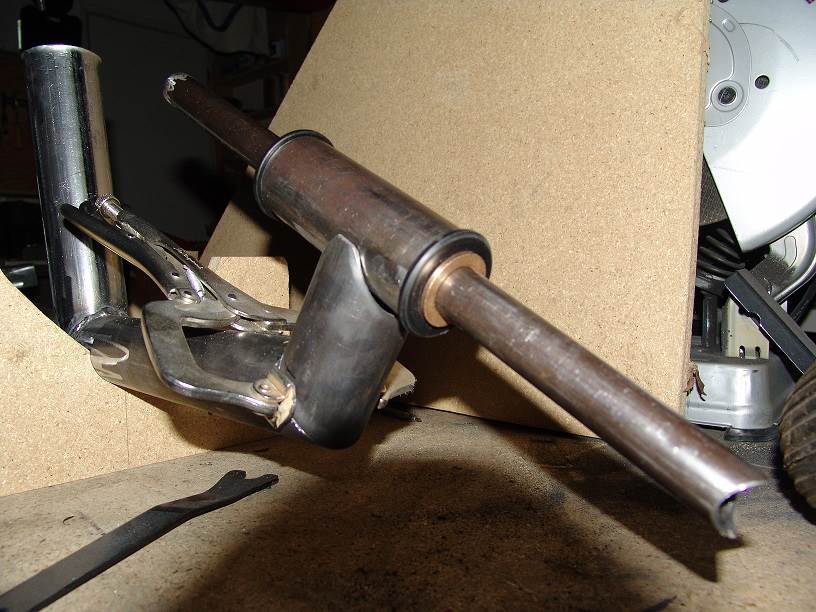
The larger bronze bushings allowed me to use a thicker stem of 1" (25.4mm) x 1/8" (3mm) DOM. Below I'm notching the end of a piece of tubing to use as a stem. The notch will mate with the 'U' shaped fork of the same material.
Looking awesome! When I was building mine ,everyone complained how anal us yanks are on our builds! Keep up the analness!!!!!
Great work. Shooting to meet you at misfits, have a young friend started his today .
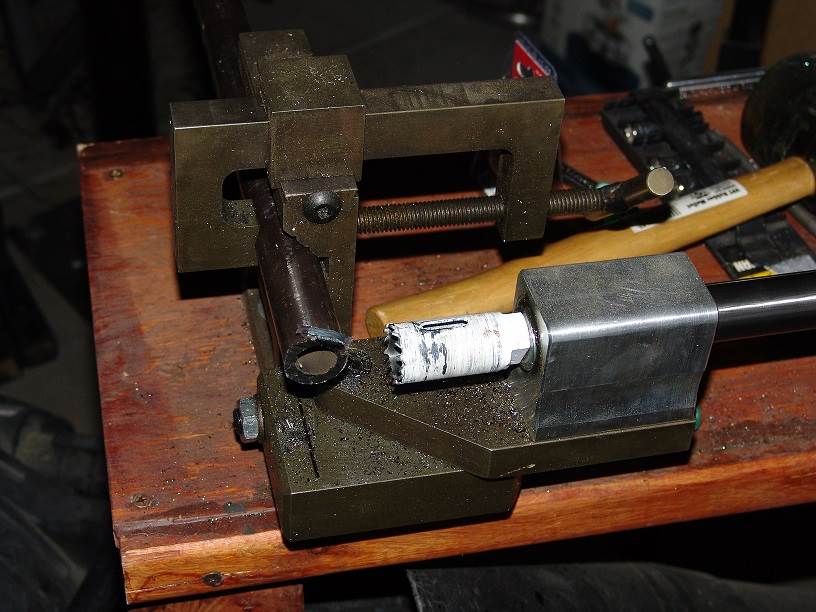
Ursa Major that notching machine looks interesting I havent seen anything quite like it
Could we have another view of it ? how does the hole saw get fed in to the tube ?
GrLynch
Great job on the blocks They look the part and must have saved some $$$s
I have made blocks before but have always used bought sheaves as I never had a lathe
but now I do have access to one so some more might be in my future
You can get the same tube notcher from harbor freight for $46. You can also get a 12 ton bender for $98. Just think of
the things you can do with those things. I will post what I did as soon as I finish.
^^^ Well well well.... if it isn't nikrum............
Long time no hear, Ron. Have You been building, crashing, sailing, or chatting up anything landyacht lately?
I hope so![]() if so, post pics. Otherwise, I can give you advise for free (what it's worth) on any anal retentive finishing techniques you like.
if so, post pics. Otherwise, I can give you advise for free (what it's worth) on any anal retentive finishing techniques you like.
Was wondering when you would come back to give TP1 a hard time![]()
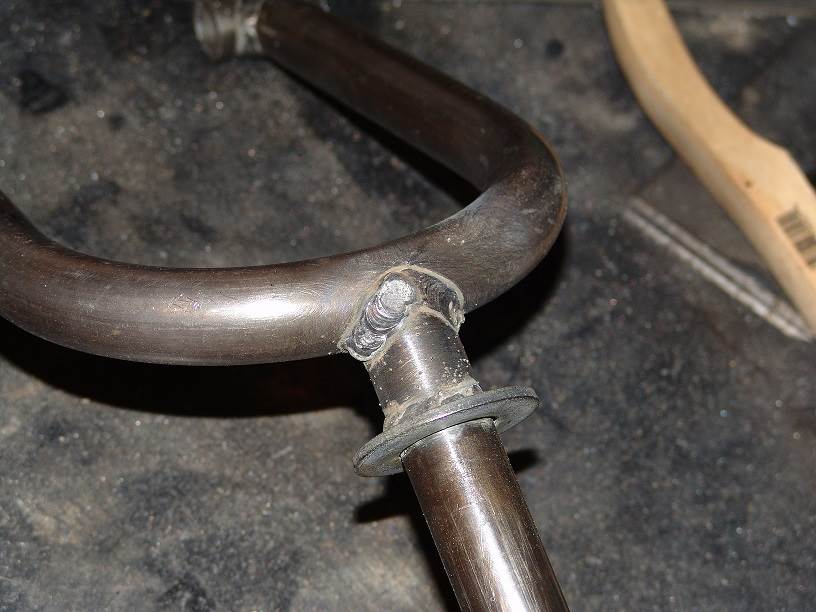
Thanks for all the comments guys. With holidays and the ridiculous heat we've been having I haven't been at it much. But I haven't been completely idle. I welded up the gooseneck, and have sized up the forks. I'll try to get those forks finished and the seat brackets welded up today. I also made a Craigslist score on 3 sails and two masts.
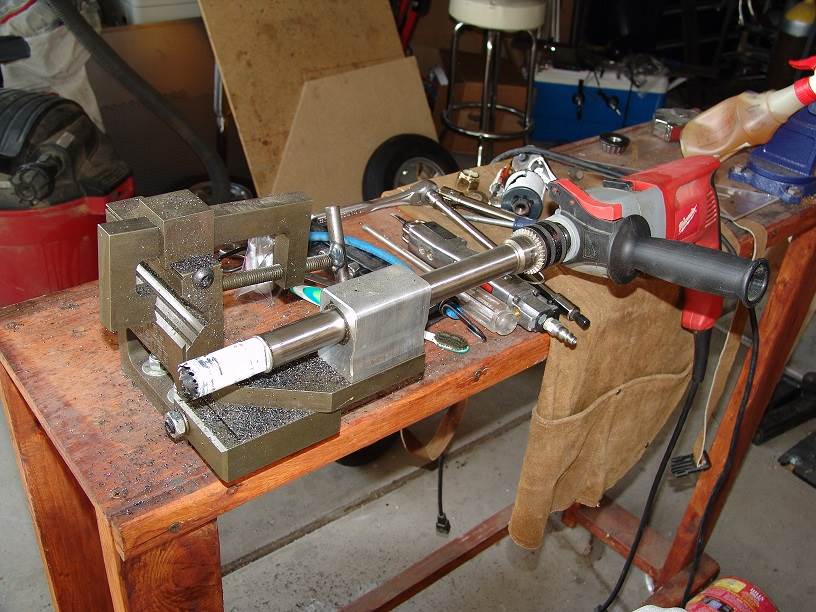
Hiko, I'll get another picture of the notcher tonight, but it's very similar to what Desertyank posted up. The chrome rod exiting the pic on the right has a drill motor attached to the other end, and rides through the big silver block pushing the hole saw into the tubing. It works very well, but is a little tricky to adjust.
Here's the three sails I picked up. The first is another big boy that I'll have to cut down a bit.
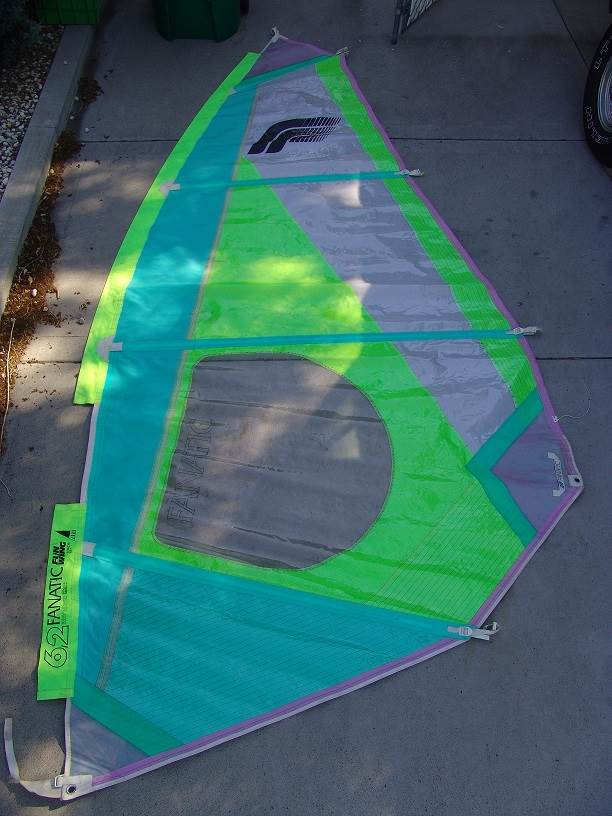
And some details:
This guy's got an interesting notch in the leech:
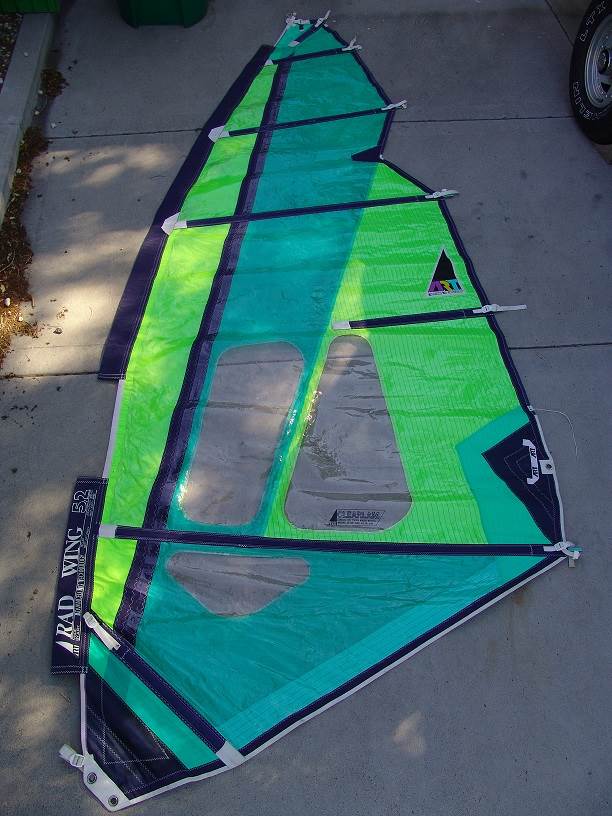
And I finally picked up a sail under 5 meters. Also in the pic are the two masts. One is aluminum, and the other is an interesting carbon bit:
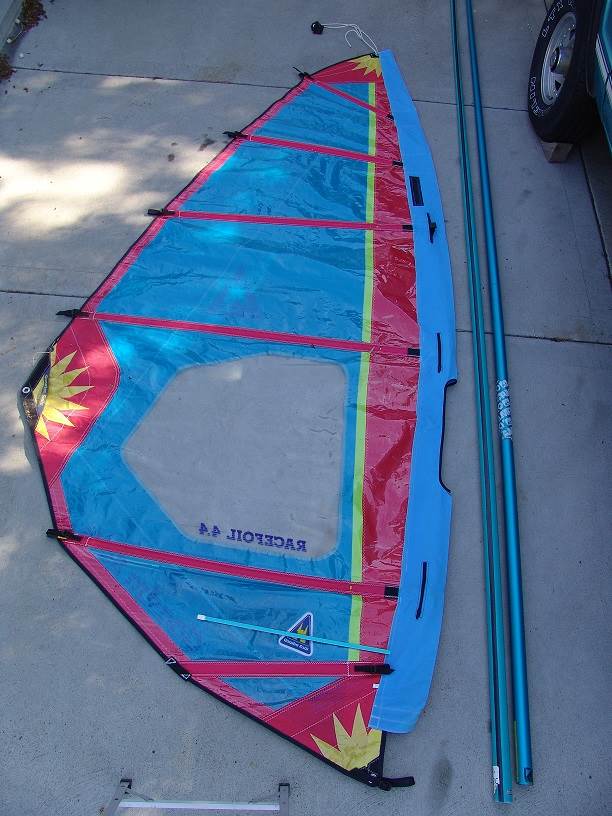
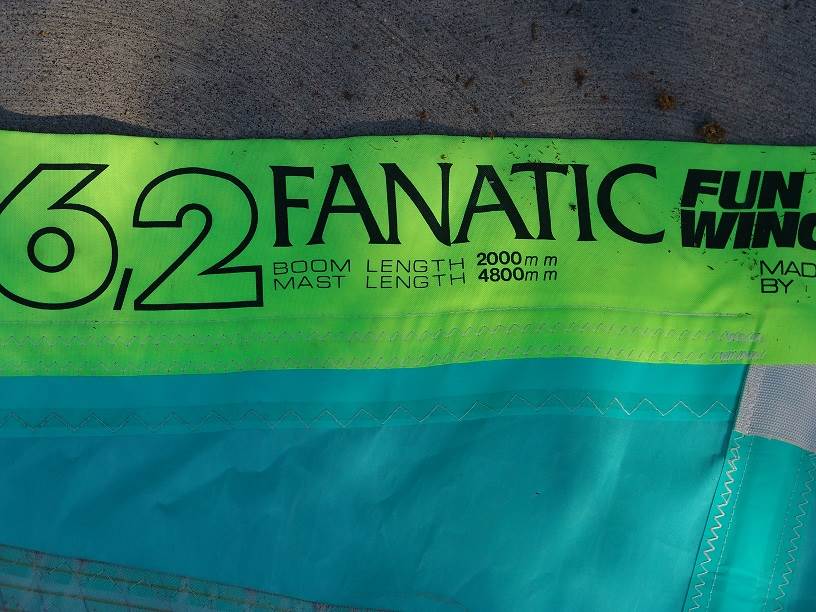
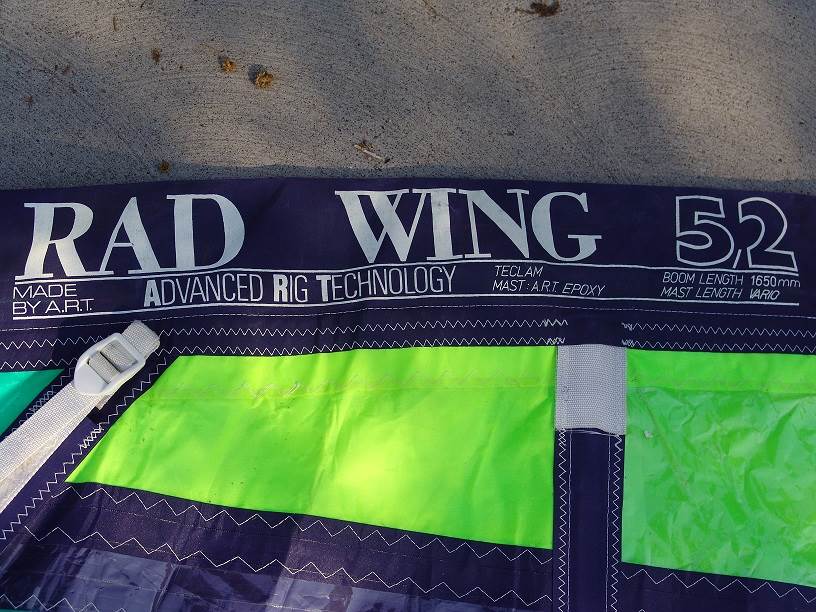
Details on the sail:
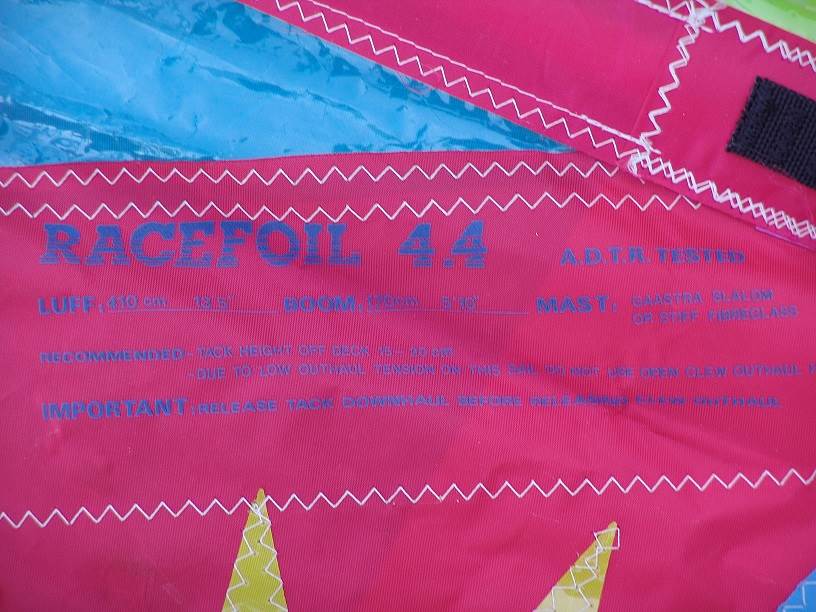
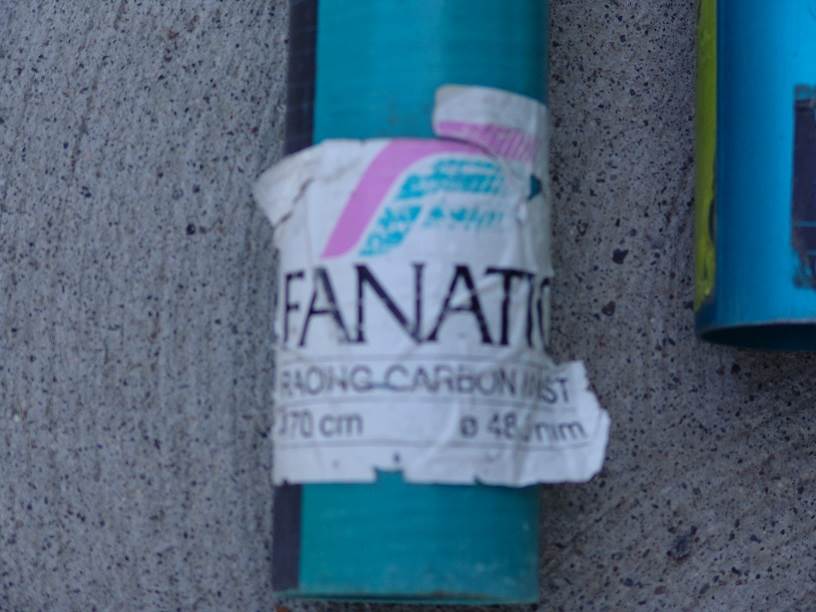
And the info on the carbon mast. It looks like there's two strips of carbon running down the sides for side to side stiffness. It's also slightly bent perpendicular to the carbon strips, if that makes sense.
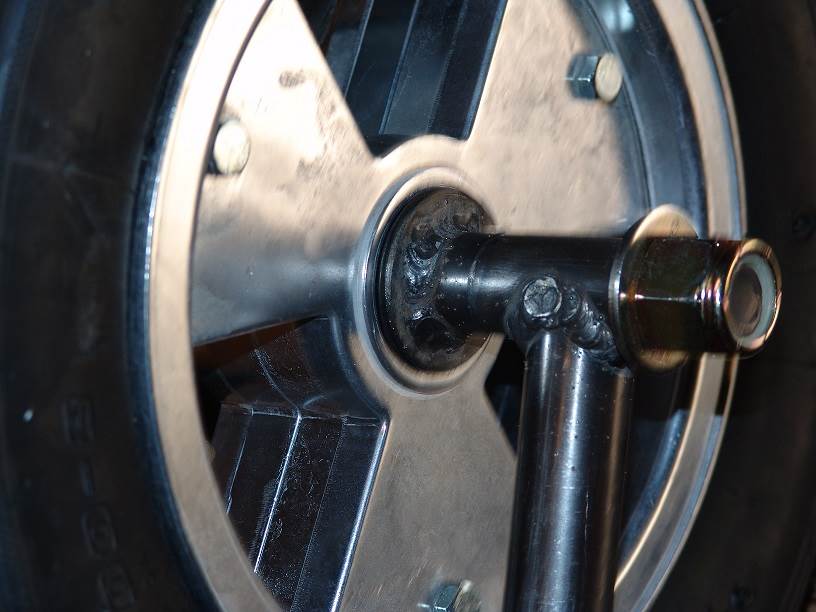
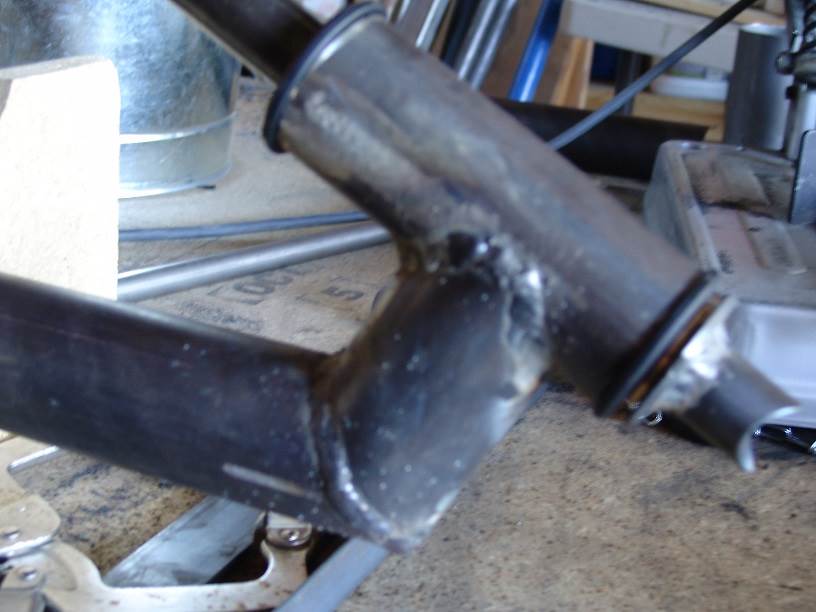
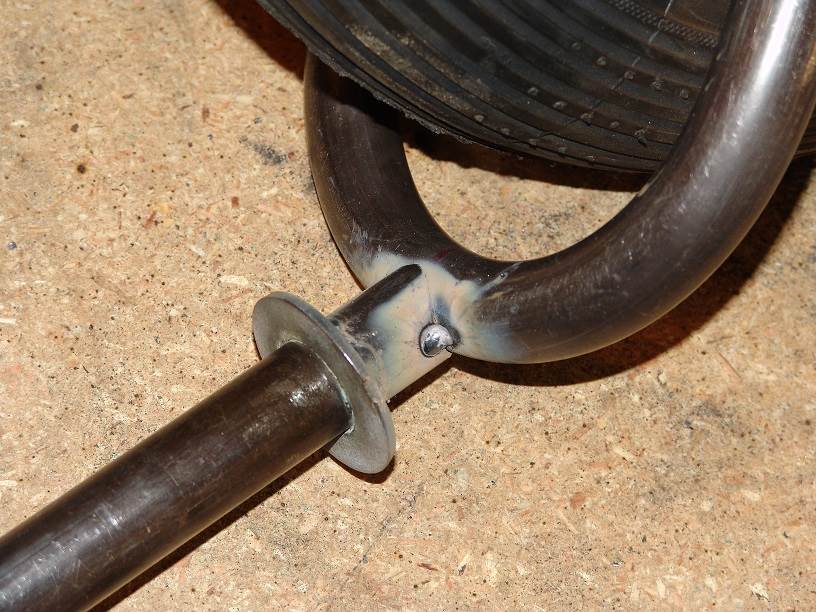
And a slightly out of focus shot of the gooseneck. I think i might add a gusset between the "bend" in the main tube and the gooseneck. Will make more progress today! You can see the lip of the bronze bushing between the washer welded to the stem and the black lip of the polyurethane bushing.
I wouldnt recut the luff on any of those sails, maybe just recut the foot , or work on a curved boom under the sails.
also try using the cams on the racefoil4.4
Landyacht, thanks for the advice on the sails. I probably won't do more than try to even out the bottoms then.
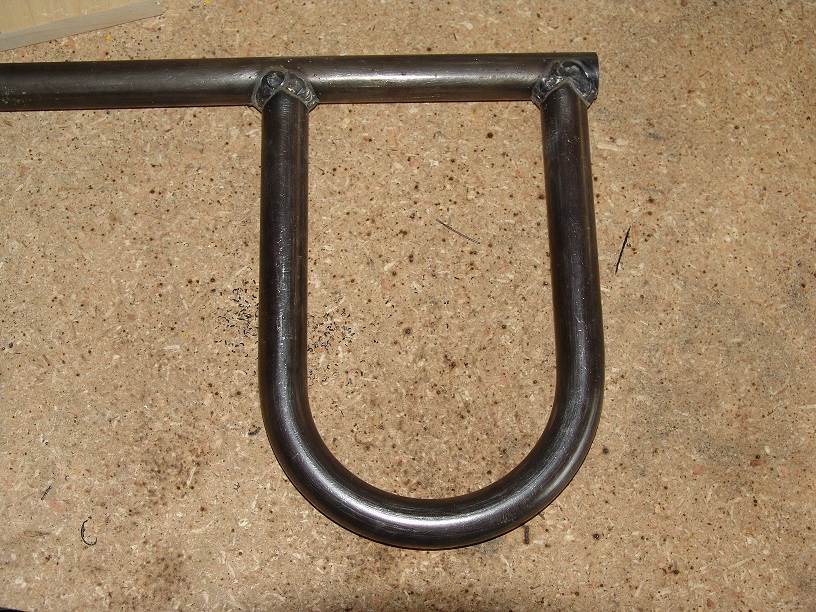
I made a little more progress on the forks. After measuring and notching the forks, I welded a piece of 1" (25.4mm) x 1/8 (3 mm) DOM tubing across the notched ends in hopes that this would keep it straight during the welding. Here's the result:
After measuring out a 4" (101 mm) gap for the wheel to fit through, I cut off the excess:
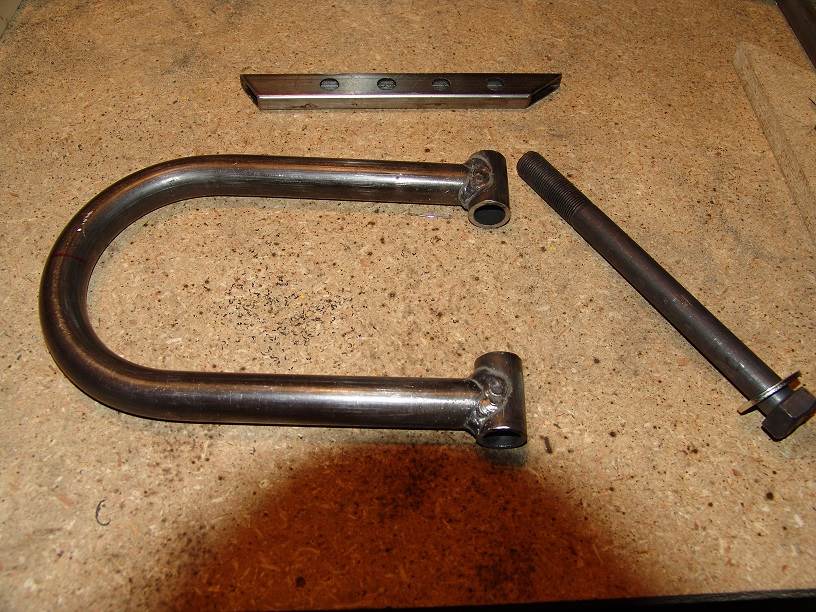
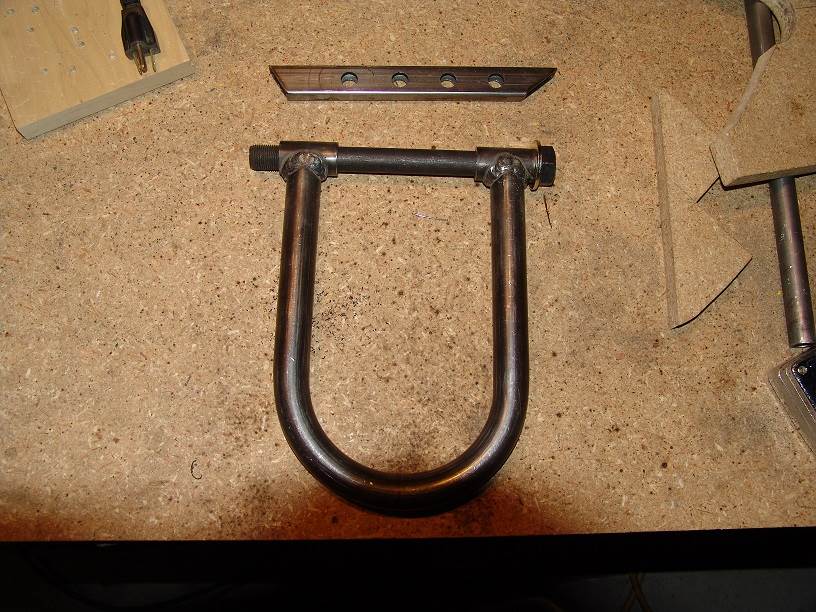
And here I've got the 3/4" (19 mm) bolt that will be the front axle fit nicely through the remaining guides. Also in the picture is the mast step stay. I've got some 1/2" (13 mm) holes drilled out and I'll weld sections of 1/2" (13 mm) x 1/8" (3 mm) tubing into those holes for the downhaul and whatever else I might need to attach there.
Hiko,
Here's another pic of the notcher. On this one the guide for the hole saw swings out if you're making the cut on an angle. In Desertyank's it looks like the part with the clamp adjusts for angled notches while the guide stays put. Also visible in this pic is the operating room like neatness of the work environment. ![]()
Another small step forward after some extensive slacking. I cut some spacers for the front axle to keep the wheel centered, and welded the forks to the gooseneck stem. I should have gotten a shot of the rig I had to hold everything in place, but once I had everything just so I was in too much of a hurry to get it tacked in place. Then once I got it tacked, I was rushing to get it apart worried I would melt my bushings. The bronze one was pretty warm by the time I got it off the stem.

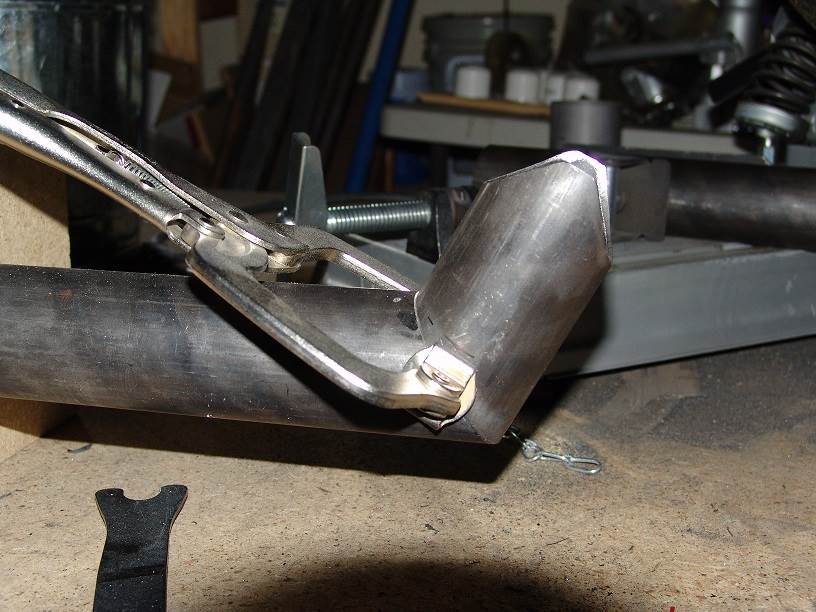
And here's the stem and the forks freshly tacked:
And here I've got the welds complete:
I cut some spacers and welded some washers on to where they would push against the bearings. These will keep the wheel centered on the axle.
I was having second thoughts about the method I chose to hold the front axle. I was contemplating cutting the fork in half and going with a single fork. I was a little worried that the tubing that the axle bolt rides in on the end of the forks would bind against the axle when I tried to tighten them snug against the bearings. I was picturing those tubes pinching into the center as I tightened the tips of the 'U' together. But they came together just fine in the end.