Really impressed with what you have achieved Chook, hope it does not end up me wanting to build one of these things, but it is a very interesting project.![]() (my saviour or argument to myself is that there are to many hills in Bridgetown)
(my saviour or argument to myself is that there are to many hills in Bridgetown)
Hey thanks aus230.![]() That means a lot, coming from a bloke with your skills.
That means a lot, coming from a bloke with your skills.![]()
Esperance is not exactly flat, either Vic.![]()
Select to expand quoteTest pilot 1 said..
Next they will be trying to put sails on them![]()
![]()
![]()
![]()

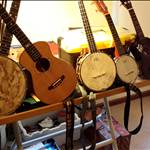
I like the preloaded masts in the photo. Still hanging back to the rear with full sails, and huge tell tails.![]()
I have just finished profiling two 36" rims, two 48" and two 17" rear rims.
It is raining and blowing a gale here, because I'm ready to do some painting on another project. Bloody typical eh????![]()
Select to expand quoteChook2 said..
Hey thanks aus230.![]() That means a lot, coming from a bloke with your skills.
That means a lot, coming from a bloke with your skills.![]()
Esperance is not exactly flat, either Vic.![]()
Test pilot 1 said..
Next they will be trying to put sails on them![]()
![]()
![]()
![]()
I like the preloaded masts in the photo. Still hanging back to the rear with full sails, and huge tell tails.![]()
I have just finished profiling two 36" rims, two 48" and two 17" rear rims.
It is raining and blowing a gale here, because I'm ready to do some painting on another project. Bloody typical eh????![]()
Some amazing athletes and rigs in the picture![]() Based on the streamers at the top of the masts, they have sailed downwind/pedaled faster than the wind!!
Based on the streamers at the top of the masts, they have sailed downwind/pedaled faster than the wind!!![]() ... and we thought it took hi-tech methods to achieve that!
... and we thought it took hi-tech methods to achieve that!![]()
![]()
Seriously though, your ring roller and die setup is VERY slick. Great work Chook![]()
Slowly getting a bit more built in between getting gear ready for the upcoming Lefroy trip.
After rolling the rims, I drill two 8mm holes and plug weld the joiner into one side, of the inside of the rim. It has to be the inside (spoke side) this allows for the tyre profile to be rolled onto it afterwards, from the outside. Hope that makes sense.![]()

One side is flushed off after plug welding it, so that the rim can be checked with a template to make sure it's ready to be joined, nice and true but more importantly perfectly round and flat.

This is the backbone (frame) of the bike. I cut long pie shaped sections out of tube to make the end taper. I have made up the some mandrels. The mandrels are welded to lengths of smaller pipe, that slide fit full length inside the backbone tube, to allow me to tap the tube to the correct taper over the last 250mm on the 34mm diameter small frames and 300mm on the 42mm large frame tubes.
Squeeze it up with the chain vice grips. Lots of spot welds to hold it in shape, while it's peened round.

Back in the tube roller with another set of dies and roll it to shape it. Camera on my phone doesn't like the shed lights.![]()

Slowly getting there.![]()

I got asked how I tapered the frame so I've outlined how I have done it. Chime in if you think there is a better way. I made a cardboard template to mark them out.

Taped it to the pipe with electrical tape so it's easy to remove without damaging the cardboard.

Cut the tapers out with a 125mm x 1.25mm Ultra fine disc on the angle grinder.

Closed the ends up really tight on the mandrel with the chain vice grips, tapping the mandrel through the taper to pull it as tight as I could.

Spot welded it and kept shifting the chain back up as I went closing it up as I went.

I the peened the whole thing, to as round as I could get it with a large hammer. Tapping the mandrel through all the time to keep it nice and tight.
I then cut in between the spot welds with the Ultrafine disc, so that I would get a full penetration of the weld.

As you can see the taper is offset(the back of the tube is straight)

Curving the frame.

The finished taper.

Gday chook, today LIl STig and I went off to measure an 1896 49" model. and get some measurements![]()
I dont think they were expecting us to ride up on our fakethings.
same spoke thread problem as your dads![]() but couldnt ride it due to a missing rear wheel nut . also the rear fork had buckled after going over a big pothole. it made me realize that some solidity could be good
but couldnt ride it due to a missing rear wheel nut . also the rear fork had buckled after going over a big pothole. it made me realize that some solidity could be good
I recon I was the first to pick the powder coated base on the leather seat![]()
Cheers Guys. I just love a challenge.Select to expand quotelandyacht said..
I recon I was the first to pick the powder coated base on the leather seat![]()
What are you saying........... an after market seat?![]()
more like a well disguised restoration,where they stripped a modern seat and relaid it in leather. i was planning to make a frame and then fit moled leather over
Id Have a go at that!!!!!!!![]()

I just want this one to be true

and heres one for christmas chook
10play.com.au
Hope this works. It shows the course that builds a penny farting in Brisbane, at the 19min.50sec mark.
Got started on the spokes on the weekend, trying to recreate the jig we saw on arrons blog. it aint as easy as it looks![]()
hees the result of a whole days bashing and machining

They look crap, but I will now wait until I can roll a thread on one and put it under strain. and test it for failure![]()
Maybe this way Paul.

Quote from the blog.
Spoking from one I saw in Berlin Transport Museum, in a moment's inattention to the German road pothole situation, where each spoke doubles upon itself in the flange and so is actually two spokes at once.
Here is the site.
colonial-diaspora.blogspot.com/2010/02/penny-farthings.html
the rest of the commentary from that blog
It's a cunning and simple way of spoking a penny but overnight each spoke transmits tension to its partner and you come out in the morning to find a four foot potato crisp sitting on the Workmate. Took me two weeks to true my wheel. Even now it's half an inch out of round and three-eighths out sideways.
why wouldn't one try a dished instead of spoked wheel,
it may be the reason that the PF reached its limits of design ![]()
Select to expand quotegibberjoe said..
why wouldn't one try a dished instead of spoked wheel,
it may be the reason that the PF reached its limits of design ![]()
keep in mind that back in the 1860's when it all began, the wheels would have started as wood or iron/steel.
going to spokes made the wheels possible.
so they simply invented the spoking system we use to this day.literally. replacements for the system are only now being invented, .
meanwhile i came home with a bit of energy tonight and tried again. this time I drilled a 12mm x19mm deep hole into the clamping block and machined a 12 mm punch to drop into the hole with the shape machines in. after hardening and tempering the punch , I found that I could do a single hit on the block to get a nice fat even head.
I hung this from a plate with a hole in it and it held 100kg ![]()
![]()
i feel that might be a tick the box moment![]()

Oy, where is the back jaw off your vice mate????![]()
Nice work. if you took the forming/captive, edge off the tip of the punch it may mushroom the ends better, you reckon? More like a conventional spoke end I'm thinking.
One more problem overcome.........onwards and upwards.![]()
![]()
OOps ,its the front jaw. still got it but the threads in the casting flogged out and for the life of me i cant think of a way to remount it.
i played with the punch some more today but really couldnt improve on the "nail " head. . so its wait for the thread roller head to arrive![]()
I found my other camera (hadn't seen it since I left for Lake Lefroy) and look what it had on it Paul and Graeme.

After the speed run, GPS in hand. What was your speed? I even have a short video of the event.

and here are some snaps of my spoke head thingy that were on it.

I found you had to leave 4.6mm of spoke proud of the die, to get enough material to make a good mushroom head.
A huge hit with a 3 pound hammer does the job.

once again you made mine look like pooblobs![]()
Back to shed tommorrow for the next generation![]()
what is the diameter of your punch?
25.4mm, 4140 shafting, with a small dimple ground into the bottom.
Got the spoke threader finished today. ![]()
I used the straight end of hardened chromed "main shaft" out of my model helicopter for it.
Yes....... it had previously dug a hole and been replaced.![]()
Some very clever machining there "bazl". Spent some time checking it all out, thanks.![]()
Paint is not quite dry, due to the wet weather we have been having. (It is harvest after all. Lots of fantastic crops under threat here.![]() )
)

So I'm hoping the 12 gauge, CYCLO HEAD, I got from England will roll, 56 threads per inch, onto 2.6mm wire.![]()