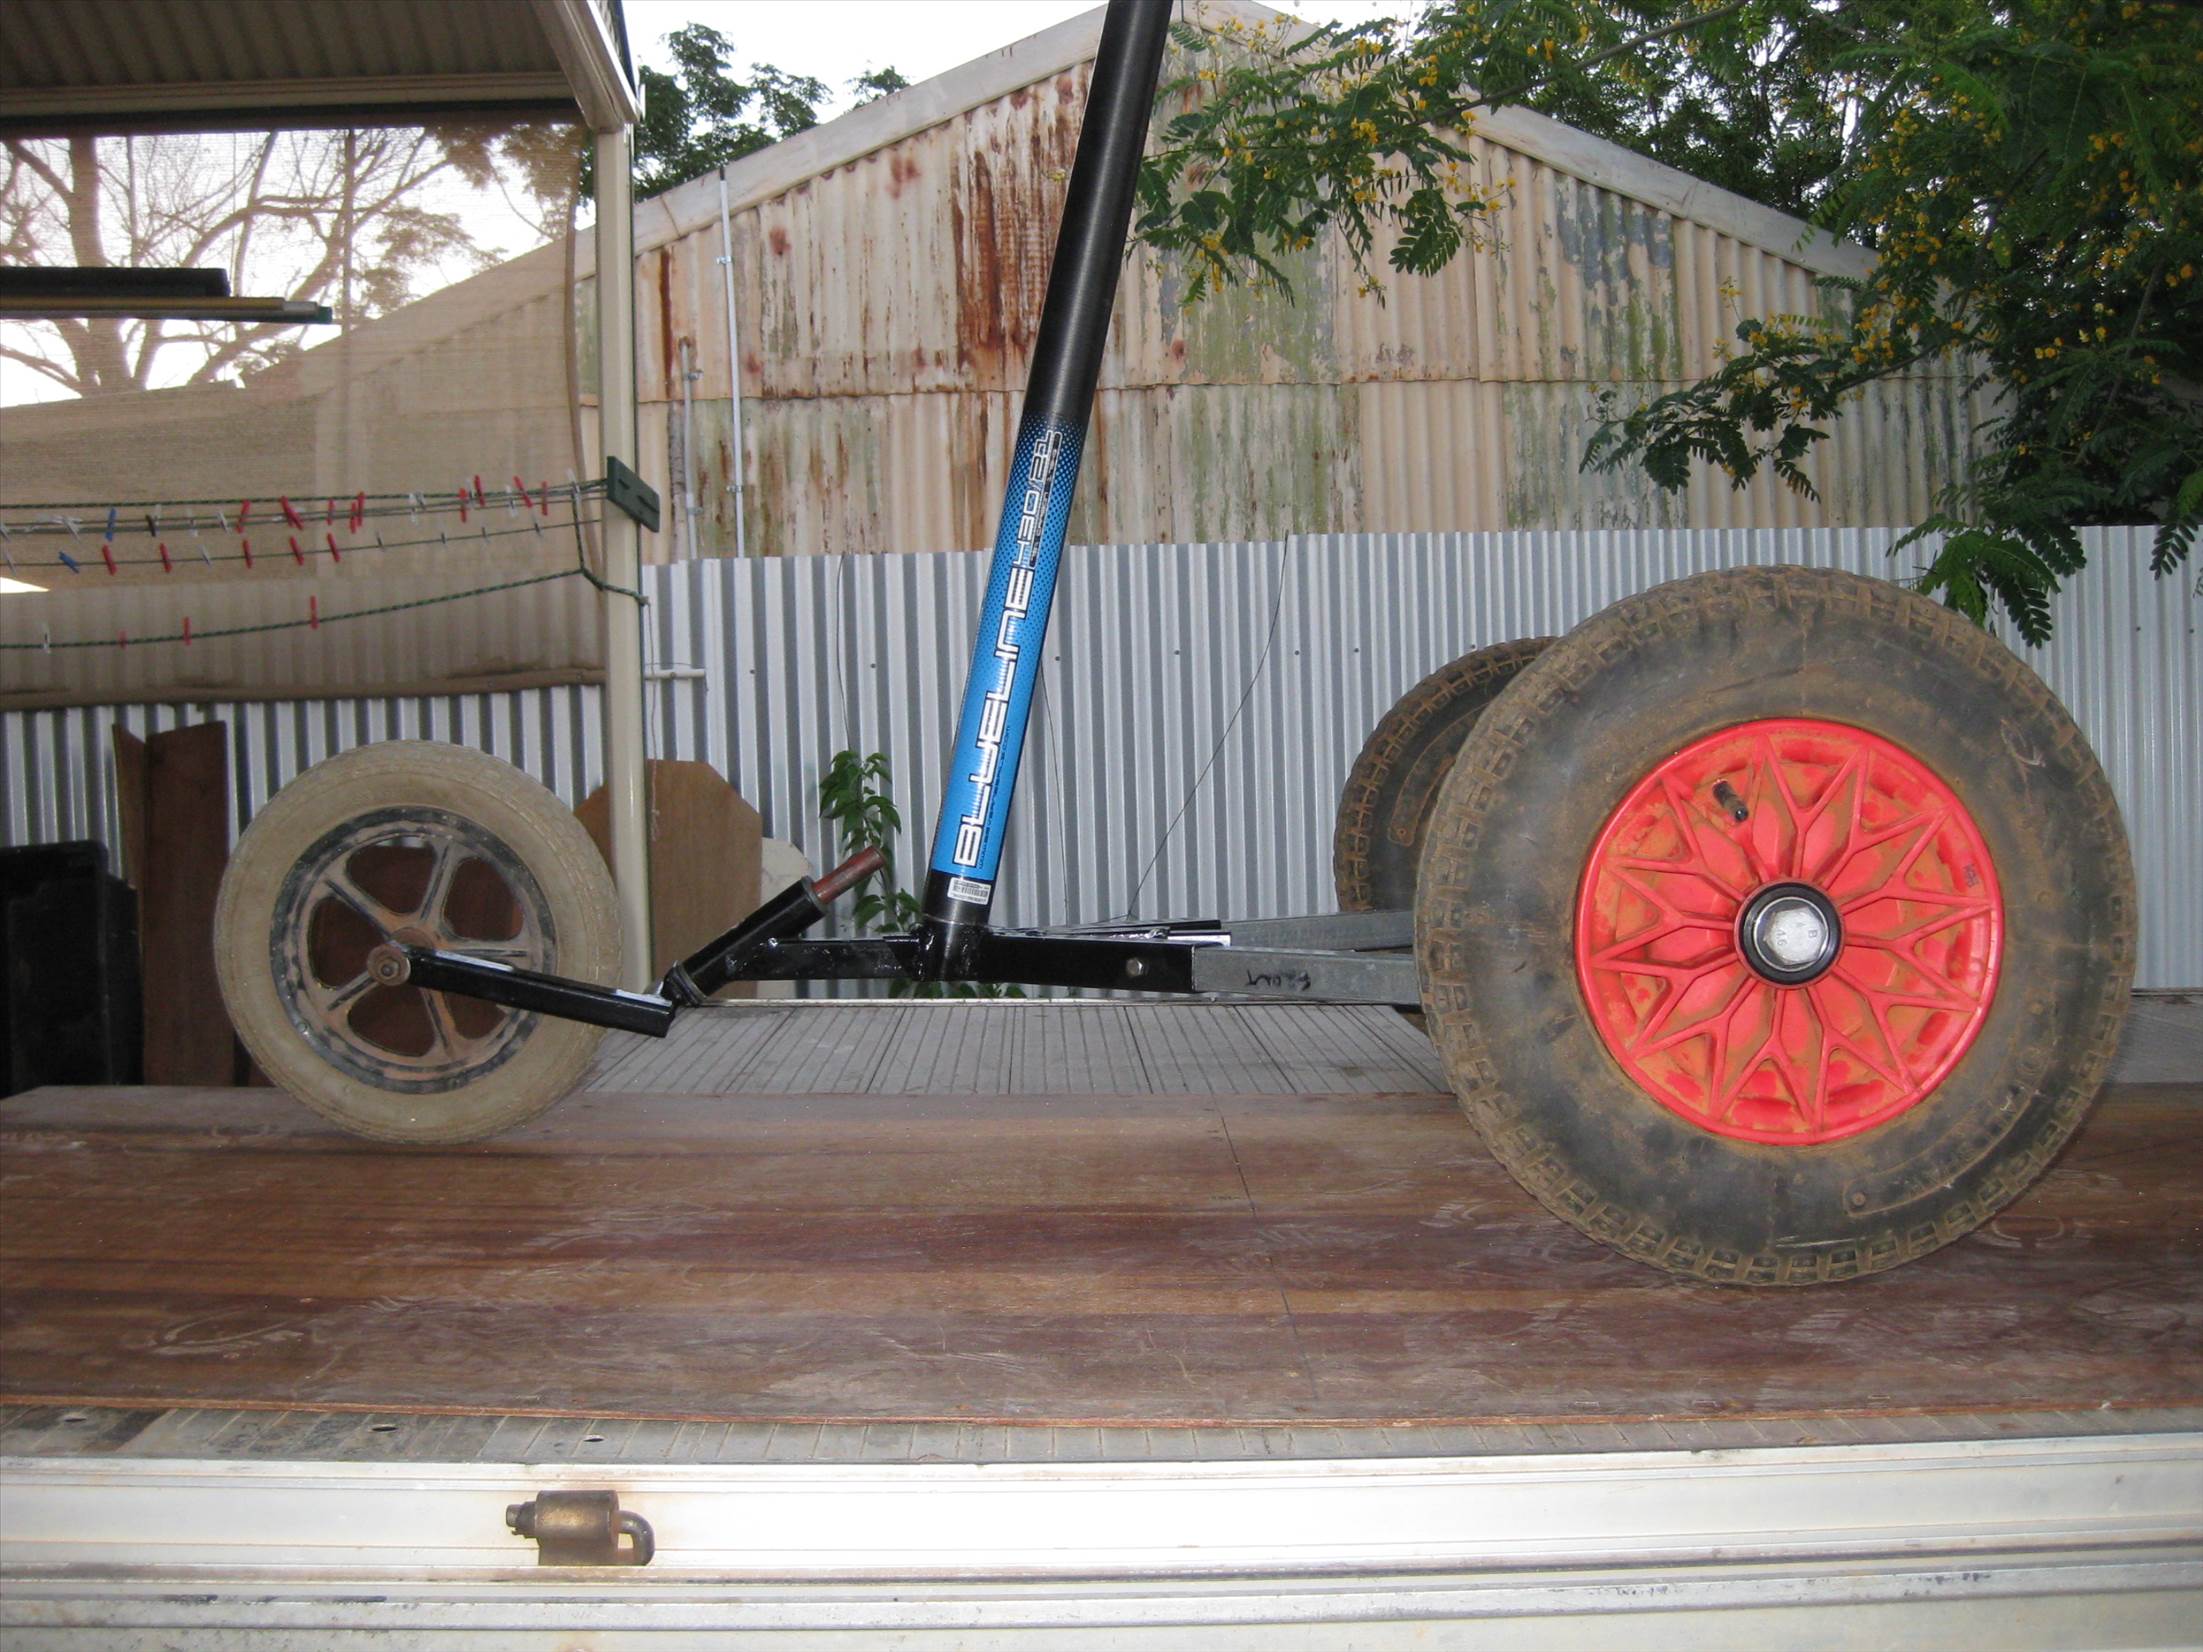
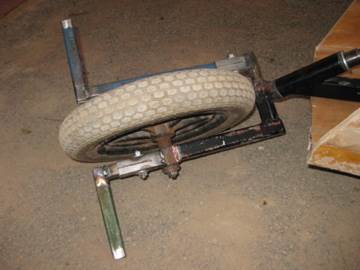
Started making my new Hummingbird/Mini Mini yesterday after being inspired by "Black Oops".
Yacht Design:
1050mmx1050mm
Flat Y- 35Degree
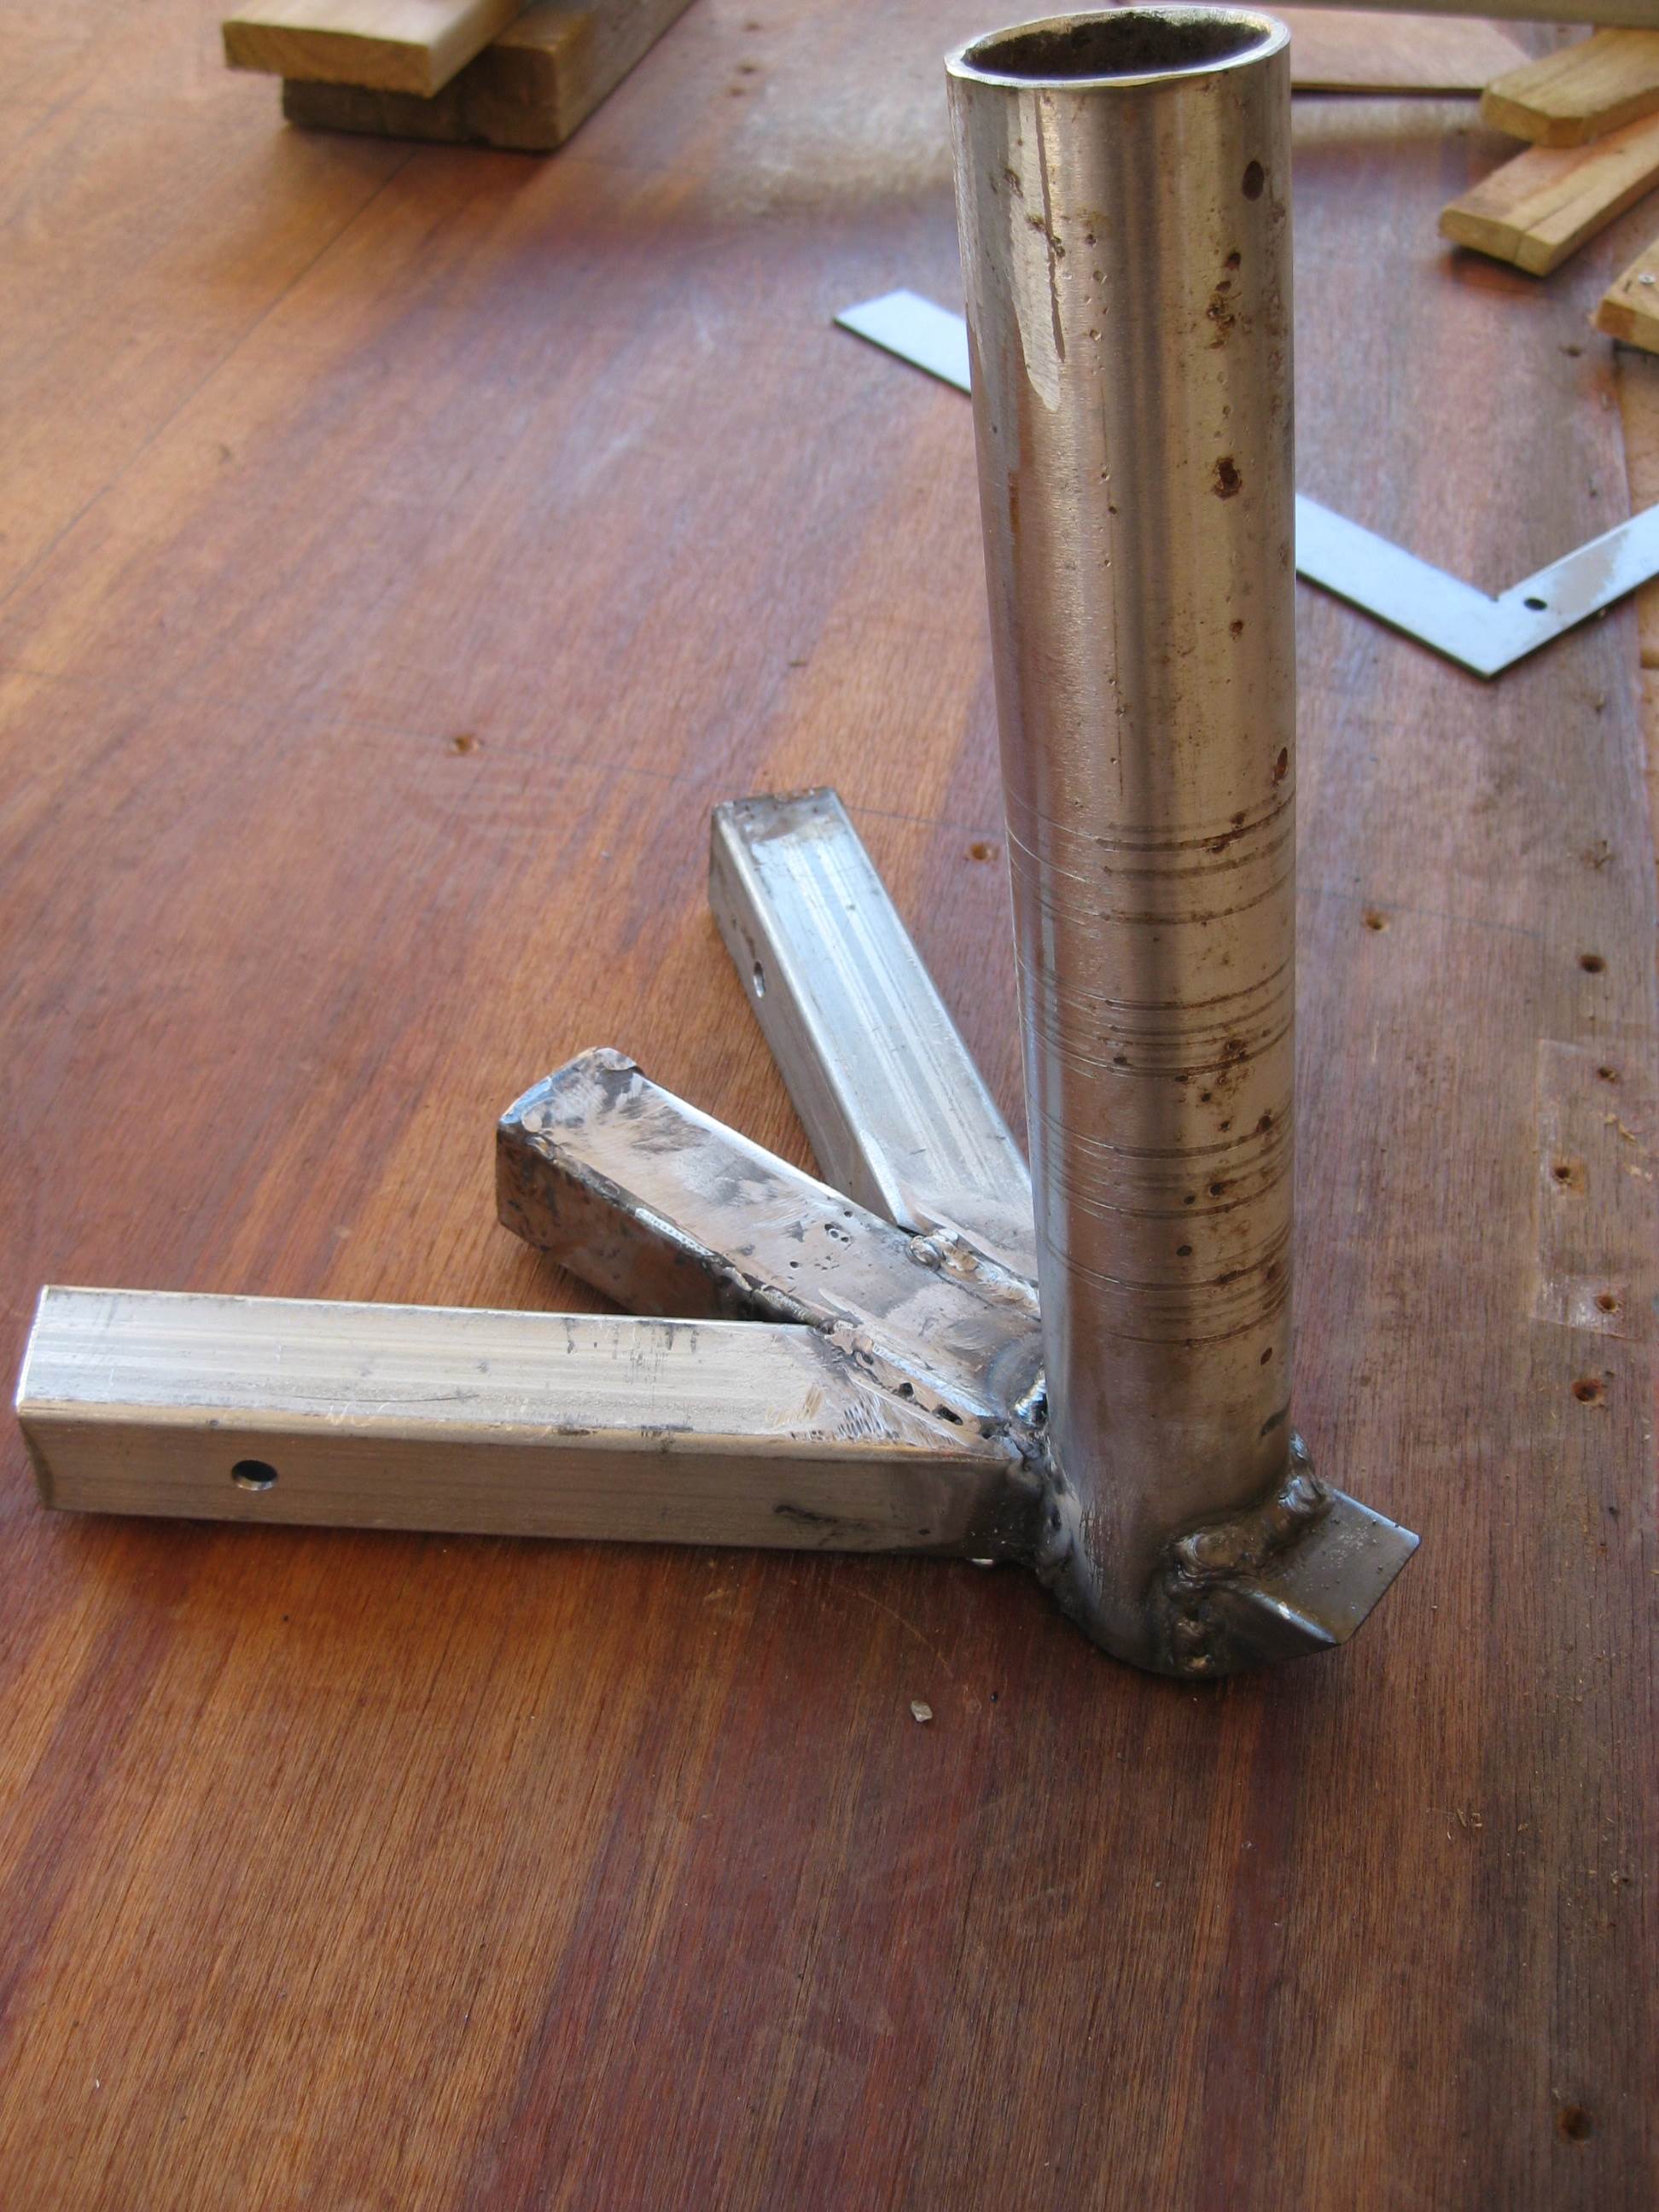
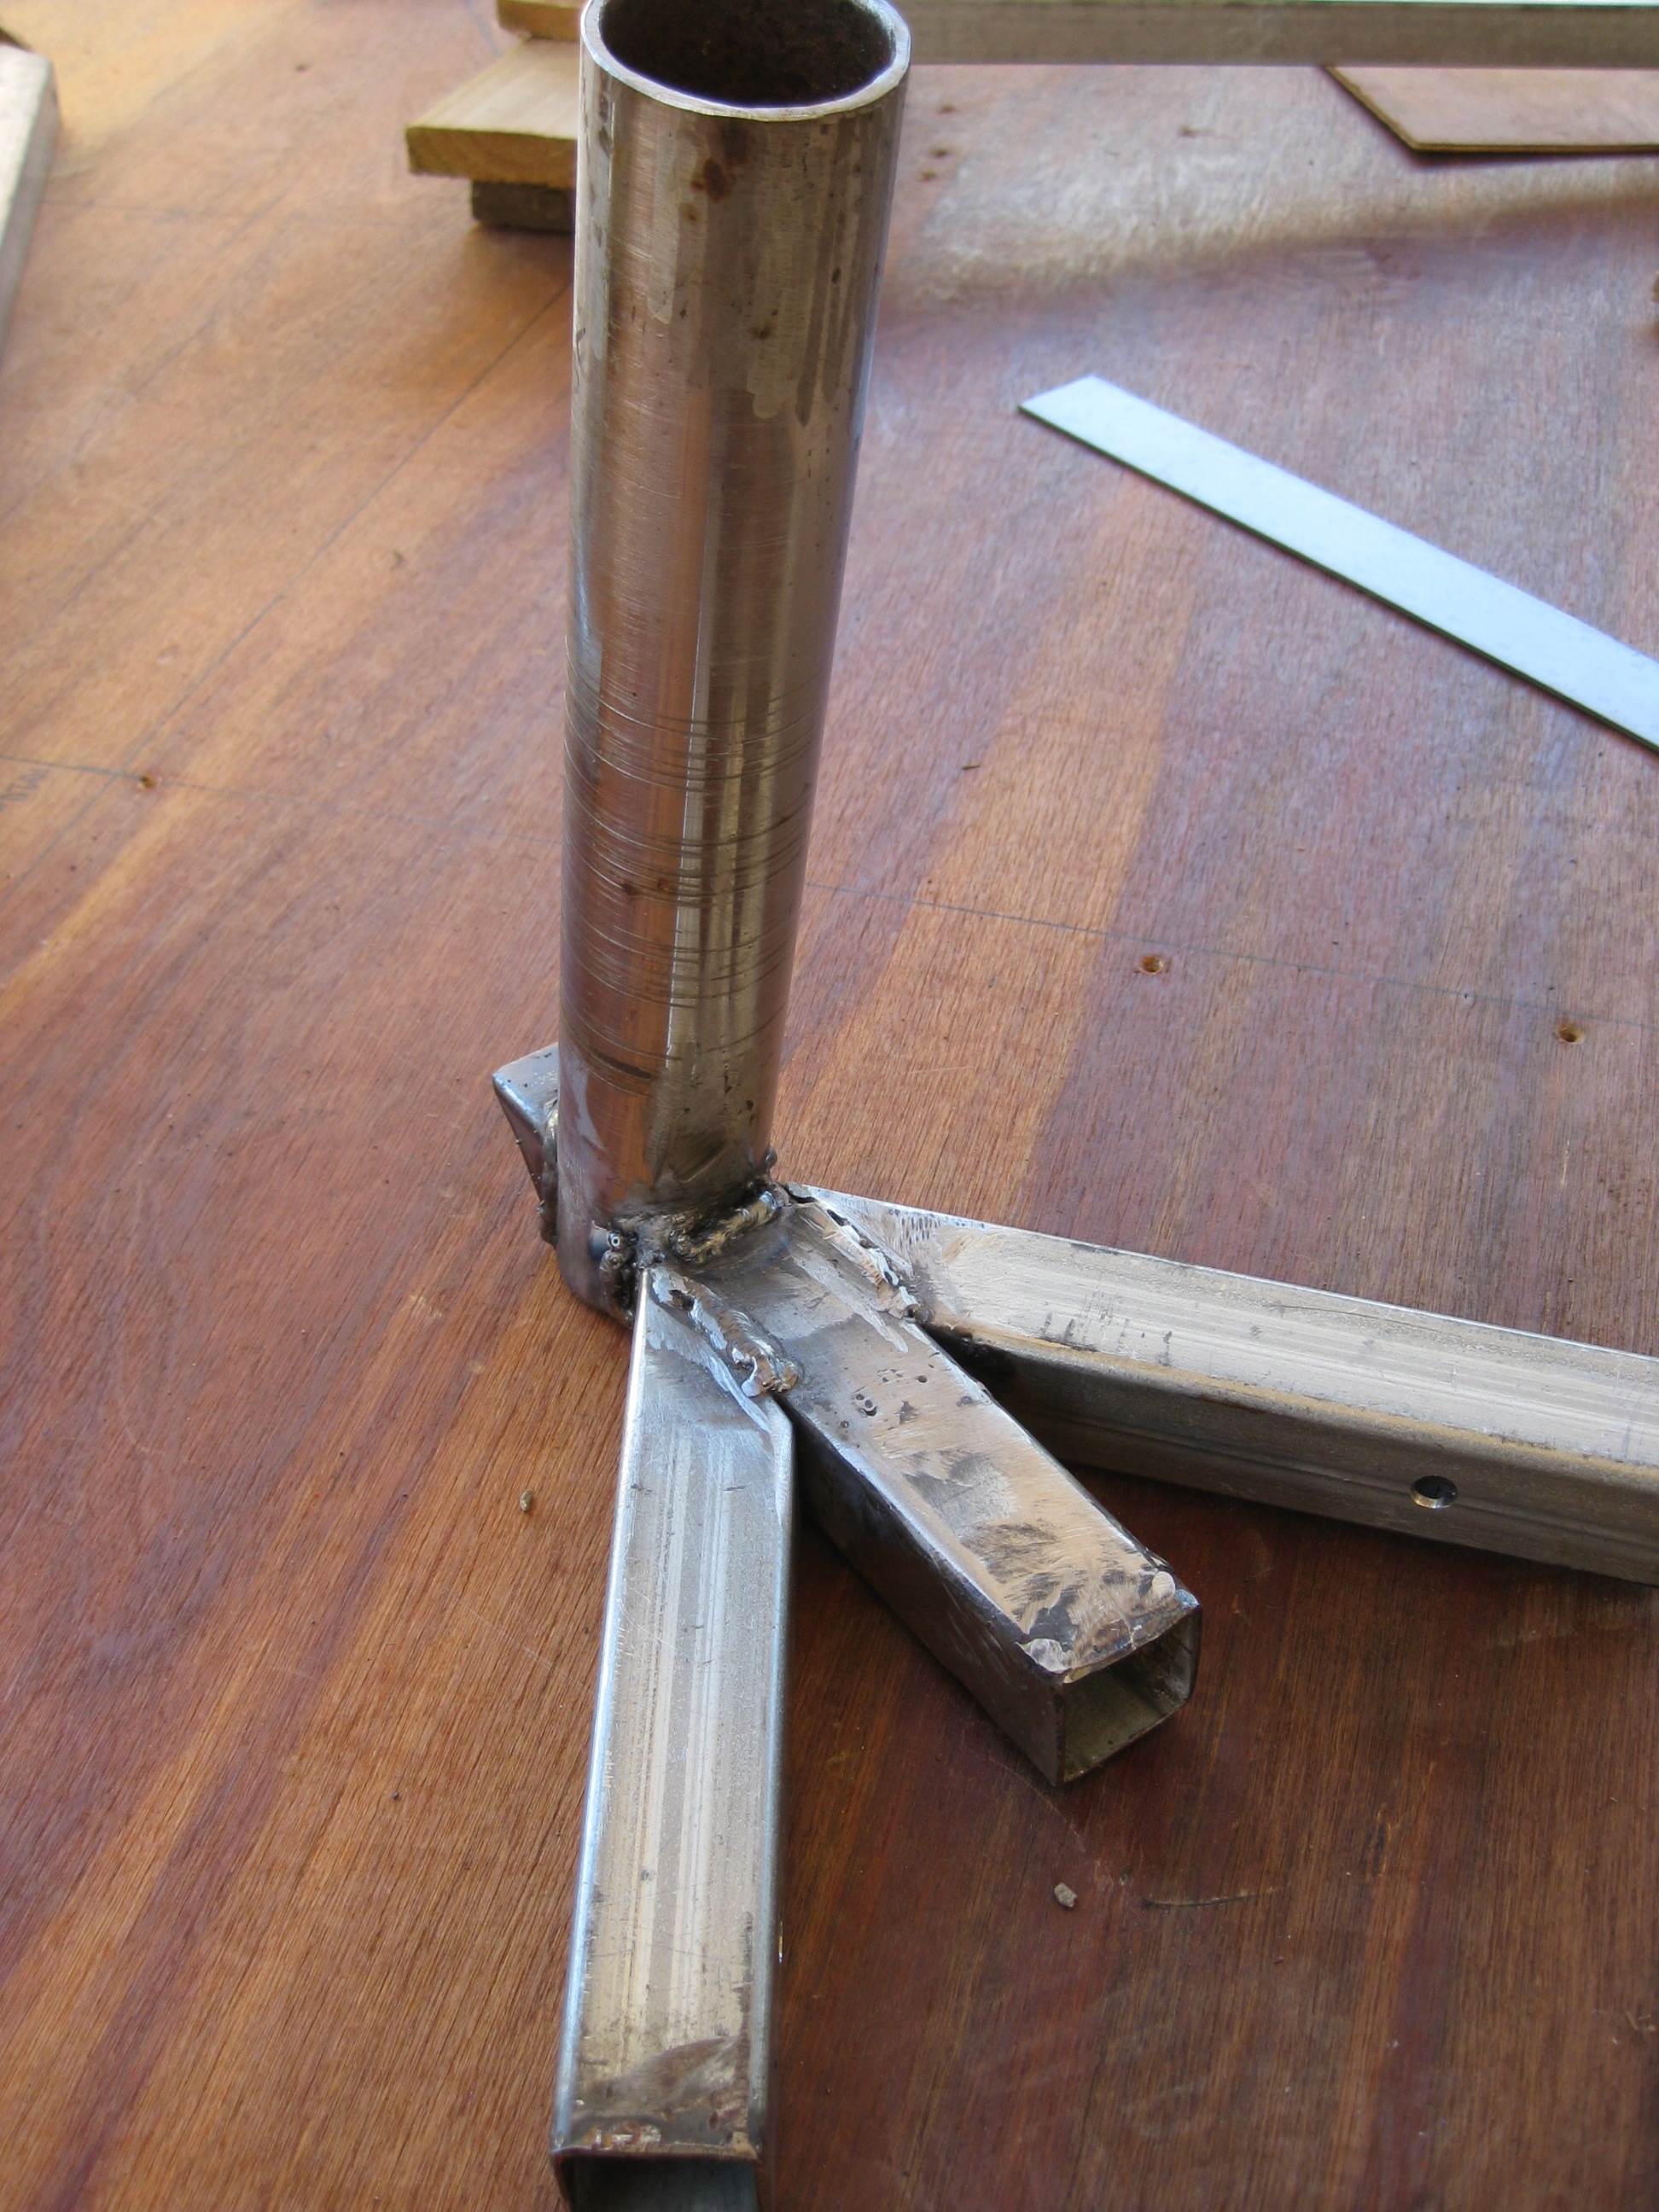
Made from recycled cut up mini that failed.
Decided to make it so I can pack it up into a small bag for easy transport as well as making it future proof. I like the idea one yacht for a kid or big kid that they can grow into and give them flexibility to change the yacht from a Hummingbird to a Mini 5.6 just by replacing the rear axles and extending the front.
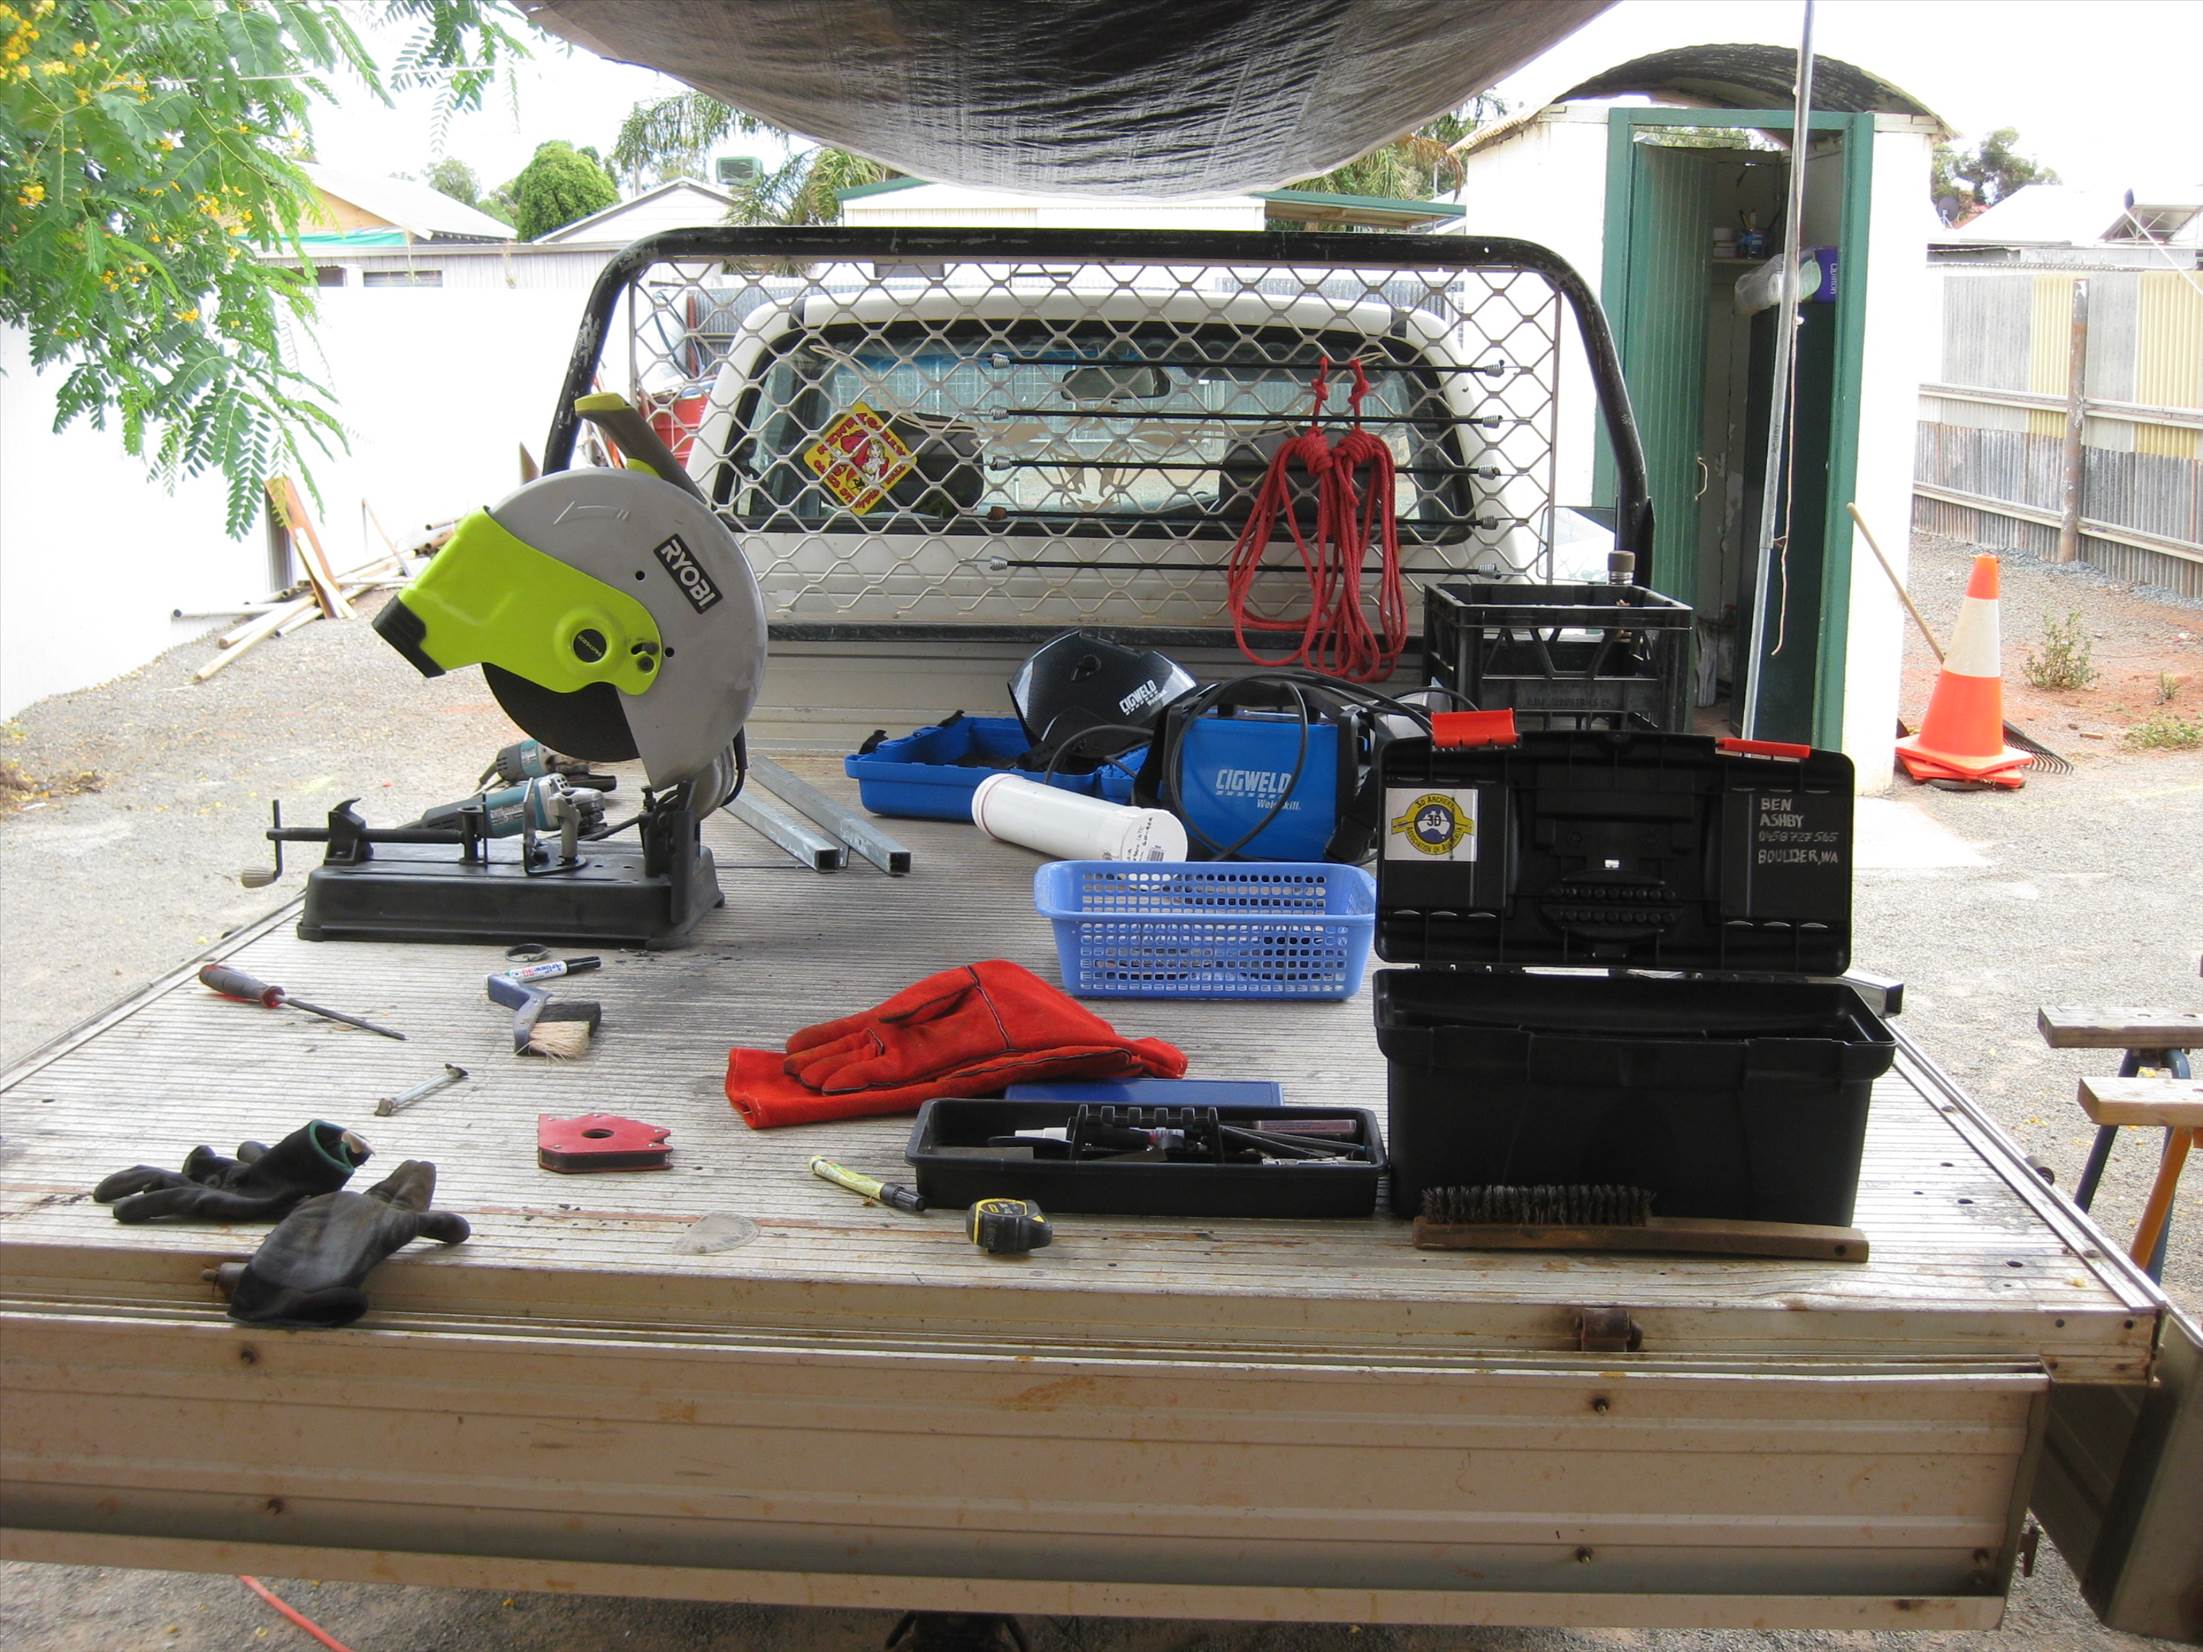
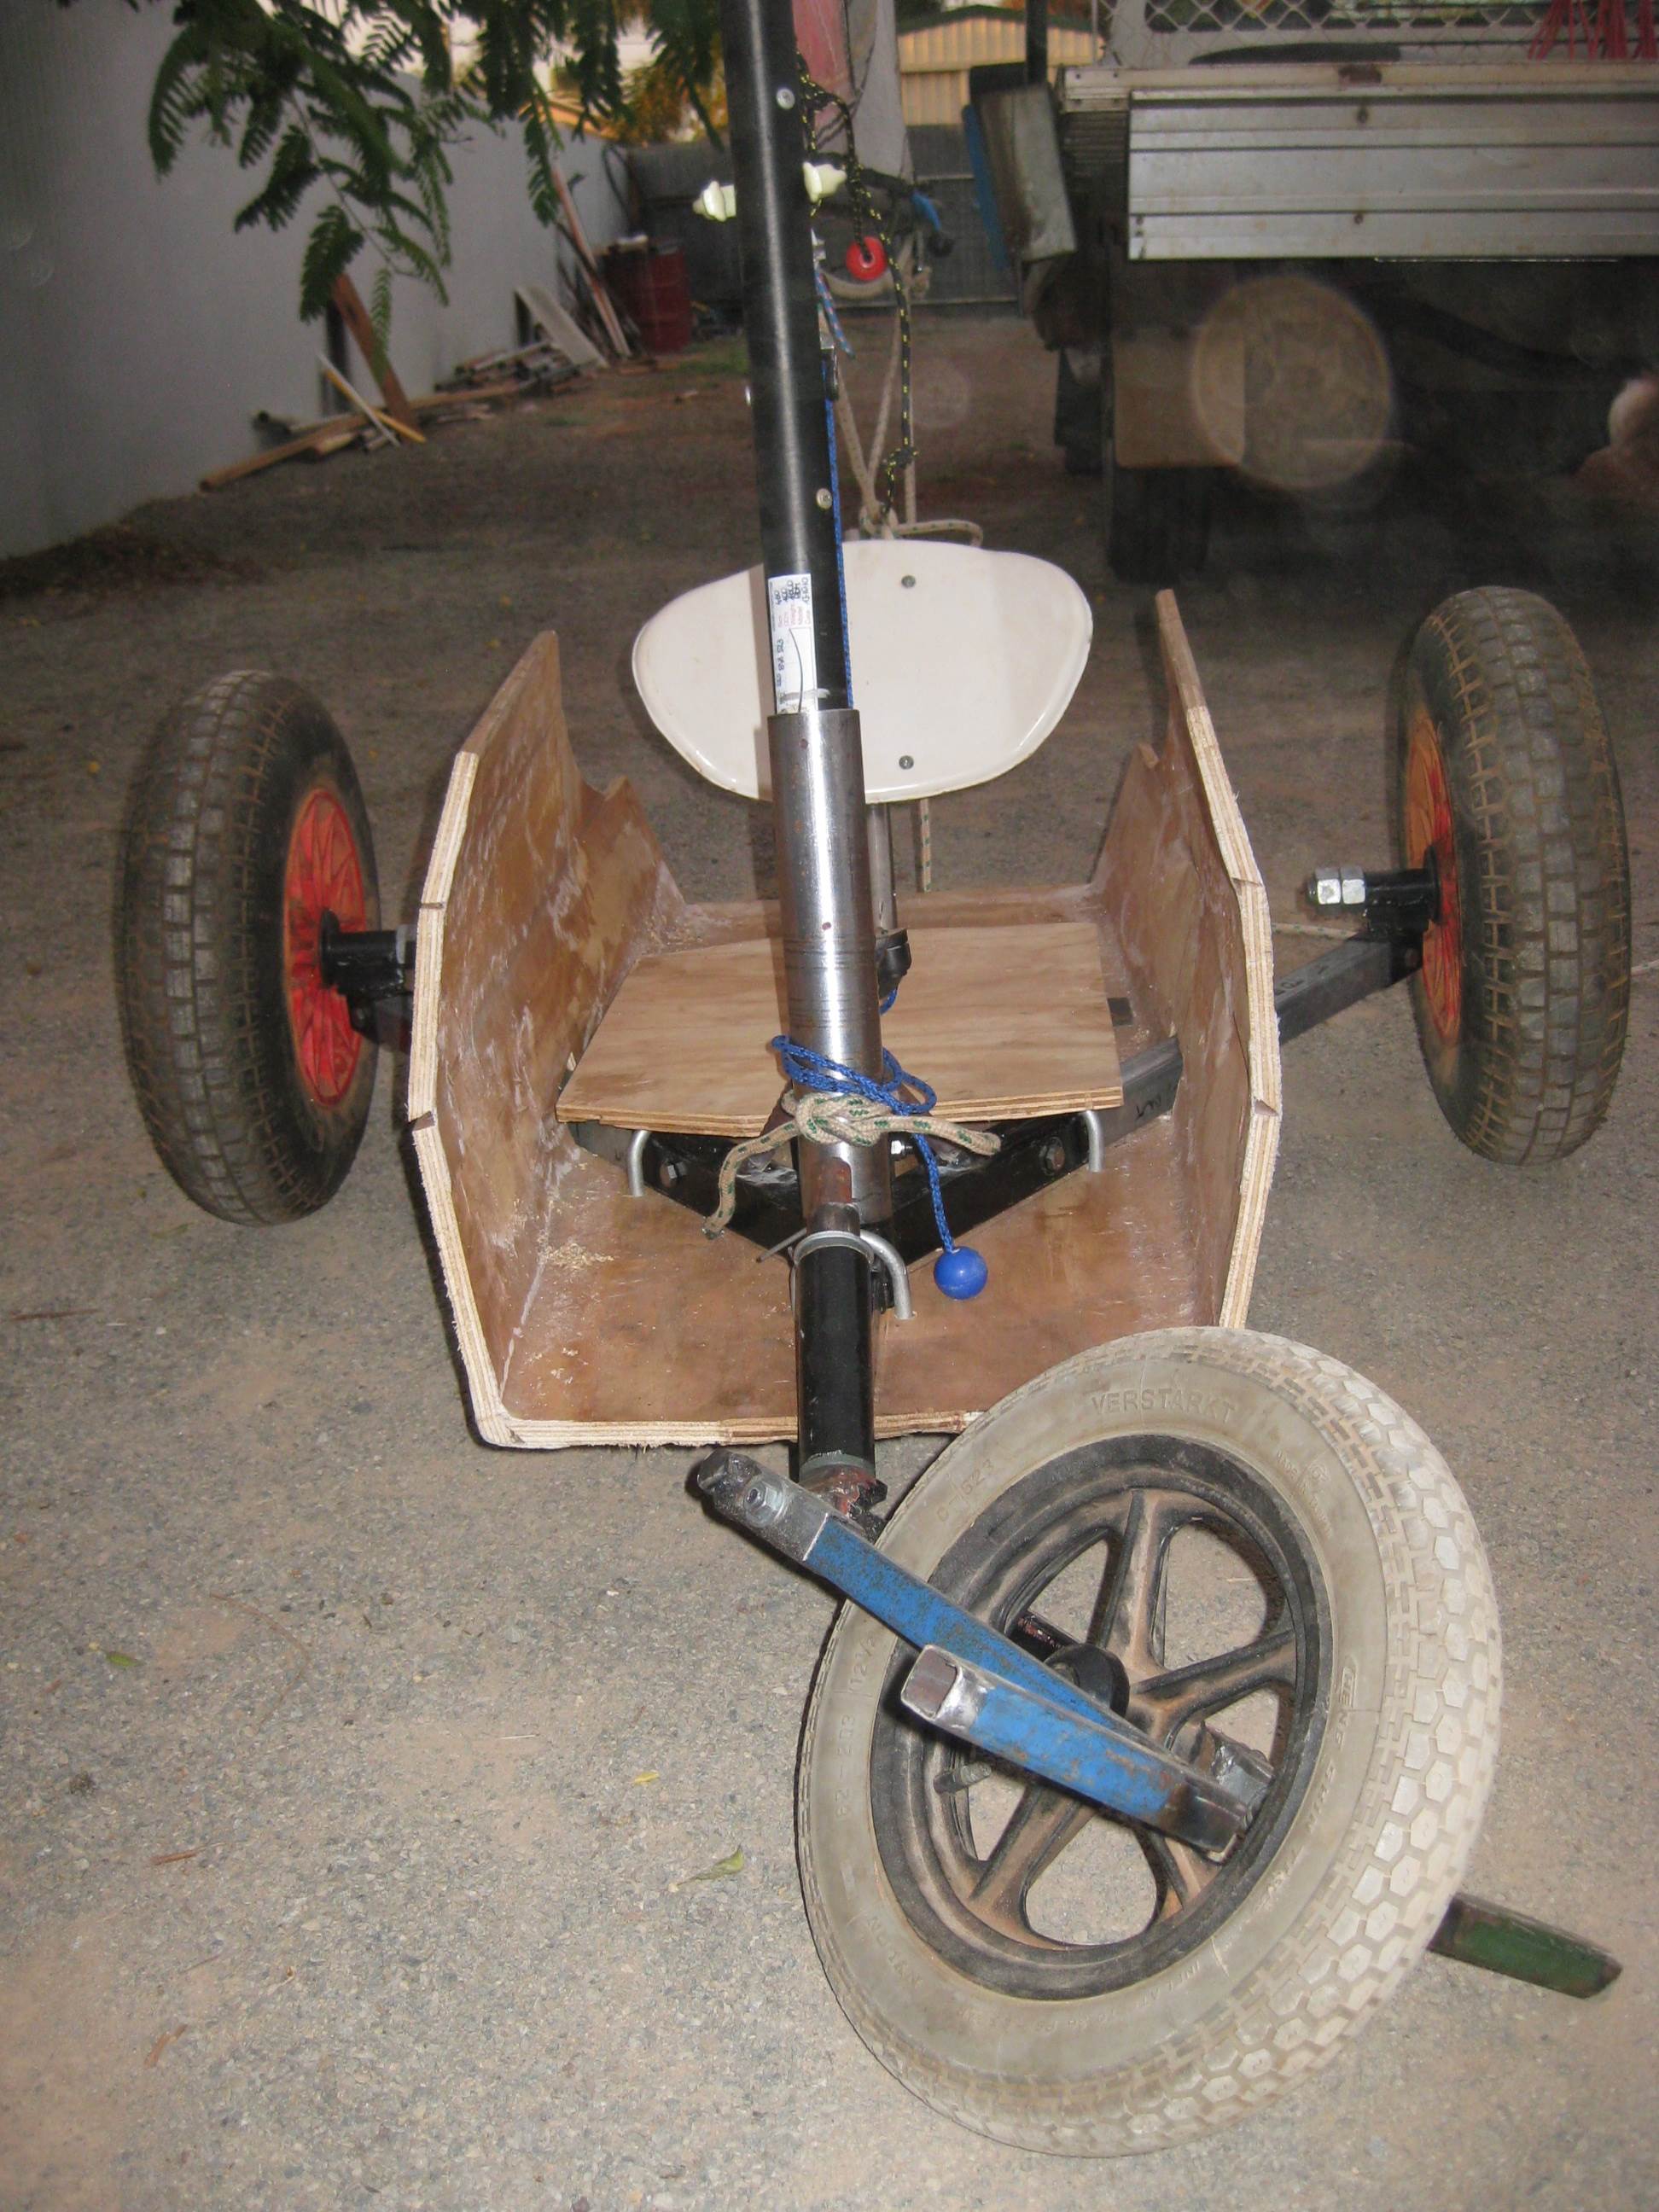
Have completed the rolling chassis.
Things to left to build:
-seat ('nappy rush' type)
-foot steering bar
-rigging
B
en
.
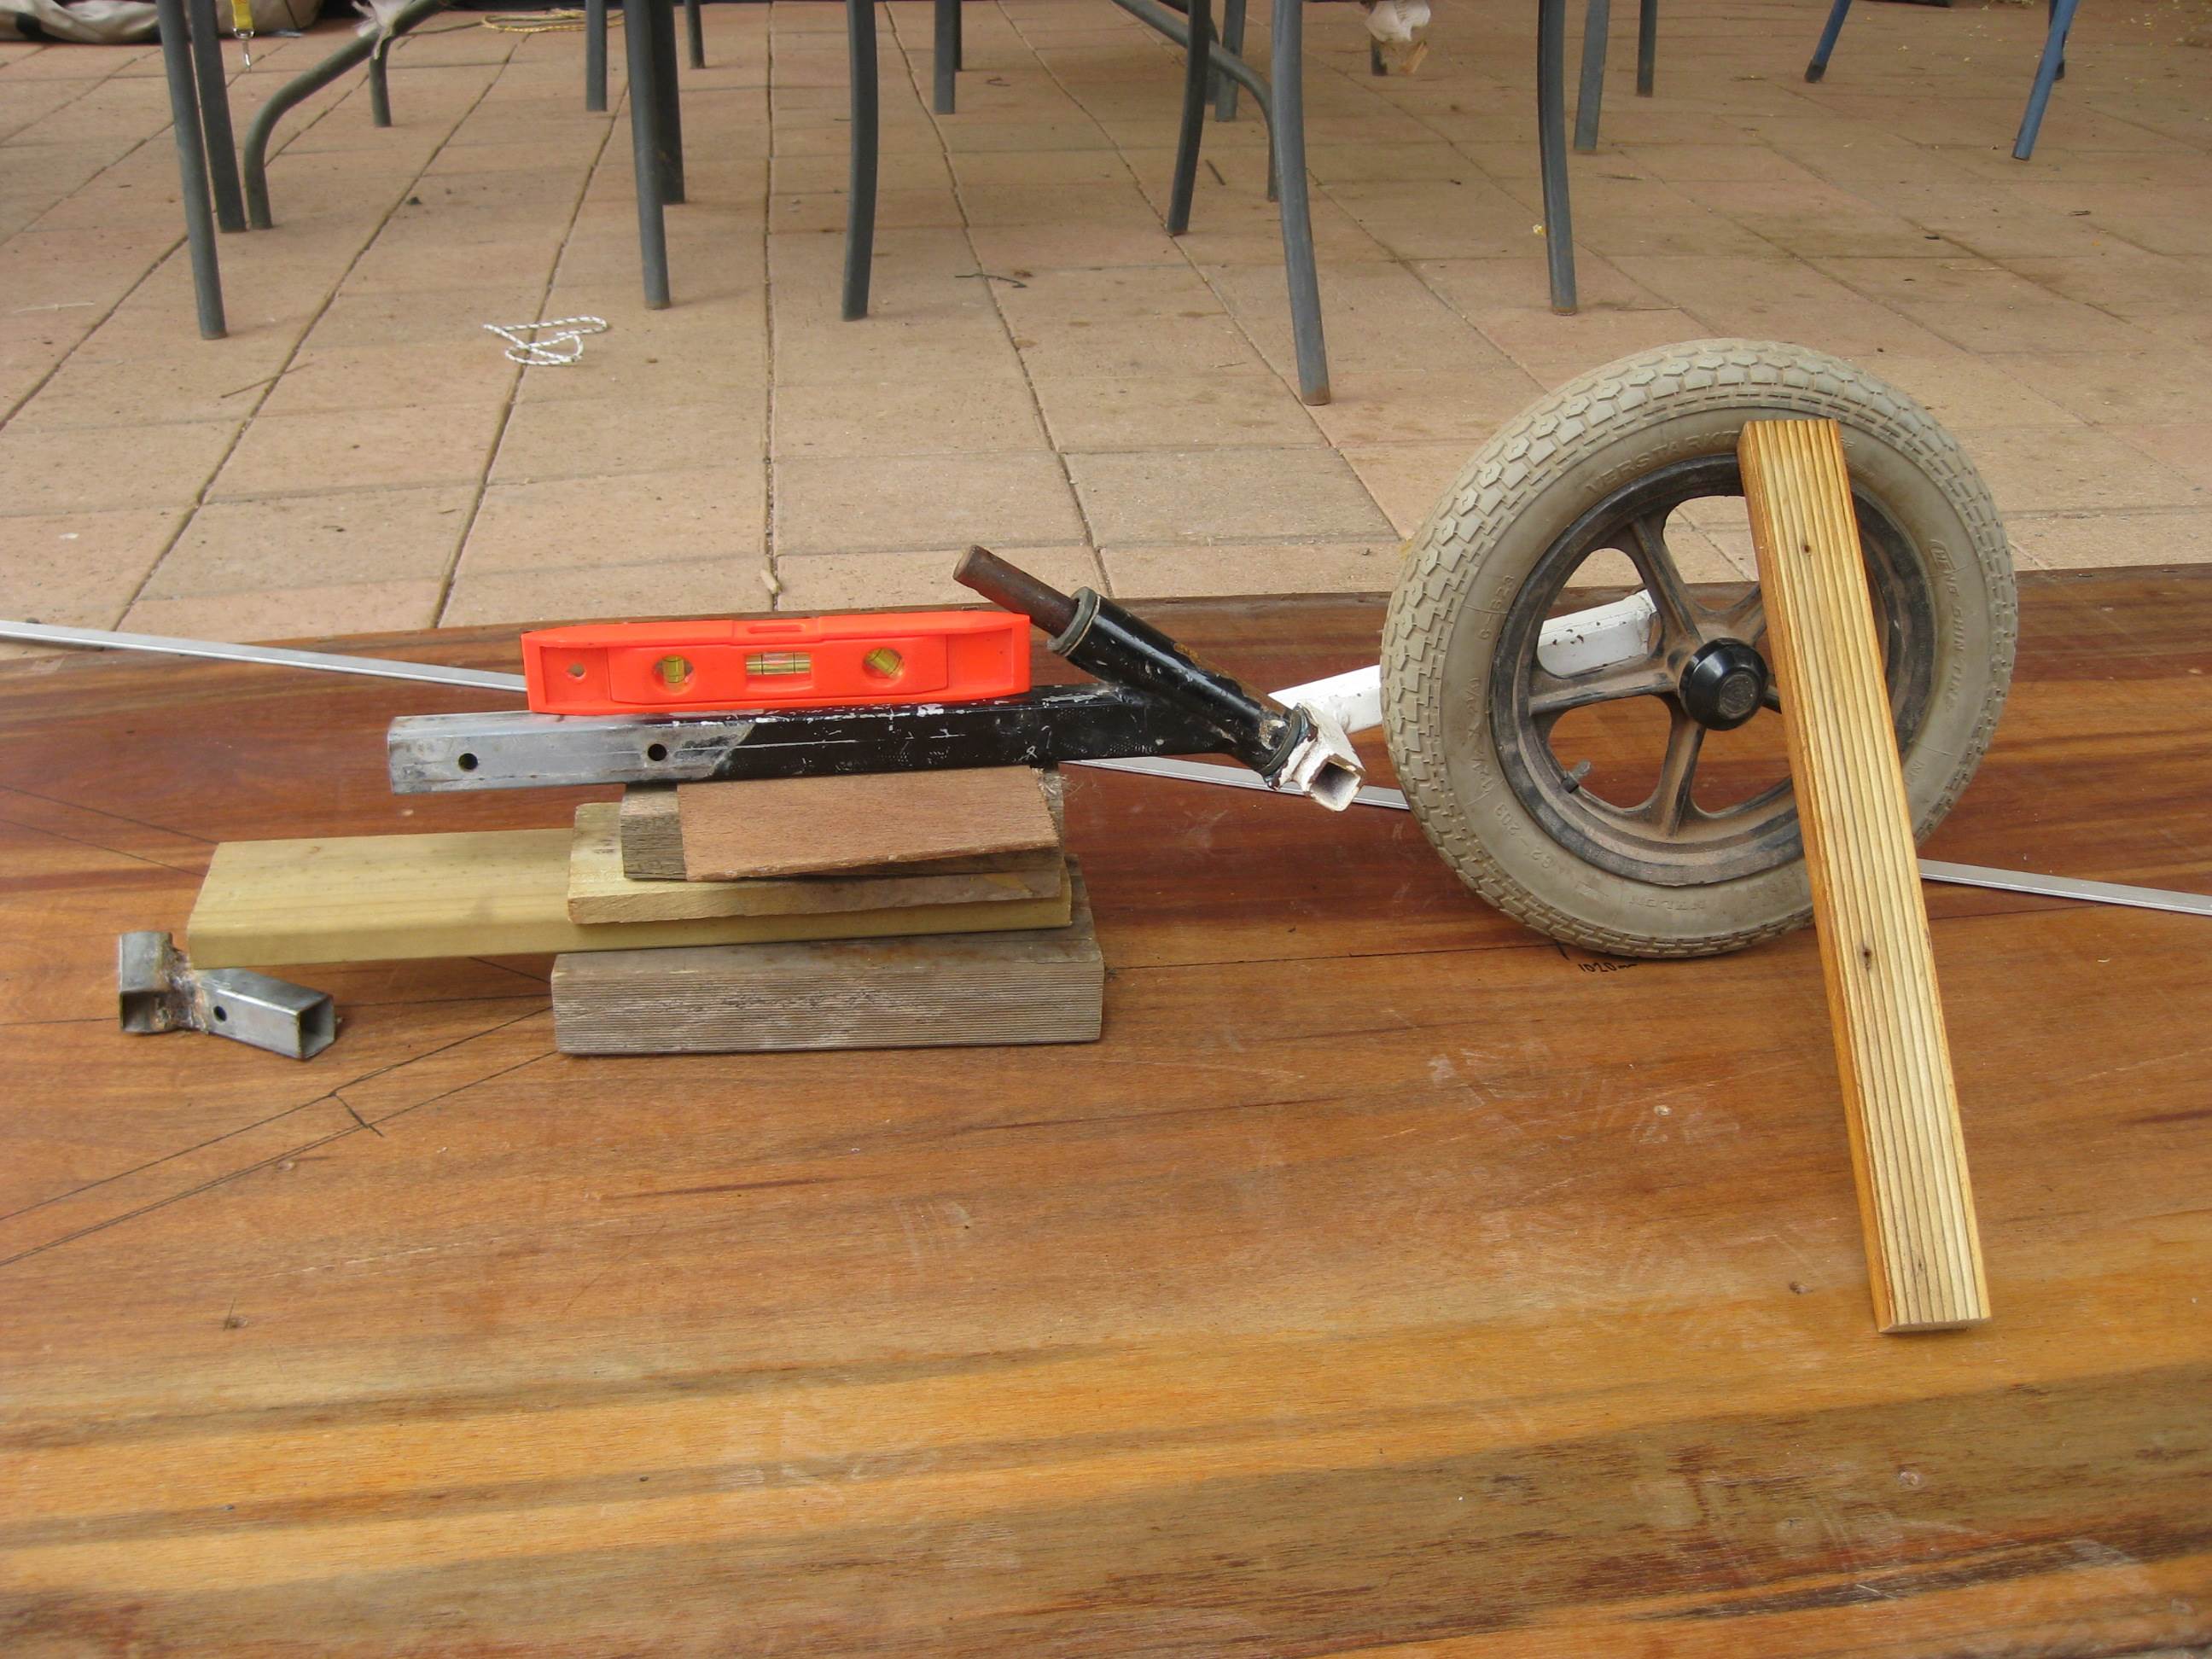
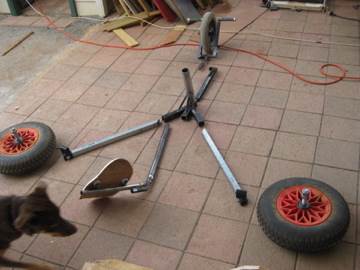
now thats a small chassis![]()
It makes me wonder if a OTT chassis might be the go with a seat slung underneath![]()
no
no
no
no.
.
.
.
.
.
.
.
.
.
.
.
.
.![]()
Gibber you can be a stirrer sometimes.![]()
![]()
![]()
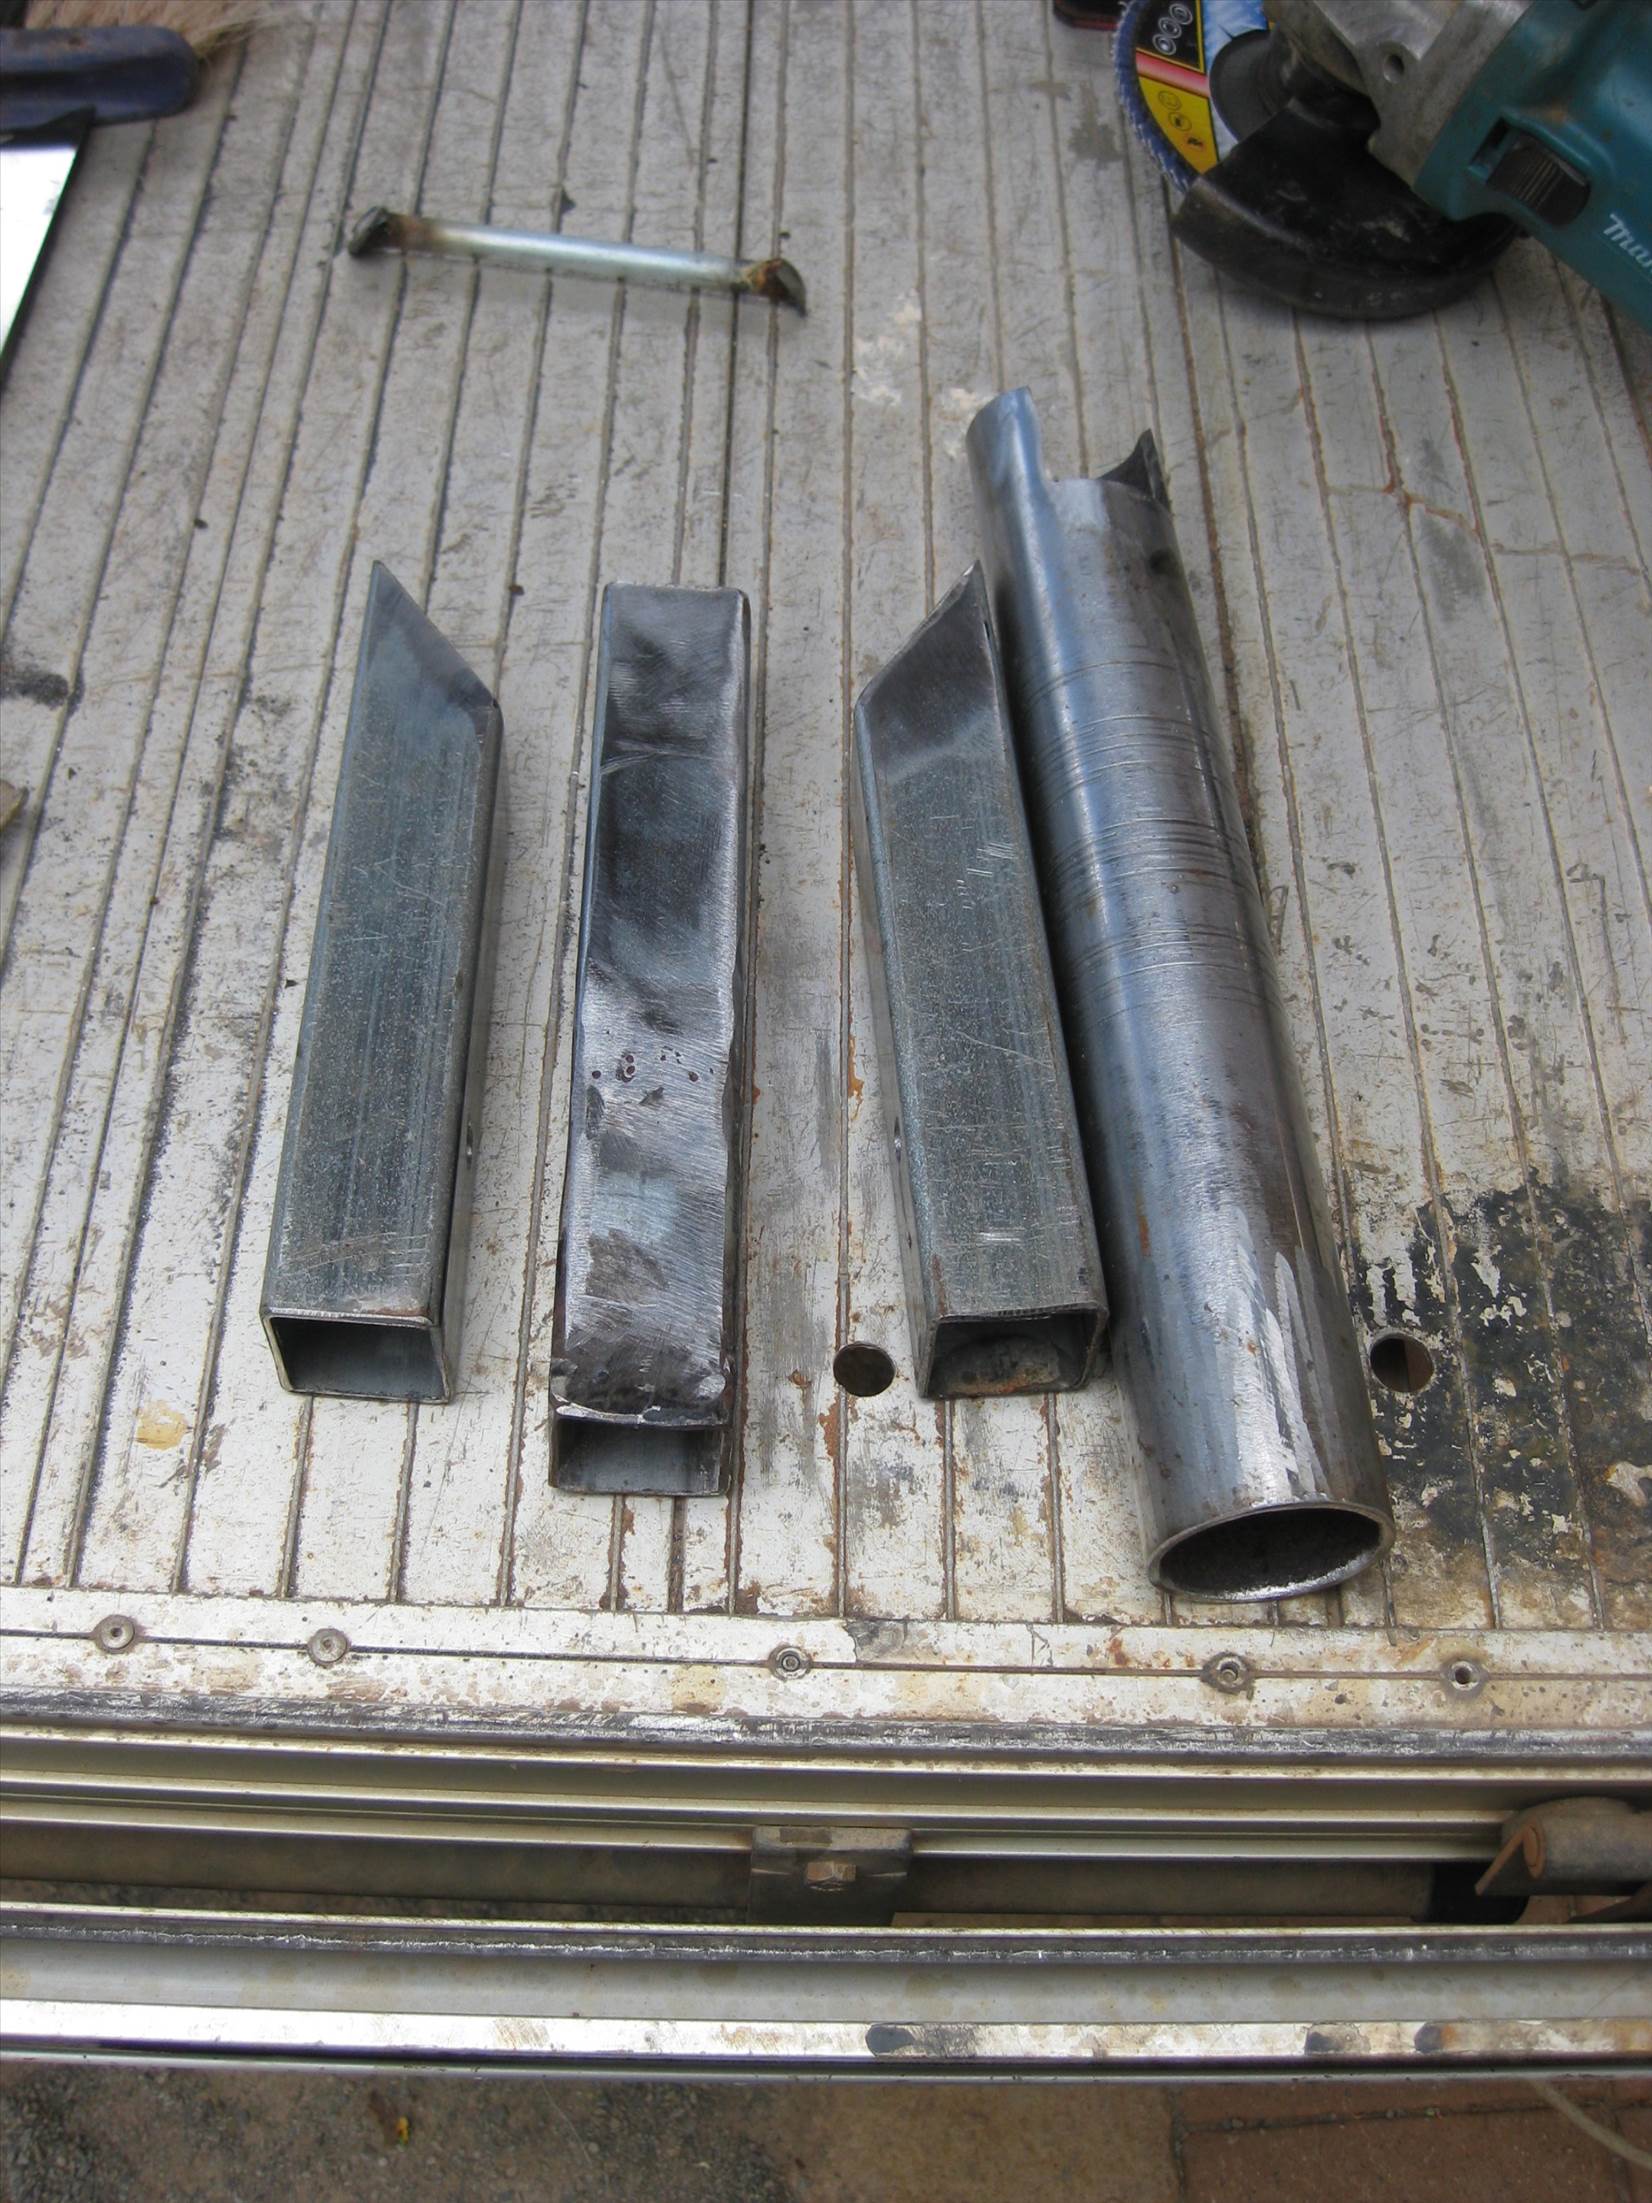
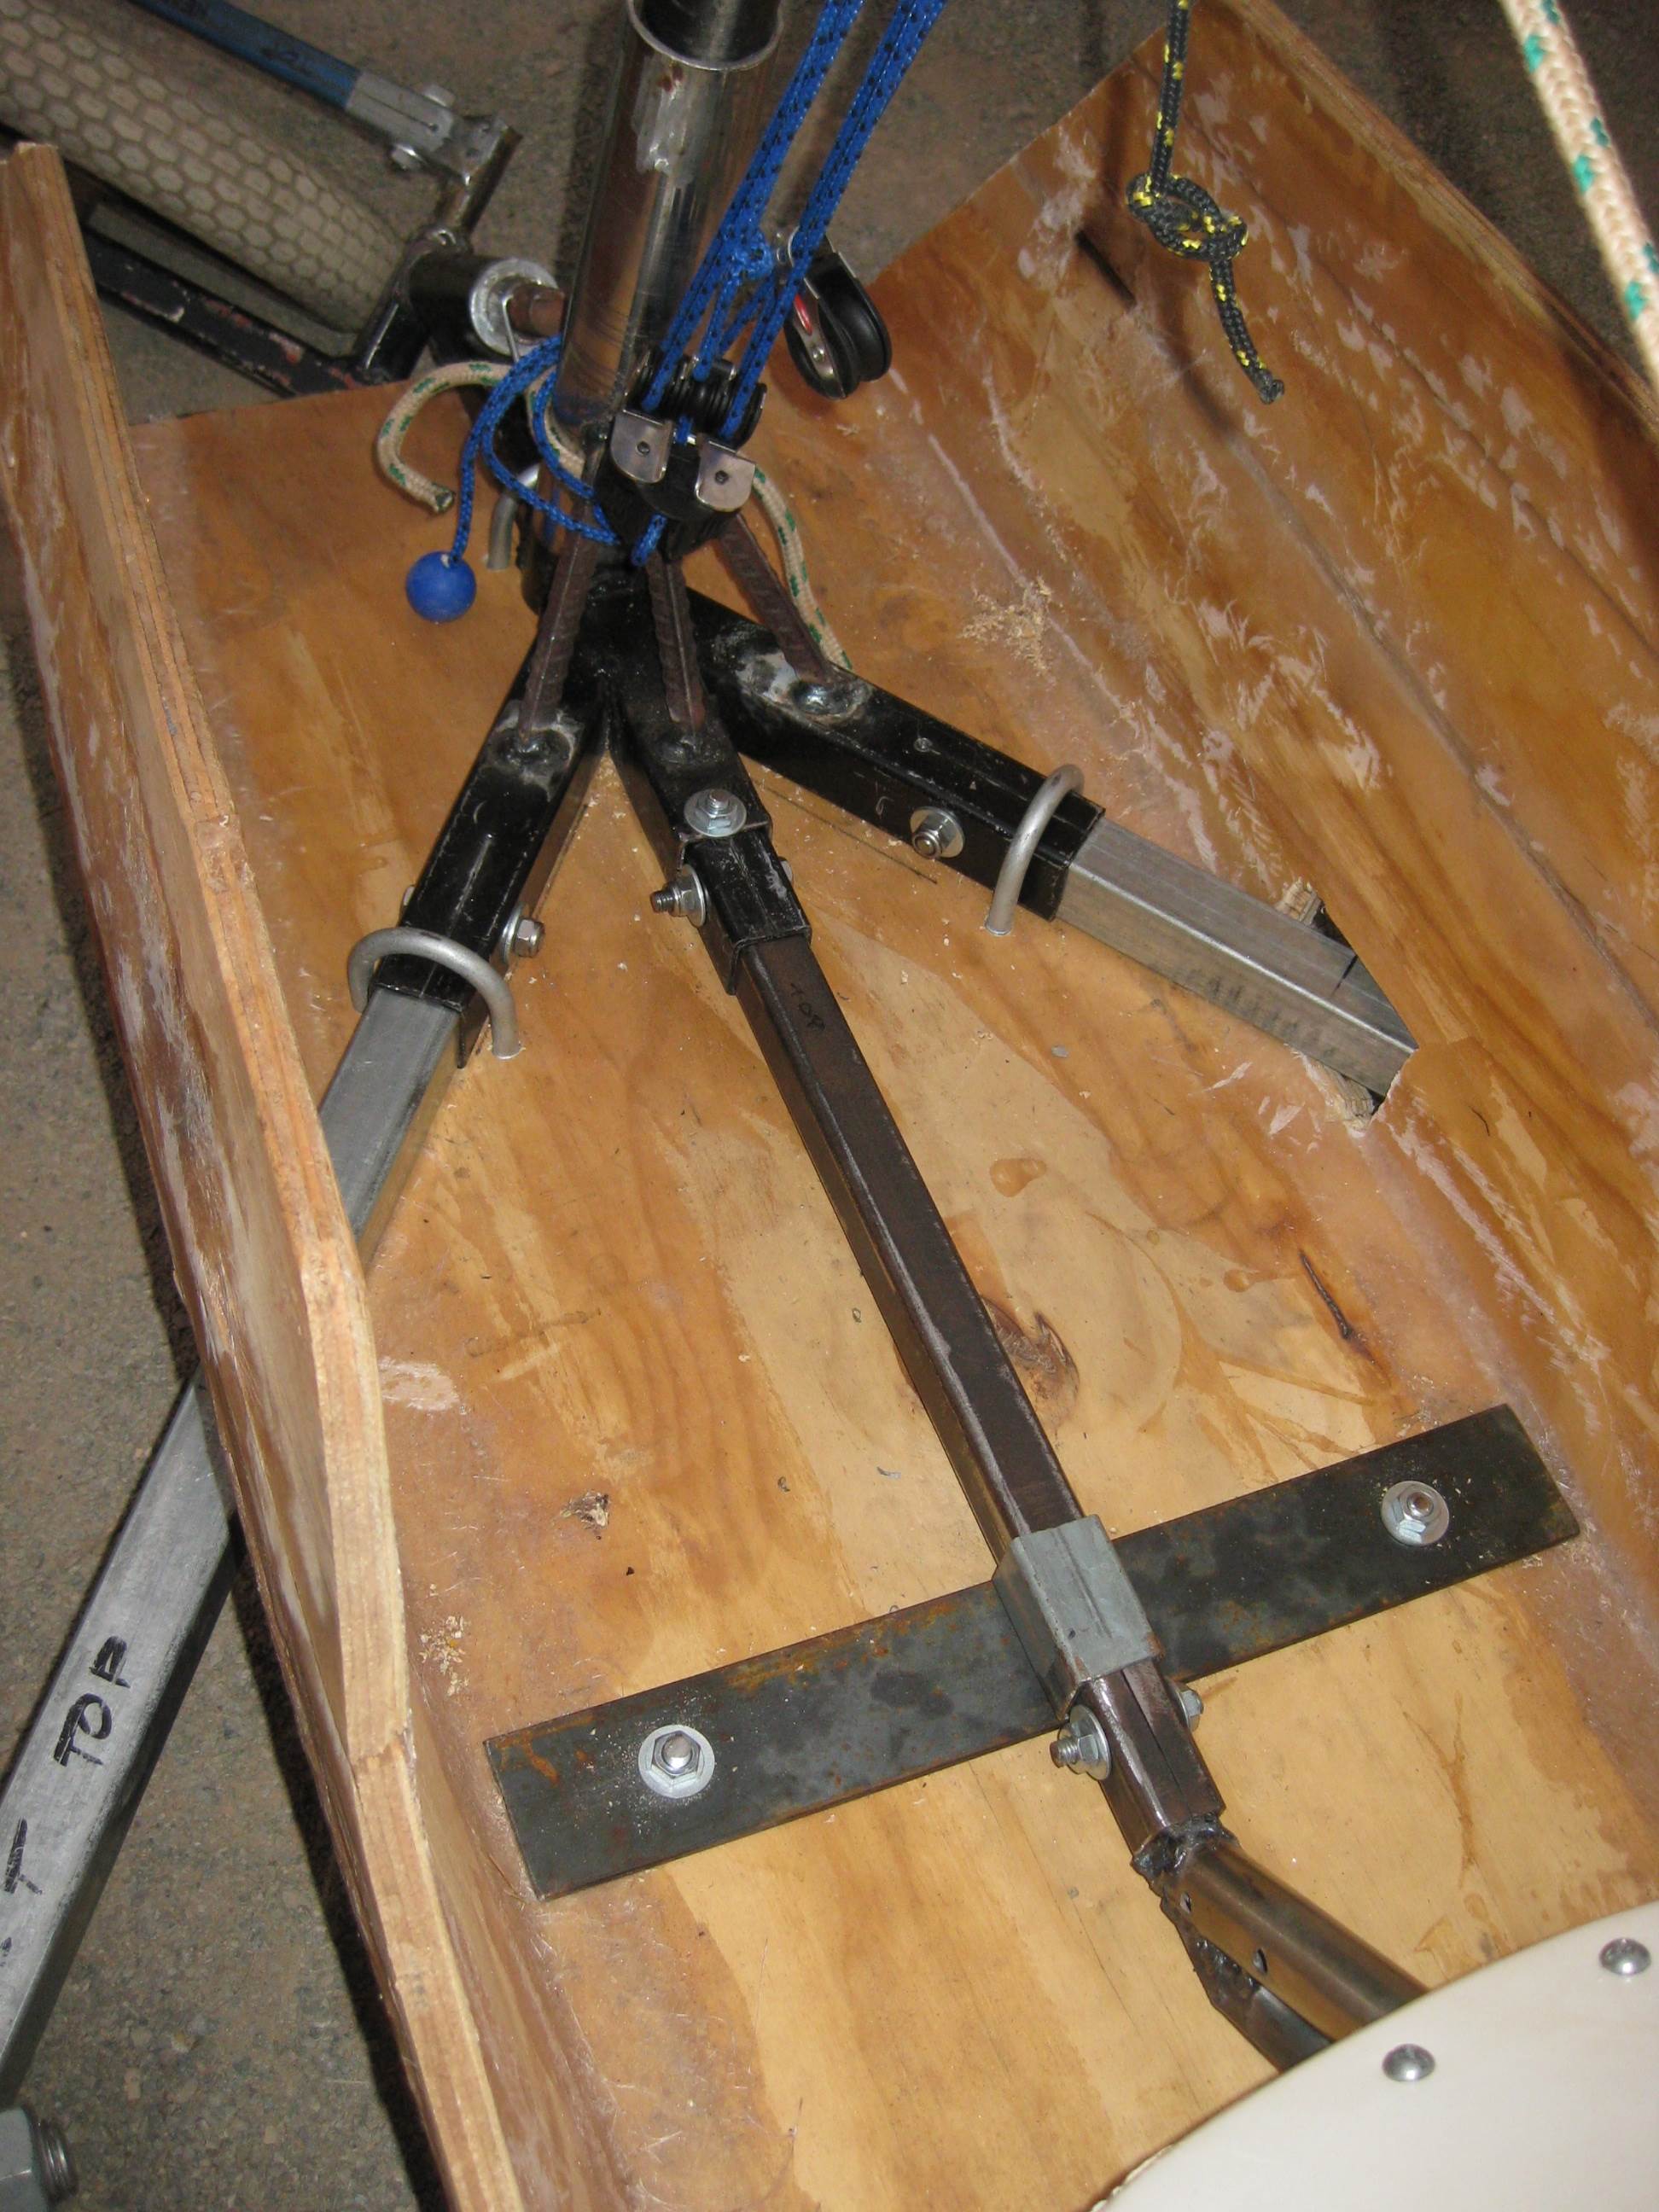
Slag inclusion is a very common problem with beginners, or to be more polite, "less experienced welders".![]()
Looking at these, the weld is too cold. I'm guessing the rod end was too close/buried in the flux and the arc length too short to generate the heat required. Turn the amps up (often quite a bit) and regulate your bead size by the speed at which you travel.
Smaller diameter rods help a lot here. I would be using 2mm rods to make it easy, or 2.5mm to make it quicker, on material this light/thin.
As a rule your electrode should only be "slightly" thicker than the wall thickness, you are welding. 1.5mm steel= 2mm rods. This is a general rule for light fabrication welding.
When you weld you FOCUS ONLY on the edges of a bead "wetting the tubes you are joining".
The centre takes care of itself.
As you weld the rods "tip", can be tracing little letter e's, or figure 8's as you weld along.
This gives the weld a tiny time to cool slightly before you add to it in a long bead.
If you are trying to fill a gap make multiple runs so the tubes don't overheat and lose their integrity.
At the end of the day I'm very impressed with your design Ben. ![]()
Very clever, how it can be extended for bigger pilots. A great feature.
I'm sure "sn" would have appreciated this feature on "Pannikin" when he sailed it.
Go on, get it finished, we want to see the pics of it sailing.![]()
![]()
![]()
Nothin' wrong with those welds that a few coats of paint wont fix ![]()
[works for me] ![]()
Pannikin is great fun- but hard work to keep going in a straight line- or on 3 wheels,
I had a sandbag draped over the front axle to try and hold the front down- sometimes it worked!
There were several "oh dear" moments when I was finding myself sailing on one rear wheel, closely followed by "oops" and grovelling on the salt
I was trying to figure out a way of steering with my legs extended foreward of the front wheel, to put the weight of my legs and feet as far in front as possible for better stability- instead of sailing with my knees up my nostrils.
Keep up the good work!
stephen
Select to expand quoteChook2 said..
Gibber you can be a stirrer sometimes.![]()
![]()
![]()
Slag inclusion is a very common problem with beginners, or to be more polite, "less experienced welders".![]()
Looking at these, the weld is too cold. I'm guessing the rod end was too close/buried in the flux and the arc length too short to generate the heat required. Turn the amps up (often quite a bit) and regulate your bead size by the speed at which you travel.
Smaller diameter rods help a lot here. I would be using 2mm rods to make it easy, or 2.5mm to make it quicker, on material this light/thin.
As a rule your electrode should only be "slightly" thicker than the wall thickness, you are welding. 1.5mm steel= 2mm rods. This is a general rule for light fabrication welding.
When you weld you FOCUS ONLY on the edges of a bead "wetting the tubes you are joining".
The centre takes care of itself.
As you weld the rods "tip", can be tracing little letter e's, or figure 8's as you weld along.
This gives the weld a tiny time to cool slightly before you add to it in a long bead.
If you are trying to fill a gap make multiple runs so the tubes don't overheat and lose their integrity.
At the end of the day I'm very impressed with your design Ben. ![]()
Very clever, how it can be extended for bigger pilots. A great feature.
I'm sure "sn" would have appreciated this feature on "Pannikin" when he sailed it.
Go on, get it finished, we want to see the pics of it sailing.![]()
![]()
![]()
what a great post. I shall be printing this and handing it to my team of specialized welding pigeons tommorrow. ![]()
we looked at the chassis today and made a few suggestions towards the overall integrity.
It will look great with its speed pod attached![]()
Well in the nicest of ways........i feel a lot has been accomplished . ![]()
welding or pidgoening, as LY says, is an art form , commonly hidden by paint after being ground ![]()
then have a Chook to smooth ruffled feathers can only be a plus.......thanks chook! ![]()
Well in the nicest of ways........i feel a lot has been accomplished . ![]()
welding or pidgoening, as LY says, is an art form , commonly hidden by paint after being ground ,sn ![]()
then have a Chook to smooth ruffled feathers can only be a plus.......thanks chook! ![]()
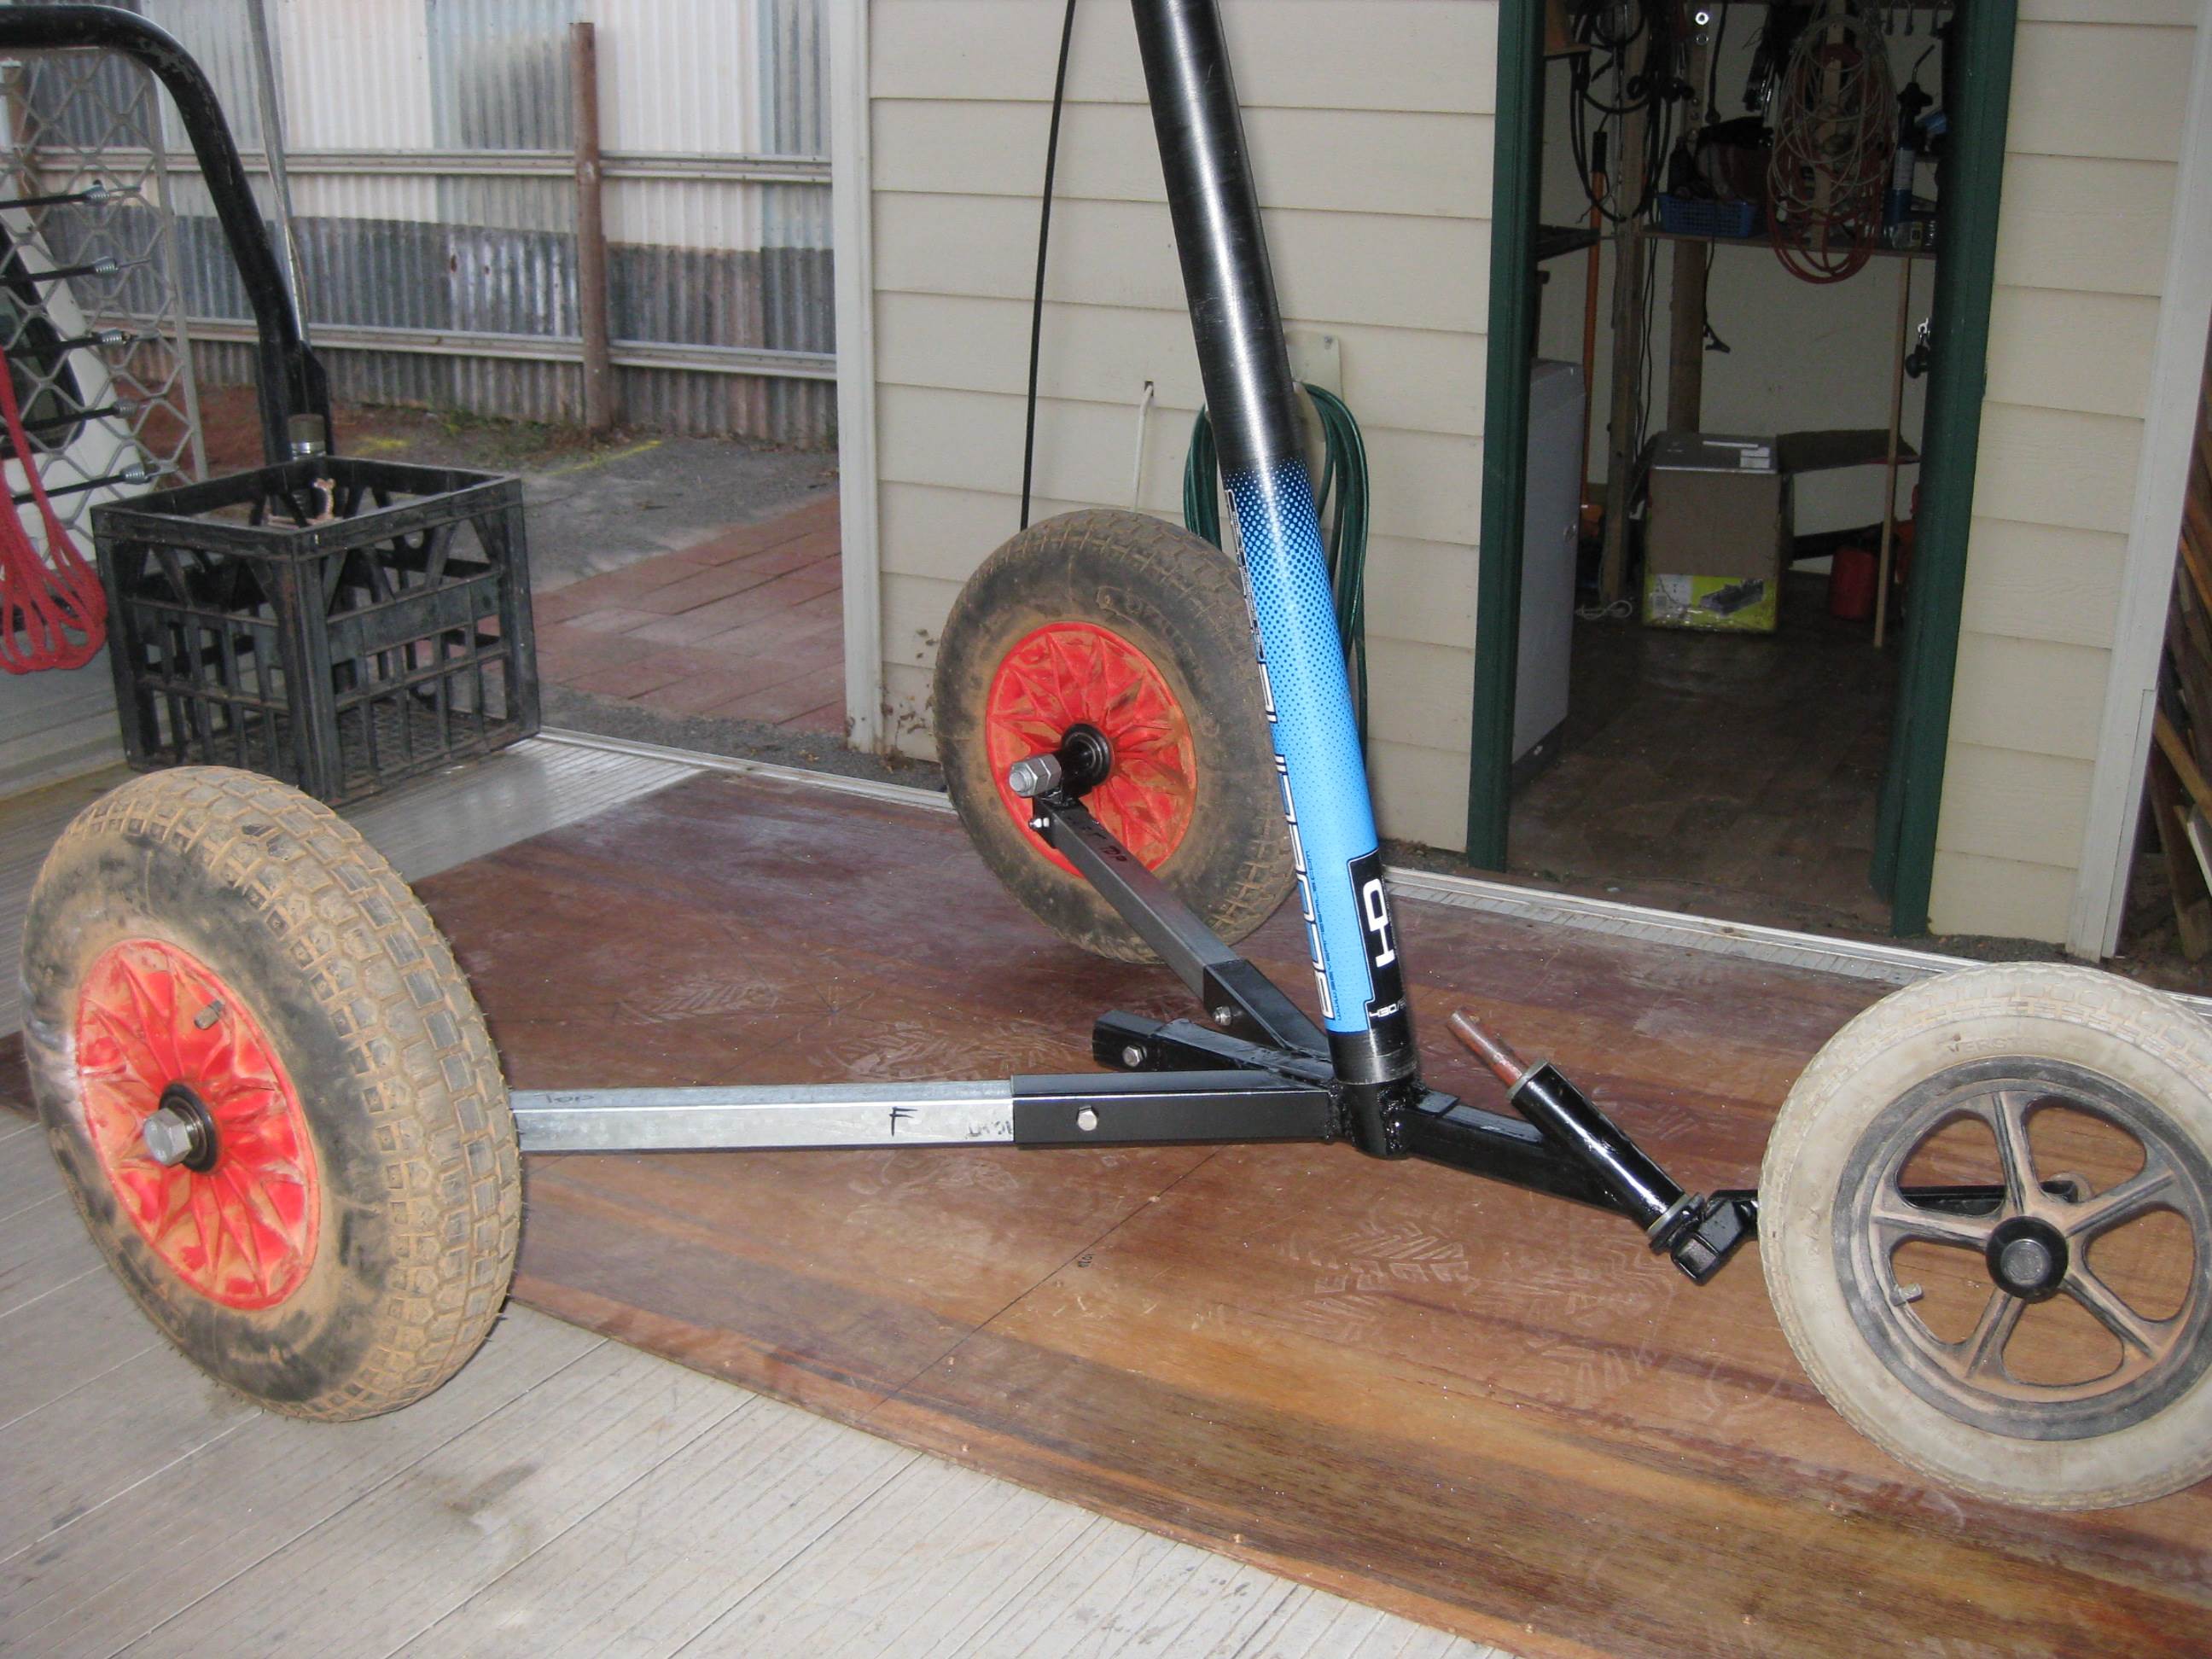
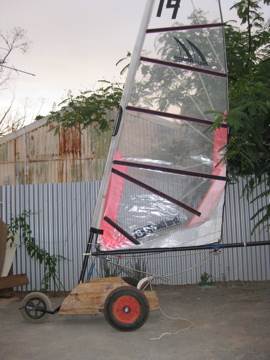
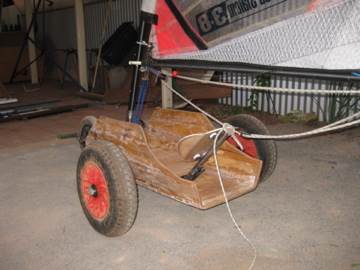
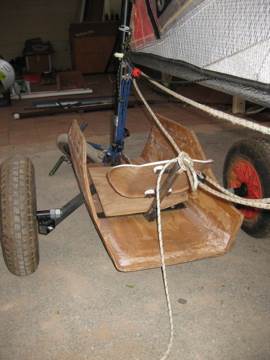
Completed more of the Hummingbird today. Made the most of the cooler overcast weather.
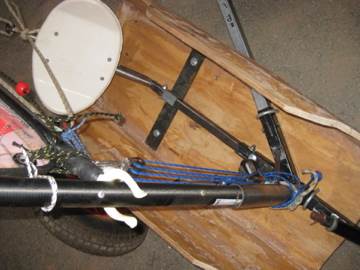
Mounted the pod, seat, foot steering and a few other bits and pieces.
Followed LY advice and gave the mast post additional support posts.
Managed to get a fair amount of weight forward onto the front wheel, however once rigged the downhaul is running pretty close to my baby maker.
The pod had several trims to allow the legs to move.
I am concerned about the steering biting the ground and will need to add steering stops.
Quickly slapped a rig together for a quick photo.
This project has been an interesting learning process for me.
I feel this yacht will stay 90% complete. I will get it functional to sail but it feels to small and I should be putting my time and effort into my Mini5.6 and class 5.
It has been frustrating and fun. But this is a SMALL yacht but BIG smiles.![]()
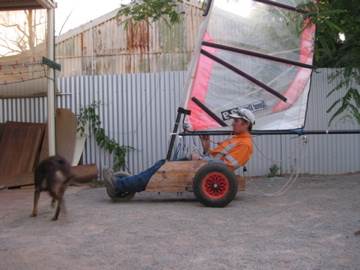

Walked out of my toilet and seen this.
Ben.
1. How about putting your pedals on top of the front wheel.
2. Is that a methane flame shooting out of the top of the throne dome![]()
![]()
![]()
![]()