
Picked up 4 windsurfing sails and two carbon fiber masts for free today. Sail sizes range from 2.9 to 5.0 square meters. Love it when someone gives up windsurfing for kite boarding. I have acess to 6, 8, and 10 square meter sails.
Just about have all my materials, having a little problem with the metric / U.S conversions as the pipe sizes are just a bit small (2mm) to fit the mast. I have a metal supply guy who is going to help me out. Plus he lets me scrounge his scrap metal bin for free.
I should have my materials together for when I get back from windsurfing school. I will start to post photos of my build. I appreciate all your help and support. With the information gathered from this forum, I should be able to get a decent result. I am a little scared to post photos of my welding as I have never done any before; my welder was a Christmas present. I am going to read the welding book on the plane. Hopefully my build will not be too embarassing, i guess it doesn't matter as long as it is fun and safe.
Thanks for your help
Brian
Just a suggestion when teaching yourself to weld get some scrap steel from your friend and spend a while just practicing, use 4-5 rods... relax, take a break then go back for some more.... try different settings, use another 4-5 then have another relax. (the more you do the better you will get)
That way you wont get frustrated on mucking up your project
gizmo is right , get a chunk of clean scrap plate , draw some chalk line s on it and just practice welding straight lines. practice changing angleson your rods, changing the settings on the welder, etc. when you are happy , turn the plate over , get a second plate , set it at right angles, and start again , learning to do a fillet? weld.
What is this BS Sabydent? Embarrassing?? Where did you find that word? What does it mean? BS.
Follow the Drawings and as the Lads said Practice on waste scrap. getting the settings right is the trick. If you are just sticking the surface together it is not going to be strong enough. If you are blowing Holes then you have to much power flowing. Penetration. Get penetration just think of your Lady Friend![]()
I am beginning to believe that Land Yachting is definitely the most fun you can have laying down and you don't have to take your Clobber Off.[}:)]![]() .
.
Heavier Tube/Pipes will be easier to weld than thin walled stuff. Like Gizmo and Landyacht I use a stick Welder though I have tried Mig and Tig, unimpressed.. Penetration is the key + Practice. If you know someone that welds then get them to help you. We are just too far away to come and sit in on a session.
Ron
Nah! That doesn't worry me at all. It is the Sun Burn and the Bloody Seagulls chasing me around the beach!
Evidently you haven't read; www.seabreeze.com.au/forums/Land-Yacht-Sailing/Construction/Just-working-out-a-build/?page=13
At that speed Sand Blasting could become a problem as well.
Ron ![]()
![]()
![]()
![]()
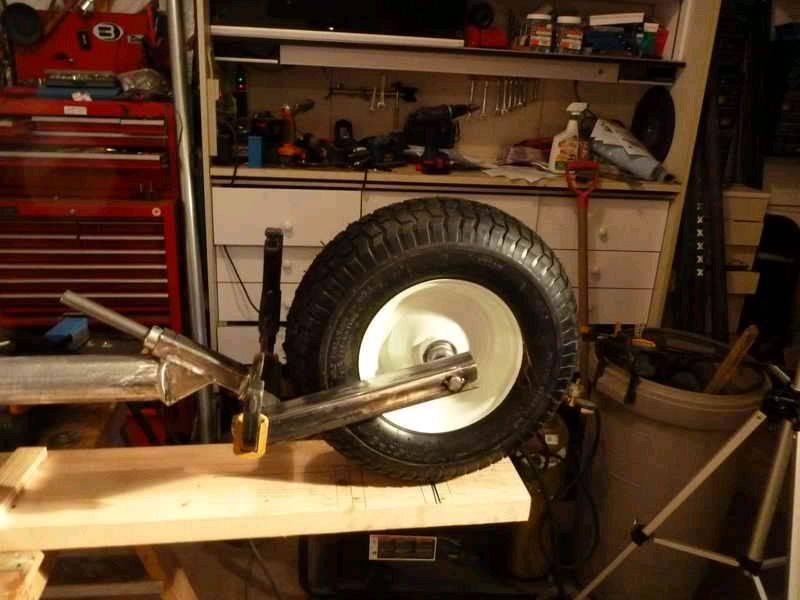
There has still been no wind so I have not been able to try out the new skis on my Zooter. I have started construction of my mini. I took your advice and welded up some scrap and then went ahead and gave it a go.
I am almost done the metal work, but thought I should get some feedback before I went further. I would like your opinions, especially if it is going to be a safety issue. I have no practical experience in either metal construction or land sailing so I am requesting your help to ensure that this thing will be somewhat safe.
I have followed Landyacht's plans with some modifications suggested by Cisco. This welding is kind of fun. I had some problems in some areas, so I have included with my photographs some of the things I did to make it easier for a rookie.
Thanks for your help.
Brian
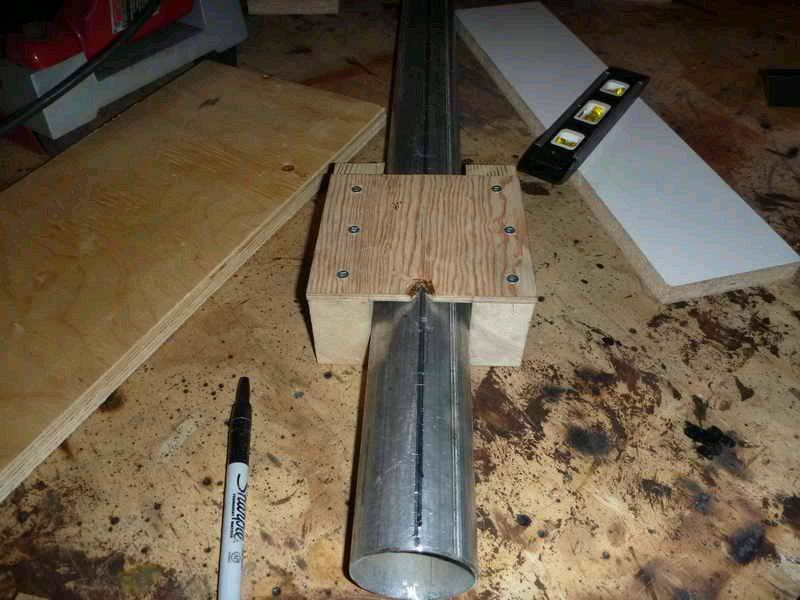
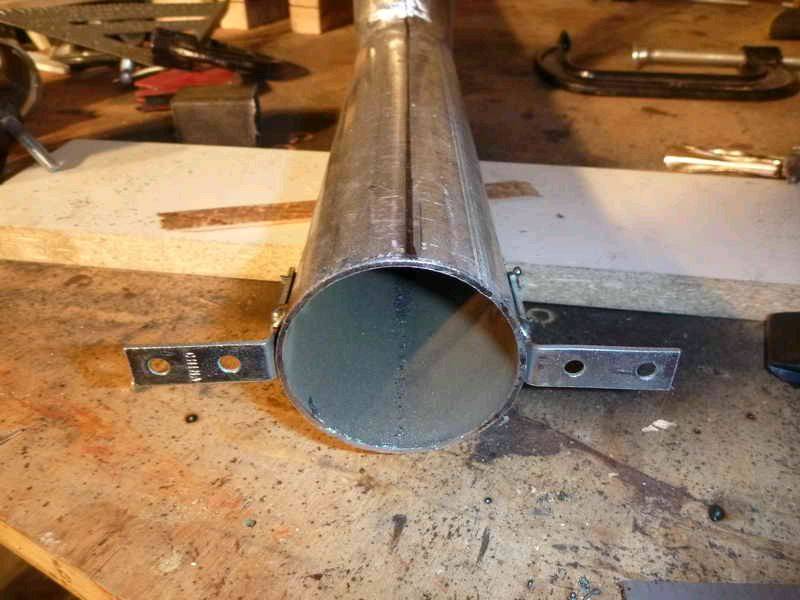
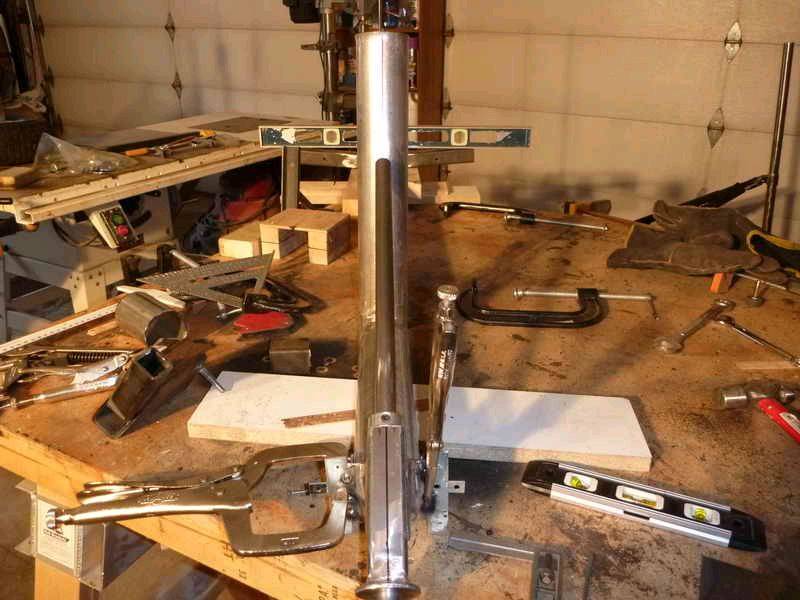
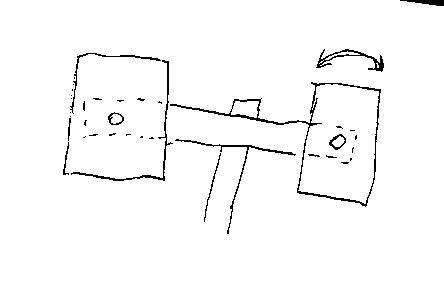
Since alignment is critical I made this little jig to mark the center line of the pipe. Simply mark a spot on the bench and on the pipe. Clamp the pipe then run the jig over the top of the pipe marking with a felt pen. Rotate the pipe 180 degrees and clamp the pipe so the line you just made lines up with the mark on the bench. The jig should line up exactly with the spot you made earlier. Run the jig down the pipe you will now have an exact midline of your pipe marked on both top and bottom.
When doing your fitting, if the marks line up, it has to be in alignment
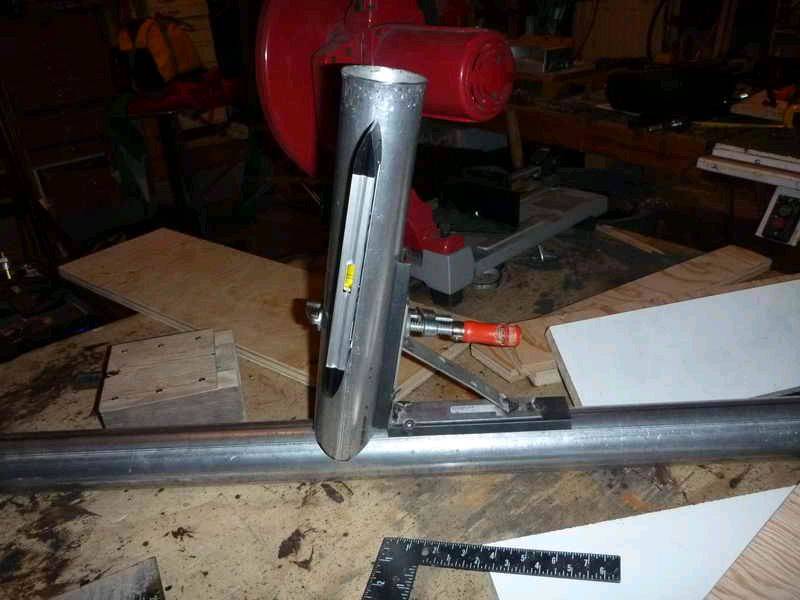
I made a little jig to help with the 10 degree mast holder thingy.
I used a modification of Cisco's steering tube. I had a rectangular piece of tube so I cut it at 60 degrees. I cut the ends of the wider tube so the steering tube could fit inside. I then put a plate on the end.
I had a heck of a time clamping the steering tube to the frame, so I tacked some wings to the steering tube and tacked an angle bracket to the frame.
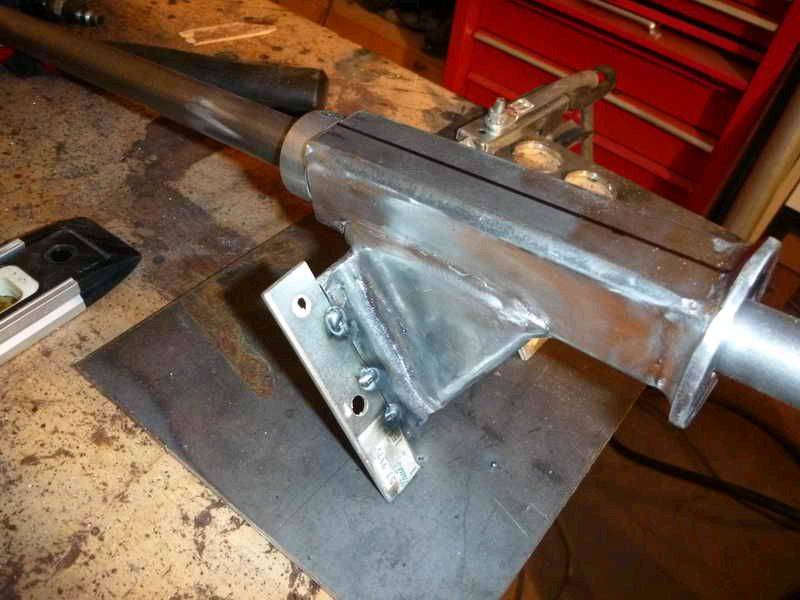
Now it is pretty easy to clamp the steering tube to the frame.
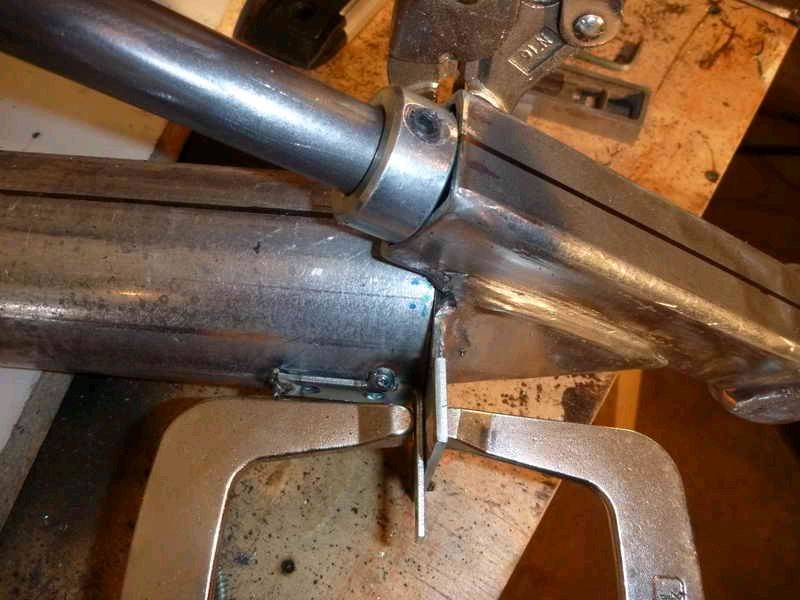
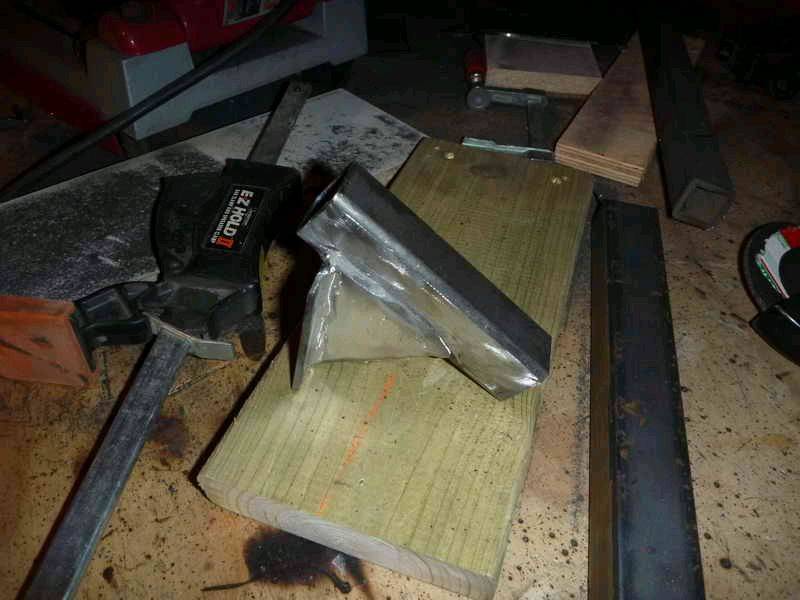
After it was tack welded, I simply ground off the wings and brackets.
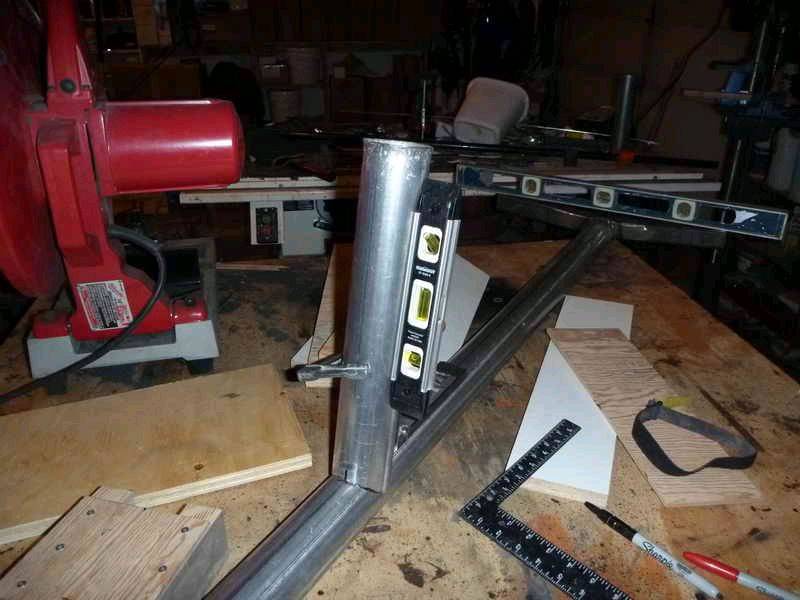
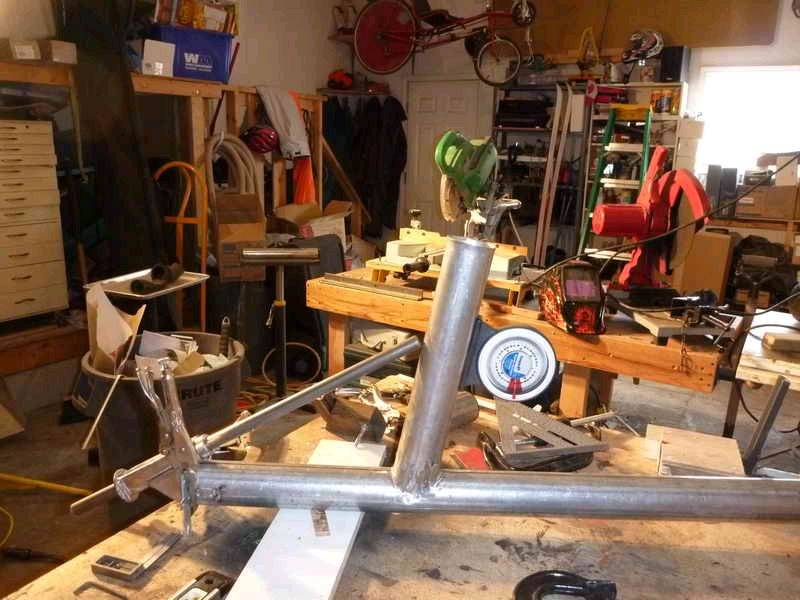
To help me line up the front wheel, I used an old laser level that I attached to a camera tripod.
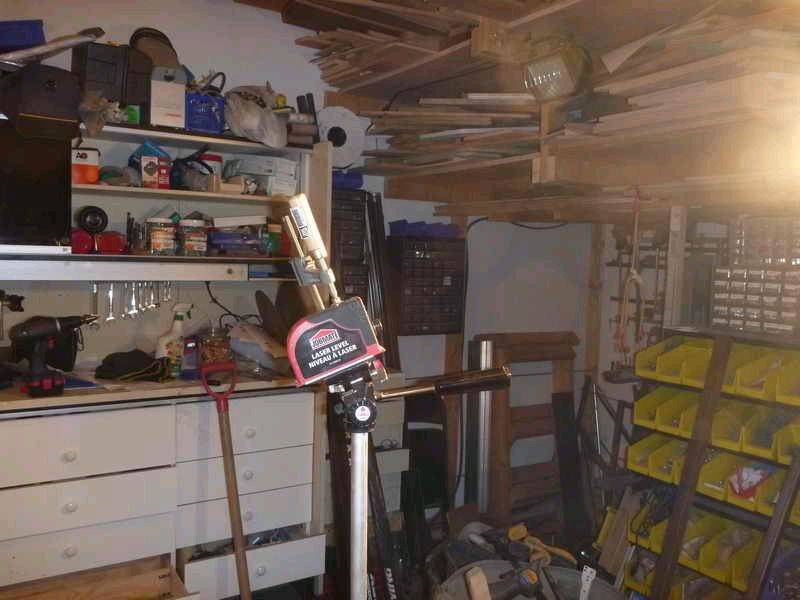
This helped me ensure that everything was lined up. Here it really helped that I had my center line of the frame marked.
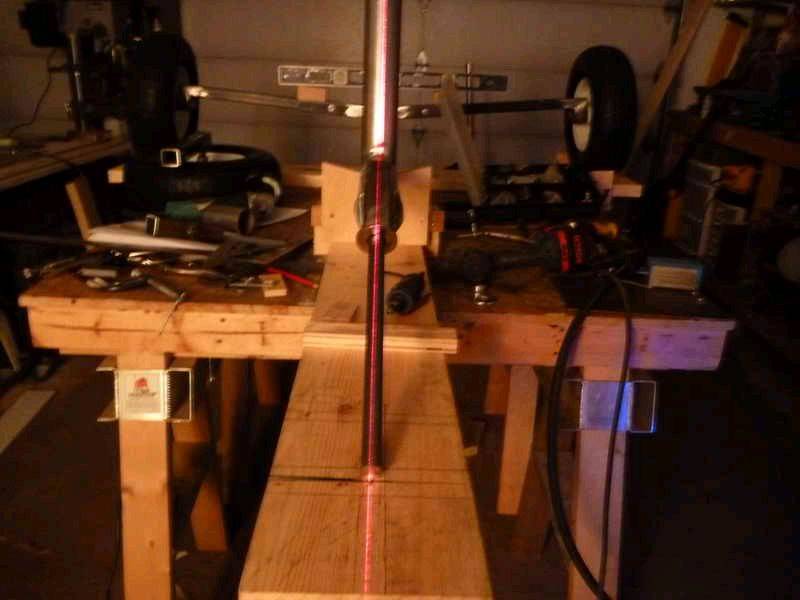
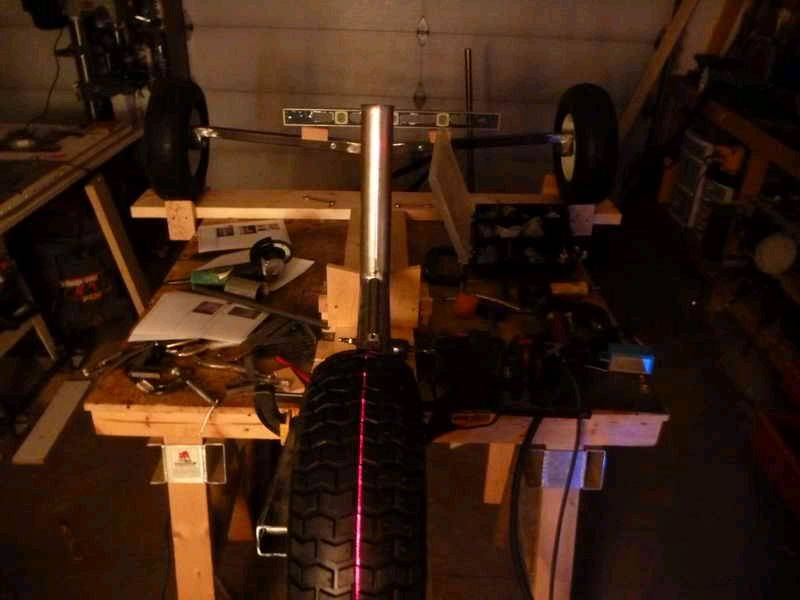
I got the front wheel lined up and ready for welding...then I thought it would be a good idea to check with you folks to see if I am on the right track.
Thanks again for all your help. This is fun.
Brian
Bloody Yanks. You have everything. Can't you not have just one little tool? Just an eensyweensy little one just so's you have a little something to go wrong. Just so's you can yell at the top of your Lungs *&^%$$&!!
Lookin' Good Sabydent. But please please have a little problem just so I can have a giggle.
Ron[}:)]![]()
Nice work sabydent. That Laser Level is a handy thing.
Just a suggestion. Grinding and polishing your welds back looks good now but it may be taking strength from them. Just be careful how far you grind them back.
If you are doing it because you think your welding looks a bit rough, just remember that a bit of bog and a good coat of paint will hide a multitude of sins.![]()
Keep the pics coming. Cheers Cisco.
Thanks for your feedback. Cisco, I think I am genetically programed to have things smooth and shiny. On my first pass, I am trying to make a great weld. It is slowly getting better, however, it looks like crap. I am making a second pass to build up the weld and then spend a **** load of time grinding it away. I am trying to keep the integrity of the weld intact, hope it works. This is not an effective way to fabricate, but its cold outside, there is no wind for my Zooter and TV sucks, so what better way to pass the time than grinding metal. Hopefully, soon my first pass will be sufficient.
I have a friend who owned a large natural gas compression fabrication company, he mentioned that he saw one of his welders grinding a weld. His comment was that he wasn't paying him to grind, he was paying professional welders so they didn't have to grind. Something to aspire to.
Thanks,
Brian
Metal fabrication is complete except for the steering pedals. I have a question. Is there any advantage to having the pedals rotate laterally rather than have them welded?
not quite sure what you mean, I have a square tube that bolts over the round shaft then the pedals slide up and down as a length adjustment.
the round/square setup isnt terribly elegant, but it is fairly simpleAND effective.
. some of the fellas have little or no length adjustment, but I constantly have other size people in and out of the yacht![]()
I was thinking more about having the pedals rotate so when your feet are on them and you turn, your feet do not need to slide on the pedals. This would entail using a bolt through the pedal that attaches to the horizontal bar on the steering assembly. It is likely overkill in design, but easy to do.
Not needed as it is more likely to make your feet slip off as you need a stable foot for finer control
Thank you. That makes sense. Next questions: I am going to make a wooden seat. Does the back rest on the seat attach to the pole up the back or just rest against it? Would an adjustable angle for the seat be an advantage?
Brian
A bit like the pedals I tried adjustable seat back on my first mini they are both fixed now at 35 degrees from the horizontal I think they are
More hassle than its worth IMHO
Seat back is normally attached to the rear pole
I tend to agree with Hiko the 35deg I would suggest is a nominal Angle. As you raise the angle of the seat you throw more weight towards the front wheel which makes the opposite for angle back. I put my tiny Pea sized mind into the Land Yachting Mode sat in my Recliner, put a small cushion behind my Mellon and stretched out to a comfy position.
[}:)]![]()
![]() Alright if you must throw up a Video of a Desert Run on the Tele', make yourself comfy and adjust the Recliner to a happy position. This most likely will be as you normally watch Tele' anyway. You can check the Lengths and angles and transfer them to the Mini from there. Combine these ideas with Hiko arrangement and you should come up with something that will suit you down to the ground.
Alright if you must throw up a Video of a Desert Run on the Tele', make yourself comfy and adjust the Recliner to a happy position. This most likely will be as you normally watch Tele' anyway. You can check the Lengths and angles and transfer them to the Mini from there. Combine these ideas with Hiko arrangement and you should come up with something that will suit you down to the ground.
Look at some of the seat designs on the Forum but be careful of those like Occum's Razor and the like. They could lead to Cutting ZZZZZZZZZ's at the WRONG time and you might find that disadvantageous.
When building my machines I took the attitude that they are going to be used by me mostly with others maybe having a go every now and then, therefore I built around. Others will just have to take it as it comes.
At some time down the track you may decide to build a Class V LY. In Occum's Razor I took others into account and Fitted a Lockable Sliding unit and to this I fitted the Steering Bar/Peddle The Steering Ropes are connected through Trampoline type Springs which can then be adjusted this can also the case with Push Rod Steering.
Ron
Ron
Mine is 37 degrees now and has an adjustable back and it's a pain, as the sheet rope hooks round it, if tension is not maintained during the turn. There is no need for a cusion under the neck at this angle.
My booms are now 500mm off the seat floor. The sails have been cut at 72 degrees (With a 50mm bow down in the middle ) for the boom, to the straight line on the template as per Pauls plans and it seems just fine.
I built the adjustable seat back, to shift the complete seat back forward 200 mm for shorter kids.
Will reconsider this mod after the weekend.
You may want to consider lengthening your seatback support to help stop the tangling, though you should not let the sheet rope go slack when turning.
By the way, that scrap steel traffic hazard on the side of the road would make a nice back verandafo my place![]()
Also I will be down there for the Windy festival with my LLM M3
Ah the 75 x75 x3mm RHS in my drive way, is what is left over from making the verandahs on a mates house. These 6 of 12 meter and 4 of 8mtr lengths are for the colums of the raised section of the front verandah. Bloody big house next to the fire shed at Pink Lake.
You are right about not letting it go slack, but the newer chums are getting it tangled and then struggling to be able to pull the sail in. I'm nearly hoarse from buggying by and yelling at them to untangle it. ![]()
I like the idea of the extension as that will be a quick fix. I'll do that tomorrow, Thanks a lot for that idea.![]()
Paul, I personally like the foot pedals as in the plans.
When we end up on the wrong side of the salt, or becalmed, we can just unthread the sheeting rope and feed it inside the square tube (through the horizontal 25 x25mm RHS) of the steering pedals.
We have used this set up to tow and steer it back, by holding both ends of the rope. It works a treat.![]()
Please don't think I'm raining on your party, sabydent. Just my thoughts only.![]()
Thanks, I went with the welded pedals. When I get some experience, I will make the rotating pedals and give them a comparison as per Landyacht's suggestion.
Finished all the welding on the frame last night. I should be able to get back to into the shop Thurdsay to take photos. I am designing a brake that I will run by you guys. I decided that I need to have something to stop the mini when moving at low speeds. I will be doing 90% of my sailing in the local parking lot of the civic centre, there will be some parked cars and my friends are idiots, so they need an way to stop.
I am looking for material for my boom. I have access to an aluminum tube. 1" X 3/32" (25.4mm X 2.38mm) . Will this be strong enough? I cannot find plastic oar locks, if I use the aluminum for the boom, is there a problem with making the the boom hook to the mast thing out of aluminum?
Teflon cutting boards are cheap. If you dont mind making your own fitting. (Obviously you don't mind judging by the quality of your workmanship) I saw a small teflon board about 9"x12"x1/2" thick for $5.00 US at the local market. You can cut and stack it to get the thickness you need and it won't wear into your mast.


