
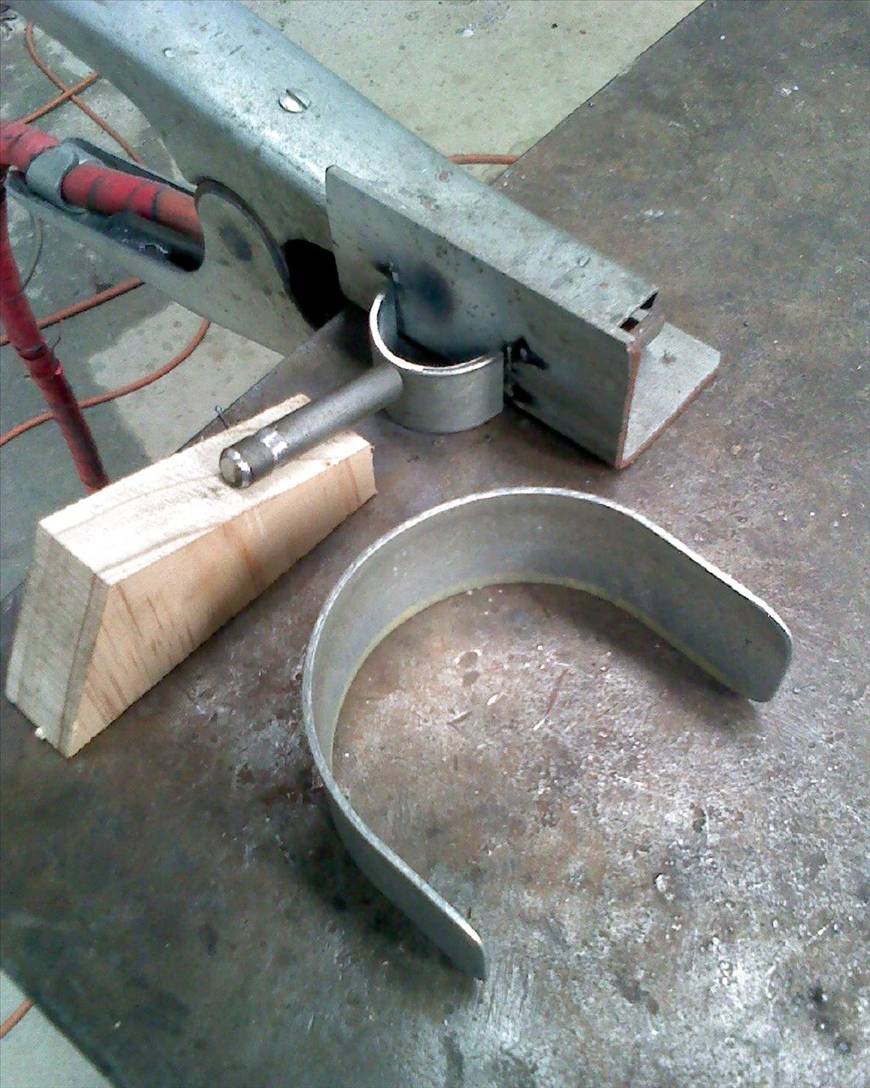
Here is the way I sorted it out.
I slit 25nb pipe in half and welded some 10mm rod to it at 13 degrees. (The groove is to trap some araldite, when gluing them into the 10mm hole drilled into the wooden plug that was hammered 50mm into one end of the boom tube)
The curve around the mast is 1.6mm galv sheet 40mm wide and 150mm long
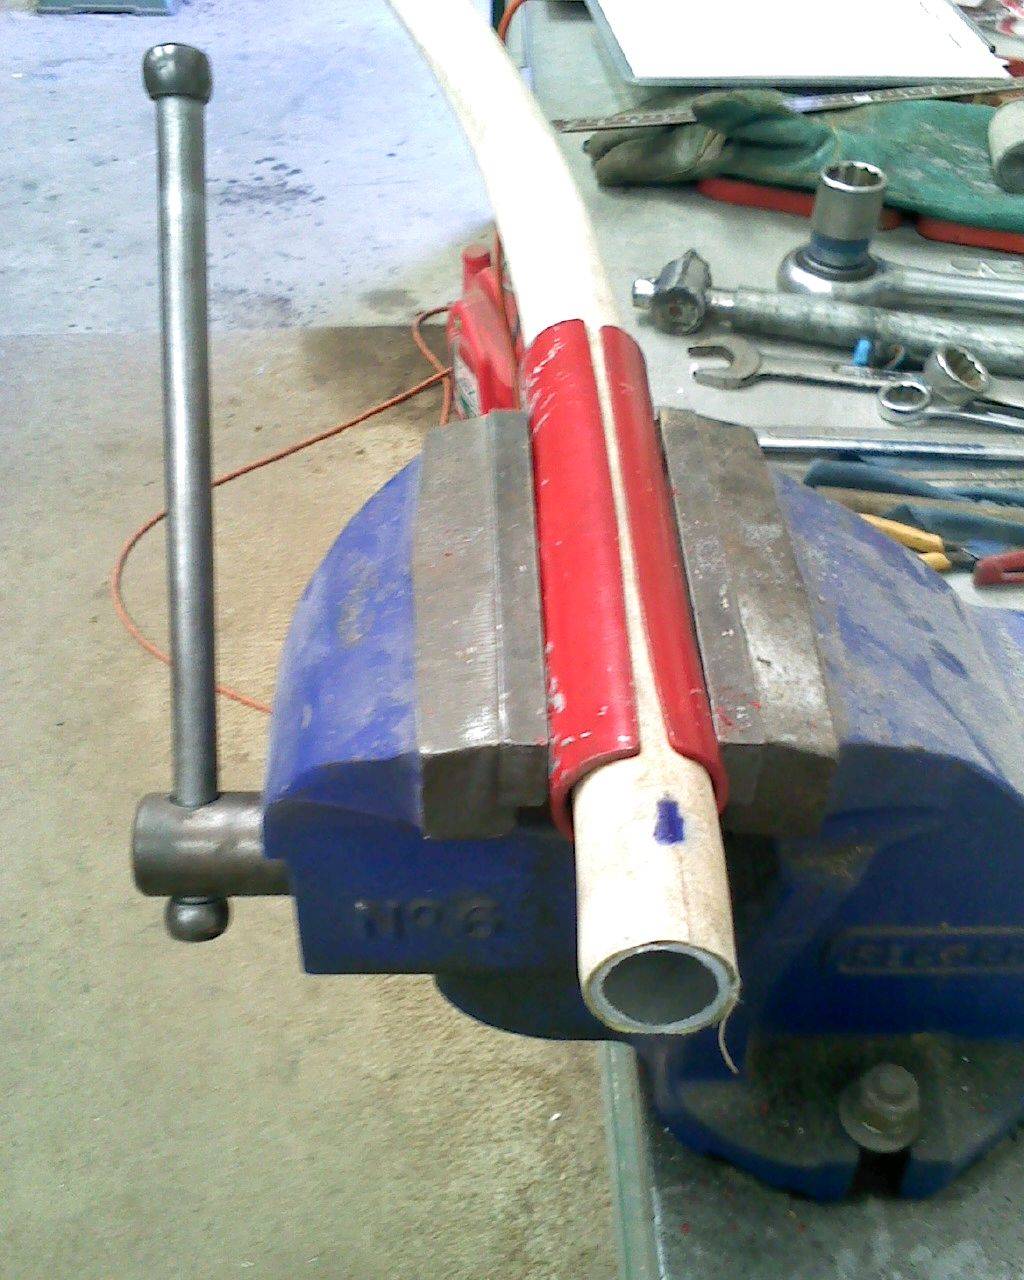
I used straightened out windsurfer booms.
This was done by slitting 300mm of pipe length ways. By using this in the vice it is a simple 5 min job to do both halves of a boom. It was made easier if the covering was left on till they were straight and then strip it off afterwards.
I made up the covers out of seat belt. The cord holds them tight onto the bracket. 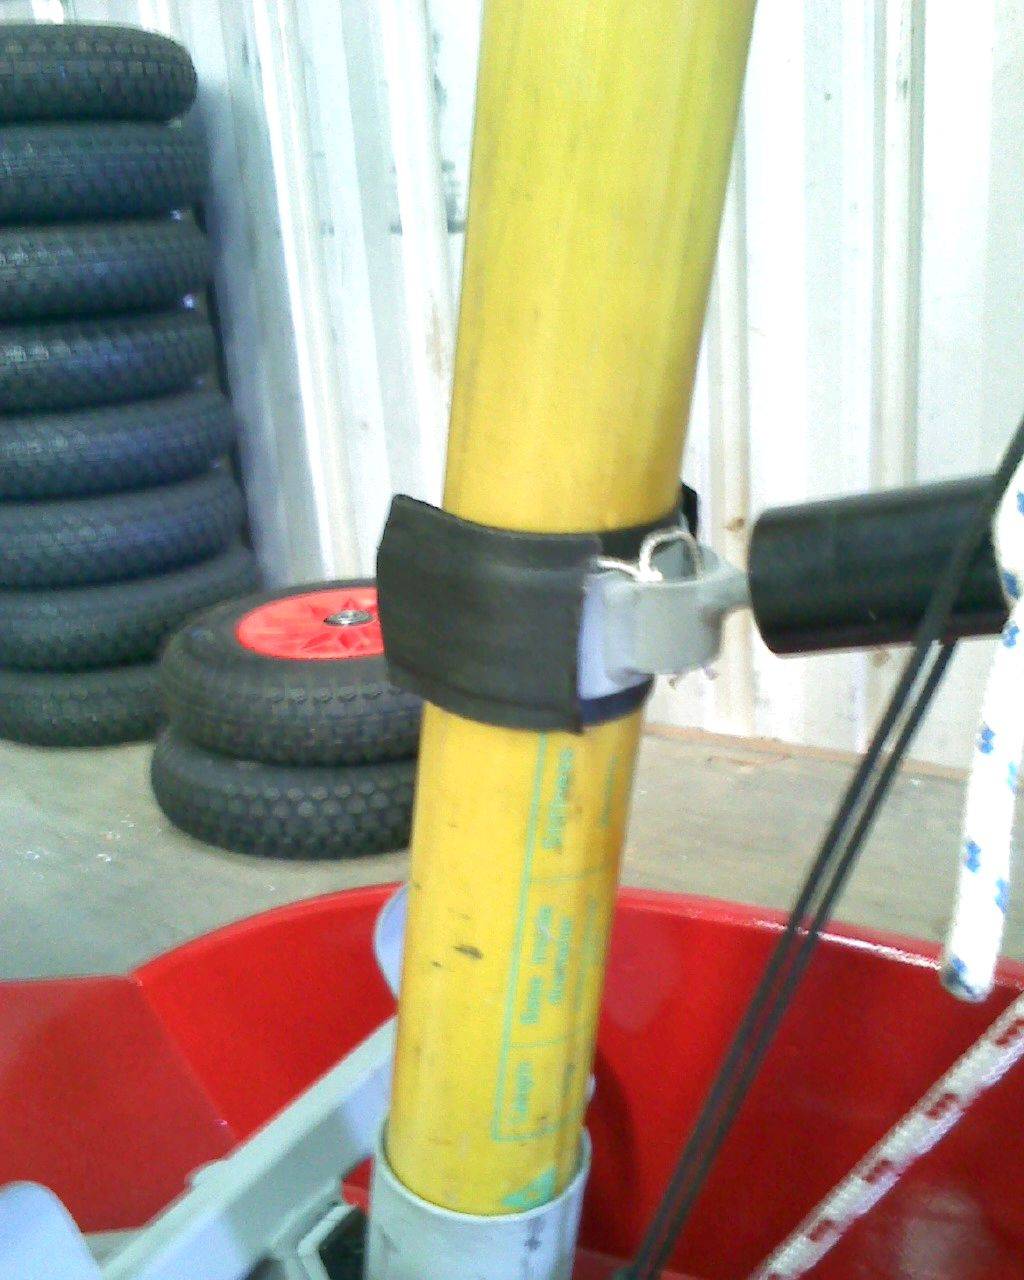
Sorry bout the photo quality of my phone.
I'm a worried man, as we have had 11mm of rain so far and its still falling.
Pink Lake will be too damp I fear.
Cheers.
Thats a neat fix. No vacant car parks around or other possible venues just for the weekend? Where the rest of the festival being held perhaps? You can at least show them there?
![]()
![]()
![]()
![]()
![]()
![]()
![]()
![]()
![]()
![]()
![]()
![]()
![]()
![]()
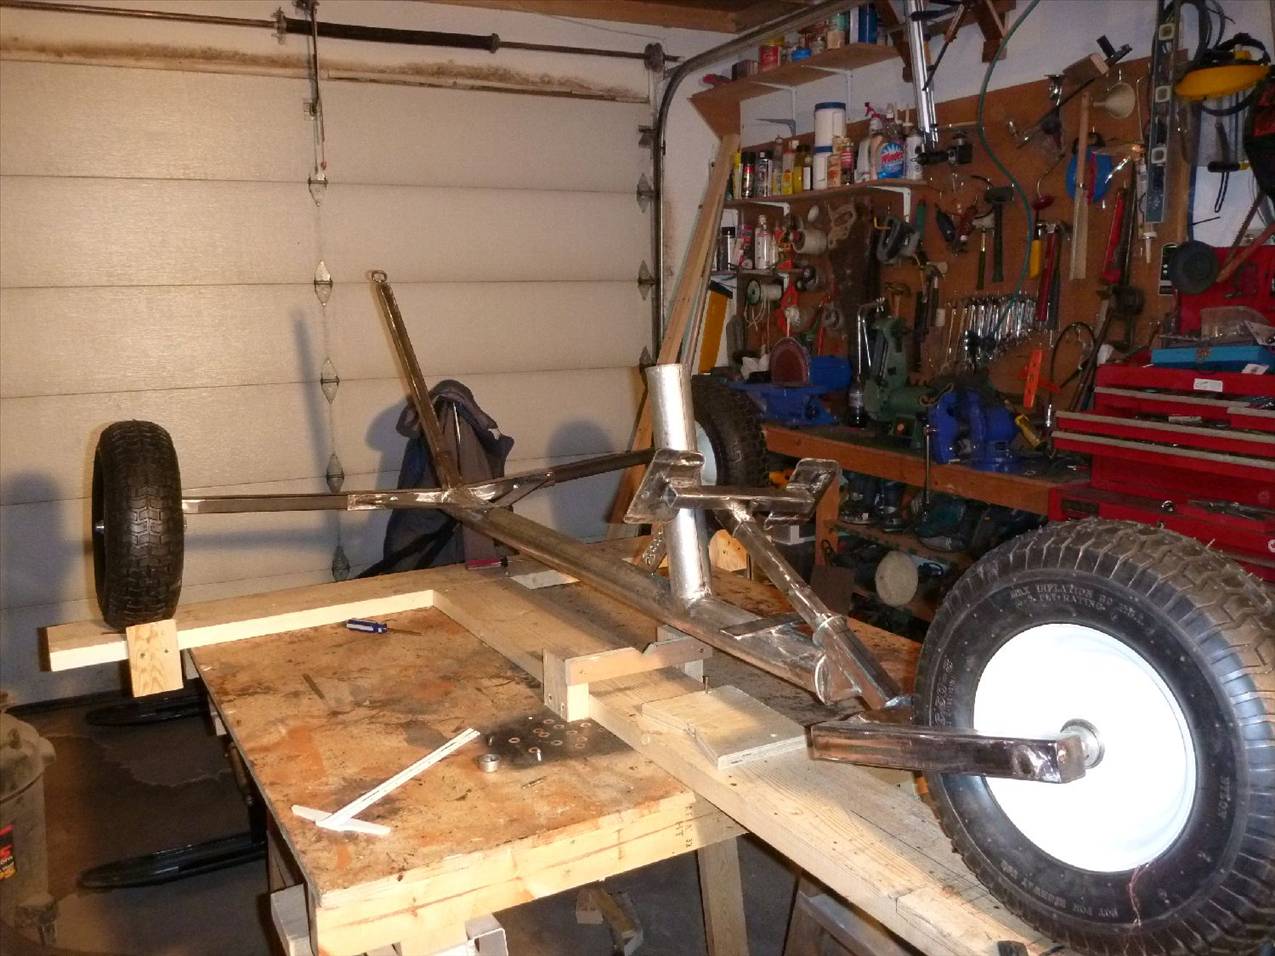
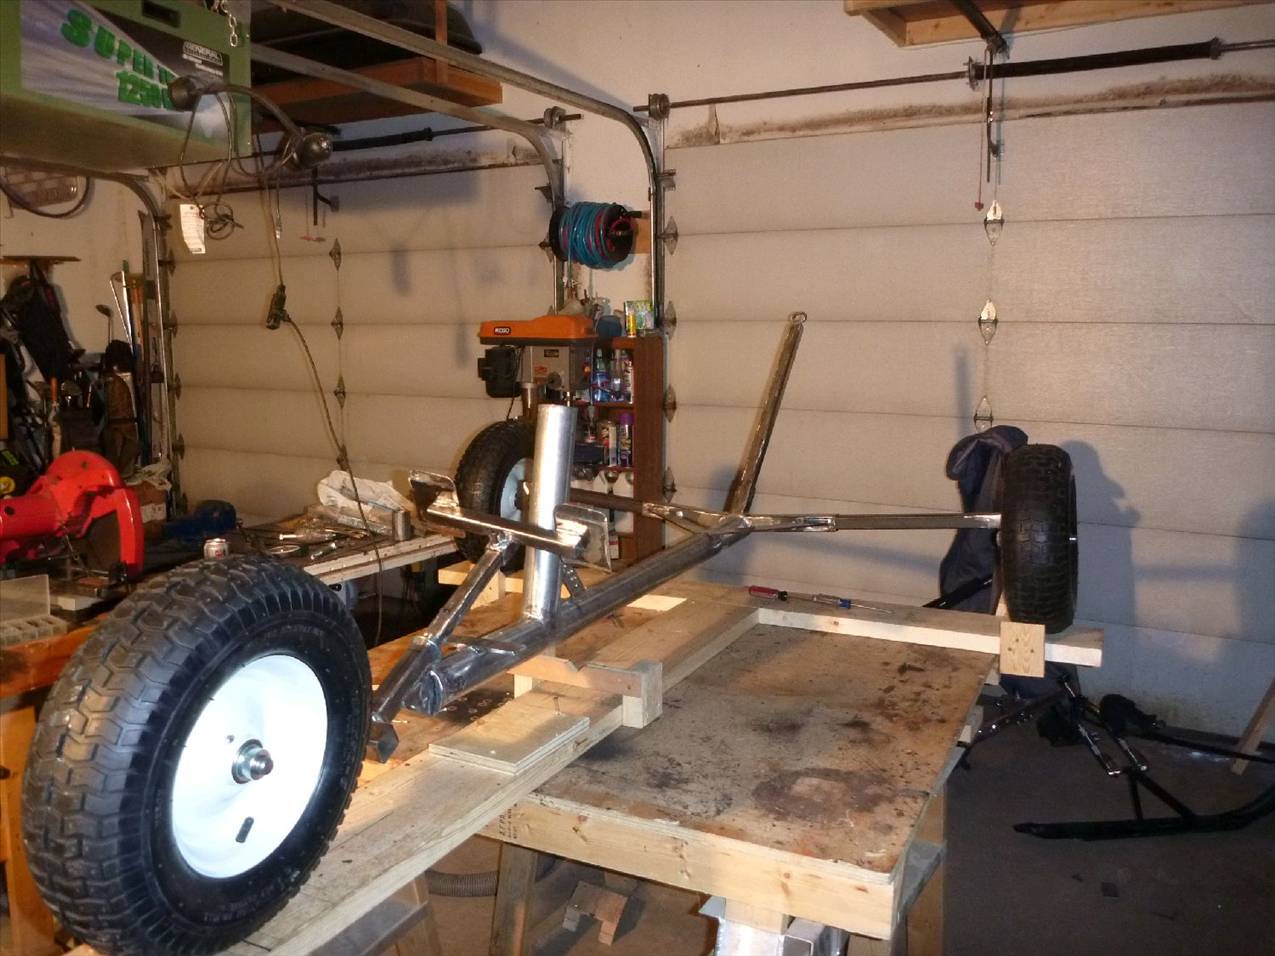
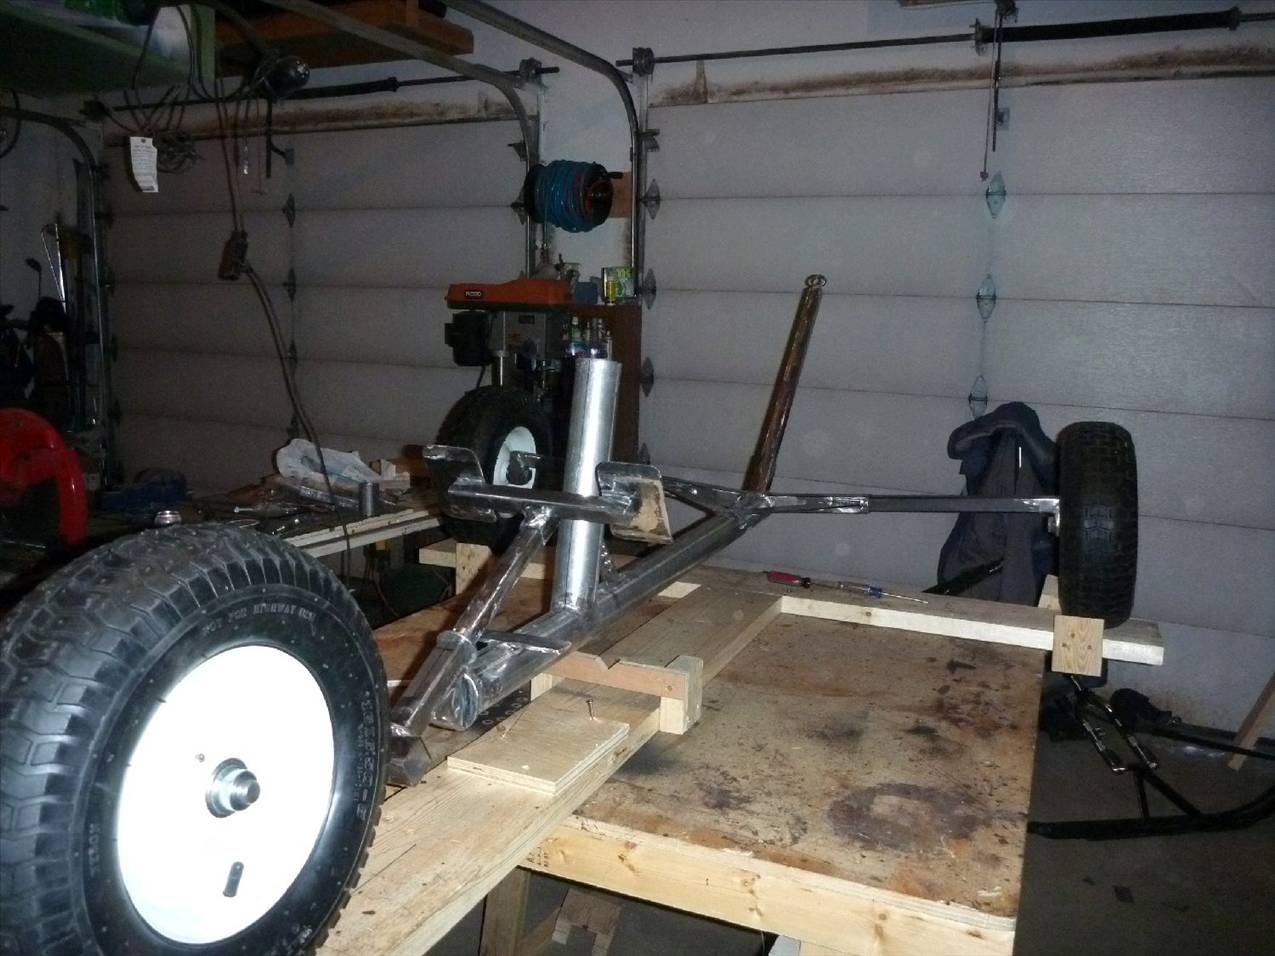
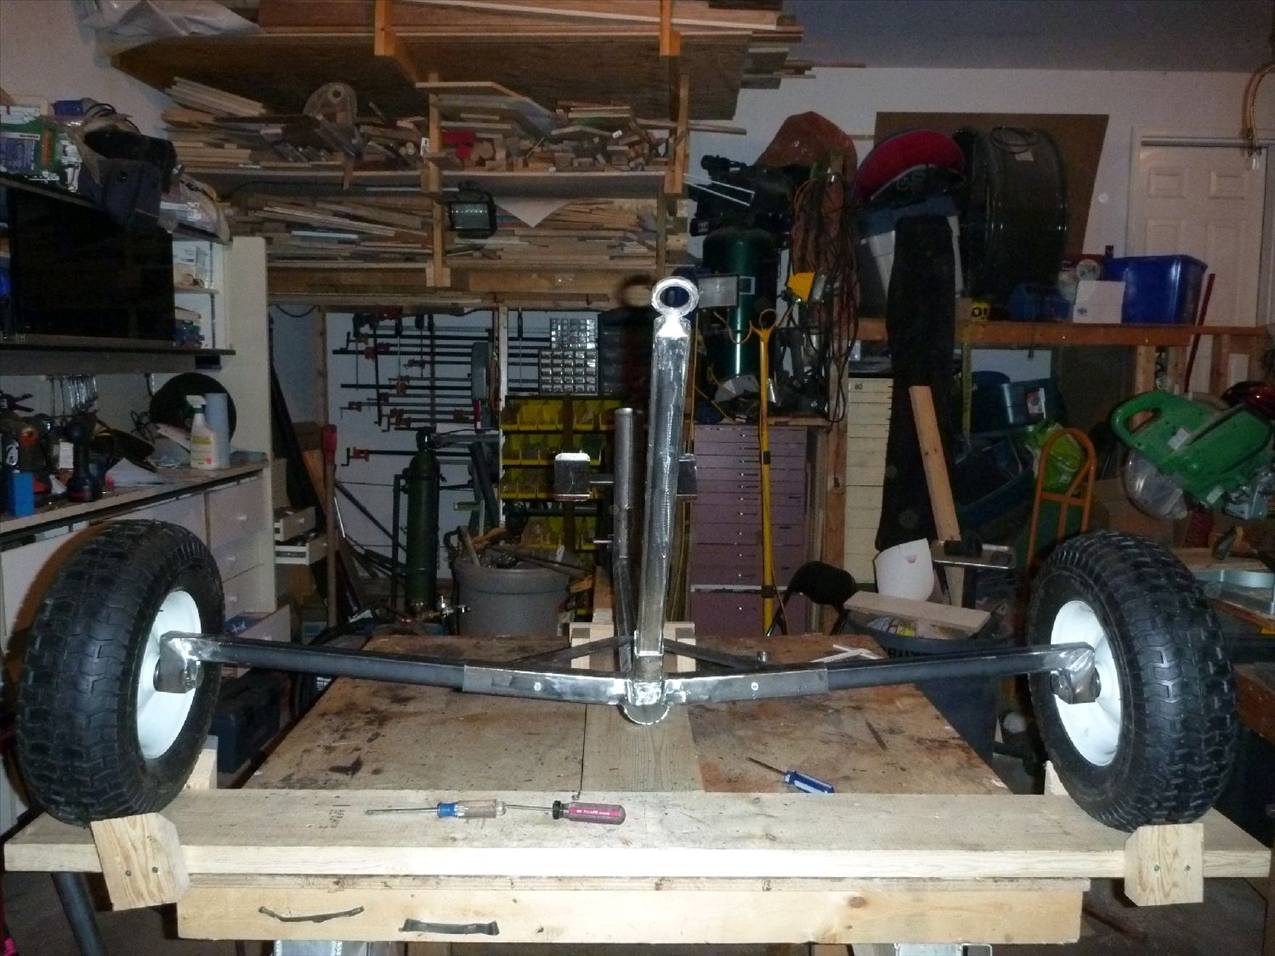
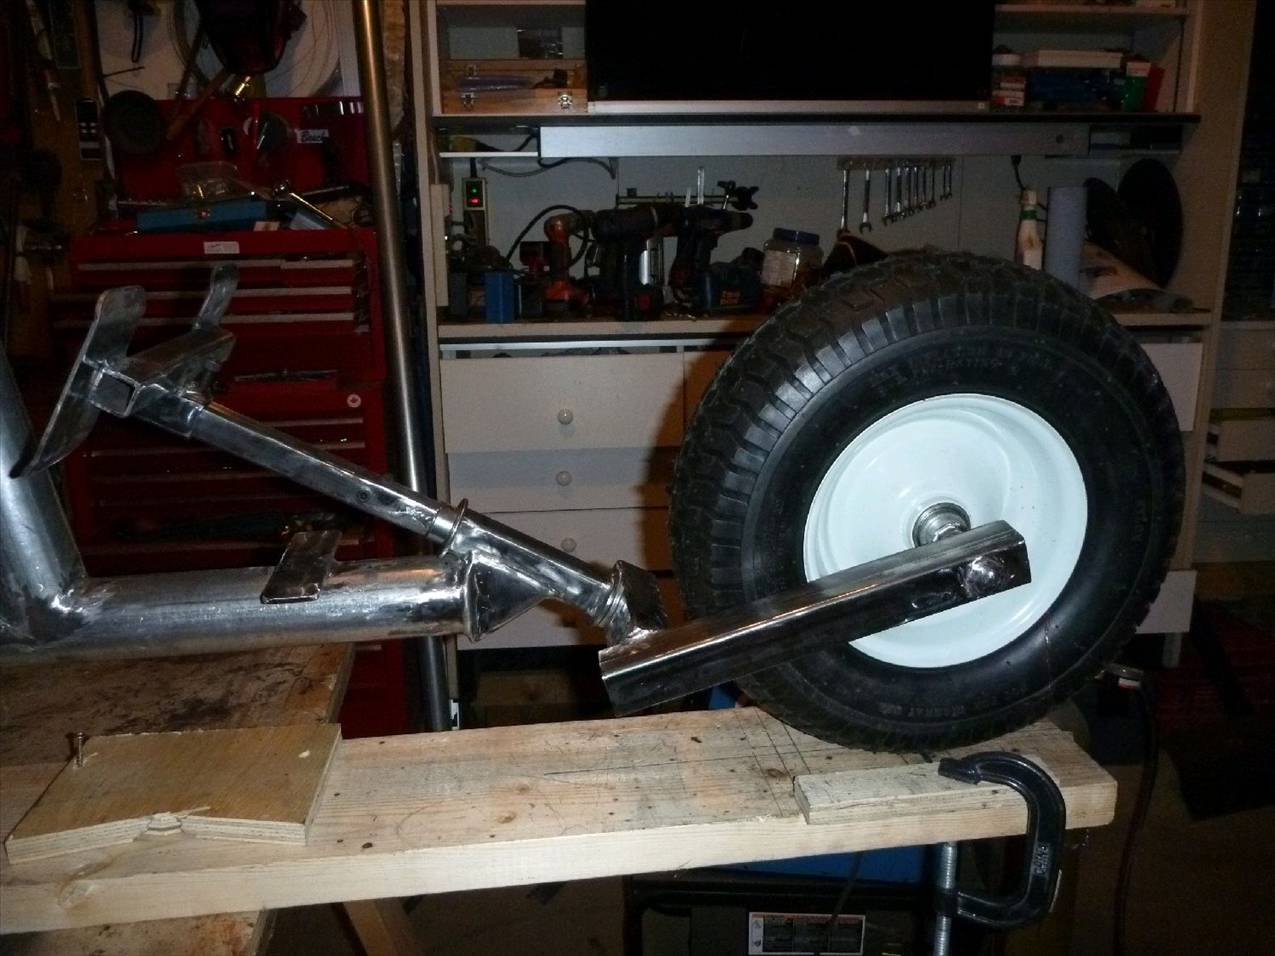
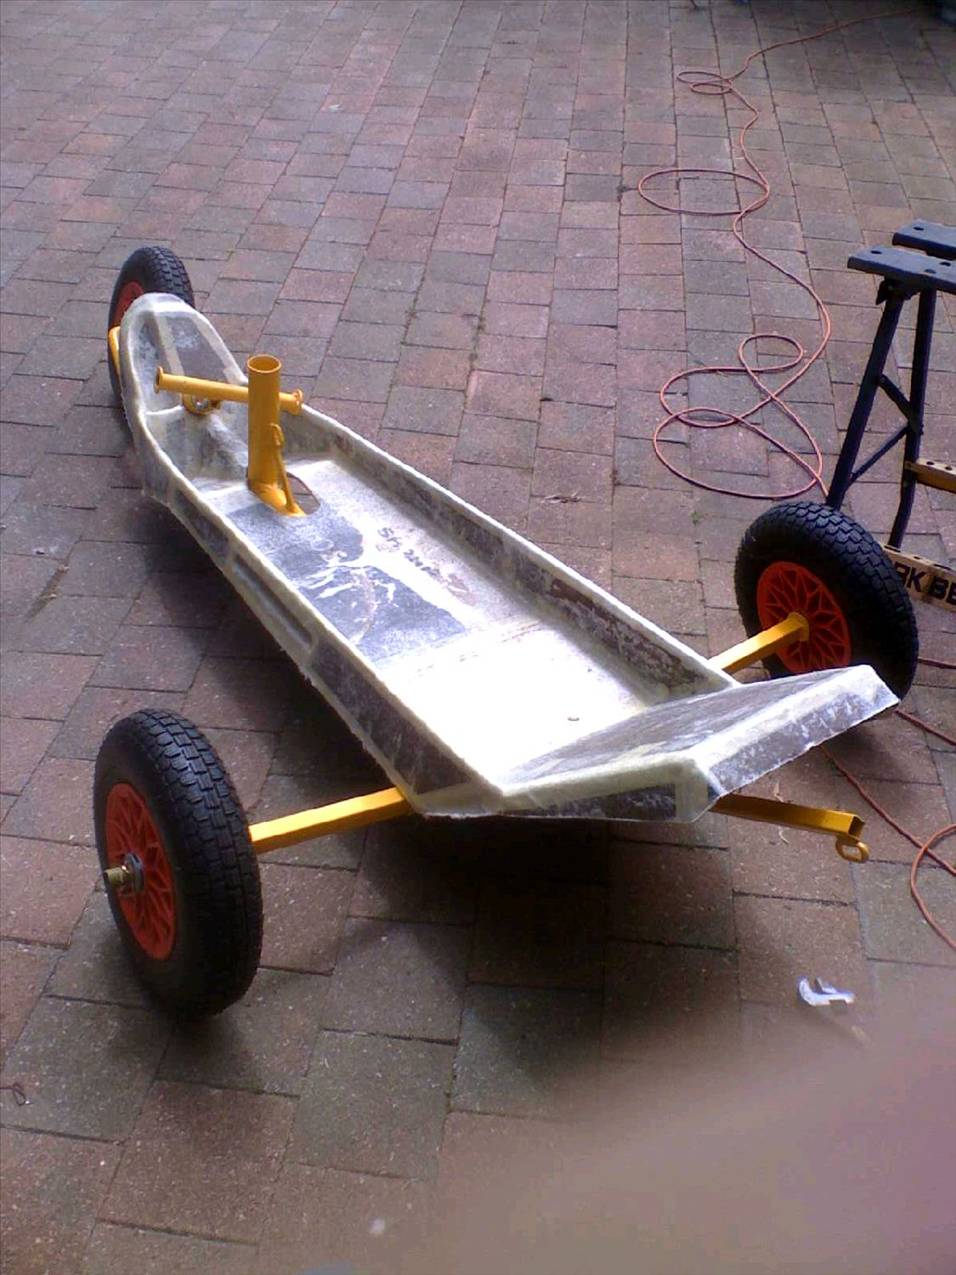
I have my framework done and am ready for paint....I think.
Please take a look at my photos and let me know if there is anything I should change.
I really appreciate this forum and how helpful everyone is. I am humbled by your skills and knowledge.
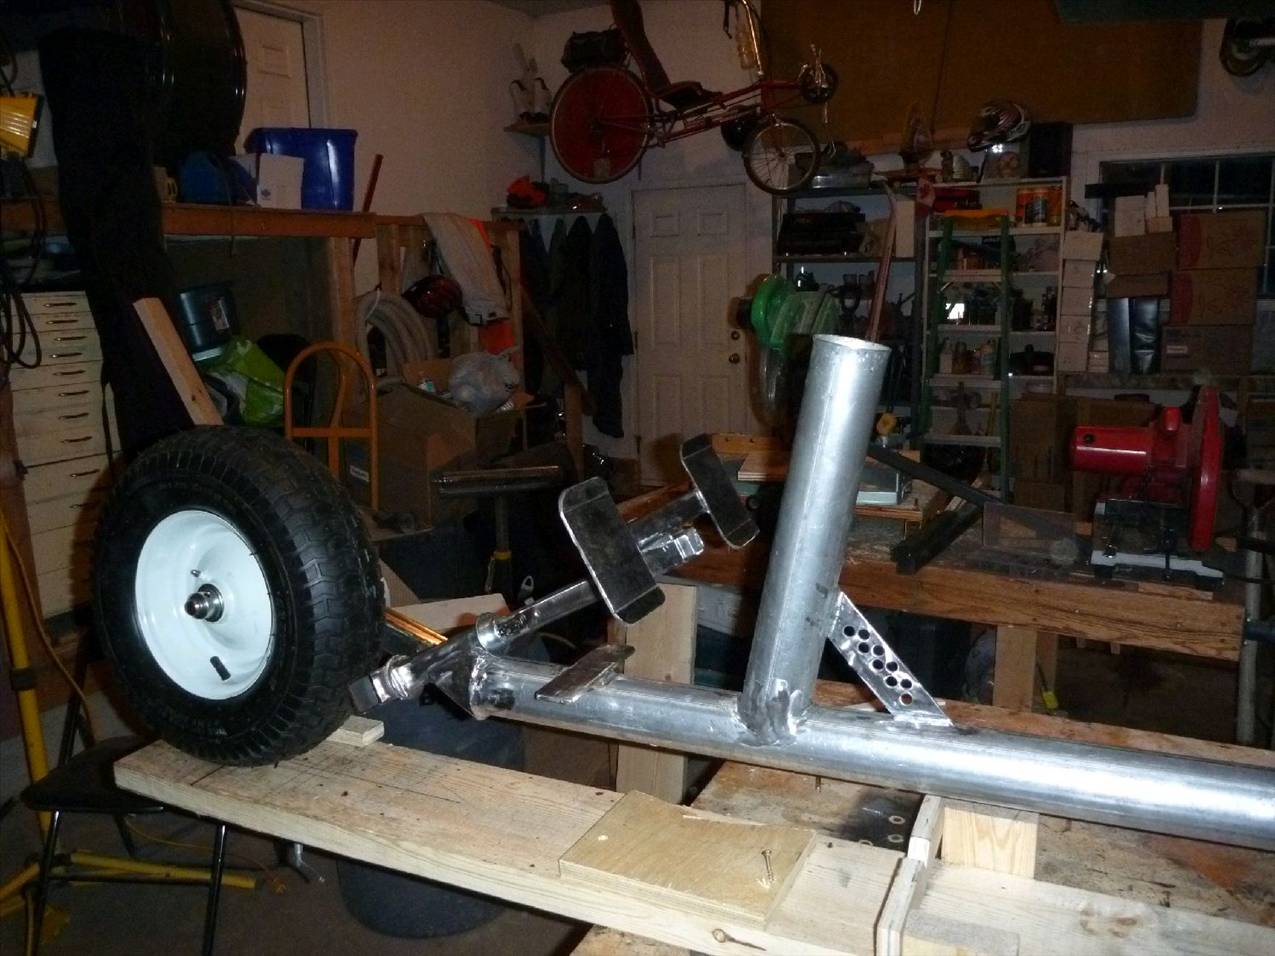
Looks good As you are at that stage you might want to put the reinforcing strap under the mast step that has been suggested
Looks great! Just curious why you added the rear risers on the axles? Are you going to run it somewhere you need a lot of ground clearance?
Cheers![]()
Basically I screwed up.
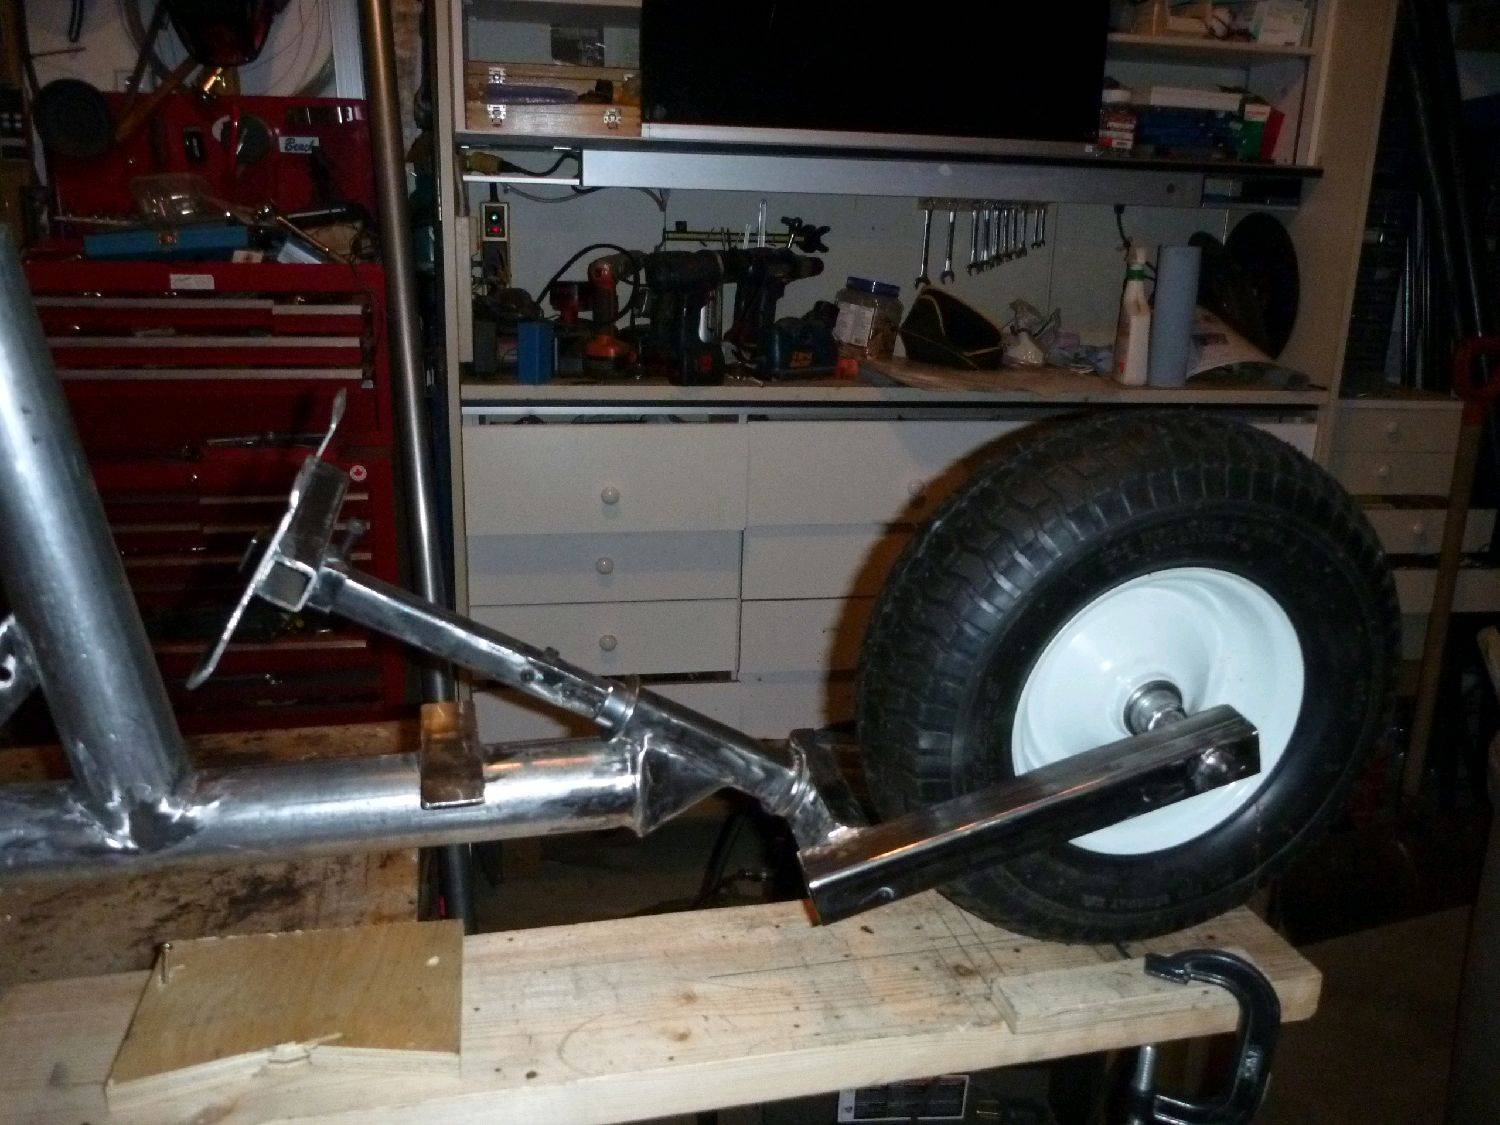
I was following the plan from Cisco. I made the front steering mechanism too long and I could not make the steering column line up with the contact patch. I will likely be sailing in a parking lot and in a cow pasture so the additional clearance would be good so I flipped the axles over and the steering lined up. I will be three inches higher. I hope this is not a big problem.
Brian
Tubby Super Man,
That shouldn't make a great deal of difference other than to raise your C of G a bit which ion turn will increase you chances of tipping over side ways minimally but for what you are doing I should imagine you won't notice it all that much.
Pie Yumpin' Yimminy dat sure looks Great.
You have every reason to be proud of your workmanship. Well done Sir. Once you have "Mounted for the Fray" and been there a few times, know what your machine is about I can see you heading "Down Mexico Way"???? You know "South of the Border" into LA and their Dry Lakes or Beaches for your Holidays. I hope you have an Understanding Missus, PAL, because that is the effect Land Yachting has on its Partakers.
Don't Screw Up and forget the reinforcing Strap, You don't need to have such a good job torn apart at the Mast Step.
Ron
PS Keep with the Pic's
Bugger!!!!! I knew there was something I'd forgotten. Mast straps.![]()
She is looking fantastic there sabydent.
Very nice work, bloke.![]()
Great work Sabydent.
You've given me motivation to get on with things.
What size chassis pipe did you end up using? Street Sign? What OD and WT?
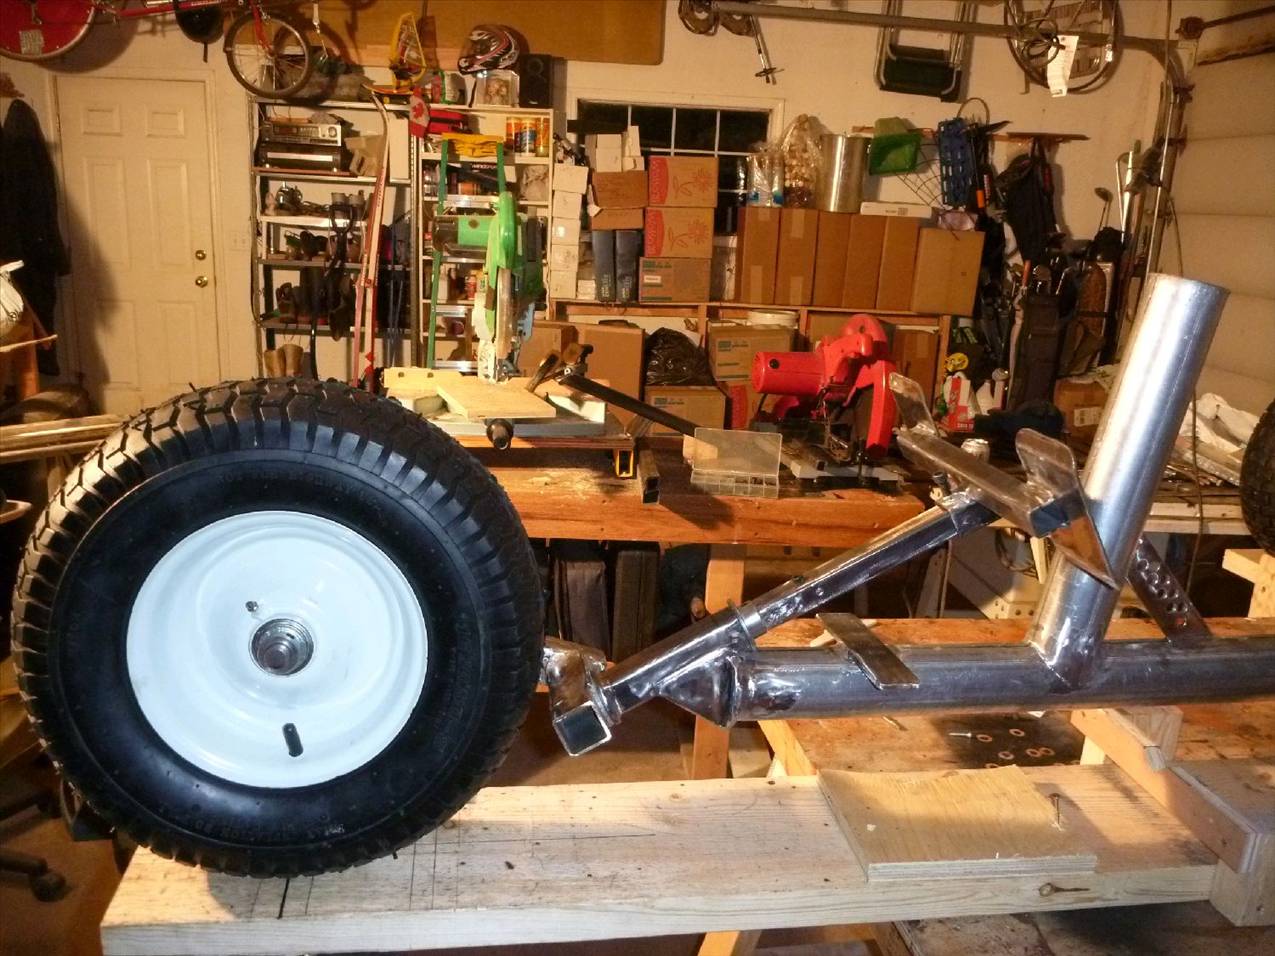
Your wheels look great. What brand and size are they?
Hi Brian,
Unfortuneatly you have followed two of my variations from Paul's original plan that I should not have done.
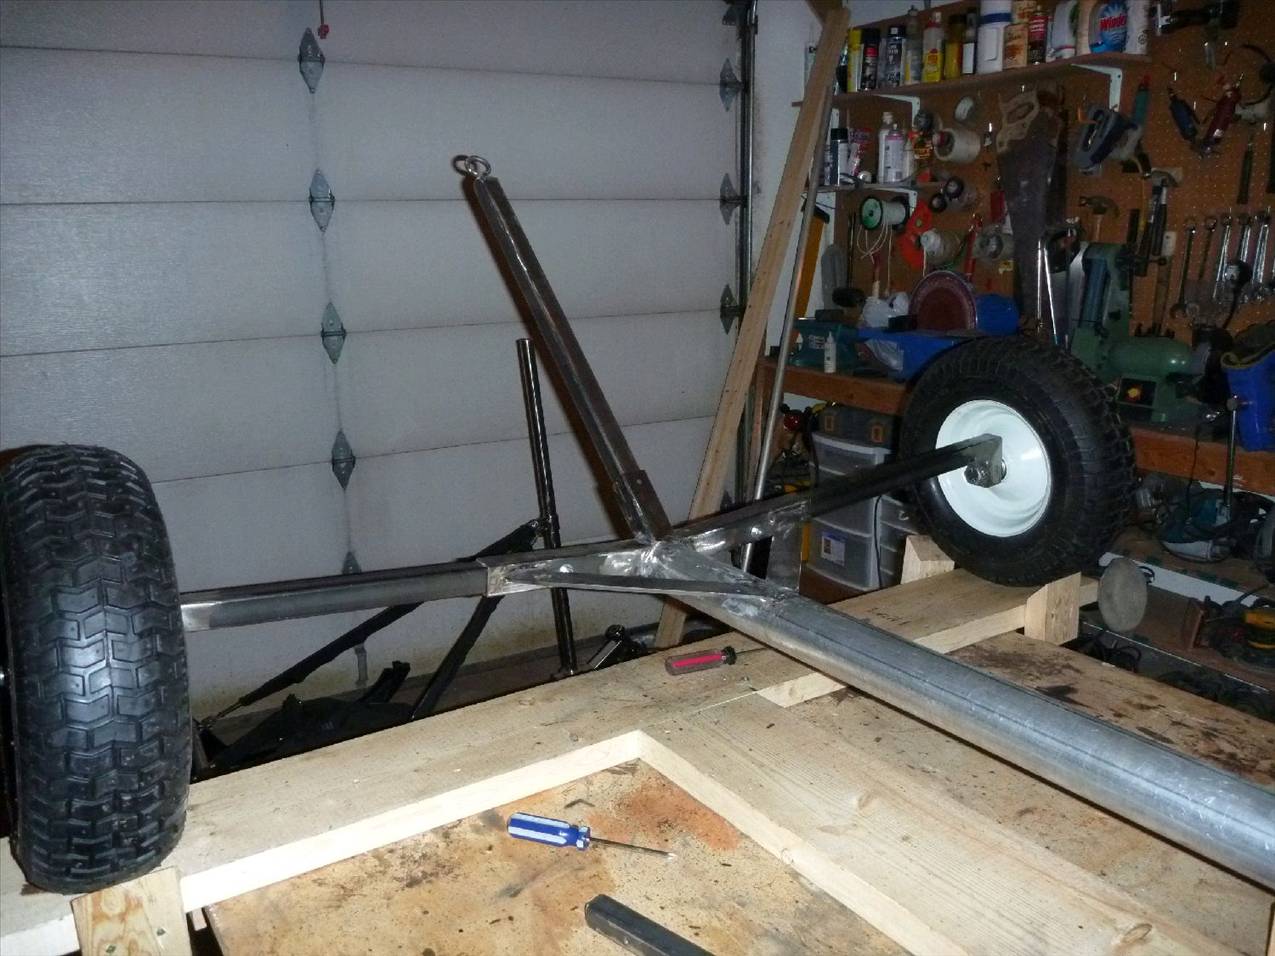
One is the rear axle mounting that allows you to high/low/forward or rear set the axle centres. Not a big problem to revert to original just by making new extensions with the axles welded or bolted into the extension on the centre line of the extension.
The way you have made them like mine is handy though as it does give you three height settings for the rear of the yacht.
I thought I was being smart in getting the rear ground clearance as low as possible. For all but the smoothest of surfaces it turned out to be too low. However I have drilled my extensions twice at 90 degrees which allows me to set the height at high/low or standard. At standard height you can have a short or long wheel base.
No real need to change back now as it is something you can experiment with on different surfaces. One reason I did it that way was so that it would be simple to bolt or unbolt my threaded rod axles.
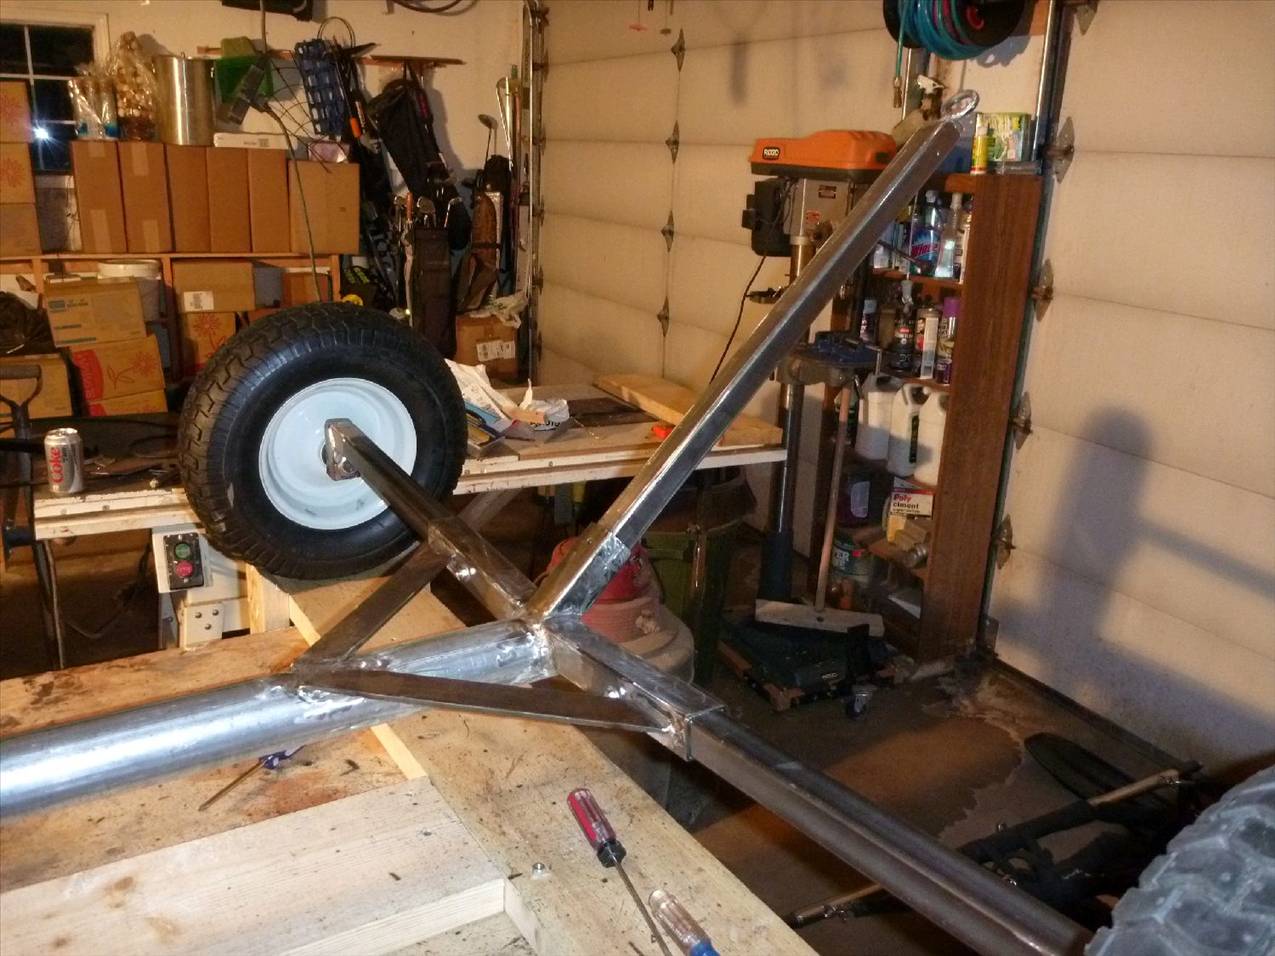
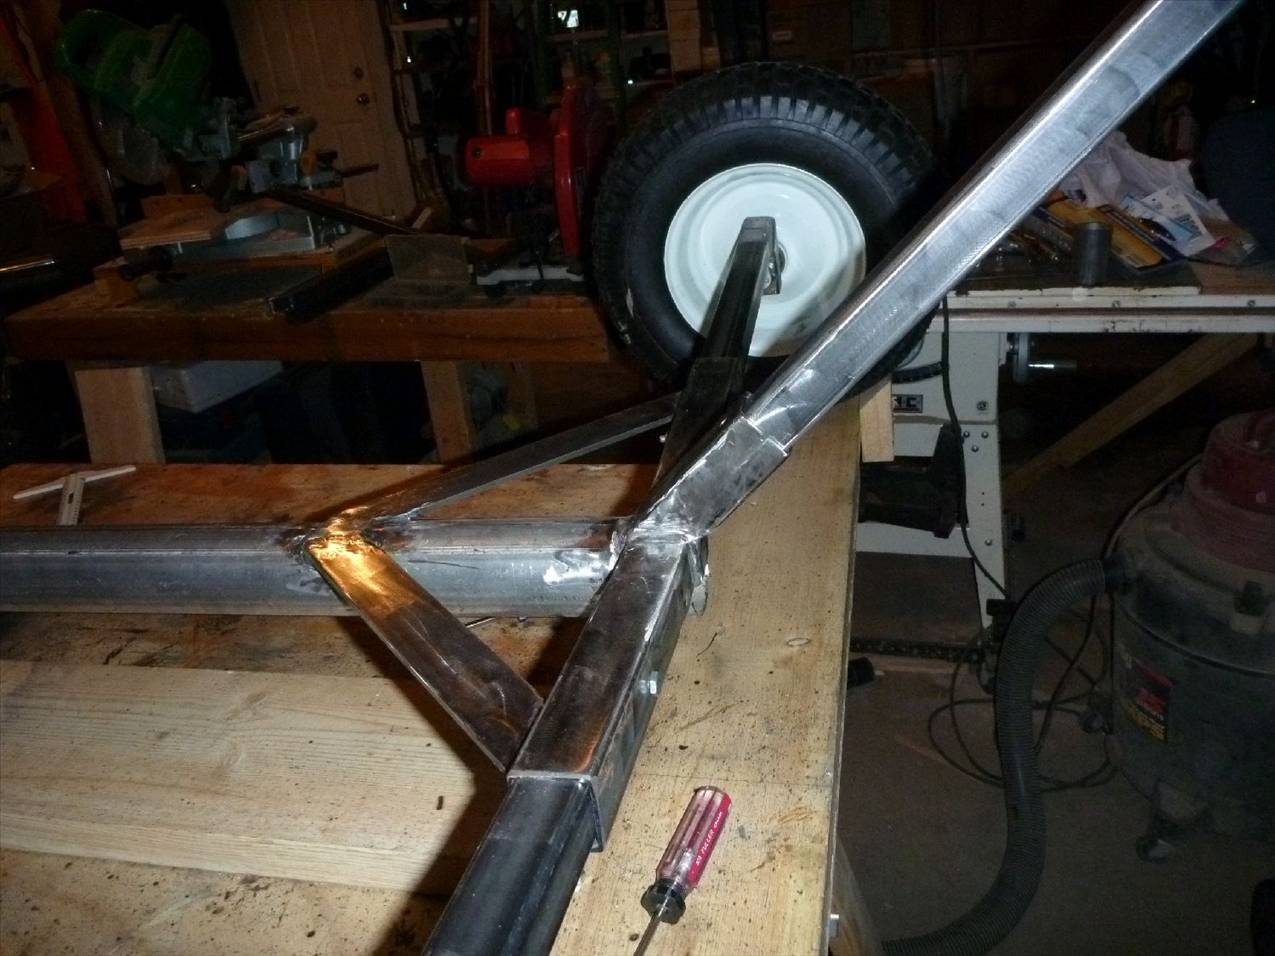
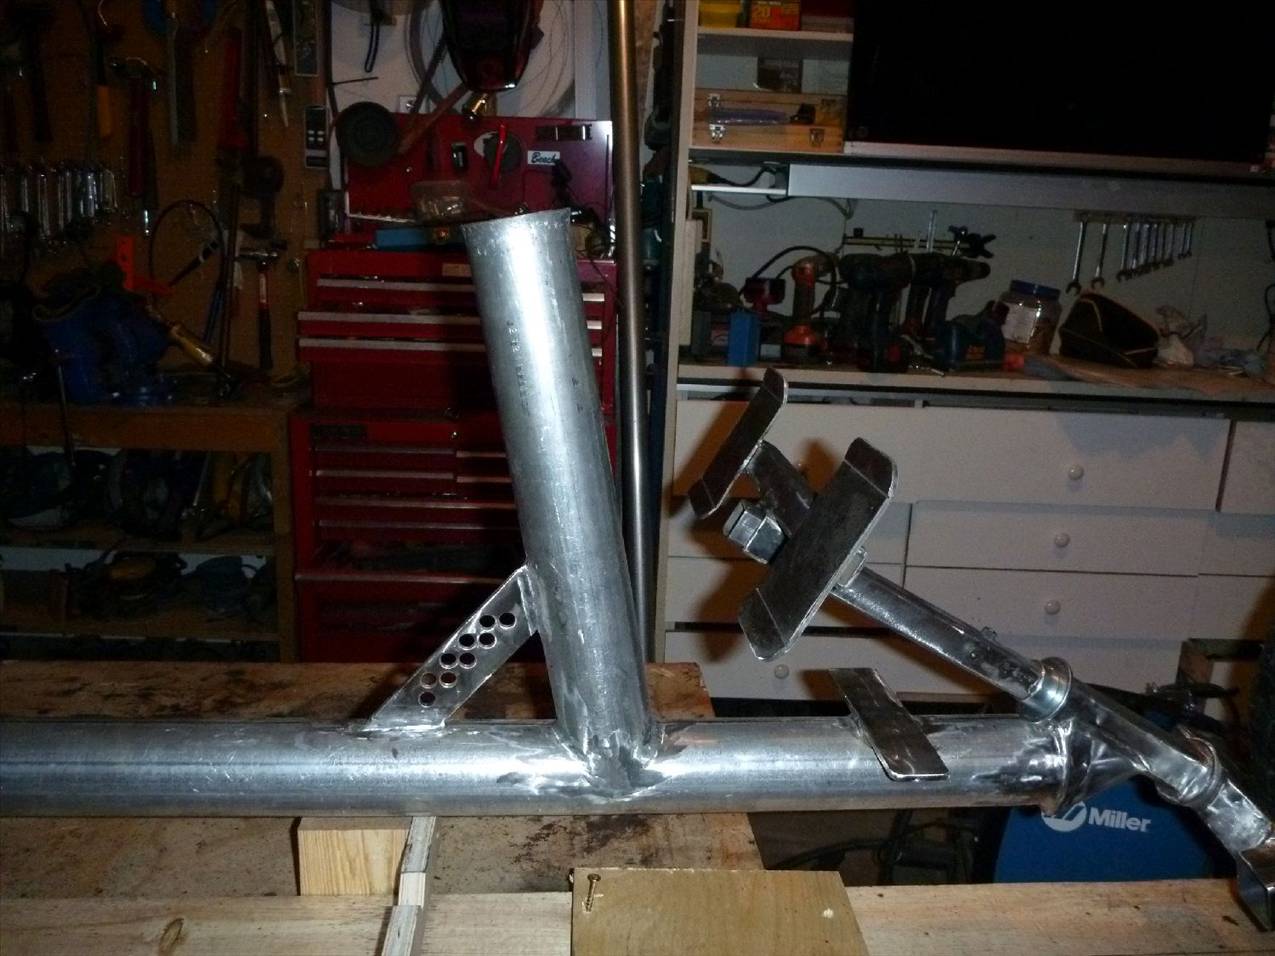
The other thing you have done is welded the seat back mount on the top of the rear X-member not the back.
The reason I did this was so that I could weld a link lug onto the back for the purpose of bolting another yacht without front fork onto it and do tandem sailing as they do with blokarts using the deuce bar. Great fun!!!
Because I put it on top and because my cut off wheel will only go to 45 degrees and not 60 degrees, my seat back angle is 45 degrees and not 30 degrees.
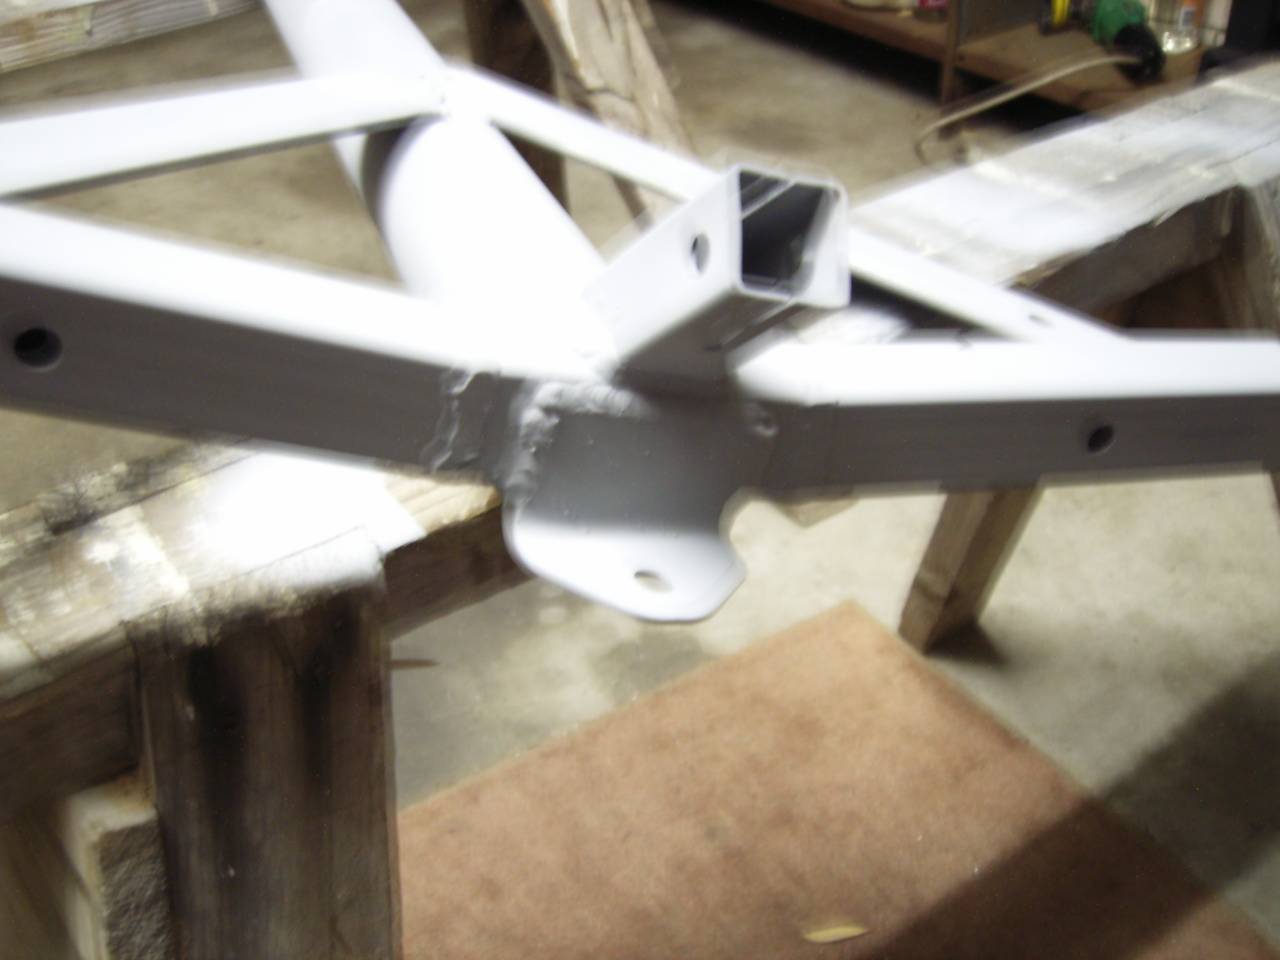
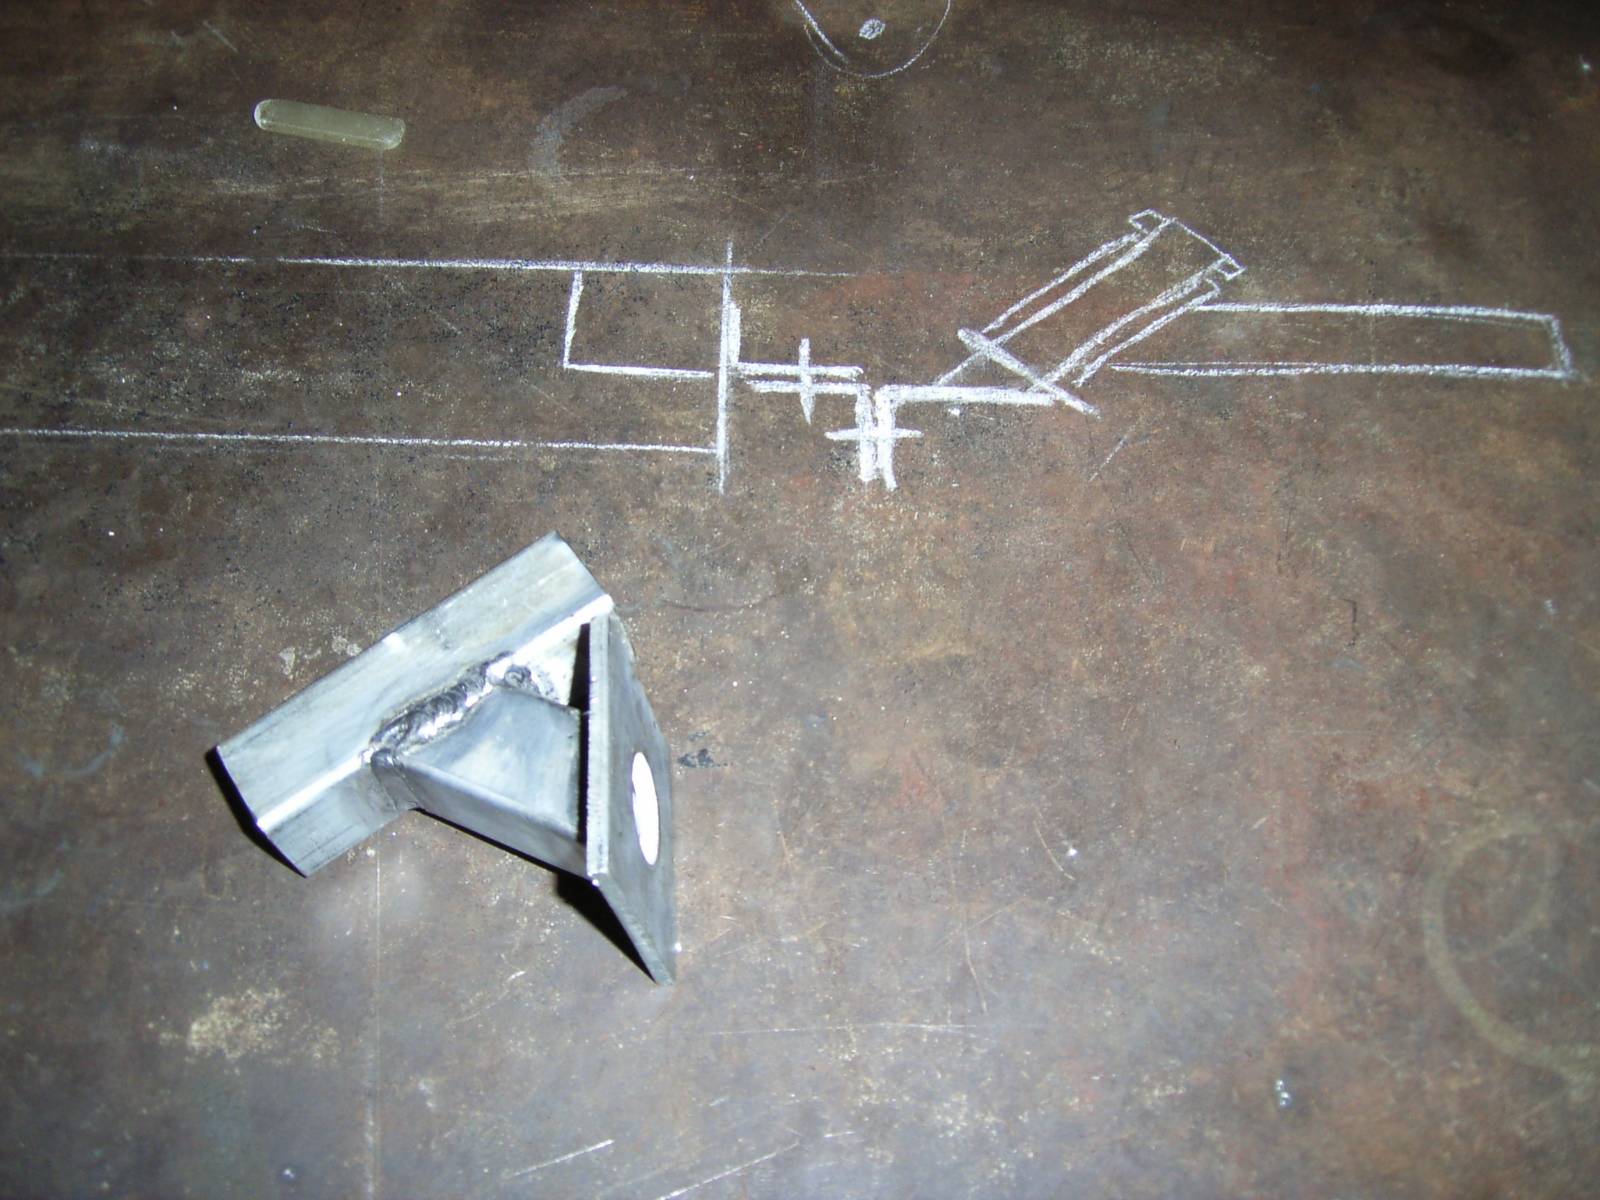
The photo of the back and the drawing on the bench show how you can set up for tandem sailing when you have built your second yacht.![]()
Again something that is not critical and you could it change at a later date.
I would recommend you do not build your seat like I have using solid timber for the sides front and rear. It has made it a little heavier than it should be.
The shape of it is nice and simple but it does need some padding here and there. I just bought a patio seat cushion from K-Mart for $35 which makes it fairly comfy. The joinery work for the seat sides etc was a little bit tricky but it does look good all varnished up but as I said, too heavy.
My suggestion is to build it from the lightest ply possible (3mm ?) with 20 or 25mm pine battens on the outside top edges the use the stitch and glue method and fibreglass it with one or two layers of woven cloth.
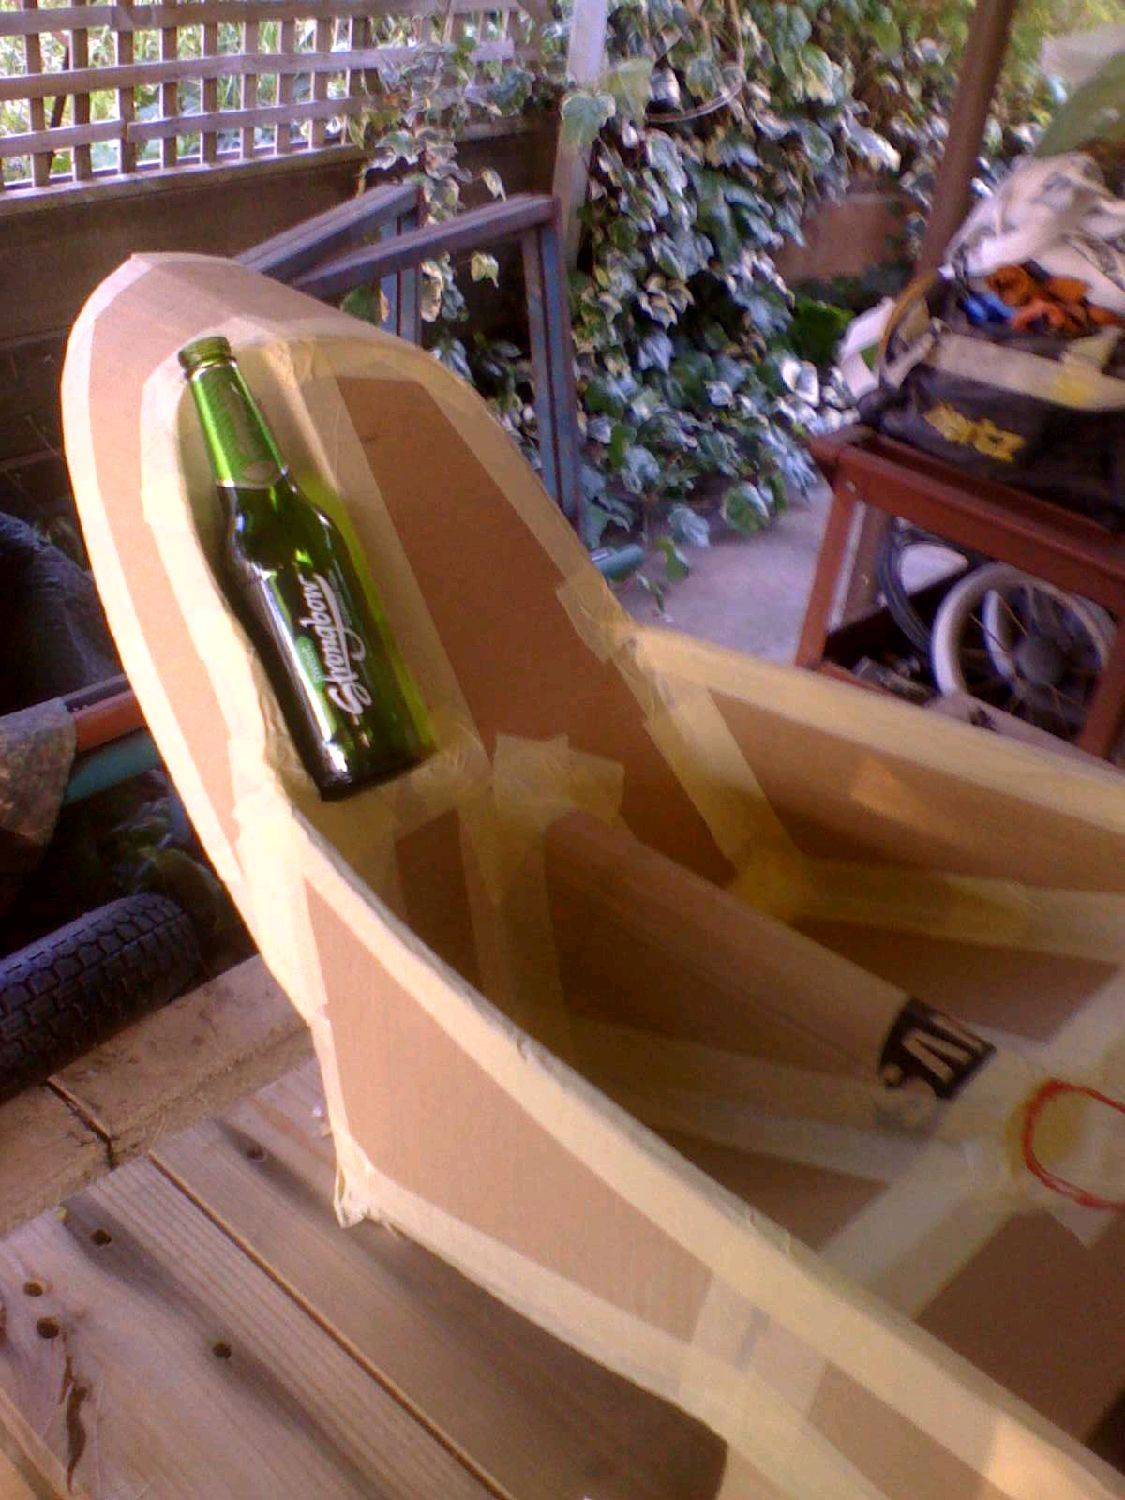
You could even make it out of cardboard and glass that as Gizmo has suggested.
Cheers Cisco.
Strongbow????? Gawd Spare Me Days! Pure Blond, Light Ice all that Clear or Green Bottle Piss! Doesn't anyone Drink a Full Strength Brewed from Hopes Beer these days?? We have the Asians Take over our Breweries and they Destroy perfectly Good Beverages and replace it with Sugar Loaded Chemicals.. I do not drink enough to be bothered with Home Brew. All I want is for one of our good old Aussie Companies to remain true to Manhood and stick to traditional Brewing methods and at least one good Bitter. DAMN! Even the YANKs are getting in on the act. They have taken over KRAFT Foods and want to change Our Vegemite to suit themselves. Hay! That is cool but it will no longer be Vegemite! So Keep your version in the US and LEAVE THE AUSSIE PRODUCT ALONE>> Vegemite as is 2mm thick on a slice of bread and Lettuce.. Yumoh!
As Cisco said the Thin ply method is strong and light. Schrodinger's Cat, The seat incorporated 2 layers 3mm/1/8" Ply sandwiched with Woven Glass and coated with same. Damn! It is strong and durable. I intend to Build incorporate the sides using the same method.
Ron
PS. One doesn't have to pour rubbish down ones neck just get Stoned. I prefer a couple of Full-ies with a little quality.
Cisco: Thanks for your feedback. I thought the way you mounted your rear wheels was the best way for me to get them true. If I have to change things, I will probably have to rebuild the front end as well since I have the front end too low. This will not allow me to keep the yacht level and still have the steering axel line up with the contact spot if the wheels are lower.
I followed your design for the seat mount because it was easier. I will put the seat back at 45 degrees for now just because it is a more comfortable position for me. As I gain sailing experience I may feel the need to change. This will be easier to change now that I am becoming more comfortable with welding.
I think I will go with a wooden seat to start. I am not too concerned about the weight of this yacht it will be not much of a factor until I drop a few pounds off the pilot. After I have tried sailing, I can always go to a fiberglass seat. Right now with learning to weld, and having to learn to sew (for the sail and seat cushion) and having to learn to sail the thing, I believe my brain is just about full. Learning to glass would probably make it explode. Plus my wife wants to get her car back in the garage.
Brian
PS
I want to thank you and landyacht for the build posts. This is amazing fun, I can hardly wait to try it out.
![]()
![]()
![]() You either gonna have to tell her tough luck" Missus"! or build yourself a workshop because if you think Land Yacht building is over?? THINK AGAIN! If you don't become obsessed with the Sport I will be very surprised.. Also if you think your Brain is Full you have a very small brain.. If So what fills the space around it?? A Vacuum???
You either gonna have to tell her tough luck" Missus"! or build yourself a workshop because if you think Land Yacht building is over?? THINK AGAIN! If you don't become obsessed with the Sport I will be very surprised.. Also if you think your Brain is Full you have a very small brain.. If So what fills the space around it?? A Vacuum???![]()
Ron
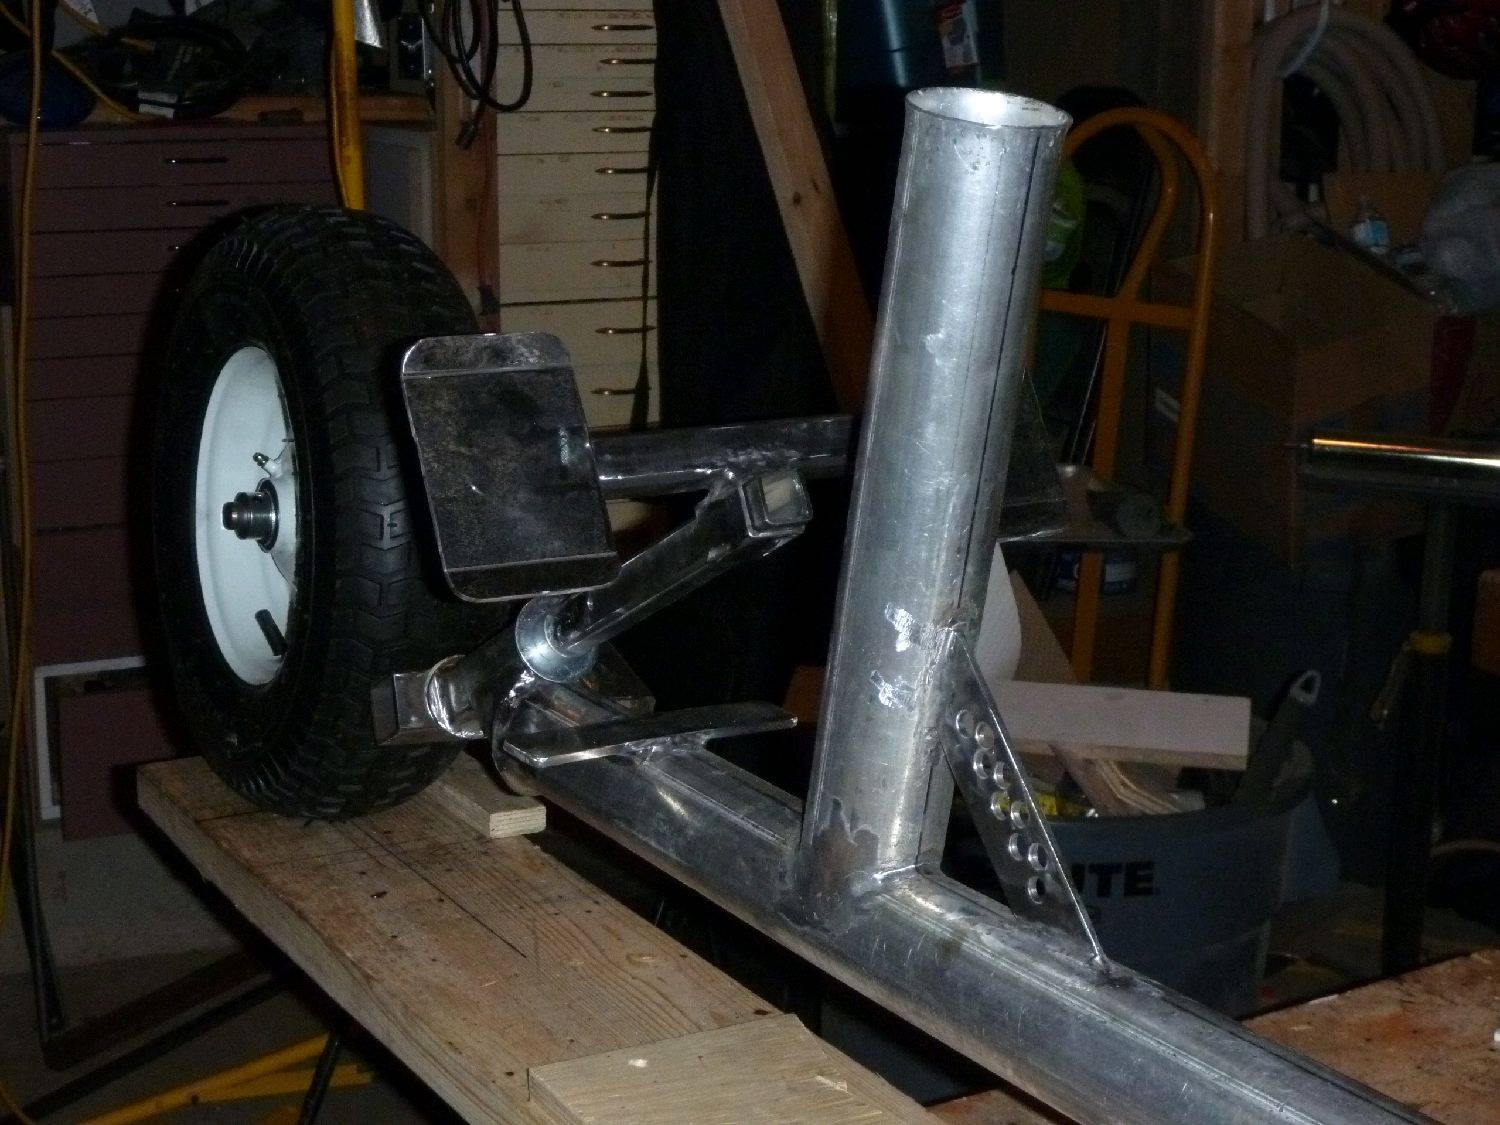
I added the strap to the mast step. I used 3mm steel strap perpendicular to the main frame tube. I angled the front of the strap and used welds to fill. the pink stuff is a little body filler.

Looks great keep up the good work and show us the finished product when its done![]()
Brian,
That looks great to me. Now instead of potentially tearing the Mast Step apart you will have to Screw the Spine off.. You will have to put on a bunch more weight and go out in a Tornado or Cyclone to do that kind of damage
Good Job,
Ron
Exhaust pipe is a great idea, I think anyway.
2.5 inches = 63.5mm which is ample OD. The wall wouldn't be more than 2.5mm so it isn't all that heavy to pick up. What do you think it would weigh? I assume it was seamed pipe?
It will be in teresting to see how exhaust tubeing fares, as a readily bendable pipe it shouldnt work , but let the experiment begin![]()
I hope it works. I took a piece the length of the frame, blocked up the ends, stood in the middle and bounced up and down. I could detect no discernable flex. If it does not work, I will be sure to let you know from the hospital.
I have decided to make a fiberglass seat using glass covered cardboard. Might as well make this project a total learning experience.
I am designing a brake that will attach a class I lever fulcrum under the seat near the center. This will attach to the brake lever with an axel so the brake lever sits on the right hand side near the side rail of the seat. This set up will give me a 4:1 mechanical advantage. The brake pad will have a piece of tire attached to increase the friction to the pavement. It will hit in the center of the rear so I should not get a turning effect while applying the brake. I decided to go with a brake, even though it may not be effective because of the total lack of land sailing experience of anyone who will be sailing this beast. This way, at least I will be able to tell the judge I tried.
Taking next week off for a trip to California. Will post photos when I return to the shop.
According to my book it's 3.033 kg per meter, aluminised seamed tube.
The aluminium coating is for protection of the pipe in the hostile enviroment it was designed for.
There isn't a strength rating for it though. Should work harden anyway.![]()
Here is the way you can calculate the mass of black Circular pipe and tube.
It's (Outside Diameter - Wall Thickness) x Wall Thickness X 0.0246615
Examples: (51mm - 2.6mm) x 2.6mm x 0.0246615
= 3.10 kg per meter
(114.3mm - 6.0mm x 0.0246615
= 16.02 kilograms per meter
Cheers Chook
I can't see why exhaust tube is a poor choice.
2mm wall is pretty thin but seems up to the task, given what Hiko has done. He would be the test case. When his stuff fails then start thinking a little thicker in the wall. But not much.
Unless you went to a Chromolloy steel pipe with all its flexural elastic properties (and cost) with an even thinner wall, 2mm is almost as thin as you would want to go in W.T. for exhaust tube.
In the Long run it all boils down to the fulcrum point and leverage plus Body Mass[}:)]![]()
![]()
![]() In Sabydents Case BIG/HEAVY[}:)]
In Sabydents Case BIG/HEAVY[}:)]![]() That is if you are sticking to the Fisley competition Std, however if you run to a Wider Wheel Base than all the loadings change for greater stability. Both Razor and the Cat are from Sign Post Pipe of Nominal Bore2 7/8" @3mm+ - with slightly wider than standard Wheel Base and are standing up to heavy usage under my 100kg .
That is if you are sticking to the Fisley competition Std, however if you run to a Wider Wheel Base than all the loadings change for greater stability. Both Razor and the Cat are from Sign Post Pipe of Nominal Bore2 7/8" @3mm+ - with slightly wider than standard Wheel Base and are standing up to heavy usage under my 100kg .
If you really see what sort of twist moment it takes then take a spine length of the Exhaust Pipe, weld a Mast Step to it and a couple of lengths at 90deg to the MS then clamp the whole shooting match to a base at about Chest Height then take a 4 or 5mtr length of pipe and set it into the mast step. Weigh yourself and move out along the Mock Mast @ 500mm intervals and apply your body weight to the Mock Mast until something bends. I'm picking that the Mast Step will tear out long before the Spine bends. These would probably be good tests to do if anyone has a few bucks to through down the Toilet.
Ron


