
Weather | Buy&Sell | Forums |  |
Weather | Buy & Sell | Gallery | Forums | |
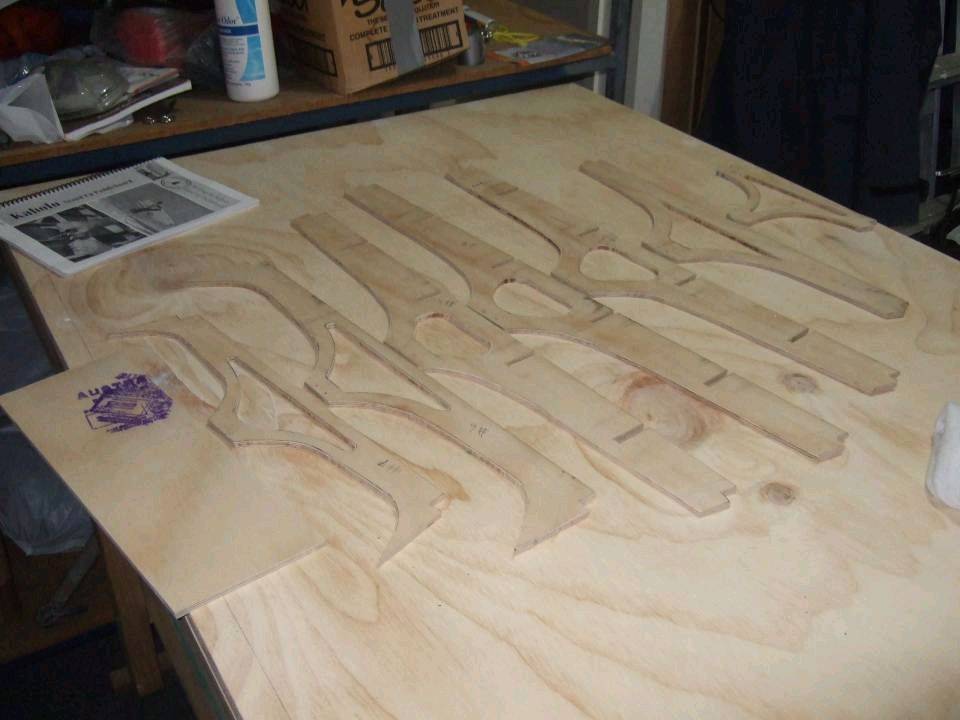
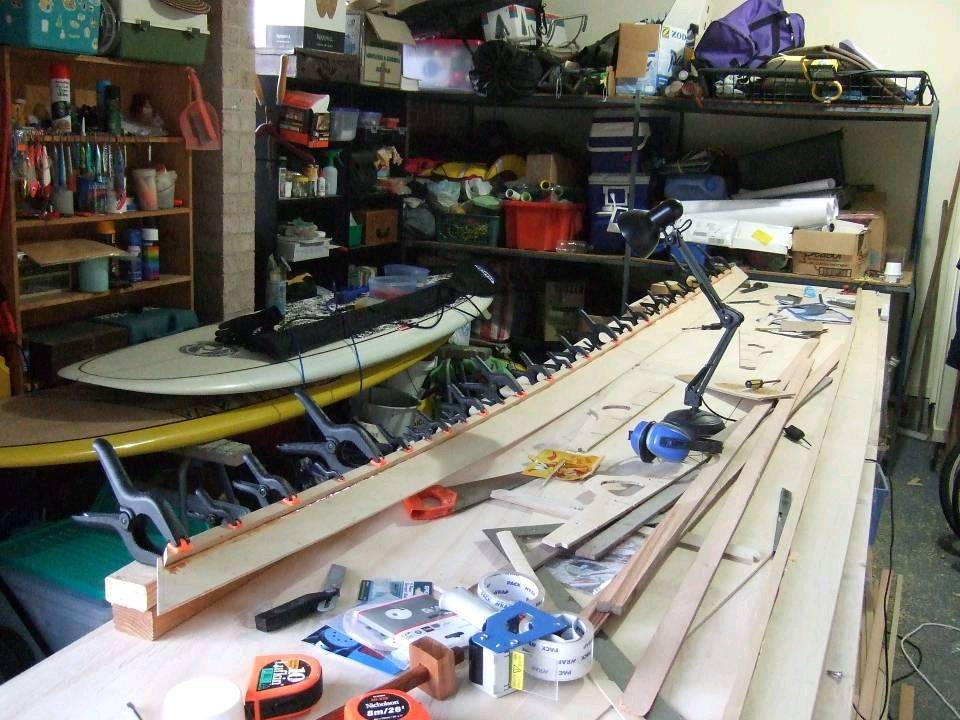
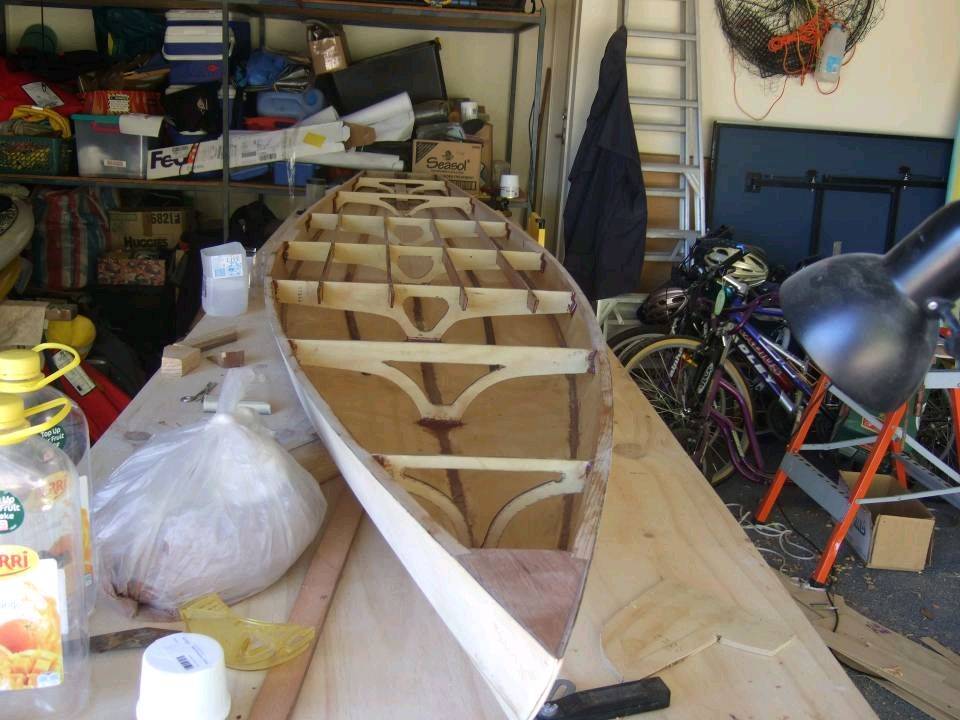
Here a few shots of the build process for the Chesapeake Light Craft Kaholo 14' raceboard
Marking ply by pricking through full size plans

Bulkheads and stern cut out
planing ply to glue together (scarfing) and make 14' lengths

clamping rail chines to top of side panels - yep that's a lot of clamps
hull joins tacked with glue, copper wire "stitches" removed, joins bogged up with thickened epoxy and fin box support (western red ceder block) installed ready for epoxy sealer and deck
deck covered with a layer of 4oz cloth and epoxy on the underside and glued down with just a little pressure![]()

Cover top and bottom with 4oz cloth and epoxy overlapping at the deck hull join.
Apply two epoxy filler coats. I chose to finish with marine varnish on the deck and 2 pack polyurethane on the hull (2 coats each).
Some of the many traps that I fell into: The plans are pretty good but take some time at the stich up stage to adjust joins and get clean lines (needs about 1cm taken off bottom of front two bulkheads IMHO). If you haven't used much epoxy take care when its hot and only mix up small batches (yep as I think LSD said epoxy can catch fire if you get too greedy![]() ). Amine blush where the epoxy (or polyurethane paint!) retracts from around a point leaving a hollow is a fri%&$#ng curse. Washing with detergent and warm water between coats made all the difference for me.
). Amine blush where the epoxy (or polyurethane paint!) retracts from around a point leaving a hollow is a fri%&$#ng curse. Washing with detergent and warm water between coats made all the difference for me.
Used stick on auto detailing tape for the pin lines to cover the paint varnish join

I can recommend the project to anyone with basic woodworking skills, a few hand tools and a bit of time to spare.
Bill

