Looking good there clemco. I hope you are not going to use that rusty pipe in the jig, or do you figure you will wreck the yacht before it finishes rusting out.![]()
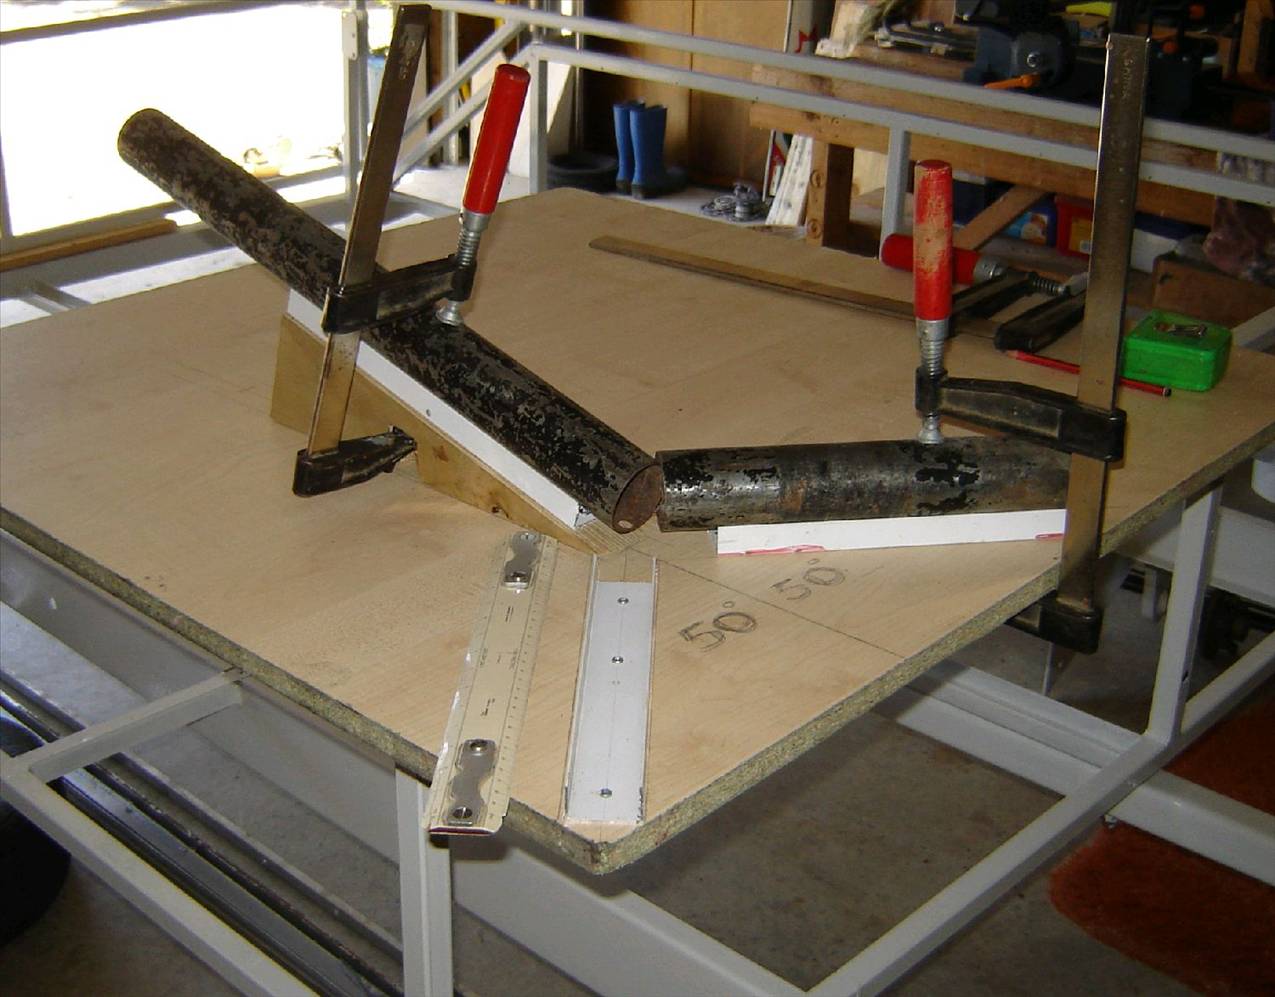
The drawing is great but I couldn't see where the angle between the centre tube and rear tubes is defined in the side elevation, ie the angle of the wooden wedge on the jig.
When welding it together would you weld the rear tubes together first and then weld the spine tube to them?? That would seem the easist method and avoid too many complicated angle cuts for notching of the pipes. Cheers Cisco![]()
Hi Cisco, you may not know, but Clem is an architect, so he's used to looking at things through weird angles!
There is enough info on the drawing for anyone who wanted to build one IMHO
The builder has to do some thinking on these things thats the fun part ![]()
Cheers Hiko
Ah yes. What is the hardest work in the world?? Thinking and that is why so few people do it.![]()
Just wondering whether (and if you are, why?) you are doing the steering the same as in your plan? ![]() From my experience with the same setup; the conventional LLF mini steering is better on all accounts (manufacture, simplicity, cost, performance). Looks to me like the steering head angle in your plans would be perfect to mount the pedals directly to.
From my experience with the same setup; the conventional LLF mini steering is better on all accounts (manufacture, simplicity, cost, performance). Looks to me like the steering head angle in your plans would be perfect to mount the pedals directly to.
Got a few more bits cut out. Will build the jig up to them. That black bit wasn't too rusty on the inside. It should do a few years. The y pieces are 1.6mm wall thickness. I will weld them as you suggested Cisco. The black bit 2mm wall minus a bit of rust. I will be adding a few gussets. This build may take longer than I thought!
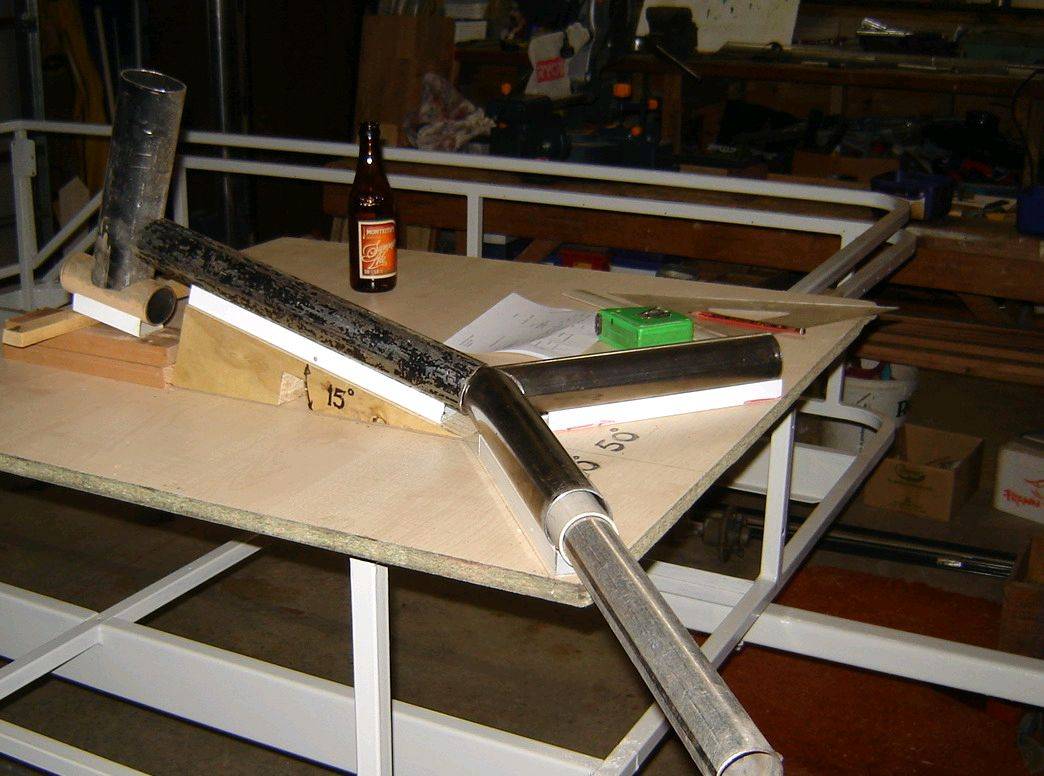
Thanks for penning in the angle clemco.![]() I notice you have a container of building fluid in the background but I can't quite make out the brand name.
I notice you have a container of building fluid in the background but I can't quite make out the brand name.![]()
Great build Clem. one of the advantages I have found by building a Y frame is that the front and rear axles can be extended or withdrawn to fit in both class2 or 3 minni, somthing that would be very dificult with a T framed yacht. (mainly in the tuning area) I will be leaving mine as a class3 for the moment
Cheers
aus230
Thanks for the encouragement guys. I think this is only my eighth yacht build. I intend to try and stick to my plan as much as possible, but any helpfull suggestions would be appreciated. I have never done any welding before but intend to have a go on this one. I have only a 100 amp Mig welder for the job. Most of the tube is only 1.6 wall. Is this welder ample for the job, or should I just tack it and take it to an expert ?
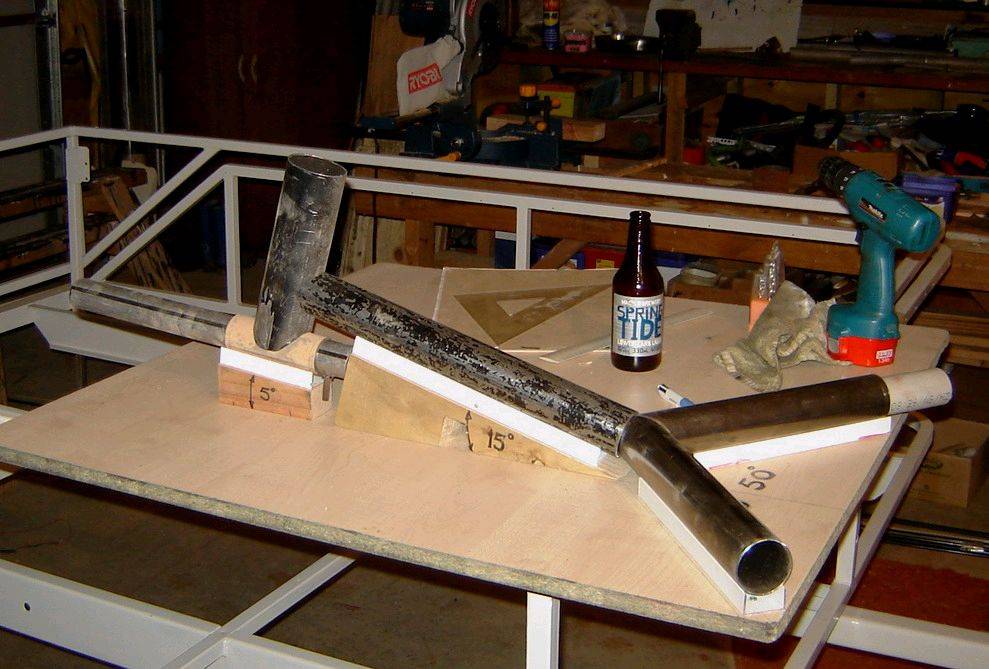
Starting to look a bit like the plan.
The 100 amp welder should be just fine clemco. You will only be running it between 60-80 amps. For 1.6mm tube I was using CIGWELD Ferrocraft 12XP, 2mm rods on a faily low amperage (about 65 from memory).
Smaller diameter rods tend to have a hotter arc and blow holes in the material.
Practise the type of join you want to make on some scrap material first to get your hand in. Your welding helmet (helmet, not hand held shield) should be adjusted on the hinges so that when you nod your head the face shield will come down to the right position. A helmet leaves both hands free.
The helmet should have a clear plastic lens on the front, a spacer washer, then the shaded lens, another spacer washer and another plastic lens at the back. Keep the lenses clean so you can see what is going on in the arc. A No. 10 or 11 shaded lens should be about right for welding in the workshop.
If you have a spare $200 you can buy a self shading helmet from your local welding supplies shop. I hear they are good but I prefer my 30 year old fixed front nodder helmet.![]()
Welding supplies shops are better than Bunnings, Mitre 10 and the like to buy your gear from. It is where the professionals shop and the electrodes tend to be fresher.
You need to keep your rods dry and if they a bit old you can dry them out in you oven at 150 degrees for a half hour or more.
Happy building and keep us posted.
Edit:- Spring Tide building fluid!! How appropriate!!
Thanks Cisco. I may need more of your help yet.
The welder I have is an Gasless Mig auto wire feed type. It has a coil of 0.8mm gasless flux cored wire in it. The only adjustment of the power (amps) is a high and low switch. Do I need a coil of thicker wire? Can this type of welder be used with hand held flux cored wire? If there such a thing? Would that give me more control, or have I the wrong type of welder for what I need?
I could re-sell this welder if it is not suitable and look for another type.
I am determined to learn to weld this year!
A Gas-less MIG welder should do the job well, I have one (gasless MIG) and use it often, mine has 4 step settings and I run .9mm wire. And for that job would use #3
As a setting sugestion run Hi current and a med/fast feed rate, and work fast. The LO setting may not give enough penetration into the metal. The feed rate you will work out easily when you get welding. BUT try it on some scrap pieces first.
Gas-less MIGs actually work better than gas fed MIGs on Galv. steel.
When you get up and welding with good results a whole new world will open up to you !!!!
hello clem. andy from hamilton. i have finished my new class 5 that fits into my boot of my focus. (yes packs down smaller than a blokart) just doing some fine tuning. before going into production. your mini is looking good.
Hi Andy and welcome.... WOW a compact class5, when your ready post some pics we would love to see them.
Hi Clem
Following this one with anticipation, like the design.
I use a small gasless mig as well (ebay bargain from years ago) with the .8mm flux core rod. I also have a small stick welder, which is great for heavier material (2mm+)
No you won't be able to use the hand held flux core wire with this type of welder, I assume you refer to TIG welding rods?
For yours, set it on high, and as mentioned test some welds on the same type of material, and get a feel for it.
Always tack around your joints, and double check movement and shrinkage before completing a final weld.
Mig's are great, just like point and click (for welding) ![]()
Brett
Spent a couple of hours today doing test welds. Did a T joint and an L with some 38mm tube. Not as easy as I thought it would be. Joins were pretty ugly but learnt heaps about my welder. Had to re-thread the wire 3 times when I burnt it down to the nozzle and the wire jambed at the feeder. Figured out the right tension to set the feeder wheels by the 3rd time. Couldnt find the right distance to hold the nozzle from the metal being welded, and the speed to feed the wire. This skill will take a bit if time and practise to master. I will have another go tomorrow.
The wire burndown means the feed speed is to slow... the distance to the work needs to be about 4-6mm and the wire should be used up at the same speed it comes out of the tip, it almost buzzes at that "sweet spot", work in a zzzzig zzzzzag accross the weld or in a cccccc motion.
Just another hint if the tip is clogging up with lots of slag and waste splatters give the nozzle a light spray with some cooking spray taken from the kitchen, works well and make the shed smell like a BBQ which goes well with that other building fliud![]() ... seriously !!!!
... seriously !!!!
Clem , I was shown somthing the other day that I was not aware of with my mig. The wheel below the tension wheel has two groves in it for diferent wire thickness. I had mine set on the wrong one and the wire did not feed proply Hope this helps
Cheers
AUS230
Clem.
Yep, practice practice practice!
I have been fiddling around with welders since I was about 14 (my father owned a metalwork/blacksmith/fab shop) but I don't consider myself an expert welder. I just don't do it enough, plus I work in an office these days, they don't let me weld the computers [}:)]
Some pointy nosed side cutters are your friend when welding. Mine sometimes melts back (rarely as I am used to how it feeds these days - mine does not allow feed adjustment) and I just use the side cutters to grasp the tips of wire left and pull it out a little and keep welding.
Aus230 - yeah, noticed mine was the same when i first changed the wire. Two different grooves with tighness adjustment. Use the wrong groove and it will constantly slip and play up. I actually modifed my feed spring to provide a tighter grip on the wire - no more problems.
Brett
On some welders the 2 grooves are for different sizes or for different types of wires. One of my Migs has both a V and U groove one is for gassless wire the other for solid wire used with gas (I forget which is for what).
The reason I use .9mm wire rather than .8mm is infact to give a bit more grip on the roller .... and its a fraction cheaper per roll, less wire in length but same weight on the roll.
But yes.. practice practice practice !!!
I did a quote once on a welding job and they said why did I charge that for just welding? My comment was "Its a fair price for the job and Can you do it?" ....So I tore up the quote and walked away and to this day that gate is still bent and with broken hinges.
Reminds me of the one about the panelbeater who straightened out a dent with one hammer blow and when questioned on the price of the job said
Ten percent is for the hammer blow and 90 percent is for the knowledge of how hard to hit it and where and with what
Cheers Hiko
Yes, the tension wheel had the correct size groove. I had the tension way too tight and it was deforming the wire slighty with a rough surface which would tend to create lots of friction in the tube and at the nozzle. Also keeping the feed line straight as possible helps a lot! My biggest problem was vision. The lense in the helmet I have is only good out in bright sunlight. Then I got lots of reflection from the sunlight coming in the back of the helmet. I will get another lense. It has been suggested I should get an auto-darkening helmet. I have heard they are excelent.
Sounds like a good idea to me.
I've found when welding in the shed I prefer a flip down (because it's clear until you flip the front lens down), if outside I use the auto-darkening (which prior to striking the arc is like dark sunglasses and be hard to see detail in low light situations)
My choice light weight hand held mask with the lens changed to a gold film rather than green, it then shows the weld in natural color and easy to see through.
Finally got the welder sorted. The drag on the wire was caused by the spool getting jambed up. Have been practicing welding up a frame for a glass top table out of some 25 square tube I had lying about the property. Have had success with some nice joints, and plenty of ugly ones. Just a matter of grinding it off and doing it again, and again, and again, till I am happy with the result. Thanks for all the constructive comments and tips.
My next post I will show my welded frame!
Had one oops moment. A rag I was using to wipe things down with was lying on the bench about half a metre away from where I was working. When I lifted my helmet after doing a weld the rag had burst into flames! I am more carefull now.
Remember "One flash and your Ash"
For grinding off try using flap wheels in your angle grinder (a wonderful invention)