Weather | Buy&Sell | Forums |  |
Weather | Buy & Sell | Gallery | Forums | |
Its been 1 week since my last wheel, and I thought I'd beaten my addiction, but it It wasnt to be on.Sunday the compulsive constructive disorder kicked in, and I started the next experiment.
The problem we have had in the heat is that the all glass rims would split along the rims under heat and pressure. Along comes Vic Bermingham and slips in his mig welded rims thus solving that little issue. but the wheels are heavy and if your not careful you could end up with a stonking heavy wheel.
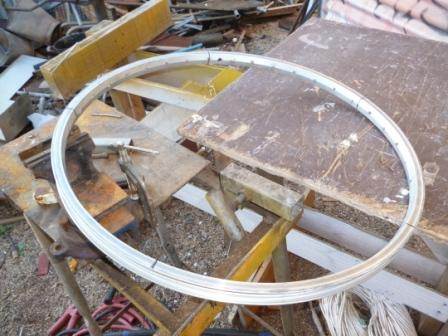
A light 26"x75mm wheel from a single 26x1.75 alloy rim![]()
![]()
![]() without tig welding( for those who canny weld)could really cut back the weight but retain the rim edge strength and that beaded edge to retain the light bike tyres.
without tig welding( for those who canny weld)could really cut back the weight but retain the rim edge strength and that beaded edge to retain the light bike tyres.
The plan is a 5 spoke wheel with 5 ally spacers riveted and 5 glass spokes holding the 2 halves of the rim apart.
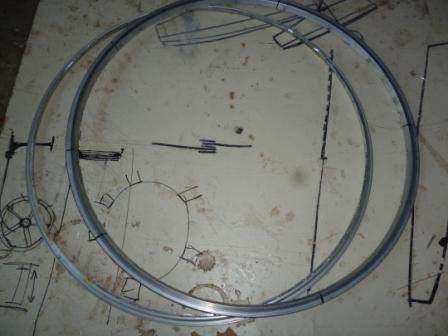
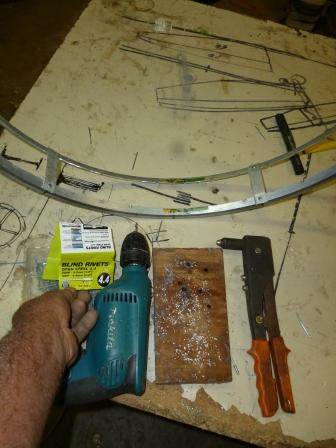
I ve started by marking out the 5 spoke locations at 72 degrees apart.
This will allow me to match the rims back up again when riveting
I would have prefered to use a 32 or 38mm rim but they are not that common,and the 1.75(25mm) are really common.
I then sliced the rim down the middle with a 1mm ultra thin cutting disc.I used an INOX type for stainless steel as they dont bog up with ally when cutting.
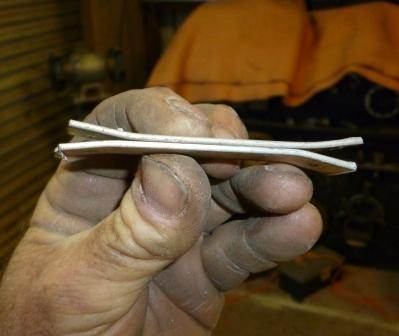
The spacer strips are 15mmx1.5mm aluminium, 75mm long.
Ive put a slight bend in each end to allow for the shape of the rim.
And no its not the beginning of some metallic muppet![]()
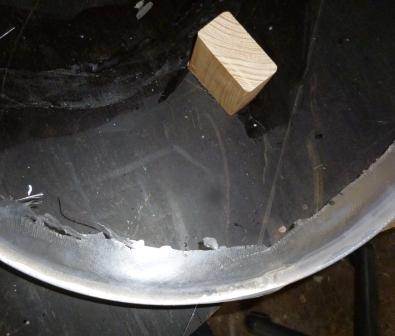
Rather than trying to put the fragile awkward rim into a drill stand I simply used a electric hand drill on a wooden block. It was simpler than I expected. This is where all the black marks were a blessing. Rivets were little 1/8 steel rivets.The rivets went from the inside to the outside,so they would sit flat once the glassing is done I will also hammer them flat to keep them away from the tubes
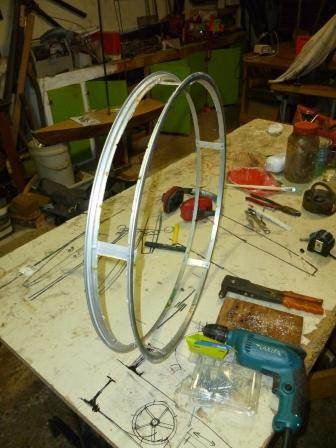
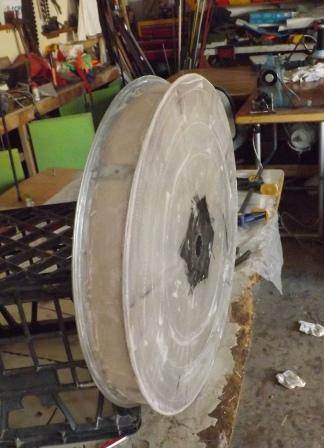
heres the result of 1 hrs effort. this presently weighs in at 440gms![]()
![]() . my 3 rim tig welded rims come in a 1200gms at this stage
. my 3 rim tig welded rims come in a 1200gms at this stage![]()
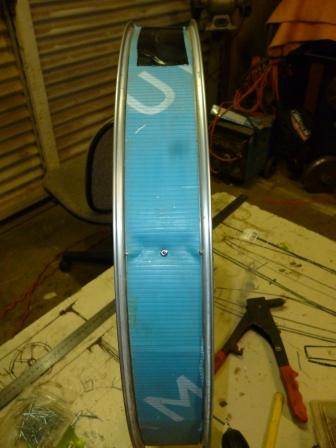
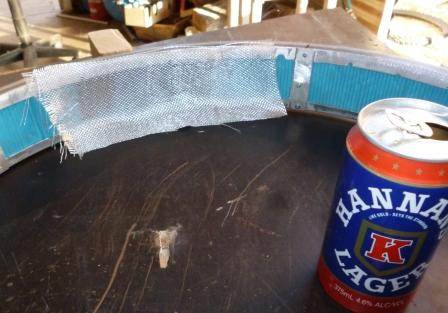
now i have a rim , the next stageis to put a spacer into the gap that I want to glass. Ive cut a strip of plastic coreflut from a large realestate sign that seemed lonely on the side of the road. Ive seen the same light stuff in the skips at trucking companies as they use it as packing.
the strip is 55mm wide and 1800mm long and is pressed into the outer face of the rim ,pulled tight and taped into place.
Ive used a peice of my beloved formply , waxed and PVA'd as a base to glass on. the wooden blocks were carefully cut to ensure they are at 90 degrees to the base, then simply glued and nailed down . theoretically this should give a correctly aligned wheel
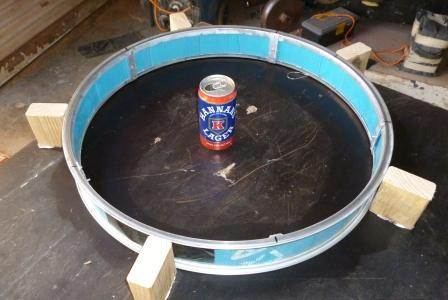
Im using strips of 100mm tape, weight is 8oz. 75mm will be glassed to the rim and 25mm allowed to lay flat on the base board, creating a wider glueing surface later in the wheel build.
next ive roughed up the ally surface with a wire brush ready to lay glass/resin.
Ive mixed 200gms of resin, 50 will be mixed into a cotton flock paste and the 150 willl be for glassing the cloth on. the CF paste is thick , but still paintable with a brush and added to the ally surface roughly
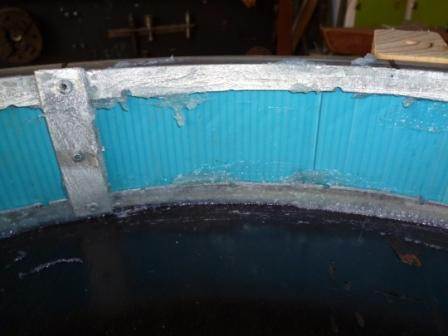
next the glass resin is added , there was exactly eneough resin for the job,.
note that the extra 25mm of cloth that will form the lip can be seen on the board. because the board surface is waxed and PVA'd it will lift off nicely when cured
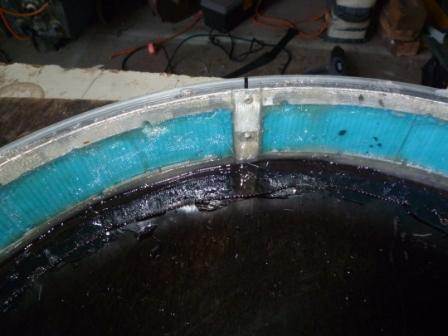
just like this![]()
I scored some good gear at the tip t other day. One piece was the 5 stared castor dolly off a secretarial chair. After scabbing the castors i was left with a very strong 5 spoker which i would say could fit landy's project with a bit of out of the square thinking.....possibilitys ![]()
Thats how this forum works, one persons dribble is anothers bile, so to speak.
I am not ready to say what i am doing with the supert duper pram i retrieved
from the recyclers heap t other day. Except they are intricately built and contain
almost everything one needs for a super smart LY..............![]()
![]()
![]()
well I finally got on with finishing the single rim fat project.
everything seemed to go together just fine.This time i used some strips of carbon in the hub layup, even though the holeyspoker really didnt fail too badly in that area. I used a slightly thinner cotton flock blend this time for the glueing as the dead wheel showed it to grip better than the stiffer mix.
the premade glass extension on the rim that you can see in the last photo did its job well resulting in a 30mm wide glueing area on the rim instead of the previous 10mm
the wheel came out round and fairly well balanced, AND I finally cracked the 3000gm barrier with a wheel weighing in at 2920gms![]() .I have to be happy with this given the tyre and tube weighs in at 1995gms
.I have to be happy with this given the tyre and tube weighs in at 1995gms![]()
Looking good Paul. I'm looking forward to seeing if the split rim can take the running and air pressure. I think it will be ok.
Is that all up weight (Inc Tyre and tube) under 3kg? That is very good
no such luck with the weight stu, the rim is 2920gms,tyre and tube 1990gms
I fitted the tyre todayand huffed it up to 50psi. normally a wheel wil make a few noises as it settles in but this one just sat there and took it all.
I cannnot see or feel any flexing on the glass between the rims either.
It didnt need any rim balancing at all which will mean smoother running.
chook did some speed testing with the wheels I made for him , which were rather fascinating, perhaps he could post them here ![]() . the wheel looks rather see-through as I havent painted it so I can see any "changes"
. the wheel looks rather see-through as I havent painted it so I can see any "changes"
I'm forgetting this is a 26" wheel. That's pretty good weight considering how robust is seems to be. What tyres are you using?
Yes sorry Landyacht, I had forgotten about the results I got.![]()
I just wanted the peace of mind that these wheels will take high speeds, cause as everyone knows I'm not a risk taking kind of fellow.![]()
I mounted the 26" flat sided rim onto an arm with a 20mm stub axle and put the whole lot into my 6” bench vice and really swung on it to clamp everything up super tight.
For the revolutions per minute, I used the optical tachometer I have for reading the main rotor speed of my radio controlled helicopters.
So a bit of reflective tape was attached to the shoulder of the rim for the RPM sensor to pick up.
I used a polishing mop (like a very coarse pot scourer on a mandrel) in my air die grinder, to spin the wheel up to speed and just read off the RPM.
The 26" wheel had a strange sounding harmonic as it passed through 630 rpm and then settled down again with very little vibration till it topped out at 1165 rpm. This is as fast as I could get it to rotate as if I applied more pressure to increase the friction on the tyre it just slowed it down and the grinder had its tongue hanging out with no more power to be had.
When I worked it out that's 142 Kmh and it took 52 minutes to come to a complete stop.
I was very impressed.
I spun the "20 x 3" Fatti-o" wheel, (That I used on the front of the kite buggy) when I got home from Lake Lefroy and it was very lumpy for a start. The tyre wasn't seated evenly around the rim and had a high spot that I corrected by deflating it and slipping the tyre around the rim until it was even. It took 3 goes, as the sidewalls of this tyre are very soft and when it was inflated it crept out of position each time.
I gave it the spin test and this tyre was a whole new ball game. Even at 40 psi it grew in height by about 6mm at the tread centre and the “snake pattern” indentation of the tread on a pretty smooth tyre pumped an amazing amount of air.
Due to its smaller diameter I couldn't get it over 118 kmh and it stopped rotating in just over 18 minutes. A big difference and slowing due to the air disturbance rather than it's smaller 550mm diameter.
That's as far as I've got testing them.![]()
I have now shifted the front wheel back 135mm on the kite buggy, which has increases the load on the front tyre by 680 grams compared to the before weight. So will be interesting to weigh it with me in it after the modification to see the increase on the front end.
Thanks for all your help Paul.![]()
![]()
![]()
the wheels got a great run tis weekend, they just worked fine, , temps were around 35deg celcius, so temp doesnt seem to be a worry,
I dont think I would change anything on the next wheel