Hi,
Anyone got any ideas on how to repair this, which is pretty much all the way around the boat. Its not leaking.
Would I just grind out all the loose stuff, then epoxy in long, thin strips of woven matting, sand, then flowcoat over it?
Repair will be done on the mooring.
There is a timber rub rail, just below the toe rail, so I wasn't thinking about adding any further timber to cover the hull/deck joint
cheers
That is what I would do, though I might be tempted to stick with polyester resin for compatibility and use several ribbons of glass mat. Just like a surfboard rail, brushing the resin will stick the ribbon over the joint. I would experiment first to make sure your mat is a low enough weight. Very thick mat is not flexible enough for this type of application. So a few layers of lighter ribbons will stronger and easier.
Anyway will be interesting to hear what other think.
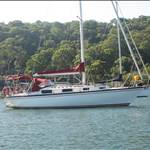
Yes GRP. Top Hat 25.
Thanks Stormy....good point with the Polyester resin, and the light weight mat (CSM chopped strand mat is what you need with polyester, isn't it?)
cheers
Sad to say but I reckon that whatever you use to bog that up will end up cracking because of the differing movement of the hull and deck.
I think you should consider raking out the joint to a constant width and then fill with a good quality flexible jointing compound like "T-REX", perhaps with a timber strip covering to dress it up. Or not as you wish.
Cheers Bob
If you use epoxy remember you can gel coat later ( that's the old theory) I have not tried it.
So think about what you want as far as color goes when its finished color match might be harder
Good luck and enjoy ![]()
I would just grind out a groove and fill with Fibremax. Fibremax has fibreglass fibres in it and sticks well and is waterproof.
If it is not leaking I would try doing 30cm with whatever you decide on and see how it looks after a month before committing to the whole job. I would also seek the advice of a good shipwright.
I would use epoxy not polyester as epoxy sticks to just about everything and polyester is really only good sticking to itself. Also epoxy is far more flexible and actually bonds to timber where as polyester sticks to timber, for a while, if you're lucky!!
I know you said no more timber but the easiest way IMHO would be to grind out the current cracked stuff, fill with epoxy mixed with glue powder then glue on (with the same epoxy mix) on a timber 'U" channel all around the boat. or maybe a 'L' shape that rolls over the top of the rail.

Sorry about dragging up an old post again, thanks for the replies.
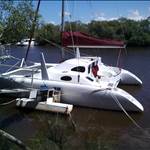
Im over half way through this repair.
Trying to put in thin strips of cloth was a failure, most likely the cloth I had was too thick leaving air bubbles behind it, so I pulled the cloth out before it set.
As this is purely a cosmetic repair (the strength for the hull deck joint is in the tab on the inside), I took onboard the comments about this is an area that will flex constantly, so I used Bote-Cote epoxy mixed with their easy-sanding compound, which is supposed to be the most flexible of the epoxy resins.
I have another question for the Brains Trust.
Once I have the repair filled & faired im looking to paint it & the light blue area above the timber rubbing strake. Have thought maybe Norglass Weatherfast Pricoat primer, followed by Norglass Weatherfast enamel, am I on the right track...? or should I be looking at the 2 part primer & & 2 part Northane polyurethane paint as im not sure what paint the light blue stuff is ?
cheers
Looks like you've done a nice job there Blue Moon. My opinion is that you've gone to all this trouble to do such a great job don't skimp on the paint. Use an epoxy hi build primer then the 2 pack system. The high build will give a good bond and an easy sand and the 2 pack has the best chance of bonding to the existing topcoat.
Select to expand quoteBlueMoon said..
Sorry about dragging up an old post again, thanks for the replies.
Im over half way through this repair.
Trying to put in thin strips of cloth was a failure, most likely the cloth I had was too thick leaving air bubbles behind it, so I pulled the cloth out before it set.
As this is purely a cosmetic repair (the strength for the hull deck joint is in the tab on the inside), I took onboard the comments about this is an area that will flex constantly, so I used Bote-Cote epoxy mixed with their easy-sanding compound, which is supposed to be the most flexible of the epoxy resins.
I have another question for the Brains Trust.
Once I have the repair filled & faired im looking to paint it & the light blue area above the timber rubbing strake. Have thought maybe Norglass Weatherfast Pricoat primer, followed by Norglass Weatherfast enamel, am I on the right track...? or should I be looking at the 2 part primer & & 2 part Northane polyurethane paint as im not sure what paint the light blue stuff is ?
cheers
It would be a good idea if you covered the filled join with a 50mm wide tape , a little extra work admittedly but would fix it for good ,make sure you have a nice round edge on the deck, sorry not familiar with Norglass products. A 75mmwide belting would save painting the hull and you could put non skid on the top.
Cheers
Al
Like the way you have cut off that vertical lip that was there, it was surely harsh on the feet.
I'd make sure that you full up the gap with a very thin "whatever" that you are going to use.
Just to make sure no water pools below the top edge seal you are about to do.
Just remember that deck to hull join is holding the Top Hat together!!! ![]()
if you intend to do any racing ? My bad memory is suggesting you may need a toe rail to comply with the blue book ? someone else may be able to confirm or throw out that statement ?
in the mean time ill try looking it up ....
I can now see that my last photo, before I started with the filler is a very poor photo....it looks like there is no lip(like a mini-bulwark for want of a better name), there is still a lip but I have tried to round it off a little bit so its not so harsh on peoples feet when they try to board from the side, rather than from the transom.
I can understand why there needs to be a lip/toe rail/bulwark, a critical feature on any yacht if one needs to go forward while on a heel.
cheers
yeah pretty sure its in the blue book. this is cut and paste from an extract from somewhere on the www .
<div data-canvas-width="42.11759999999999">3.14:
<div data-canvas-width="119.91279999999995">Toe Rail or Foot
<div>-
<div data-canvas-width="42.54079999999999">stop:
<div data-canvas-width="270.40639999999996">National Equipment Auditor Manual
<div data-canvas-width="255.6864000000001">Yachting Australia NEAs V1.4 2013
<div>7
<div data-canvas-width="12.558399999999999">|
<div data-canvas-width="51.096799999999995">P a g e
<div data-canvas-width="756.8656000000003">25mm toe rail from abreast the mast around the foredeck. 20mm for boats constructed before 1981.
Id make a mix of bote cote epoxy and either or both high strength filler and to finish off sanding filler. once the void is filled the choice is yours if its already a strong join
When you mix either powder with the epoxy you use lots of powder to the amount of epoxy and you can get a really thick mix like crunch peanut butter
http://www.marinetimbers.com.au/sc/110/epoxy_resins_and_paints
Looks like you have already done that.
Id be a bit like dialdan and add a 50mm fiber glass strip to finish off with epoxy
Then prime and paint with two pack
Paint shop where I work the boss there said use international so did Andy

Got Bluemoon his 2 part Northane polyurethane paint from WW in Sydney yesterday.
Raining here today so think he'll be into it tomorrow! ![]()
![]()

I don't mind admitting, I completely underestimated the extent & time (60 or 70 hours at least so far) required to effect this repair!
Obviously it doesn't help doing it on the mooring in a strong tidal flow estuary, having to hold on in the dinghy with one hand & work with the other hand is slow going (but strangely still enjoyable).
Seems one thing leads to another, always an extra epoxy fill is needed or an extra sand etc.
Thanks fellas, picked up the 2pack undercoat & topcoat (Norglass).
Since above progress pic, have sanded all the light blue paint, down to the original darker blue gelcoat & the dark blue from the timber, filled and sanded some more on the toe rail lip, & finally got the first undercoat on today. Wow the 2pack paints are really difficult to use, it mixed up nicely....but soon as I touched the brush onto the surface on the first brush stroke, I know it would a bugger to do. Haven't used 2pack paints before.
Picked up some brushing thinners, so hopefully the next coats should be easier.
cheers
For those who are interested what the "blue Book" says about toe rails .....
3.17Toe Rail or Foot - StopMo0,1,2,33.17.1A toe rail of minimum height 25 mm (1 in) shall be permanently installed around the foredeck from abreast the mast, except in way of fittings and not further inboard from the edge of the working deck than one third of the local half-beam.Mo0,1,2,3
3.17.2The following variations shall apply:-Mo0,1,2,3 TABLE 10Mo0,1,2,3 anybefore January 1981a toe rail minimum height of 20 mm (3/4 in) is acceptable.anybefore January 1994an additional lifeline of minimum height 25 mm (1 in) and maximum height 50 mm (2 in) is acceptable in lieu of a toe rail (but shall not count as an intermediate lifeline).anyJanuary 1994 and afterthe toe rail shall be fitted as close as practicable to the vertical axis of stanchion bases but not further inboard than 1/3 the local half-beam.
Knew I had it somewhere as my toe rails are cut back flush from just aft of the chainplates ..... why, just a shedload more comfortable for the "rail weight" .... and looks "Gucci" too