If Select to expand quoteHG02 said..
Filled in and sanded back to make ready for two pack after that adding a new door hinge and also redoing the sound proofing. I still have to fill in the old engine loom cut out top left hand side
If it was me I would finish that with marine ribbed carpet that will help with the soundproofing and also look really neat!
Ill think about that south ace![]() would be safer to no slipping on the carpet
would be safer to no slipping on the carpet
another job is removing the cabin side carpet and the roof carpet as well will have white cabin sides with possibly a very lightly stained timber roof
plus new opening port lights and finish every thing off in there and I'm done inside should be xmas by then
You can kind of see the finish, behind my companion way steps? That carpet is very easy to use and can hide just about any crap surface! I use sharp sissors to cut.....and the hot melt glue gun to stick. It's $50 per lineal meter about 2220mm rolls cheaper than paints!

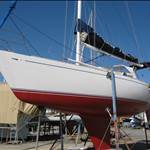
Your boat would be looking something like this now HG02? I just found this pic i never posted it before, lucky you cant see all the empty beer bottles! Haha

South ace
I think Ill do the carpet I have some of this free and it matches my cushions
 , Went to spotlight for material could not really find what I wanted ended up with this added the curtain material and will buy one color scatter cushions
 can get the above marine carpet for free
I'm not much of a color coordinator I'm afraid
your spot on south ace crap every where and a lot of half done jobs at least my two sinks and stove will be here this week so I can make more mess ![]()
![]()
then while im finishing off all this Ill save some mega bucks and then buy these port lights
 <not this size but the same ones
the above with teak trims and fly screens and tinted glass
There will be lots of fiberglass dust when this gets done ![]()

Select to expand quoteHG02 said..
Filled in and sanded back to make ready for two pack after that adding a new door hinge and also redoing the sound proofing. I still have to fill in the old engine loom cut out top left hand side
A job I'm not looking forward to is this one cleaning and repairing any thing behind the engine and then replacing all the sound proofing . So if you don't here from me for a few weeks you will know I'm stuck behind the engine and cant get out![]()

Maybe I should just take engine out and do it properly check the engine mounts do any thing thats needed to the motor trans and then clean and paint out the bilge would be easier and a far better job
Ill get Mangrovefrog to sail by and use his boom as a engine crane ![]()
If you take your engine out you can get it looking like this before it goes back in!

These are what you really want.
This is the way to go for ports last a life time .
www.robinhoodmarinecenter.com/ports-bronze/ports-bronze/
These are the ones Ive been looking at
newfoundmetals.com/ was thinking about bronze but felt the original are stainless steel
Ill check them out thanks Bornfree ![]()
South Ace
Were I work we sell rolls of adhesive back aluminum foil comes in a 50 yard roll 12 inches wide I am buy a roll next pay ![]() I am going to apply that to the sound proofing I get . Id say Ill pull the motor out dammit
I am going to apply that to the sound proofing I get . Id say Ill pull the motor out dammit ![]()
Stove arrived sat it on the original walker stove /sink cabinet seem to just fit so Ill start building the the framing and top Im hoping to make the stove and sink recess so I can fit tops over then when not in use to make more room

spent the next couple of hours disassembling the stove and cleaning it

 Spongeblob was right the fiddle rail just needed a bit of elbow grease I have the rest soaking in vinegar Ill start on the rest of the fiddle rail tomorrow . One of the side panels has a little bit of damage probably trans port Ill use the a press at work to straighten it tomorrow then reassemble with out the burners so I can make the cabinet and work on them at home
I'm happy ![]()
Select to expand quotespongeblob said..
Happy for you HG, how bad is the damage ?![]()
All good the Gimbals pivot on one side must of got bumped in transit and it moved the stove side plate a little. Ill use the press at work its not much just a little . it wont mark it . Ill sandwich the side plate with some thing at work and the press will straighten it All good spongeBlob
How's the new job going Sponge blob? ![]()

Gave it a quick clean for now and a quick fiddle rail polish . I think I will get the stove top re enameled in Black, I don't like the color it is .
The Kero tank is in the cleaning tank stripping off the paint . I will pull it apart later after the cabinet is made and really clean and polish it
I left the burners out for now till the cabinet is made

I straighted the gimbals ( stove side plate) that was bent in transport
That stove top plate is stainless isn't it? I doubt any sort of enamel (baked or other) will stick to it.
It looks good to me.
I never used the burner plates on my stove when I had it. They are really only there to moderate the heat when cooking with thin bottomed pots/pans or aluminium ones so they don't melt or buckle.
When you get that stove right with good burners etc you will swear by it.
My tank was attached to the stove and when full would put a tilt on the stove. Mount the tank separately if you can and fit a schraeder valve (as on your car wheels) and then you can pressurize it with a bicycle pump. The pump that comes with the stove is not terribly efficient.
Did a few things tonight after work

Blasted the tank and fittings and the aluminum gimbal mounts
Had a lovely afternoon on The Port Hacking. Blew the cobwebs out of the Yanmar, hoisted the headsail then later the main. Joined in the Wednesday arvo race. Beat the lot of 'em (had to cut a few corners) but it was too good not to enjoy.

Select to expand quoteHG02 said..
Did a few things tonight after work.
Blasted the tank and fittings and the aluminum gimbal mounts
You blasted the tank!?!? Oh dear, that will make it hard to polish up again. ![]()
Before refitting it you better check the soldered joints and give the tank a pressure test.
I am not sure what pressure they would normally run at but I would imagine 20 to 30 psi would be about it.
With kero stoves you should only fill the tank 1/2 to 2/3. More than that and you will be pumping the tank pressure up every 5 mins until it comes down to that level.
it was painted before with included scratches it will be two packed thought about polishing but thought it might be to much of a hasel plus the tank solder joins weren't that pretty

I will check the whole system for leaks before its fitted to the boat. It didn't come with a fuel filter or on off tap which Ill have to buy thought about sourcing a local easy to obtain fuel filter as it runs around 20 PSI Ill see what I can find as far as a easy spin on filter rather than the original
Select to expand quoteLexmark said..
Are Kero the same as Metho stove ????
No they are not, as the latent energy of heat for metho is differnet to kero the jet sizes would not be compatible. While it is possible to modify the stoves to burn different fuels why would you bother? Fire is something not to be trifled with on a boat.
Select to expand quoteLexmark said..
Above may have been interesting, but has been disabled by owner !!!!
Its still on You Tube Lexmarks just the owner prefers you tube only
Select to expand quoteLexmark said..
Above may have been interesting, but has been disabled by owner !!!!
Right click in the image area and copy the video URL , open new window and paste the video URL .....watch video.
Select to expand quotewhiteout said..
Heading out to Scawfell Island for the weekend maybe Brampton too.


Dam Half you luck White Out ![]()
Would like to ask you about your cowl vents for ventilation. a Wondered do you have opening port lights as well heading that way in the future and want to make sure I have enough ventilation ![]()
 Did a rough fitting for the Isolator panel and cut battery cables to length ready to crimp the ends maybe tomorrow if I can source some crimp terminals . Also fitted the opposite side panel ready for MPPT charger and later the yacht navigation switch panel.