yes you can really put some pressure on the green stuff, it doesnt break so easy, and the epoxy wont stick , the bom says 20 to 30 hopefully a few PB'S ![]()
No worries Keef, i was just explaining how professional Board builders and repairs do it..


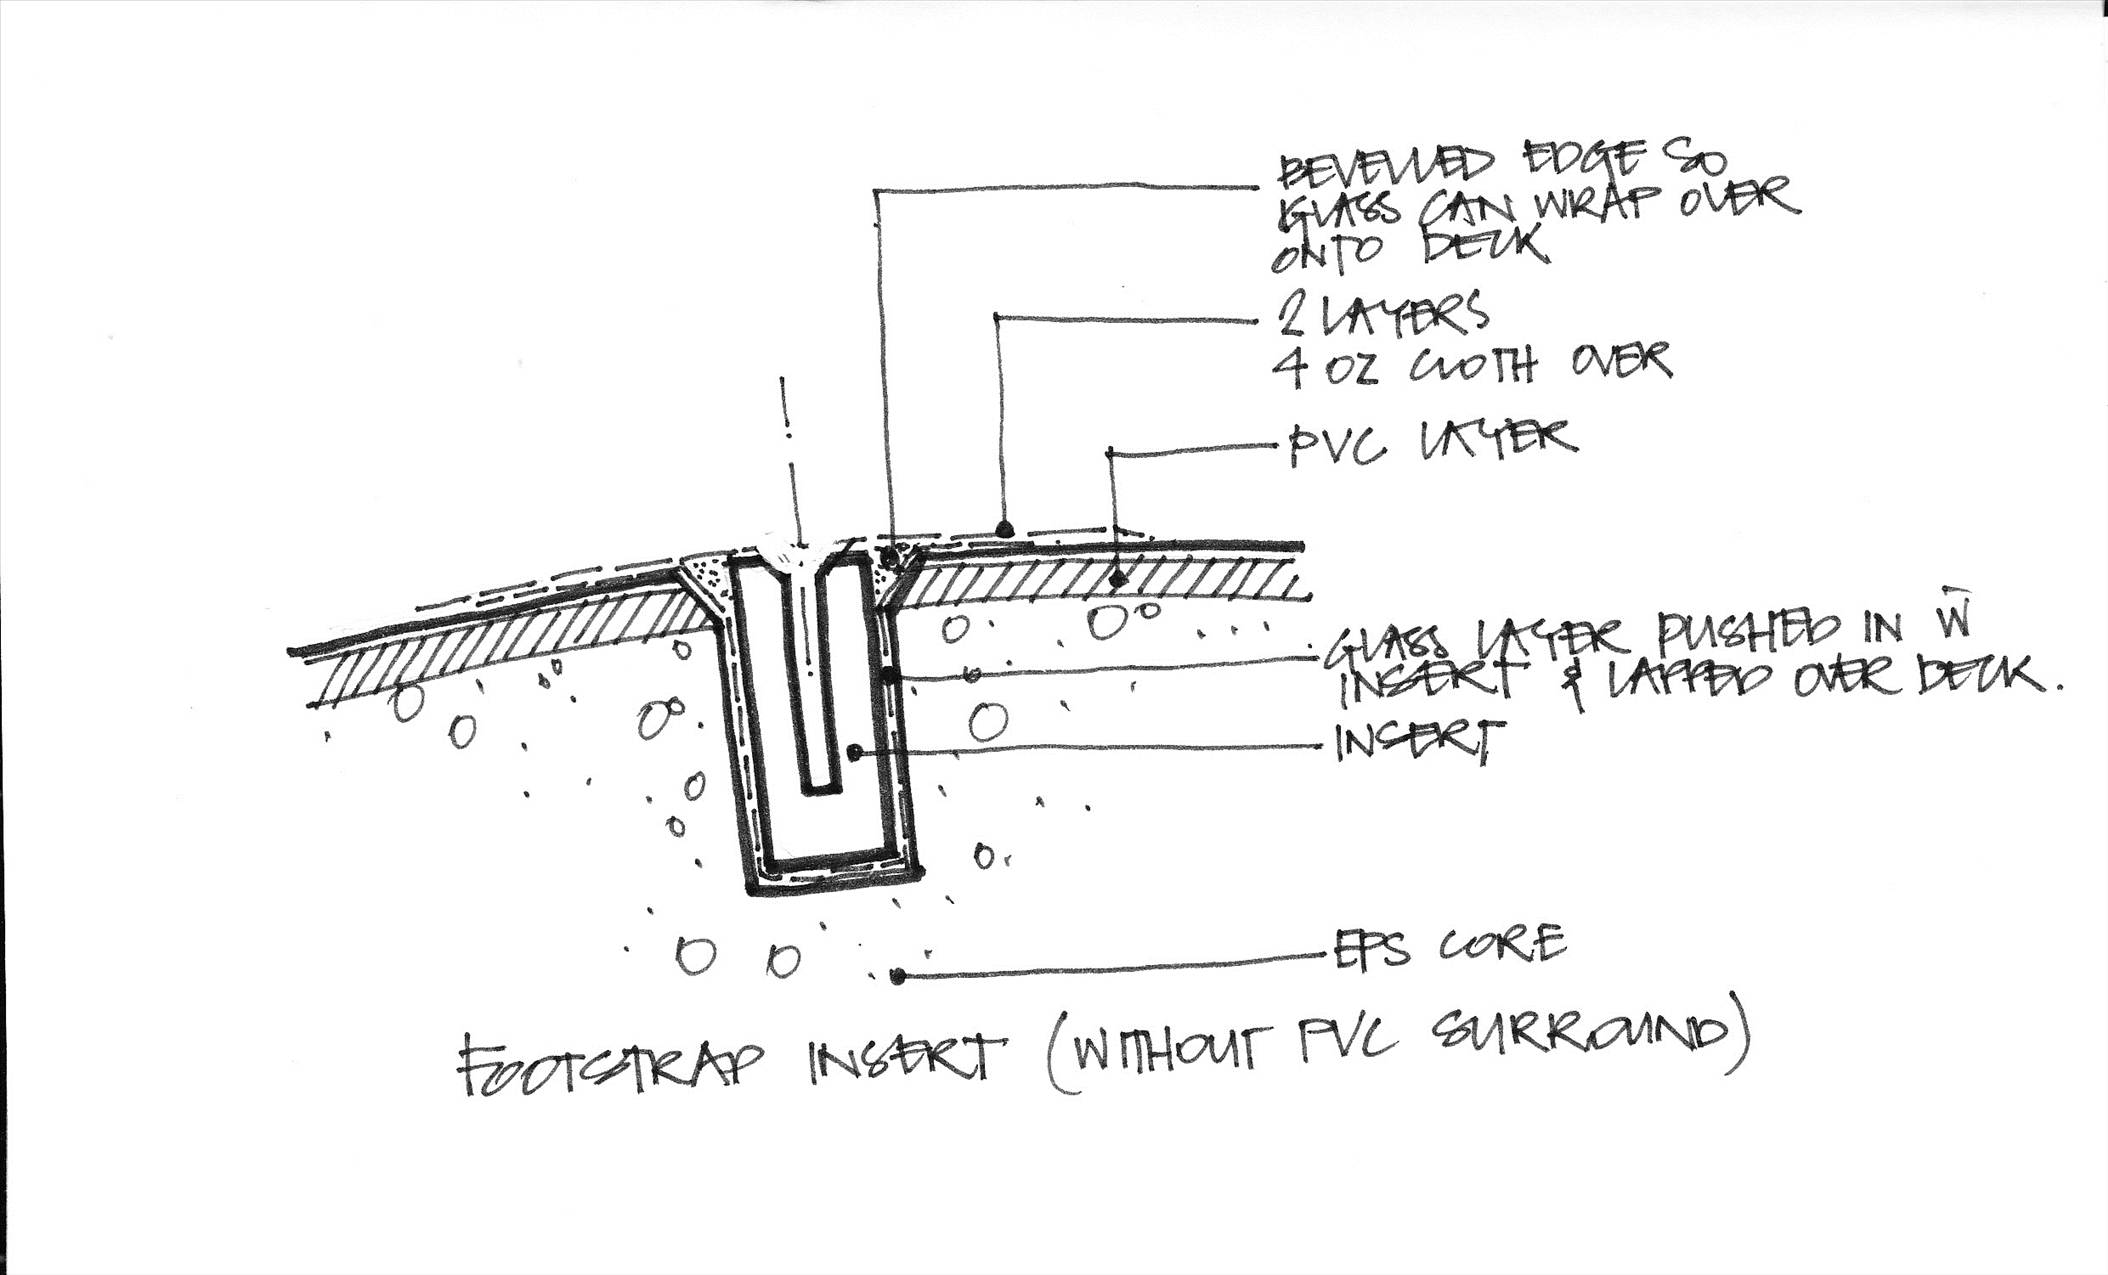
Okay I thought a quick sketch would explain how I think it can be done without PVC sandwich around insert. I'm proposing to bevel the PVC layer on edge of insert opening so I can fold recessed layer of glass onto deck as Kimba suggested and then layer over. Any comments still appreciated.
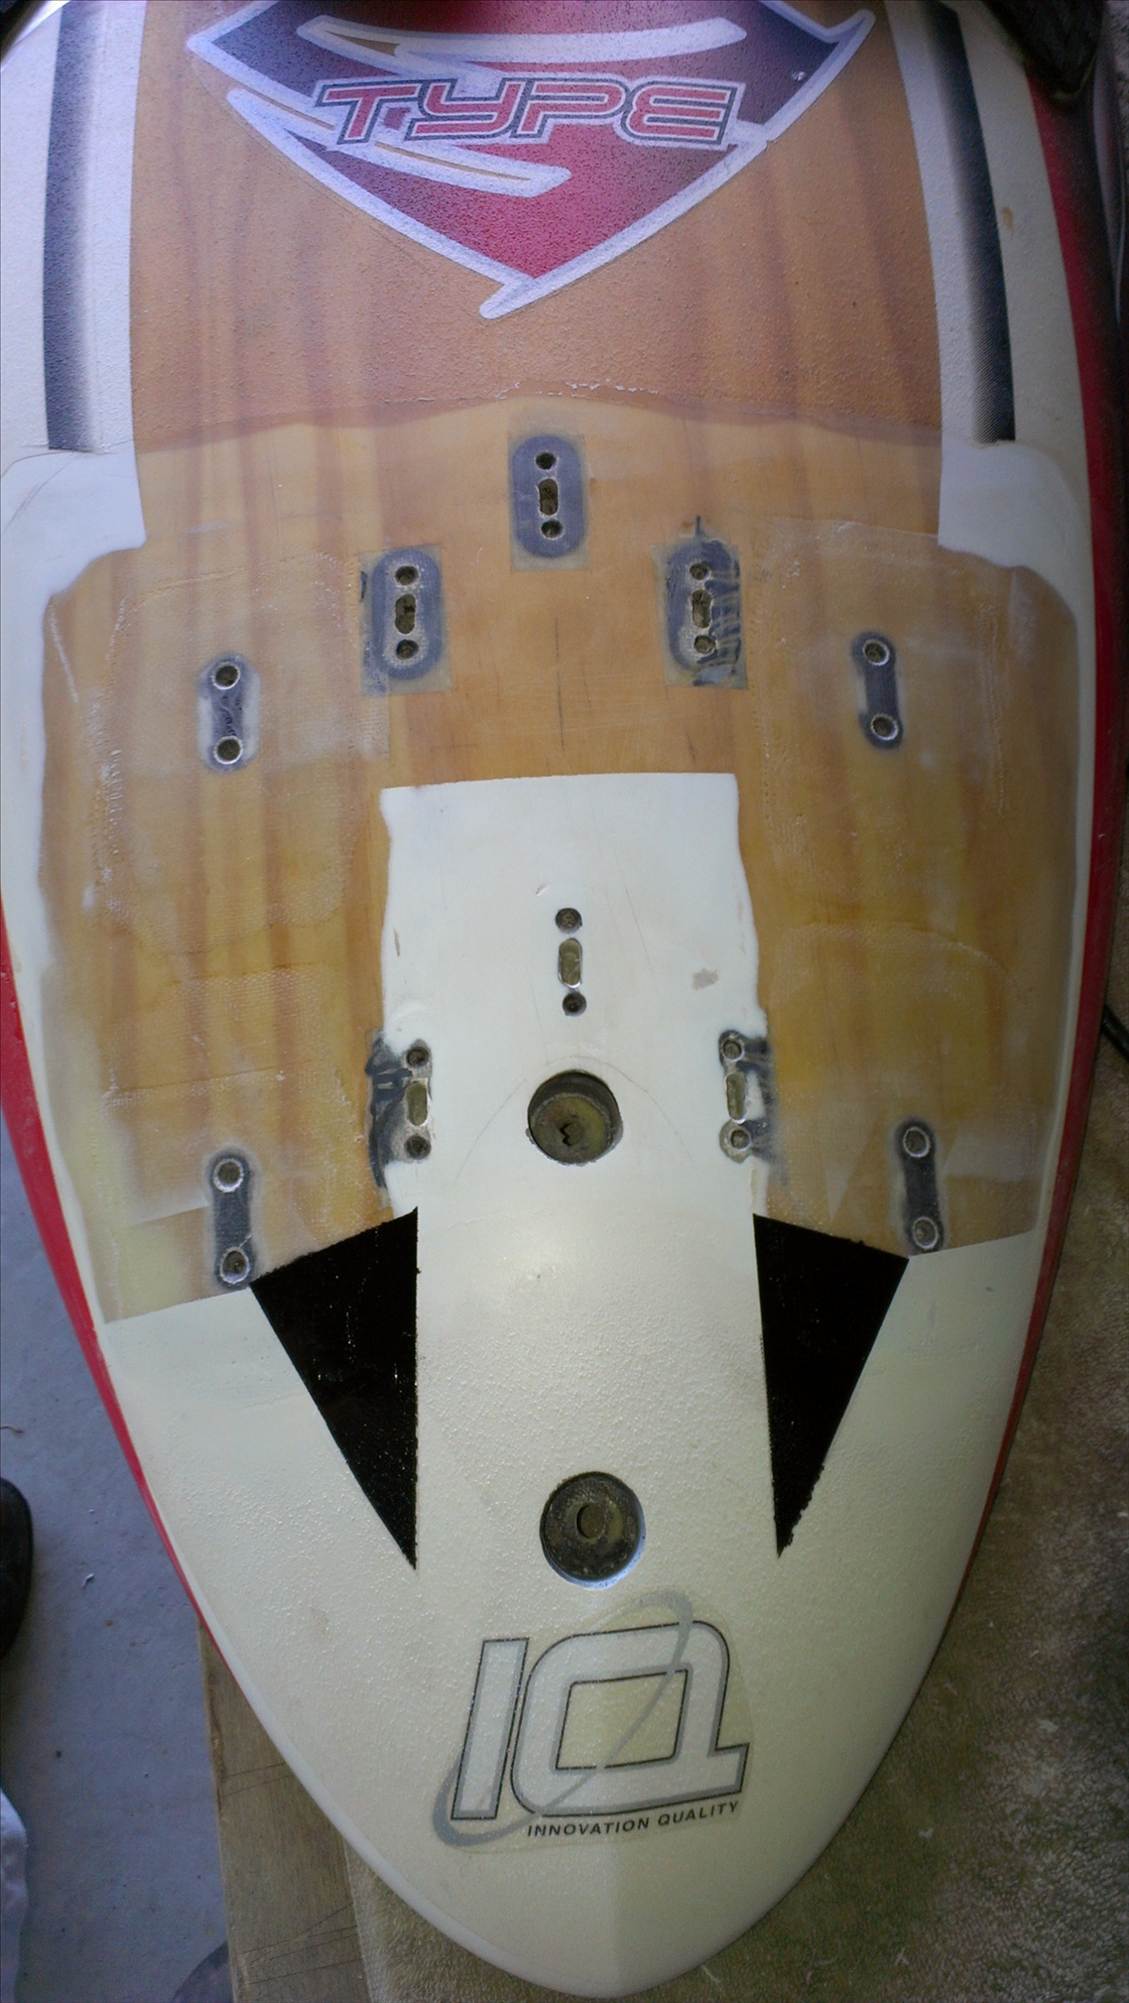
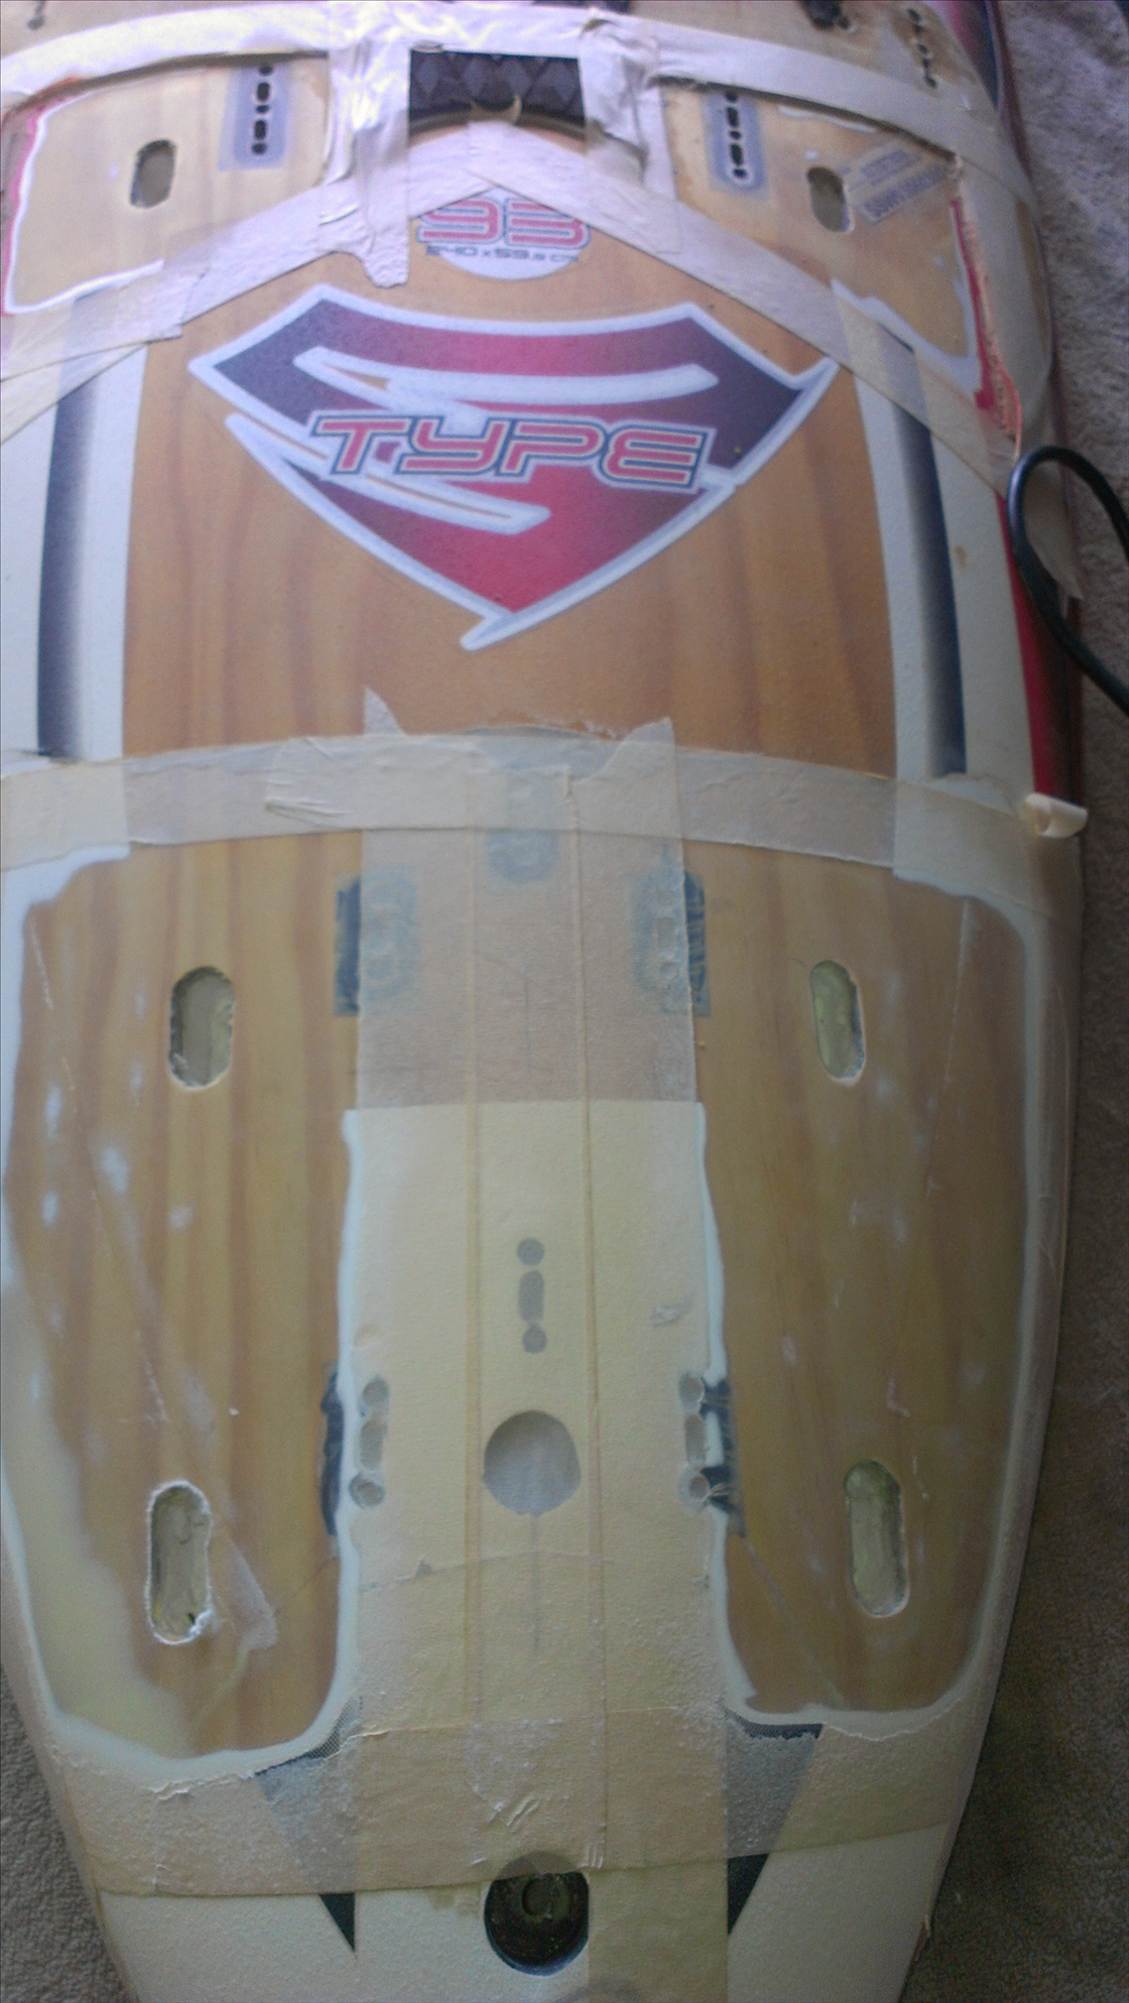
Made a start and everything going to plan. Plugs with 2 layers of 6oz cloth fit snuggly into rebates. As some existing plugs will be near new glass or even glassed over, can I fill the holes with candle wax to eliminate resin intrusion or do I just fill with shoe polish as Mark suggested. I plan to do it in two steps 1. set plugs in & just have small glass overlap onto deck and then 2. glass over the plugs with 3 layers. Comments appreciated - especially if anyone thinks I don't have enough surface area for overlay of plugs.
Looks good so far. What is the go with the front strap, are you using the existing outer insert?
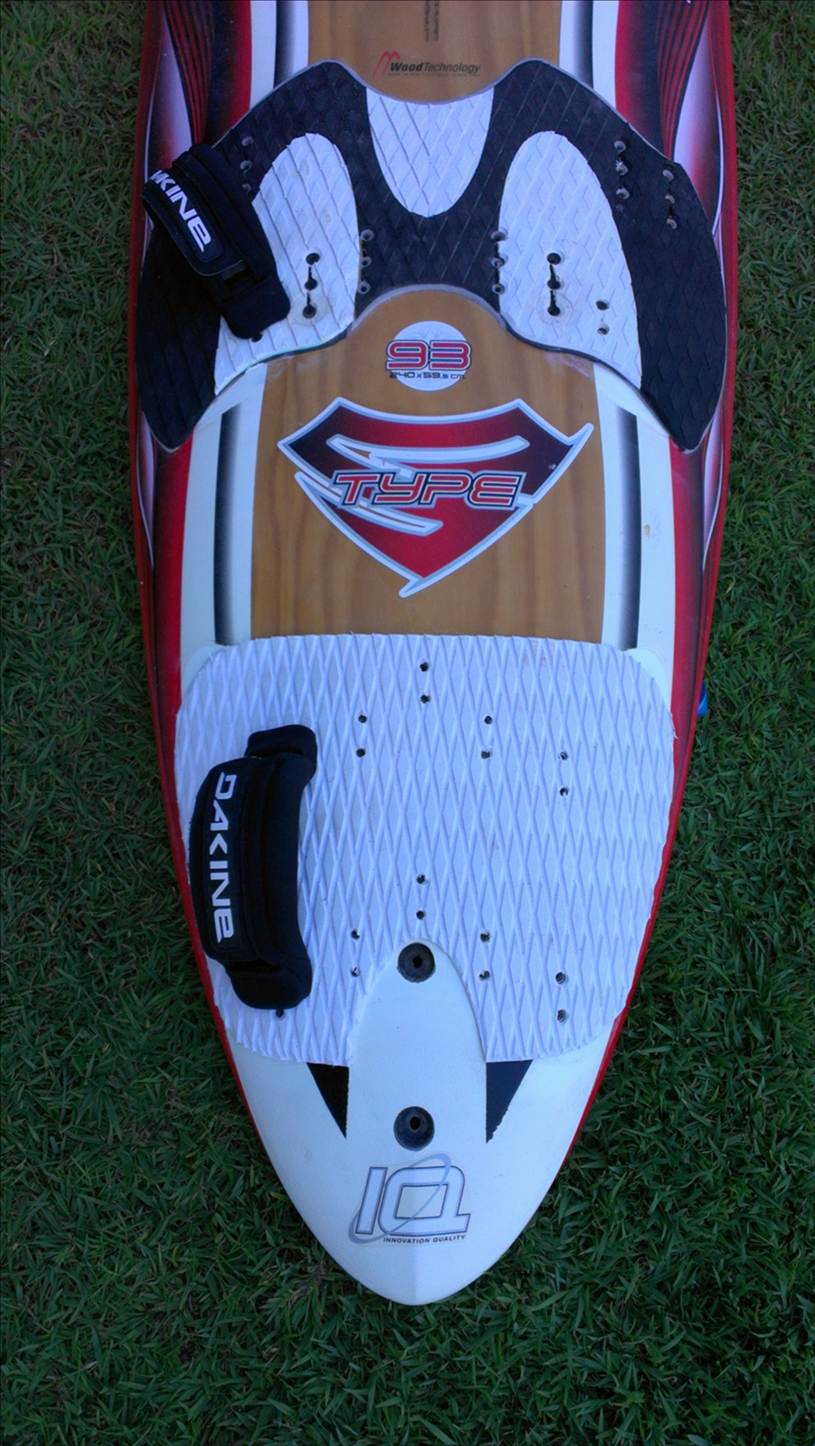
Just a few photos of finished product. Took it for a spin about 2 weeks ago and it felt really good although I have since added two outer plugs right at the front as front foot couldn't twist off at 45deg comfortably. Have thoroughly enjoyed doing the inserts although I'm a long way from being interetsed in building a whole board (just yet).
Going to take it out this arvo and see how it goes now I've added front plugs as well.