i have only used a vac on the outer laminate and i use a bleeder and a breather then the vac bag so its the same right
Not sure what you mean by bleeder, is that thin plastic with lots of very small holes????
If so I don't use it.
For the dcell I usually just use a breather on the opposite side, so it doesn't stick to the resin.
Only danger with this is excess resin can form sharp daggers in the bag, and hole it the next time you use it. I just have to check the bag carefully.
On the outside laminate I use peel ply and quilting wadding as a breather/soaker.
ok i understand now thanks for all of your addvice decrepit if i decide to do another board ill give you a nudge ive got enough stuff here to do 10 boards except for the blanks
ps if you dont have any satin weave get some, it will come in handy, its hard to sand so its tough and wraps around and into any tight corner without lifting and no air bubbles
Thanks Keef, I've been hearing satin weave a bit now, I'll have to check it out.
I've used "crows foot" and "herringbone", they both conform very well, but still won't wrap 90deg without lifting.
Dcrepit, I'm using 13kg/m3 block which Birdseyeveiw (Colin L.) had blown extra light for us (15 is a standard extra light) and h80 (80kg/m3) dcell for the sandwich. It's around the 70 ltr mark with everything pre-preged. The one before it is 85ltr @ 5.3kgs with pads, same layup but less carbon.
G'day Hoop (another builder who makes a sweet board), yeah, it's bullet proof and loving it, it's the one in my avatar![]() .
.
Nice work on the longboard Keef, I'd ride it given the chance![]() . I bag each board 4 times so one side at a time. I do use satin and twirl weave as well as yourself on the mast track, conforms better than any and sink my boxes into 40 mm thick dcell blocks. Nutting out track installs with Rider 5 we have not had any fail, he knows what he's doing.
. I bag each board 4 times so one side at a time. I do use satin and twirl weave as well as yourself on the mast track, conforms better than any and sink my boxes into 40 mm thick dcell blocks. Nutting out track installs with Rider 5 we have not had any fail, he knows what he's doing.
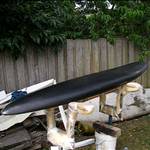
I also pre-bend the deck then remove it before laying down a 4oz bonding layer, here are some pix I prepared earlier![]() .....
.....

And fully sucked before weighting it down on the rocker bed to avoid twists or extra rocker......fly screen ideas pretty nifty Decrepit, I been twisting the end , bending it over and taping it around, quick and easy, dosen't leak.

I use the same resin as Decrepit which cures to 100% if heated to between 65>80 deg C. for two hours. Over time with fatigue the epoxys matrix breaks down and the foam squashes a little giving the board a softer feel, the resin can be rebaked but the foam stays as is. This was my point on the 'new board feel,' plus I like making my own . I like seeing what others have made so please show 'em if you got 'em.
Select to expand quoteI use the same resin as Decrepit which cures to 100% if heated to between 65>80 deg C. for two hours. Over time with fatigue the epoxys matrix breaks down and the foam squashes a little giving the board a softer feel, the resin can be rebaked but the foam stays as is..
how do you bake it other than wrapping it in black plastic and leaveing it in the sun, and tell me are the blanks a square block or do they have rocker,the only ones we could get were square blocks and i had to bend the nose rocker and use a preshaped carbon 8mmclegacellx80mm deep stringer, the blank was as stiff as a honeymooners pr-ck
if anyone out there is haveing trouble with pinholes in there filler coat i can give you a tip, have a look in my pics and check out other photos of that race board and check out how flat and how sharp those rails are (keef) 
My block was thick enough to keep me going for 8 years, there's been 9 boards taken from it already, and it still has at least 1 more in it, a mere 300mm rocker no worries!!!! But it's only 600mm wide so you'd have to add another 50mm somewhere.
i thought i said it was 650 wide from two 400's
you still havent told me how you bake your boards
Sorry, my blank is 600mm wide, you'd need to add another 50 to make your 650.
I thought you'd checked the link I posted earlier, shows quite clearly board, wrapped in black plastic, being baked in the sun.
Thought your question was aimed at Mr no-one
I once tried making an oven, but I had the thermometer at the bottom in the coldest place, ended up melting the core, have stuck with the sun since, but that can still get too hot on a hot day, OK this time of year thou.
And you haven't told us what you mean by "bleeder"
Select to expand quotedecrepit said...
Sorry, my blank is 600mm wide, you'd need to add another 50 to make your 650.[/quote![]() and youve made 9 boards useing a template for the rocker that block must have been at least 8ft high where did you store it
and youve made 9 boards useing a template for the rocker that block must have been at least 8ft high where did you store it
the bleeder is that peelply
Nup, you only need the rocker once, then you have a blank with a curve up one end, don't think any of my cores have been over 120mm, the early ones would have been more like 110mm.
Think it was about 1.5m tall.
"the blank was as stiff as a honeymooners pr-ck[":D]![]() with the same amount of rocker?
with the same amount of rocker?
The block was around 2400x1200x480 which is hot wired as Decrepit does . this will give me 6 to 8 blanks without having to bend them. I use the outside off cut as a rocker bed when bagging, just needs to be placed on a flat surface.
" But I haven't noticed my boards getting a "soft feel", is it very pronounced??? " Mainly with production and lightly glassed customs which have had a hard two or three seasons. Under the heels would be first then in front of the fin box and overall a little more flex. It's something that's not really noticed until riding a brand spanking new board that's a bit stiffer giving it a lively feel, but that's just what I find, anyone else?
For baking , if it's cold weather I'll use foam and cardboard sheets for an oven with a room heater and fan to circulate the hot air. If it's warmer the car will will get over 65C. on a hot day. In both cases it's baked before sanding the epoxy filler to prevent sink back later on, then once again after painting. I tried the black plastic method but found it hard to regulate the heat evenly .
Yours truly, The Humpty Dumpty Board Construction Company.
have you ever had the hotwire breaking , i use the thickest element wire from the electrical supplys, and if theres too much heat and too much load it will break,so tell he what do you guys use
Hey Keef,
Go slower! You want the wire to be making a nice 'pssh' sound as it cuts, and only light pressure. The wire should have a spring on it to keep it tensioned as the wire expands due to heat, and the temperature if you leave it in air should be a bit less than glowing red (very technical explanation I know). It's easiest to have two people on the bow, and mark out numbers on your templates every couple of cm. When cutting you call out the numbers to each other, this ensures that your wire is straight. You should be going fast enough that the foam doesn't melt away from the wire from radiant heat, and slow enough that the wire doesn't bow.
The most important thing with hot wires is to get the current right. The best way is to use a current-limited power supply but failing that you can adjust the length of wire (or add some more) so that the temperature is right.
I use Nickel-Chrome wire (from Jaycar here: http://www.jaycar.com.au/productView.asp?ID=WW4040&CATID=22&SUBCATID=616) and a beefy 12V power supply (current-limited to from memory between 2 and 4 amps). This gives me good results.
thanks nebbian for the addvise my hotwire is from an old B&W TV with a light dimmer to control the heat so im not sure what the amps are
I really hope that you're not using 240V, and if you are, that you've got a very good earth leakage system attached to it ![]()
Element wire isn't designed to have load on it, no wonder you're breaking wires!
Honestly the best system is NiChrome wire and a good power supply, easy, safe, reliable, good.
your rite 240V,a friend made it im not sure about the earth leakage system the light dimmer seems too work ok, i think the problem is as you said going to quick i havent used it in the last 15years and if i need to ill get some NICHROME wire
i probabley will make a board but i dont think ill need the hotwire
Nebbian, do you know anything about making an adjustable power supply for a hot wire? At the moment I'm using a battery charger which works okay but it cuts out for about 20seconds if it gets too hot. I've checked out a heap of stuff on the net but I dont like mucking around with electricity cause I know bugger all about it and dont want to cook myself.
Apparrently you can use the old style model train transformer but I havent been able to find one.
I used to use nichrome but now use stainless mono-strand trace wire from the tackle shop ( size #5 "HOLDFAST") and works great and at around $1.50 for a 3mtr pack I bought one of each size . The gauge wire depends on the current, if the amps are down use thicker wire. My variable power supply pumps out up to 16amps and up to 16volts but will also work quite well with a 5amp battery charger. The hot wire frame is a timber 'H' shape with cutting wire at the bottom and an occy strap for tension at the top. When the wire just starts to glow it's good to go![]() .
.
I can post some pics and info on the supply tonight if you like.
Yeah some pics would be good. I'm mainly interested in the adjustable power source. I've got a couple of bows that work well but I need to have more control over how hot it gets and stop it from cutting out.
thanks.
I've built a CNC foam cutter - it's not big enough for board blanks, but does RC plane wings perfectly with some insane precision (0.005mm in theory)..
I use an old electric-blanket transformer from the 60s to power my wire. It's still A/C but seems to have tonnes of current available (they used real copper, and decent gauge wire to make stuff back then). Like someone said before, I have an extra length of wire pinned under the bench with an alligator clip to vary the wire temp. Wire tension is built into my bow - a broom handle with a piece of piano wire sticking out on an angle on either end. The combination of the springiness in the wood, and the piano wire is plenty to allow for the expansion and contraction in the ni-chrome wire.
Stainless wire doesn't stretch with the heating, so you can tighten that sucker right up to avoid any wire sag as you're cutting, although it's only really necessary if you're using a really long wire, or there is some harmonic in the mechanism pulling the wire through. (like stepping in a CNC setup - caused ripples on my wings until I figured that one out!)
Technically, the wire should be cutting by 'radiance' and never actually touching the foam. The foam melts away as the wire gets close.
For best temp control you need to have as little wire outside the block as possible, or at the very least minimise any sideways movement of the wire, because the resistance of the wire changes with the heat of the wire, and you get messy cuts at the edges. The wire inside the block is insulated to an extent by the foam, while any wire left outside will be cooler because the air can circulate. Also be aware of the material used for the template because some materials act as a heat sink, and you end up with a cooler wire at the edges of the block, and bigger kerf (the melted bit) in the middle - especially if you're feeding it by hand..
If you're up for the challenge, you can build a 'chopper' circuit to control the current (not that hard), and hook up two car battery chargers in series to give you around 30V DC. VERY nice setup which will happily run a 2m Stainless wire, at feed rates up to 20mm/s.
Instead of using a 12v battery charger to heat the wire try using an old 12v car battery. It's pretty low tech, but it does work and it doesn't cut out 1 minute into the job. I use a fairly thin guage wire though.

Hey hoop,
1-Easy) Put a 12V battery in parallel with the output of your battery charger (like smithers suggested). This will take some of the load off the charger and hopefully stop it cutting out. An old car battery should work fine.
2-Hard) Build a chopper circuit (as 555 mentioned before) but this does call for some soldering and technical know-how, not really recommended if you're not that familiar with electrickery.
3-Expensive) Buy a unit like the one Mr. No-one posted above. The only ones I could find at Jaycar were over $200 so I'd go with his model.
Hey 555, what did you use to position the wire? How do you control it? Did you write the software yourself? Hats off to you, a CNC project isn't for the faint-hearted ![]()