Select to expand quoteJolene said..
The internal thread has tool chatter. Its common in stainless because of the way it sings when you machine it. Tool geometry and rigidity along with speed, feed and depth of cut plays a big part in avoiding chatter. Often it occurs more often whilst cutting an internal thread simply because the machinist is being too careful. The tool chatter leaves tiny little barbs on the thread and these really help to start galling.
For applications where you constantly are having to assemble and disassemble a thread or bolt, often where permissible you can help by using two different grades of stainless,, eg 304 nut and a 316 bolt
Hi Joene, the chatter is obvious on the inner threads but looks to be less on the outer threads which look to have the galling damage. As you said chatter can also increase the chances of galling and it looks like that has happened on the outer threads. You are correct in using dissimilar grades in reducing galling.
Select to expand quoteJode5 said..Jolene said..
The internal thread has tool chatter. Its common in stainless because of the way it sings when you machine it. Tool geometry and rigidity along with speed, feed and depth of cut plays a big part in avoiding chatter. Often it occurs more often whilst cutting an internal thread simply because the machinist is being too careful. The tool chatter leaves tiny little barbs on the thread and these really help to start galling.
For applications where you constantly are having to assemble and disassemble a thread or bolt, often where permissible you can help by using two different grades of stainless,, eg 304 nut and a 316 bolt
Hi Joene, the chatter is obvious on the inner threads but looks to be less on the outer threads which look to have the galling damage. As you said chatter can also increase the chances of galling and it looks like that has happened on the outer threads.
That's often what happens. The chatter marks with their work hardened little barb's start tearing into the other components matching surface, lifting metal and crudely depositing it back into the surface, greatly increasing friction and heat between the two parts. And then you get the galling of two smooth surface working together with little clearence , when subject to friction the two surfaces grab and pull metal from each other and gall up. Stainless steel can be thought of as being non porous unlike ferrous carbon metals. This sort of has the effect of not being able to obsorb lubricant and tiny particles that are the result of friction.
Thanks gents for the replies,
You learn something new every day! I hadn't heard of galling before, but that fits, it felt like you were undoing a cross threaded bolt.
We spent hours yesterday working threads with thread files, then with liberal amounts of molybdenum grease we'd screw the end cap back on till it started catching , gently work it to see if it was a single tight spot, then dropping it out and re-attacking the newly discovered part with a thread file and a small wire buff.
Put it all back together, find the next grabby point, do it again. I reckon we pulled it on and off a good 20 x times.
The tool chatter also explains perfectly the look and feel of the threads, they felt like the serrated edge of a boning knife.
Appreciate the advice gentlemen, I feel much happier knowing what I am dealing with, I like understanding what causes the issues.
I was going to use molybdenum grease when I re-assemble it, would this be your recommendation? Noting that it is a seal with no moving parts.
Happy shaggy!
Cheers,
SB
Edit: love the link Craig! Wifey dearest wants the towel back so she can wash it... I don't have the heart to tell her it is liberally covered in oil, degreaser, grease and (insert here favorite shed chemicals) . Maybe I should get a couple ![]()
Select to expand quoteshaggybaxter said..
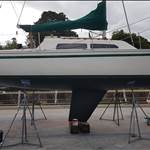
This morning was a trip up to Rvergate and success! we managed to get the ram out today.
The first stage was to drop the pin out that holds the ram to the keel. This necessitated removal of a small 5mm allen key bolt with a big flat washer either side of the keel head, and that gave you access to the pin itself. Look for the circlip on one side and then simply drift punch the pin out in the opposite direction. It came out straight away , all very simple and quick.
The second part was unbolting the ram from the keelbox, which was 4 nuts either side and drop off the big s/s plates. Preceded by a fair bit of work with knife blades cutting away the generous amount of silicon binding the plates on. One neat trick I really liked, at the top and bottom of both plates a small 5mm hole had been drilled and a nut welded on. By putting any 5mm bolt in and doing it up you pulled the plate off the keelbox to break the silicon bead. It certainly helped, but there was a LOT of silicon, hence the knives.
With that out of the way, all we had left was to 'slide' the ram out. And that turned out to be a mongrel. Some lube gunk on the keel/ram mating had picked up some dirt and rubbish, enough to stop the ram head from sliding out of the keel. You know one of those jobs when you don't have the purchase to pull against? The ram is cylindrical and felt like you were wrestling a muddy pig. It would move about 1" and then get caught on something in the keel and refuse to budge. Grrr...
After an hour or so of sweating and cursing, still no success. So we applied an old mechanics trick, soaked everything we could reach in Innox, downed tools and walked away from it for 10 mins.
Came back and sure enough, a few more struggles and curses then out she popped, no problems at all.![]()
So, tomorrow will be play "find the leak". We'll use compressed air to point us to the right spot, then get it up on the bench and start stripping it. It's heavier than I expected, it's a struggle to carry it by yourself.
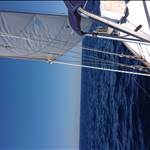
I'll try and post some pics, today was too much hydraulic oil and sweat for pics. I did manage to get a few pics on the trip down, ending with this one of a cruise ship playing the tide passing us under the Gateway bridge. not much wriggle room there!

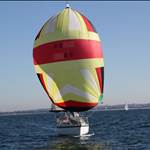
IOR hull form showing why they go to windward so sweetly. Davidson 34.
Looking comfortable with a nice lead to a hard charging T7, a Sydney 38 reaching in the 8-12 knots breeze.

Kinda hard to look all romantic with big rust streaks down the flanks, she looked a bit tired and ordinary. But little to no wake, that was good of them.
nice photos of invader and hasta shaggy we had just put new check stays and backstay on her that week they ended up winning
Select to expand quoteAzureF305 said..
Well.. I didn't do it today, I actually did it on Wednesday, but I still did it!!
I tinted my cabin windows!
The original acrylic has faded, but is still in ok condition, so....
Not a difficult job, only slightly messy (dripping soapy water), and I'm very happy with the results.
Stbd side not done

Port side done

Big difference in glare - more obvious from inside the cabin compared to the pics. Looks much better from the outside too. Nice and dark.
Left is tinted, right is not.
 Only a slight reduction in light transmission , but 99.5% of UV is blocked.
It's a bit hard to tell but I have spent 2 days doing 4 cabin windows out of the 8 , wouldn't be so bad if they where square! Had to buy a surgical knife to cut the off cut tint around the corners and will need to paint flat black on the inside around the window cut outs!


Looking really good so far Southace. Yep, a bit messy and fiddly, but it is worth it. Black in the cutouts will look great!
Two hours out of Manly and the rudder broke with me and two mates on board. Lashed it back together in the middle of Moreton Bay and limped back to Manly. It held up just long enough to get us back. Alerted the Coast Guard, but didn't need them. The photo was taken when we had safely tied up. The black flecks are the innards of the rudder that got ground out as the lower section worked and flexed against the upper section. You can see the lower part of the split in the rudder casing just below the lashings.

Well done!! That was a damned good save from something that could have completely ruined you day. ![]()
Select to expand quoteAchernar said..
Two hours out of Manly and the rudder broke with me and two mates on board. Lashed it back together in the middle of Moreton Bay and limped back to Manly. It held up just long enough to get us back. Alerted the Coast Guard, but didn't need them. The photo was taken when we had safely tied up. The black flecks are the innards of the rudder that got ground out as the lower section worked and flexed against the upper section. You can see the lower part of the split in the rudder casing just below the lashings.
Nice recovery Achernar!
I don't envy you, that would not be much fun at all.
Just curious, was as it heavy to helm prior? I'm trying to work why it went the way it did,
SB
Thx for your responses.
troubadour - My boat is a Cavalier 28.
Shaggy - Yes, we had noticeable weather helm. It was a northerly wind, and when we had the wind on the beam heading out of Manly (due east), and when we turned right (SE) to head towards Peel Island. This put a fair amount of sustained pressure on the tiller, and so, torsion on the part that failed. My mates and I were tinkering with the sail trim to reduce the weather helm, but she kept wanting to round up. I cannot be certain, but I wonder if the rudder had already started to twist out of shape, or had started to flex.
Providentially, my boat came with two rudders. This was the replacement, larger rudder, and I'll take a closer look when I get it off. It looks to be a timber core with a fibreglass case, and the timber might have rotted, which would explain the black flecks below the split. I also have the class-compliant smaller rudder at home, so will be fitting that.
Doubly providentially, I had scheduled a haul out the week after next to replace my prop and prop shaft. I can see the advantage of a transom-mounted rudder in that you can take it off with the boat still in the water, but it would be easier (and less prone to dropping nuts, bolts, spanners into the drink) to do it on the hard.
There is never a good time to lose your rudder, but if you're going to do it, try and arrange good weather, plenty of time in the morning, a couple of competent mates on board, within telephone range, a fully functional radio, subscription to Marine Assist, near to your home port, tide carrying you back home and a scheduled haul out in the next few days with a spare rudder sitting under your house. Thank God.
It was nervy, though. I used my most inventive language when a large stink-boat steamed past and pushed a nice big wake towards us. Managed to turn the boat head-on in time and didn't lose the rudder.
Select to expand quoteAchernar said..
It was nervy, though. I used my most inventive language when a large stink-boat steamed past and pushed a nice big wake towards us. Managed to turn the boat head-on in time and didn't lose the rudder.![]()
![]()
![]() This is one of those moments, like when you're holding something really important, have no spare hands, you can see the swell come toward you and just out of arms reach you see the errant , but critical, nuts and bolts you didn't put in a container are about to roll 6 feet and drop off the transom......
This is one of those moments, like when you're holding something really important, have no spare hands, you can see the swell come toward you and just out of arms reach you see the errant , but critical, nuts and bolts you didn't put in a container are about to roll 6 feet and drop off the transom......
As the dog from Footrot Flats used to say..."Now what would Lassie do?"
I thought it looked like a Cav 28 transom and rudder fittings but the rudder is a different shape to mine. It's not a J24 rudder is it?
A sailboat or sailing boat is a boat propelled partly or entirely by sails smaller than a sailing ship Boat Bimini Top Cover. Distinctions in what constitutes a sailing boat and ship vary by region and maritime culture.
Select to expand quotetroubadour said..
I thought it looked like a Cav 28 transom and rudder fittings but the rudder is a different shape to mine. It's not a J24 rudder is it?
troubadour - asked the previous owner who told me that the owner before him and his Dad fitted it as a replacement. Bigger rudder with an extended leading edge to provide more purchase when sailing downwind.
It seems that the "original" rudder is not the original either, because Laurie Davidson's design looked more like a Spitfire Wing. In any case, we are currently preparing the "original" to put it back on the boat. The replacement, big rudder is stuffed. As I had suspected, the timber core was rotten. Some of the gudgeon bolts had sheared, too.


Angle of the blade forward like that indicates it's off a yacht with a slight reverse counter stern. Best to have the blade vertical or slope back a bit with about 10% prebalance.
That added area on the front of the blade, the bit that's ahead of the pivot point is prebalance. It's meant to be there and it makes the steering lighter. To get more grip downwind make the blade longer.
Sikaflex fail, not worth a new thread sorta fits here. Last time I left the boat I splashed some vinegar in the hand basin to clean it upon return the sikaflex that I bedded the basin waste in has turned into an expanding mass of goo !

Out of interest I exposed some sikaflex plugs to a variety of substances bleach, peroxide, petrol, metho, a strong alkaline cleaner, phosphoric acid and vinegar. The petrol and to a lesser degree metho softened it no supprize there, none of the others had any effect other than maybe a little cleaning but the vinegars effect was obvious.

New Toy added, been looking at Navionics Sonarchart Live and thinking about it. Was originally going to get a Yaktalk, but then realised I had all ST & STNG data in Opencpn as NMEA0183 so why not just output it to Wifi?
First tests using the mini PC Hotspot didn't work, only some PC can Hotspot without a internet connection, mine being one that can't.
Powered up a spare modem router I had, a little fluffing around with IP/UDP/TCP/Ports etc and suddenly I have a depth display on IPad Navionics, AIS(which used to come from wifi on dAISy, and GPS... so I can turn off GPS on IPad to save battery...all very simple and cool not only to have depth on phone/IPad but now survey the depth and modify my charts on Navionics app live and recorded... wish I could reverse it and update charts on Opencpn .... Anyway if you use O and Navionics App, it's easy, probably easier on a MFD and Tablet, or if you didn't have a PC Nav station, or MFD... then a Yak could send NMEA0183 direct to IPad Navionics. Now need Navionics to include other NMEA data, and control for Autopilot!!!! One day..
I was over on the West coast of SA when we had the heavy rain and flooding on the Shoalhaven River. The flooding brought down all the burnt logs and trees from the recent fires. Unfortunately at the same time, we had very high tides and the results were 5 moorings moved down the river from the drag caused by the trees. Interestingly we had an Amel 54 drag her mooring up the river against the flood which is a perfect demonstration of the power of a rising tide.
My boats on the right. The Van de Stadt 30 with the expensive mast was dragged down onto mine. Fortunately, my mate and other friends were on hand to fit fenders. Still getting debris on the moorings and the smell of burnt ash is unpleasant.

Not mine ,but for 40 years I've been working on her . She was getting a bit worse for wear so my mate decided to spruce her up a bit ,of course I offered my time ,I learnt to sail on this boat , my kids sailed on this boat ,was good to see her looking loved again ready for the next 40 years , lots more work to do ,but worth it. Currently 60 years old .


Select to expand quoteoldboyracer said..
Not mine ,but for 40 years I've been working on her . She was getting a bit worse for wear so my mate decided to spruce her up a bit ,of course I offered my time ,I learnt to sail on this boat , my kids sailed on this boat ,was good to see her looking loved again ready for the next 40 years , lots more work to do ,but worth it. Currently 60 years old .
wow that's a lot of non skid to grind back
Select to expand quoteoldboyracer said..
Not mine ,but for 40 years I've been working on her . She was getting a bit worse for wear so my mate decided to spruce her up a bit ,of course I offered my time ,I learnt to sail on this boat , my kids sailed on this boat ,was good to see her looking loved again ready for the next 40 years , lots more work to do ,but worth it. Currently 60 years old .
We're you one of the guys working on it Saturday?
That wasn't nonskid ,just 60 years of paint. Yep I was one of the victims on Saturday , I kept telling the owner " im sure that boat is short on crew I'm just going to check "
Tinted the forward hatch today next job is to prep ready for the Snow White pebbles white foam backed vinyl .


We tore the main all the way along the stitching just below the first reef and broke a couple of slides and sail shackles about 10 seconds before the start in Thursday nights twilight race when we were hit by a squall and had a uncontrolled gybe
I think the 1984 sails are beyond their use by date and we have been driving the boat pretty hard this season
Tassie is a strange place to sail as it was blowing about 25 knots all day and the forecast was for it to start dropping around 5pm and when we left the mooring about 5.30 it was only blowing about 10 to 15 knots and I was going to hank on the no 1 Genoa but 10 mins before the start at 6pm it started to blow mid 20's with stronger gusts and I put up the number 2 instead and on reflection we probably should have reefed as well
A massive thank you to Caroline, my sailmaker friend who has repaired the sail already so we can line up this Thursday for the last twilight of the season
Regards Don
I've just spent 5 weeks stalled on one simple bloody job preventing me from getting the boat sailing again.
There is 1 seal out of the 7 being replaced on the keel ram that necessitated removing the piston assy off the end of the ram shaft. The end of the shaft is a big male thread and the piston assy is a turned billet looking thing that spins onto it. The end face of the piston has two 8mm holes in it for a drift punch to try and help crack it and spin it off. So we gave it a good soak before getting stuck into it.
Result? No chance. It wouldn't budge, not even a mm..
We called it quits on the drift punch idea when it started deforming the hole. I then tried getting a few local shops to do it for me, no dice there either. The some work commitments got in the way and before you know it, the extraneous bills are mounting . The keel needed to be down for the ram to come out, and if I did it on the hardstand the lifelines are 5m off the ground. This means proper scaffolding etc as its a H&S issue then, a working from heights thing. So I elected to put it in a marina berth >3m LAT hence for the past 5 weeks its been double berth rental. Just from some unforeseen work commitments and an errant chunk of stainless steel and a $20 part, the do-it-yourself approach has proven yet again how it might not always be the cheaper route to take. But what it is invaluable for, is getting to know how your boat ticks. I now know every component of the hydraulics which I confess I didn't know before this little merry venture. I nearly said to hell with it a few times, the temptation to just forget about replacing that one last seal which had added all the delays, and just put it back together and go sailing again was soo overwhelming.
Then I'd think of being offshore and the crew. Regardless of the mode, albeit it cruising or hammer down, it's the responsibility of an owner to ensure the boat is fit for the task, so there is only one option. I had a leak, I'm doing all the seals just in case, so stop dillying around and just work towards Replacing. The. Bloody. Seal.
Grit the teeth, just pay the money, focus on doing it properly and then just &^^%$# do it!
So after a frustrating 5 weeks of delays all over a $20 component, we finally got it off yesterday.
The solution was fabricating what looked like an oversized grinding spanner. We got some 50 x 4mm steel and made a cage that fitted over the piston with two cut down bolts locating into the two holes on the end face, anchoring the cage over the piston. We then took a centreline mark at half the hole depth and used that to locate a steel handle welded onto the cage. This was finicky but turned out to be key, If the handle was off centre, say forward of the end face of the piston, you lose all leverage and the cage just wants to twist off the piston the moment you apply any force. A 6ft pipe then fitted over the handle for some added leverage, another generous application of squirty squirty and even though it took me hanging off the end of the pipe it finally gave. No sound or fanfare, no grinding of galled threads or loud cracks, just one minute immobile, the next it was moving.
It took the extra length of the pipe handle to undo it, all the way to the end of the the thread, stopping every two full rotations for another soaking as we went. It's off, and their is the tiniest amount of galling at the start of the thread, which took a thread file and half an hour to fix up. That took us the day, so this week we'll concentrate on fitting the new seal and re-assembling everything to be ready for drop in on Saturday. Everything is fixed, cleaned and has that smoothness and zero play feel to it, like it's brand new.
All the negatives are forgotten already, It not only feels awesome in perseverance winning out, it gives me confidence In so doing I've done it properly which mitigates the risk to the crew. I don't like spotting dark clouds with no land in sight and seeing expectant faces looking back at me whilst I'm guiltily worrying about what fragile bits have I ignored that are still on the to-do list.... ![]()
Great effort Shaggy.....proud of you. And absolutely the correct attitude in the welfare of your boat and crew. Well done on nutting it out too.