Weather | Buy&Sell | Forums |  |
Weather | Buy & Sell | Gallery | Forums | |
Hey mate, the trick is applying a few thin layers of the clear coat first to seal the wood and create a nice flat even surface for the paint. I sprayed water based polycrylic as the clear (oil based poly's tend to yellow over time). I then masked either side of where I wanted the line down the middle, and brush painted my water based acrylic, removed the masking tape (whilst the paint was still tacky), and sprayed a few more layers of polycrylic over the top once fully dry -easy!
The key is if you are using a water based clear, you must use water based paint. Same applies for oil based products.
Pretty keen to get to back on the hamboard but it's been too cold for skating lately. Plus we've had one of the best winters for swell in a long time!
Bit of a thread hijack, and may have posted some of this before, but relevant to the painting.
Previously posted my Hamboard Tribute Kombi table.
Cut from chipboard, and painted with spray cans, I was initially happy with it, but decided I could do better.
Colours not right (look OK in the photo, but the yellow is very orange in real life)
Truck screws could be better countersunk, etc.
To do the first one, I sprayed it all yellow, then masked and sprayed the orange.
Masking tape left marks on the yellow, line not sharp, the paint never really hardened properly.
This was done leading in to Melbourne winter, temperature probably 12 degrees at night.
Haven't done anything like this for maybe 25 years, but do have some knowledge and skills from boat bimbling in my youth.

Bought some 18mm marine ply, cut two new decks.
Bought a new jigsaw to cut them, but they still needed significant smoothing with (newly bought) power plane, and sander.
Sanded the first one (on the right) with decreasing grades of paper, countersunk the truck holes.
Daughter No. 1 expressed interest in doing a deck design for an art project, passed it over to her.
Edge grain could have done with more filling, but pretty good.
Mine sat untouched for quite a while
Lessons learnt - let paint go hard, buy better quality masking tape, surface preparation is everything - don't take shortcuts.
And the process is extremely rewarding, just seeing it get smoother.

Re visited my deck.
Sanded the ply, painted with yellow spray cans, sanded, paint still not hardening properly despite baking with fan heaters.
Left for days between coats.
Night temperatures dropping to 6 degrees.
Sanded, achieved smoothness to some degree.

As above, it was pretty good, smooth, but paint not properly hard.
I suppose it doesn't matter when you are spray painting trains if the paint doesn't go off.
Got frustrated, got inspired.
Side issue.
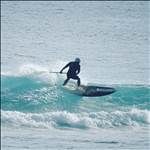
Bought a couple of paddleboards in need of renovation.
Sort of knew what to do, lack the painting skills or experience.
Read a Seabreeze post about board repairs, where someone said something like "If you don't have the skills, give it a go, then you will"
I thank that person.
Initially thought I would do prep work, sanding, filling, get a boat builder mate to spray them.
Confident in the prep work, not anything else.
Thought more, decided I could do the lot.
Took the paddle boards to my mate's factory, got some advice.
Plan for each board, but I need to re learn / learn things.
Decided the Hamboard deck could be a test bed.
As above, it was already yellow all over both sides, probably 10 coats per side, but it had refused to harden.
Had put too much work in to the deck to abandon it, sanded the soggy yellow off.
Since the paint hadn't set, this took a lot of time and sandpaper, paint clogging it quickly.
Got it back to bare wood eventually, filled edges, re sanded wood.
Took my first bit of advice - painted the deck with two pack epoxy marine undercoat.
Way overkill for this, but learning for the boards.
Rolled on 4 coats. Re questioning of the expert after the first coat, mixing an impossibly small quantity of paint, you can re coat after 20 minutes or so, pot life of the paint allows this while the rolled on paint sets.
Went the patient way, and did each side separately. This is taking significant time now.
Mixed epoxy resin with QCells to fill the edges - way overkill for this but learning for the boards.
This paint went off - somewhere along the way I bought an outdoor marquee and put it up in my factory to give me a heatable area - 6 degree nights not good for paint going off,
Sanded back the epoxy undercoat, very satisfying, impossibly smooth.

Very tempted to leave it at that - I had the smoothest deck in the southern hemisphere, possibly the world.
Too scared of "real" spray guns with compressors, I found these Wagner guns - still a compressor, but contained in the back part of the gun.
Advice was to use 2 pack polyurethane over the epoxy undercoat.
Decided I had enough of a challenge learning to spray paint, without the challenge of paint going off while I was working, I opted for single pack (oil based) marine paint.
Conveiniently it came in orange and yellow, unlike the 2 pack.
Yellow first.

Rather than spray the whole board yellow again, and with reference to learning masking for the paddleboards, I masked off just the yellow bit.
Rather than the generic yellow masking tape I had used before, I bought some bear brand I think blue stuff.

Half an hour of preparation, 2 minutes of spraying, an hour of clean up.
But I'm learning, and pleased (amazed) with the look / success of my spray painting.
Volume of turpentine sprayed through huge.
Gloves and breathing stuff go from token effort to required.

4 coats 24 hours apart, left it masked, serious worries about bleeding under the tape.
Orange peel on the finish noticeable, but wrapt with my first go finish.

Probably a week in, unmasked with fear.
Tape had held up perfectly.

Again as practise, re masked the same line for the orange.
Easier than I expected to line up, but end result unknown.
4 coats of orange (coverage way better than yellow) over another week.

Unmask the second time.
No overspray, blue tape still in position.

Final unmasking.
Line is good, no bleed.
Original plan was to wet sand from here to remove orange peel, then polish.
At the moment I'm too scared - finish is pretty good "off the gun"
Paint is hard, colours true.

And I've had the confidence to touch up the challenging orange cammo paint on that board in the background while I bimble.
Major paddle scrapes both sides are now filled and sprayed over.


New paint needs some wet and dry flattening, but really pleased with what I've done.
If in doubt, have a go.
If it's only for you, you can't **** it up.
If it turns out wrong, you can allways go back and start again.
I am stunned at the satisfaction, and relaxation, I have got out of trying to do this stuff, and succeeding enough to keep myself happy.
So in answer to the original question, Blue masking tape.
I
You've gone all out Nozza spray tent and all! Always good learning new skills and surprising yourself along the way. Good work!
Tardy, plenty of flex with the bamboo but also very strong. Was too flexy for me hence the stringer.
Can't wait for warmer weather to get back out!
Just stumbled on this DIY Hamboards Classic build by JoffaDan. Nice work! You, too, Nozza. Good stuff there.
I'm in Arizona (originally from California) and have been away from the ocean for about 6 years... I used to surf (mostly longboard...) and saw Hamboards on FB...thought it would be a good way to keep in surfing shape, practice cross-stepping, etc. until I can get back in the ocean.
$499 price tag on the Classic got me thinking of doing it myself, so glad to see someone else has given it a go.
Figure I can build it for a lot less...
Original S8 200mm trucks w/risers - $67.95
Mounting hardware - $4.95
Abec11 Biltin bearings - $26.95
Roswell 97mm x 52mm spoked longboard wheels - $60
Total: $159. 85 + tax (maybe $175 USD / $234 AUD)
So, that would leave $433 AUD / $324 USD to get a deck together... Even with good wood, paint/finish, etc. that should leave quite a bit of savings...
I have some leftover 23/32 (.703 inch thick) Doug Fir (7 ply) from a pick-up truck bedslider project.
Not enough to do a 6'6" Classic deck so I'll have to get another sheet of wood of some kind. I like Joffa's idea of putting a stringer down the center to stiffen the board up and using a grinder for the wheel cutouts...I'll keep that in mind. I have some leftover paint laying around and some polycrylic...
What did you use for the non-slip on the deck? I think Hamboards uses some spray on type...I believe there is something uses for marine applications...
I'll keep y'all posted and see if I can figure out how to post pictures.
If you have any feedback on building or how your Classic rides, please let me know.
How are the boards riding? Do you think the 97mm wheels are necessary or would smaller work? Any other tips before I get started? Thank you.
Peace Out.
http://www.actionboardshop.com/trucks/original-longboard-trucks/original-s8-longboard-trucks
www.roswellsskateboards.com/97x52mm-spoked-longboard-wheels/
Hey Geronimo,
Good to see someone else having a crack at building one of these. The amount of money you are saving will make it well worth while, plus it's a cool little project. It's a satisfying feeling riding a board you have built from scratch.
I'd highly recommend the stringer. It enables you to build the deck a bit thinner for weight savings without having too much flex.
I always ride the classic bare-foot. Never had a problem slipping whilst cross-stepping etc. So I didn't find deck grip necessary. The polycrylic finish gives quite a good grip even with shoes. If you do find you want more grip there is a company that makes a clear deck grip spray called "Monster". I use it on the front of some of my SUPs and it works well.
I love the 97mm wheels. They take a bit of effort to get moving, but allow you to cruise without pushing for a long time. Highly recommend. Same goes with the original trucks, they give the board a real surfy feel and also allow super tight turns for such a long board.
Still riding mine and absolutely loving it. If I can figure out how to put some video together I will do that in the next few days.
If you do end up building one please keep us up to date in here. Photos etc would be great!
Feel free to post if you need any advice along the way.
Cheers,
JD
Thanks for the advice, JD.
I did check out a Classic at a local shop. It is huge! ![]() Didn't get a chance to ride it because they had taken their demo home...
Didn't get a chance to ride it because they had taken their demo home...
If you get around to shooting some video, it would be great to see it.
10.4 on the 97mm wheels. Found some at half the price as the Abec's (posted link in previous post).
The only reason I was considering smaller wheels is that I was wanting some of the clear urethane wheels that remind me of my skating heydays from the 70's and I can only find them in a smaller size. I guess I can always get another set and try them out later.
Thanks for the "Monster" grip tip... I'll try it without first and add it if necessary.
I think you mentioned you pulled the outline and were able to import it into a CAD program. Can you give me some pointers on doing that? ![]()
I would like to get their shape with the rounded nose.
Also, how did you determine where to locate the trucks? ![]()
With the extra risers, what length and diameter bolts did you end up going with? ![]()
I'll definitely post pictures as I get going... Have to buy a jigsaw... Once I get the shape cut, I was thinking about rounding the edge with a router...first things first, though....Have to get the wood.
Thanks again.
Until I get the skateboard pics, here are a couple of a DIY bedslider we built for our '07 Tacoma...


UPDATE:
Pulled the trigger and ordered the Original S8 200mm trucks and Roswell 97mm x 52mm wheels.  Should have them by Friday...Guess I'm locked in to the project now!
My only hesitation was all of the other projects I've got to get done...but this one is going to be fun!
I went to a couple of lumber / hardwood yards in town today. Found some nice Baltic Birch 3/4" 4' x 8' ply for about $65US. 
Looks like 13-ply.
Figure I can get three Classic decks out of it. They had some nice hardwoods (Mahogany, Maple, Oak, etc.), but don't want to go through the hassle of glueing up narrower panels to make the 15" wide deck.
Now, I've got to figure out the bearings.
Any suggestions?
When I was skating way back when, there were probably a couple of choices in bearings and trucks. It's amazing to see how many there are now.
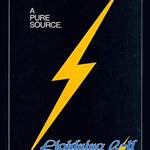
As far as graphics, I was thinking about a Lightning Bolt on the deck. Gerry Lopez, Rory Russell and Rabbit were the ** at Pipeline back in the day and the lightning bolt logo reminds me of that 70s era...

With the money I'm saving going DIY, figured I'd put that money into tools...picked up an air brush kit to do the logo (it will be my own design so no copyright infringement)...we'll see how that goes.
I'm trying to figure out how to cut the shape...jigsaw or rotozip-type tool...and thinking about routering the edge with a trim router to finish it off...


Save
Hey mate,
Just a quick note on the monster spray grip. I'm pretty sure it's oil based so if you decide to finish with water based paints/clear it might not work too well. Different if you are finishing with oil based products of course- just something to keep in mind.
In regards the outline I still have the CAD file which includes the truck hole placement. Happy to email it to you, just let me know an address. It will be one less job for you. I used a jigsaw to cut my outline.
Don't put too much thought into the bearings. I used biltin as I wanted to stick with the parts hamboards use on their classics. But really -some bones reds would do the job, and at a fraction of the cost.
I used a router on the edge of my board too. I hand sanded after routing to get them nice and smooth.
That Baltic birch looks real nice!
Hey, JD (and anyone else following this post.),
Thanks for letting me know the deal on Monster Grip, jigsaw and router/hand sand. I sent you a PM regarding the CAD file. Thanks for that...should streamline the build time.
I was just going to get the Biltins (or Bones Reds...or Super Reds...) and then found a blog by Peter Verdone on bearings.
www.peterverdone.com/archive/skatebearings
He gets way technical (which is interesting to know), but probably overkill for our applications. Still, an interesting read if you have a moment. It's everything you wanted to know about bearings that nobody told you!
Anyway, there was a link com (amongst a couple of others) on his blog to Oust Bearings - www.oustbearings.com -- which he referred to as "High quality labyrinth sealed bearings and precision spacers. Very nice!"
So, I thought I might as well check them out since the seeming bearing Guru thought so highly of them...
I went on their site and looked at the different bearing types. I wasn't sure exactly which ones to get, so I called them up in Lomita, California (near Redondo Beach, Palos Verdes, Torrance, etc.).
The person answering was very helpful (turns out it was Eric, Jr.). I explained the type of board I am making and asked for a recommendation on bearings. He recommended the Oust MOC 7 Speed, but suggested I speak with his dad.
Eric, Sr. got on the phone and talked story about shaping surfboards in Hawaii in the late '60s and 70's with the likes of Mike Diffenderfer and several other legends (did he say, Dick Brewer?)...surfing Ala Moana on a board that was re-shaped from a dinged up 9'6 down to a turned-down rail short board with very little rocker the likes of which nobody had ever seen before. Apparently the speed of the thing blew minds!
Coming back to California and surfing 8-10 foot Redondo Breakwall with a 6'9" board (same one?) ...it was the only shortboard on the entire coast -- until 2 weeks later, Hobie came out with one......
I was soaking it all up...he was telling me about starting out skateboarding in 1953 with metal wheels taken off Japanese skates that strapped onto the bottom of shoes (the wheels would only last a trip or two to the beach because they developed flat spots)...then clay wheels (actually leather)...different So. Cal. surf clubs...Man, was that cool to hear all of the history!!!
I was literally taking notes, but couldn't really keep up as I wanted to be part of the conversation and enjoy what he was telling me at the same time. It was really too cool and more than I can relate here. But, suffice it to say, it was one of the more interesting conversations I've had in a very long time. I've had the good fortune to meet some "Legends" like Sandy Kahanamoku, Rabbit Kekai, Skip Frye, Ambrose Curry, Nat Young, Tom Morey, Greg Noll, and Shaun Thompson so I really appreciate it when someone is willing to share the early history of surfing and skateboarding with me. (Eric, Sr., if you happen to visit this site, hopefully I relayed the info accurately. Feel free to correct me if I misquoted!)
OK, back to the BEARINGS!
Eric, Sr. recommended the Oust MOC 5 Tech Bearings for a variety of reasons which I cannot remember enough to repeat. My simplistic regurgitation of his highly technical explanation is that they will take a beatin' and keep on rollin'. There's a better description on their website.
He asked me to let him know how the Classic replica build goes along the way and even offered to help with some pointers! He suggested I take a look at their YouTube video on how they build their longboards at
nice project JoffaDan and nice Hamboard Nozza!
I got Santacruz longboard but I want one of these longer boards oneday.
JD, Couple questions for you...
I see you used the bamboo for your stringer. Since I don't have the bamboo, I was planning on just using a strip of the 18mm baltic birch instead. Do you think that will work or be too thick?
How did you figure out where to grind your wheel wells in?
I went back and looked over your build....really nice job...
G.
Hey mate,
The Bamboo stringer is actually mainly pine on my build. It's just a thin layer of bamboo veneer on the outside (just for looks), so the birch will be fine and will add plenty of strength.
The wheel wells were probably the trickiest part of the build. I drilled the holes for the trucks first. Mounted everything up including the bearings, wheels etc. I took the springs out of the trucks so they could move freely, pushed the wheels down all the way and marked the exact spot that the wheels touched the pine on each side. I then ground 'D-shaped' wells in the same shape/angle that the wheels touched the board.
It was mostly trial and error. I just kept grinding down until the wheels could spin freely at the steepest angle of the trucks. The shape of the wheel wells don't make much of a difference either, you could do circular shaped ones if it's easier.
Hopefully I've explained this "well" enough.![]()
Cheers
Thanks for the explanation, JD. That helps. Good tip to take the springs out of the trucks.
Just picked up the deck hardware yesterday...
I am having a problem figuring out how to print the cad file... I'm going to send you an e-mail. Maybe you've got a few pointers to help me out. I'm ready to cut this sucka out and start skating it... Thanks again.
Well, I got the template printed out and bought a jigsaw about a month ago. I cut the template out and it has been sitting on a shelf for a couple weeks now.
Tonight, I attached the paper template to some 3/16" high density board (HDF) with some spray photo adhesive. It worked pretty well...
I kind of cleaned up the template using an x-acto knife...then I cut out the template with the jigsaw.


I wanted to make a template out of the high-density board (HDF) so I can re-use it in the future if I want to make another board or someone else does. It's an extra step, but I won't have to print out the template again...
The hardest part of cutting the template was securing the HDF so it didn't jump around whilst cutting with the jigsaw...That was kind of a pita. I ended up ripping the HDF down to just slightly larger than the template so I could flip it around on the saw horses and make it easier to position for various cuts...I also put some heavier ply on top of the HDF just to hold it down...


I did a bit of cleanup/shaping using sandpaper. It's not perfect, but it's pretty good and I figure I can sand the template and/or final board later if I want to...
I got a little loose with the saw right at the start (it's only the second time I've used a jigsaw...and the first time with this one) and cut a little inside the template over about a 1-2 inch area. Maybe there is a way to build that missing chunk back up...


I was going to trace the outline onto the birch ply, but it got a bit late. Hopefully, I can get to that tomorrow and cut the plywood out... My only dilemma is that there are some interesting grain patterns on the birch, but they are about 6-8 inches in from the edge. I would like to have that interesting grain pattern show through on the deck, but not sure I want to waste that much wood. Guess I'll sleep on that one. I was thinking of just doing a polycrylic clear coat and possibly a lightning bolt design in the middle, so the grain pattern might make a difference.
Glad to see someone else had trouble with the jigsaw - dived off uncontrollably for me.
Planer and sander either side fixed it for me.
Looks like it's coming together nicely Geronimo! Love seeing updates to this thread, keep the pics coming!
Hello,
I am from Amsterdam, The Netherlands and since it flat most of the time on the water and on land... I love to make a Hamboard Classic myself...
Most of all to practice my longboarding and cross steps and reduce the costs...
Luckily I came across your forum to get me motivated, excited and started making my own Hamboard...
So if possible I like to receive CAD outlining of the Hamboard Classic, which will save me a lot of work..
I know it is bold to ask, but I just had to...
Thanks.... ^^
First of all, welcome to chimponsea! If you message me your e-mail, I can send you the file that JoffaDan sent to me.
Yeah, Nozza, that jigsaw can get away from ya... I went with a flap disc on an angle grinder and then hand sanded with 60 grit...
Thanks, JD...yes, it's coming along...got some more done on it last night and today.


I wanted to put an angle on the truck risers like Hboards does...so I set the jigsaw to 45 degrees...kind of tough to get through 3/4" 13 ply so it's going to need a bit of clean up... Hboards probably has less than 45 degrees, but my saw only had slots for 0 or 45 degrees...could have set it at other angles, but there isn't a slot to hold it in place...just tighten the tool down...if that makes sense.


I used the narrower wood-scrool blades to cut the HDF template and the other beefier ones for the 3/4" birch.


pretty rough!

Ok, today, I did some major shaping with this new Hitachi angle grinder (my old cheapo grinder crapped out...) with a flap sanding disc attached...made fast work of the excess wood.


Got the shape pretty well down to the outline...

You can see the grain pattern that I was wanting to have on the deck. I opted for "wasting" a bit of the wood on the edge of the plywood sheet to get this grain pattern somewhat centered on the deck... I think it will look nice.
An idea came to me the other day of possibly lightly burning the wood to make the grain stand out. I'm not sure that I'm going to do it, though, and if I do, I'll test it on some scrap pieces to see how it looks.
If I don't, I'll put some wood conditioner on first, because Baltic birch is notorious for being a bit blotchy when applying stain... So, we'll see as we get to that point.

I hit one of the riser blocks with the grinder just to see how it would work....should be good for roughing it out, then hand sand to finish.


I got the board sanded to a pretty reasonable state and then took a break midday...as it got up to about 34 C today here in Phoenix, Arizona.

I came out just before sundown and hand sanded some more...then set up a light and started routing the edges!

I bought a new trim router this past weekend. I've got a plunge router, but didn't really want to wrestle that beast around the board. Plus, I've always wanted/needed a trim router...so this was my excuse. This was my plan all along...to put the money I'm saving going the DIY route into tools for future projects...Working out so far... Plus, this tool has a lifetime warranty!

I stopped halfway down the first rail to put on a dust mask...might as well take a picture to show how much material I was taking off...the tool was struggling a little bit...probably the depth of cut plus maybe a somewhat dulled router bit...got er done, though.

I finished the night after having routed both rails - top and bottom - and hand sanding to smooth the ridge(s) left by the router.
I am really stoked at how it is starting to look. I really like how the routered edge reveals the plies. I hand sanded a fair amount after this picture was taken and sanded out the burn marks, etc... I'll look at it again in the light, probably do some final sanding with 60 grit and then hit it with 120 and 220 to seal the grain...
After that, I'm going to finish the riser blocks, locate and install the trucks, mark for wheel wells and router and/or grind those out and then finish the deck with fire or stain (or nothing) and hit it with polycrylic...
Hoping to get all that done tomorrow...
JD, I'm going to PM you (in case you don't see this) 'cause I need to get measurements on where to locate the trucks. The marks I made from the template don't look right, so I want to make sure I've got them in the right place. My wife commented that they don't look centered, plus I'd like to get measurements from the tail and nose to the edge of the trucks. Peace out.SaveSave
Thanks for the warm welcome GERONIMO1111....
And what a great work you have done so far... It looks really good... And you must be satisfied with the outcome so far...
I will PM you for the CAD file, so I can start my own project...
And I will keep this forum updated of my progress and experiences along the way...
Again thanks for helping me out with the outline... ^^
Geronimo, looks like you are making steady progress. Routing the edges makes a big difference and really gives it that polished look. Loving the angled risers too!
I measured my truck holes last night and it was around 21cm from the front screws to the front of the board, and 32cm from the back screws to the back of the board. Hope that make sense.
Once you get the truck holes drilled it would be a good idea to mount the trucks and wheels and go for a quick skate. The last thing you want is to go to the effort of painting/staining/finishing only to have the board snap or delaminate during your first session. It's also an opportunity to test how much flex the board has and adjust accordingly.
Look forward to the next instalment.
Thanks, JD. Yes, the routered edges make a big difference... Thanks for the truck measurements. I went the ones you provided...
(Pics from today at end of post...)
So, locating the trucks was kind of a pita...and apparently I'm not the only one who has had a problem with it. I forgot that most store-bought decks come pre-drilled.
I jumped on the net to see if I could get some guidance...visited forums, etc. Lots of people talking about truck templates, but no one left a link or, if they did, it was to a drop deck truck template. The ones I did find didn't seem to print out to scale so were pretty much useless.
But, I did learn that the mounting holes are 1 5/8" between holes left to right and 2 1/8" front to back.
So, I took four centerpoint measurements down the length of the deck and drew a line from the nose to the tail along the centerline. I eyeballed it to make sure and it looked centered.
The last thing I wanted to do was mount my trucks crooked after putting all this time in. Apparently others have done just that.
There was also some advice to make sure to drill the mounting holes directly vertical. I should have paid closer attention to that as I had to kind of muscle the deck bolts to fit the trucks and both riser pads. Maybe on a thinner deck it wouldn't be so critical, but with 3 inches of bolt, a little bit off vertical can translate into out of whack in a hurry it seems.
One other thing, forum posters mentioned making sure to drill the bolt holes from the underside and use some scrap wood backing to prevent tearout...Well, I should have gone with my gut instinct and drilled from the top of the deck, because drilling from the bottom using a 1/8" and then a 3/16" bit did cause some chipping and tearout on the top of the deck.
I drilled from the top down on the other set of truck holes and it was much cleaner...
When I first started this build, I calculated that I would probably need 2 3/4" deck bolts. I couldn't find those, so I bought 3" bolts thinking that they would probably be a bit long, but would work.
Well, they are between a 1/4 and a 1/2 inch too long and it's not a problem for the bolts towards the middle of the board. However, they are too long for the bolt holes closest to the ends of the boards due to the fact that they are situated directly underneath the truck hangers. They actually dug into and scratched the underside of the front hanger before I figured out what was going on.
I took an oscillating tool with a metal cutoff attachment to remove a little more than a quarter inch of the bolts. I cut the other two for the other set of trucks with a hacksaw before installing...much easier that way.
I installed the trucks (with springs removed) and the wheels and marked for where the wheel wells need to be located.
I put the red springs back in and stood on the board in the living room...the deck does seem to have quite a bit of flex in it and I am concerned that it might be too much. Borderline, I'd say. I weigh about 220 lbs (100 kgs?)...so I may be too heavy for this 3/4" deck.
I seem to recall that Hamboard Classics are about 1 inch thick...I wonder how they get to that one inch thickness as Baltic Birch (which I believe they use) only comes 3/4" or less as far as I know. Maybe they laminate a 1/4" onto it...Hmmm.
Looks like I may have to put a stringer on this...shoots, I thought I was almost done.
Now it looks likes cut a stringer, cut out wheel wells, final sand and finish w/ polycrylic...My other chores are backing up!!!
Pics from today:


Close enough for military work!

Once I saw the plies showing nicely, it took me back to small keed days when I would see Victoria skimboards in surfshops and just drool over them. I wanted one so badly...never got one. Seeing this gives me the idea to make the skimboard I never got as a kid...

You can see the grain pattern I wanted centered on the deck...

You can probably see the faint centerline pencil mark I used to locate the trucks...


Any and all feedback is appreciated...
Save
Front truck holes - drilled from top - no chip out...

Rear truck holes - drilled from underside - some chip out...just a head's up for future builders...

WOW..... !!!
Your board looks absolutely beautiful... Hands down for Geronimo1111.... Masterpiece... ^^
Maybe you need the extra stringer. Just to be safe....
Yeah, I was wondering how Hamboards get the 1 inch thickness too... Since I can only find 0.6 inch or max. 0.8 inch thickness Birch Plywood... But I think I will buy the 0.6 inch and glue an extra layer so it will double... 2 x 0.6 inch = 1.2 inch...
A bit thicker than the original... Will cut down the weight a bit by cutting out some rails out of the 2nd layer... Anyways.. I will post pictures when the time is due...
Template ordered at the printershop today... So we can start building soon...
STOKED.... ^^
It's a good feeling when you have the trucks/wheels mounted and you can start to see it all coming together.
I had the same problems when it came to mounting my hardware Geronimo. Trying to find screws that were the right length/width was a battle. I also struggled when it came to mounting the S8's. Was probably the hardest part of the build. I found that pushing all 4 screws through until (just) the thread ends were visible through the trucks and then tightening the nuts slowly and evenly helped align everything.
You may find even with a stringer you can still use the original black risers and the wooden ones you've made. The S8's are able to move at such great angles the more clearance the better I think. It's what allows you to turn such a large board on a dime but can also be bad for wheel bite.
Just a quick head's up...
The 97mm wheels I bought for my build are 25% off today only in honor of 420 day.
About 1/2 price as ABEC11s?
![]()
 Here's the link to their site:
 http://www.roswellsskateboards.com/97x52mm-spoked-longboard-wheels/
You can use code: Happy 420 Day at check out for the 25% off.
chimponsea, thanks for the compliment! The Baltic birch is really nice...I've read it referred to as Russian or Finnish birch, too. I was able to find a 4' x 8' sheet of it, but apparently it is more commonly available in 5' x 5' sheets outside of the U.S. I'll be interested to know what you find... Congratulations on the first step of getting the file to the printer!
That sounds like a good idea to glue up to 1.2 inches...that way you can make the cutouts along the rails like Hamboards to lighten the board and perhaps give it a bit of flex.
I think you may be right about adding a stringer to my deck...would hate to snap it after all this.
A thought came to me yesterday to put two stringers along the rails...that way I can use them for rail grabs...if I ever reach down that far!!! And, if that's not enough, I can always add another stringer down the center.
What do you think about that? JoffaDan?
I've got that nice little left over piece that I could cut in two for the rails...could make them about 1.5 to 2 inches wide...
JoffaDan, thanks for the tips on truck installation...and stringers. I hadn't thought of using the existing risers with a stringer for extra height, but nice to think about that option if necessary. I'm hoping I won't need it, because I really didn't want to add more height since the board is already high w/ the large wheels and an extra riser...but good to think about as an option if needed.
Whichever way I go, I can just screw the rails/stringer into to the deck from the bottom, right?
I remember putting plastic rails on my board to do rail slides on curbs a long time ago and I think we just screwed in from the bottom...I'm thinking either 1" or 1 1/4" countersunk screws will give enough bite without going through the deck....Do I have that right?
Well, I didn't get much done on the board today... When I was taking the springs out to measure for wheel wells the other day, I made the bonehead move of putting them on the deck. They left some grease marks that I am attempting to get out...just a heads up for future builders! Them Original springs have grease on them!!!
Anyway, thank for all the advice and encouragement. Aloooooooooha! _G