Select to expand quoteGeronimo1111 said..
A thought came to me yesterday to put two stringers along the rails...that way I can use them for rail grabs...if I ever reach down that far!!! And, if that's not enough, I can always add another stringer down the center.
What do you think about that? JoffaDan?
Hmm not sure about that one. I would have thought adding a single stringer down the middle in line and (more importantly) under the trucks would add equal or even more strength than two on the sides, and also save on weight. Don't quote me on this as I'm not entirely sure on the physics I'm just thinking more of surfboard design. Perhaps someone with better knowledge can chime in?
I just think it's really important to save as much weight as possible simply because this board already weighs a tonne, and getting it moving especially up inclines, can be hard work. Stopping it is another story.
Just for reference I measured the thickness of my stringer and risers for you.
All together my stringer (8mm height) and wooden risers (17mm) and Original plastic risers (20mm) combine to raise the trucks to 45mm in total. And even with my wheel wells, with all my weight on one side of the board I'm still getting very slight wheel bite, but I never turn the board hard enough on a regular basis for it to worry me. From memory I think I made my wooden risers slightly shorter in height than the ones Hamboard make.
JD, thanks for measuring the stringer and risers. That's good to know. I'm a little confused because the Original risers look thinner than the wooden risers I have which are about 18mm...but it's hard to get a measurement while they are mounted...so I'll double check mine when I take them off to finish the deck.
The lumberyard says the baltic birch is 3/4" or 19.05mm, but it's actually 18mm or a little less when sanded...
Interesting that you are still getting a bit of wheelbite with that much rise and wheel wheels... I may need to add the stringer just to avoid wheel bite...
If I go the stringer route, that would give me 18mm + 18mm + Original risers...
Last night, I fiddled around with making a design for the wheel wells using a program called SmartDraw.
It would be interesting to know the actual dimensions (w x l) of the wheelwells that Hamboards uses. Nozza?
I tried to count the plies on their wheel wells from a picture to get an idea how deep they are...looks like at least 13 or 14 plies? Pretty deep wells it seems...
Anyway, I'm kinda hurting my head trying to figure out the wheel well situation, because I figure I pretty much have one shot to get them right...and I want them to be equal on both sides, correct angles, proper depth, location, etc....so I'm thinking about using a template out of plywood and a straight router bit...then possibly using a 45 degree chamfer bit to put an angle on the well...
(Just went back and looked through your whole build, JD...really nice job you did...not sure I have the steady hand to make wheel wells as nice as yours with a grinder!!! BTW, what type of disk did you use? A sanding flap disk or the type to grind concrete?)
But, in the meantime, I'm going to go with the advice that someone gave me a long time ago (grade school) when taking multiple choice tests....answer the easy ones first and then come back to the hard questions... So, with that, I've decided to do the burn/stain/polycrylic finish next and then come back to the wheel wells at the end...which I think will be fine, because I want the wheel wells natural and not stained... They will be the last step of the project and I can really focus on doing them right.
As far as the finish, I'm thinking about burning the wood on the bottom of the deck with a torch, then staining it with this leftover blue stain we've got from an old project...then polycrylic... stringer or rails I'm thinking darker...like a mahogany stain for a bit of contrast...
For the top of the deck, I'm thinking of a lighter color stain to keep the natural lighter color of the birch (and to allow me to put my lightning bolt graphic on) and then polycrylic...
I'll post pics of the process...Save
OK, quick update on the build:
I cut out some rails to kind of match the outline of the board...lots of sanding to get the bumps out...not perfect, but moving on to stain/finish...
I now see why hamboards paints their baltic birch decks. After reading up a bunch...it looks like birch is notoriously a PITA to stain...apparently it has a tendency to look blotchy and water-based stains don't work well on them...neither do wipe/brush on stains like Minwax...People get REAL technical about staining birch talking about sealers, spray-on dyes, etc...
And to think I thought I was getting to the EASY part!!!
Well, after reading up, people recommended doing some tests on scrap pieces...
Burnt scrap on the left...unburnt on the right...

Left piece: I burned the middle section with a small propane torch and sanded w/ 120 and 220...the top portion has one coat of Minwax polycrylic clear semi-gloss brushed on. The wood really soaked it up...so it probably needs some kind of sealer before I do the deck for real.
I'm kind of liking that look best and thinking about going with it for the top of the deck. The only problem is that the nozzle of the propane torch is very small and can tend to make darker burn areas...I might get a bigger propane torch (the kind you attach to a big propane tank) to get a more even burn...
Far left of piece just has the polycrylic on bare wood...think we can rule that one out...boring!
Bottom right has blue stain over the pre-conditioned burned wood...gonna sand that down, put a clear coat on and see what it looks like...but I'm thinking no on that...
Right piece: Top has wood conditioner for oil stains first...then cherry stain on left, red mahogany stain on right...no clear coat.
Once it dries, I'm going to sand w/ 220 and put a clear coat on it...Thinking about using the red mahogany on the rails if it looks good.
Also, I found out that you can use water-based sealers over oil stains, but you have to let them dry and wipe 'em down with mineral spirits to get off excess and help the remaining stain "flash off"...
Bottom has the same blue stain on bare wood...w/ pre-conditioner... going to sand w/ 220 and seal w/ clear coat and evaluate...
This is just stuff I have laying around from previous projects...Save
How did you know I was still out here?
The Classic
The board measures 25mm thick.


The wheel wells are 90mm x 50mm.
They are 20mm deep, angle on the side looks about 45 degrees.
The grab handle slots are 12mm deep.
The timber riser is 25mm thick.


The board weighs 13.2kg, and is a missile.
I have pretty much moved to only flats to ride it, unless there is a dip with corresponding rise to slow the other side.
I have scared myself seriously on underpasses under roads where I get faced with asking myself "Do I bale out and hope for the best, or do I try and ride it through?"
The only way I have successfully stopped it is dragging the pole, really hard.
Enjoy reading about your build progress Geronimo
Thanks for the pictures and measurements, Nozza!
Those will help a lot. Good to get a visual... Thanks for the feedback on the ride, too...that thing is a BEAST!
Something to be said for plug 'n play like you've done...
Quick update on the build...
I ran into a few snafus, but am making progress.
I think I've pretty much got a plan for the stain finish...and I picked up a larger propane torch at Harbor Freight for about $25 (small one would take forever), borrowed a tank from a neighbor, purchased a nice red oil-based paint that I will thin with mineral spirits and use as a stain after burning, pre-conditioning and applying a natural stain first....Yep, quite a process. But, it's mostly set up ready to go when the time comes.
I jumped back into the wheel well situation after giving it a lot of thought. I purchased some 1/2", 1/4" and 1/8" risers (Imperial, I know...) from the local skate shop to help me dial in the optimal truck height / wheel well location. Turns out, I could only manage adding the 1/2" (12.7 mm) risers with the length of bolts I have on hand...
So, I set up the trucks AGAIN and made notes as to where the wheels hit the deck. It's very difficult to determine where the wheels will go as they turn due to the fact that the kingpin is on an angle.... I wish I paid better attention in math classes...probably could have figured it out with some calculations.
But, I went at it kind of eyeballing, referencing Nozza and JoffaDan's setups, kind of visualizing where the wheels might end up as the rotate towards the deck.
I want the wheel wells to have some symmetry as I can't stand things that don't!!! This is an area where one pretty much has one shot to make it happen....Once you start making deep cuts in wood, it's hard to reverse...
So, I spent some time figuring it out best I could. I figured the only real constant reference points (due to the probable differences in rails and risers from one side to the other) is the centerline I used to locate the trucks and some of the reference points to mark the truck hole locations. So, I took measurements off those to make the wheel wells somewhat equidistant from the centerline and front to back.


I used a free program called SmartDraw to design the wheel wells approx. 90mm x 50mm...per Nozza's specs.

Router guide bushing and bits (1/4", 1/2" and 45 degree chamfer)....The brass router guides allowed me to use a template for accuracy.
The template has to be sized larger than the desired well by the distance from the outside edge of the guide to the outside edge of the bit...

One of the "snafus" came when I realized that the trim router I initially bought does not accept "standard" Porter Cable-style guide bushings... Bummer. The router base has to have an opening of 1 3/16" (30.16mm) to accept them.
So, (after a lot of research for solutions) another trip to the tool department to pick up the Makita router which has the standard opening.
I measured the deck at about 17-18 mm thickness. According to Nozza, his wells are 20mm deep on a 25mm board...I figured I could go with roughly 5mm difference....maybe a little less. I was shooting for 10 to 12mm depth leaving 5-8mm of deck intact.

You can see the double-sided tape to secure the HDF template. These pictures are actually out of order. This one above shows the final well. I wanted to use the 45 degree chamfer bit, but realized I would have a problem in that it has a guide bearing on the bottom which raises the bit about 9.25mm and limits the cut. I thought I might get 3mm of 45 degree cut at the top of the well, but alas, no go. I barely got any. So, I went to a 1/2" cove bit to get a little detail and more clearance on the well.

At about 11-12 mm depth.

Checking fit without the 12.7mm riser.

Barely hitting at this height... This is with xtra template height and without the cove bit cutout...

The wheels bottom out before the truck hanger did...so a riser will be required.

Tight fit.

As the trucks are raised, the trajectory of the wheels moves towards the center of the board. So, this picture represents a "worse case scenario" of have no additional riser pads... Likely not possible due to wheel bite.


Before I figured out that the wheel would bottom out without an extra riser (and it seemed like they might not and I could possibly get away with having a lower deck!) I reshaped the template to take off some material towards the rail.


W/ no extra riser...


No extra riser = wheel bite!


With the 12.7mm extra riser...sufficient clearance and not bottoming out...


Makita trim router w/ larger guide bushing and 12.7mm straight bit - removes material a lot faster than the 1/4" but couldn't use it until after making first pass w/ the 1/4" bit... So, I had to make two passes at the well...a bit time consuming...but, hey, what isn't when it comes to building something!


Lots of changing guide bushings and bits back and forth... At one point, I averted near disaster. I heard the router make a "different" sound and immediately shut down the tool... Due to the guide bushing insert, I had to extend the bit out to get the depth of cut. Well, apparently the collet nut had come loose and the bit was dropping down more and more, cutting deeper and deeper...out of control. I caught it just in time...right at the depth (12mm) that I wanted. Phew! That was close.
I was going to stick to 10mm, but the tool made the decision for me!

Due to not being able to use the 45 degree chamfer bit, I ended up removing a lot more material than I initially wanted. I wanted the angled wells for aesthetics as well as structural integrity, but, try as I might (and I thought about it a lot and did a lot of research), I couldn't figure out how to do it. I could not find guide bushings for chamfer bits and don't even know if such an animal exists.
My kingdom for a CNC router... This deck would have been done in 15 minutes...but I am learning new skills along the way, so...
I erred on the side of over-sizing the well due to wanting to reshape the template/well as little as possible. Gave myself a bit of margin of error.
Now that I've got the template and process set, the other 3 wells should go A LOT faster.
Thanks for all of the advice, tips and encouragement along the way. Fingers crossed that this thing works out...lots of time invested...
Aloha _GSave
Nice update mate, those wheel wells are looking great! I just used a pencil to roughly mark the angle in which the wheels hit the board, drew a straight line of that angle, and hacked away with the grinder. Then I hand sanded to get them neat. Yours look a lot nicer and more professional though!
One thing that might make your life easier when you are testing for wheel bite is to take the springs out of your trucks. Saves having to put all your weight behind it trying to bend them and spin the wheels at the same time.
Thanks, JD! I'm impressed with the fact that you got your board done in less than a week.
I just didn't have enough confidence in my ability to make the wells without some sort of template. It was a time consuming process. Basically doing R&D on the fly. The limitations of the router bushing set also caused some issues. Other woodworkers have complained that the bushings are too long unless you are making templates 3/4" (18mm) thick...and few people do that.
Many have files the bushings down to 3/16" so they could work with 3/16" or 1/4" template material (HDF/MDF), but I didn't have the time or patience for that. So, I went with the smaller guide that was about 3/16" long w/ a 1/4" straight bit. Used that until the well was deep enough to break out the wider/longer bushing that I could use with a 5/8" straight bit. If I could have used the 5/8" bit exclusively from the start, this would have been a much faster process, but removing that much material w/ a 1/4" bit takes a long time....Lessons learned.
I got the other 3 wells done today:

Right about 15/32 deep...just under 12mm?

You can see the outer ring done by the 1/4" (6.35mm) bit...also had to remove all the interior wood until down to a deeper level.

Am I deep enough to break out the 5/8" (16mm) bit yet? Nope...keep going with the 1/4" one.....................

Reference marks on a curved template...not the easiest thing in the world.

Cross-referenced side to side...

The 5/8" (16mm) bit!!! My best friend today. Can see that the guide bushing is longer and can't be used until the well is deeper...or the template is thicker...

Finally done...1st one on right done a couple of days ago looks a little oversized...but, hey, it's on the bottom of the board. Who's going to see it? I'm hoping that a little hand sanding to even them out might trick the eye...We'll see.


Close enough for military work.
On to the final sanding/prep for finishing.
I am so glad to have this part behind me. Great learning experience, but time consuming...
On the home stretch...finish rails, burn wood, sand, pre-condition, natural stain, red paint cut w/ mineral spirits for a little color, clear coat....and....wait for it....RIDE!
Save
Thanks, Nozza!
Maybe it will help someone coming along...and it will help me remember what I did.
Taking a break from it for a few days...maybe get back on it tomorrow.
Wuuuuuuuu.....
Finally I have a day off to work on my board...
First outlined the printout on the wood...

Cut it out and made another copy...

Then draw rails and wheelbite holes on 1 of them and cutted it out...

Now I have 1 with rails and wheelbite holes and 1 without the rails and wheelbite holes...

Next step is to nicely sand the edges of the rails and wheelbite holes... Then glue them together and it will look like this...


Pretty STOKED with the outcome and the progress so far... Will update when I do the homemade risers and the rest of the board....
Thank you sooooo much for sharing the build of these boards with me... And making it yourself is soooo much more fullfilling then buying it... Love the manual hands on approach... Wuuuuuu... ^^
Cutting two and gluing them together...brilliant! Never thought of that one.
Build is looking good chimp, keep us up to date with your progress!
Glad to see you've got your board started, chimponsea. In hindsight, that's a good way to go to cut out the rails and wheel wells and then glue up...Looking forward to more pics of your build.
I've been detoured by other higher priority projects...like packing up and moving. The board has been put on the backburner, but I was able to get the bottom, rails and wheel wells mostly done.

I filled the wheel wells with a mixture of Gorilla glue and sawdust to even them out and hopefully add a bit of strength.

Next, I burned the wood with a propane torch. The thing was like a jet engine (50,000 btu?)...serious overkill and was concerned that I would burn the house down...I barely had the thing turned up and it was insane...got the job done fast, though. This pictures was pre-sand, I think...After this, I put some wood conditioner on the deck and hit it was the orbital sander w/ 120 and then 220, hand sanded wheel wells and then wiped on a Minwax Natural color stain just to bring out the grain.
I was hoping the wood conditioner would raise the grain so I could sand it down...and it did, but the pre-conditioner kind of gummed up the sand paper.
For the top of the deck, I wiped it down with water to raise the grain...and that's where it sits now...next, sand w/ 120...
I'm deciding what I want to do with the top as the wood looked really nice just wiped down w/ water...the water (before it dried) brought out the grain...and I'm thinking that's what it might look like with just the clear coat.
I'm debating whether to just sand, seal and clear coat OR sand, burn and clearcoat...or ad a bit of the red color...I'm leaning towards more natural on top and maybe ad a bit of color to the bottom.
Geronimo, where have you gone?
My latest from next door.
www.seabreeze.com.au/forums/Stand-Up-Paddle/SUP/The-story-of--Iron-Phil--?page=2#14
Hey, Nozza,
I'm packing up a house to move...so had to put the board aside for a minute. It's so close, too.
I found out that one can use sanding sealer between two potentially incompatible finishes (oil and water based) to allow them to go together... So, I got all that done. All that is left is to sand that sealer coat, spray with poly, attach rails and put the trucks back on...
The only thing I might have to do is add a stringer, but we will see.


I just went with a natural finish on the top of the deck. Couldn't bring myself to cover the grain...didn't even put a "natural" stain on it, because that tends to darken it a bit...


Wow....... you guys are lucky to have time to smik your ride.
We diy 2 - 4 rigs in a arvo ,with outlines from Sup n Surf mags , jigsaw, edge router, sand , drill, assemble, name ,ride.......
Very raw, decks get a beating

These young people are hungry for learning even with basic teck so the though and spec that has gone into your board is inspired.
Great work guys love to see all the photos.Does someone has the CAD drawing for me?
I want to start my own project.
thnx in advance
Bighugg, nice work with the kids...great that you are getting them out there on the boards.
movingsquare, if you pm me your e-mail I can send you the file...
Welcome to the thread to both of you.
Well, I finally finished the board. There's probably a few tweaks to be done, but I'm calling it good for now.


The rails seem to be working well...very little flex. Kinda like a Firewire stringer in the rails vs. down the center deal, I guess.

I just countersunk #10 1-inch zinc-plated phillips screws...seems to be holding up o.k. on my first couple of test runs.
I can see that I'm going to want to build a land paddle as I get winded pretty fast without one...my thighs are burning due to the height of the deck and it's dead flat around here for the most part. I'm sure I will get used to it as I skate more. It's only been 25 years since I stepped on a skateboard!
With a land paddle, I figure I can alternate between legs and upper body...
One thought for those coming along behind...you might want to just use one half of the template like shaping a surfboard so that both sides of the deck are equal. That though came to me a few weeks ago...my deck is fairly symmetrical side to side, but not exact. Close enough for me, but might save someone the effort in the future of trying to equal them out by sanding...
I messed around with the finishing and learned a lot in the process. But the sanding sealer didn't really seem to work that well. I had to pretty much sand it all off to get it smooth. It was just looking kind of funky. Maybe I didn't apply it correctly. Not sure. And in the end, I just went with a fairly natural look.
Well, that's it for now.
JoffaDan, Nozza and chimponsea, what are you gents up to? Any updates on your rides? Thanks for your help on this project!
Looks like you are doing some good work there Bighugg well done mate.
Your board turned out great Geronimo! It's definitely a work out pushing this beast around, a land paddle will help in that regards for sure. Thanks for contributing so much to the thread!
Not much skating for me at the moment, it's too cold here. Will have to get some video when it warms up.
Cheers
Heya all,
Great job Geronimo1111 looks very nice! I already got an cad file.
My girlfriend works at an architecture company and they gonna laser cut the wood and the holes for me.
I will show you guys the pictures when ready. But it will take some time because holiday just started here in Europe.
If you want i can share the updated new cad file with you guys.
This week i want to get all the parts for the board.
What do you guys think about the Abec11 flywheels 97mm with reds bearings?
@Joffadan maybe you can skate indoor somewhere?
we keep in touch love this thread!
greetings
Similarly not much skating, but because I'm getting on the water enough.
Days that it's too crap to get on the water, it's too crap to do anything.
Hamboard is always in the van though
Yes, JD, a land paddle for sure. It's been as hot 48 C (down to about 40 C degrees today) here...so it seems our problems with temperature are reversed...
@movingsquare, looking forward to seeing your ride... Are they using a CNC router to cut it? If so, that sounds like a sweet deal and the way to go. Looking forward to the pics. I'll probably hit you up for that CAD file just to have it on hand.
I can't comment on the ABEC11 97s, but that seems to be what everyone is going with...I got some cheaper 97s from a shop in Utah with a slightly higher durometer...I would imagine softer wheels would be better, but I'm pretty happy with the way mine are riding so far...
Just out of curiosity, what part of Europe are you in?
@Nozza, glad to hear you are getting on the water. I read some of your posts on stand-up paddles on a different thread...that'll be next.
@chimponsea, where did you go, bro.
Hello all,
First of all I am sorry for being absent for such a looooooong time... I got side tracked with our own build Hamboards, Carver skateboarding and the occasional surf in The Netherlands... We had some great days of surfing this summer... Considering the usual messy waves we have... Some clean days with real ground swell instead of wind swells...
Anyways... I am getting carried away...
I finished building 2 Hamboards and what great fun they are... I still have not finished the finishing touch by painting the boards but my girlfriend and I have been riding them whenever we can...
Thanks to the board I now can cross step on my surfboard instead of doing the shuffle....
Stepping the board forth and back is an amazing feeling... But the Hang Tens are unbeatable...
Amazed how easy these boards turn... Love the Original Trucks...
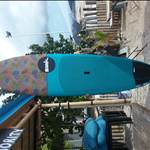
Here some pics of the boards and us having fun with them.... ^^


The one with the bat tail has 107mm wheels, but I need to adjust the risers... I wil make them 12mm higher and then the wheelbite will be history...
These diamonds in the rough will shine soon as they will be coated or painted... Updates will follow...
Geronimo your board looks great and I wish you soooo much fun with it...
Thanks all for your detailed updates of your builds and setting up this forum... My girlfriend and I can now surf on land when it is flat...
To all those who are interested and inspired in building these boards yourself... Go for it... It will be worth going through the proces of building one...
S.T.O.K.E.D..... ^^
Wow...... that is some technical gone into wheel recess.
I tried 2 x 25mm blok.... still bite ![]() ... CHOP
... CHOP ![]()
250 Originals 94mm wheels 360mm wide 25mm structural ply


I'v got cordlesstools with me most times so spontaneity in ripe.
Have seen 100mm plus wheels on the net, anyone tried them ? ? ?
Bigger wheels get terrifying quickly.
Bought at different times two MBS I think boards from Adelaide.

The green wheels roll really easily on dirt / toppings, but my paddle stick won't grip well on those surfaces.
They are 100mm.

I put the wheels on one of my Hamboard decks, really good to skate but I keep pulling calf muscles, so need to paddle.
200mm inflatable wheels roll on anything.

But get to terrifying speeds quickly.
Board came with bindings to kite it, or "snowboard" it, I have taken them off because I don't want to face plant the ground with my feet stuck to the board, but the concept is good.
BH, they would be really good where you are.
Good stuff, guys...I just bought a Kahuna Stick at about 50% off...
Just moved, so almost everything (including skateboard) is in storage. As soon as I get the land paddle I'll give an update...
Bought a Braaaptstick thing via Hamboards.
Based on the South African murderer's legs.
Hoping it takes some of the jolt / shock out of the initial "paddle" plant.
Only used it briefly, need to modify the technique I have developed that gets the stick to grip at the back end of the stroke.
Seems to brake well though.


Wow..... tath some serious mind warping...... constantly amazing the hybridization of things for sups n related. Enjoy