Weather | Buy&Sell | Forums |  |
Weather | Buy & Sell | Gallery | Forums | |
Keep the pics coming no matter what obct. It will turn out better than what most of have done....nothing![]()
Not 100% sure about anything at the moment, the shape and the dims will be dictated by my ability rather than my needs because this board will be far thicker than a nose ride should ever be.
These are a few of things I'm thinking about.
template- this will not be too far removed from an ITP, but the wide point will probably be further back
The rails - will be 50/50 up front dropping closer to 60/40 at around 32 inches back from the tip.
Deck - flat to start with, but there will be a slight step in the deck to allow greater thickness, (remember, this is a board for a fat turd) it won't be as pronounced as my pin tail because it needs to be blended to get a type of rounded deck that NRs need from the centre to the tail.
Belly - Conc up front blending away to a rolled bottom by the 40 inch mark. The rest of the bottom will be rolled until about 18" from the tail where you'll start to see a slight vee running out the arse.
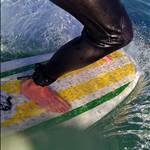
Tail - this is where it gets tricky, simply put, I can't ride a square tailed board, I don't know why, but for some reason, myself and a square tailed board just don't see eye to eye regarding how a turn should be done.
Pin tails are not the hot ticket for nose riding so that leaves me with only a couple alternatives, a moon tail which I doubt I could shape very well, let alone glass, or a diamond tail.
Although the diamond is not considered the ultimate for an NR, it may be all I can do, and if nothing else, it will at least shorten the rail length and tighten up the turns.
The rails from around 14" up from the tail and to the tip of the tail will look a bit strange, they will be like an upwards foil in an attempt to get a greater degree of laminar flow compared to the top, so if I do manage to get it under a crumbling lip, it may generate some downward force.
The dims will be around 9'6" close to 24" wide, but the thickness will be as close to 4" as I can make it.
The thickness is the tricky part because not many blanks come thick enough, that's why I had to wait a bit longer and pay a slight premium to get this one blown and shipped down from Tweed Heads. Also, I could not be too choosy about the rocker. I'd like it very flat with more tail than nose lift, but to get this thickness, I had to settle for a 4 5/16th lift at either end. After it's done I'm hopeful that I'll get at least another 5/8" kick in the tail.
I know it's a short board but has anyone here surfed the Clearwater crumpet? Any thoughts would be appreciated.. Sick looking one in the shop that has my volume thinking it might be the go for out front

is that your collection? Clearly an immoral method of laughter due to the extreme evil you produce ![]()
![]()
![]()
![]()
![]()
![]()
![]()
![]()
![]()
Nope that is Dave Bashers collection. He was nice enough to let this one go to me. He has a very nice quiver. Bennett,McT, McCoy, Tyler. Saweet!!


It's been interesting Ted, I'm finding a nose rider to be far harder than a HP board, it's the rails and the bottom roll that confuse me, I've done a rough rut of the rail bands, but there still about 1 1/4 inches that need to be rounded and refined for the apex, if I get that wrong, the whole thing is stuffed.
Almost made a big mistake on the tail when I was trying for more kick, I took too much off and I realised that I may have a problem setting the fin box far enough back, I think I stopped in time. I may be doing a Volane patch top and bottom, just in case.
The biggest problem is the boss, she not happy about me doing another board and making all the mess so I can only work when she's out and that's usually only on a Sunday, and I need to stop well in advance of her coming home so I can do a really good clean up.
Plus I needed to rig up something that would catch the worst of the dust off the planer, it seem to work well, but it does restrict the planer movements a bit.
The most immediate challenge is the nose conv, I've marked it out and I know what depth I want, but I'm just not sure of how to cut it, so I used a vernier to mark the depth along either side of the stringer by pushing the depth slider into the foam at 2 inch intervals. My theory is, as I see the pin holes disappear, I will know I'm at the right depth.
If it doesn't work, you may not see many more pics.
Mac, I'm fortunate in that getting my hand on a few spare light fittings is not a problem in my industry, as long as I put them back when I'm done.
Nice work OB - as Mac said - nice setup. I think I have mentioned to you previously that I suffered the same issues you had re the lady and mess. I found a cheap solution - go to Bunnings and get a handful of cheap blue tarps - then hang them from the roof and also stick them on the floor. It does not keep all the foam out but a fair portion of it if you hang them well. Makes life a lot easier on the cleanup as well.
Yeah it has the loaded dome but its much more subtle.
Getting her wet Saturday. Sooooo excited.
Builders plastic is cheap, and easy to roll up after glassing, to dispose of.
Re shaping the concave. Don't expect to be too exacting with the planer, it's only a rough cut. The final shaping is done with surform and sanding. A few passes with a sanding pad or gauze makes a big difference.
How did you connect the vacuum duct to the planer?
I find a tensioned wire above the board to suspend the duct and power lead from helps keep them out of the way.
Yeah I think they good boards. Built to last, insane glass jobs and work well in our waves.
People seem to love em or hate em.
Why can't more people do glass jobs like McCoy?
I've only surfed one a couple of times, but fast, loose, paddle well, hold in...what's there not to like unless the whole weight over the back is beyond you?
Awesome boards.
Beerdad, I found a piece of pvc pipe that roughly had the same area as the planer outlet, in this case it just happened to be the flush pipe that would normally go between the cistern and the pan.
I then used a heat gun to soften it up enough the get it over the weird shaped makita outlet. I needed a relief cut to get it on all the way The rest was just good old duct tape
OB if you really want an air tight type solution thats reusable we use this zipperwall system when we do building jobs in hospitals where infection control is paramount. Bit dear but if you wanted some thing reusable that will completely keep the foam in then this is it.
adxdepot.com.au/tools-accessories/floor-wall-protection/zipwall-dust-containment/zipwall-room-kit
I saw some builders using that system down at warringah mall recently. I thought it was spiffy
Probably too much for just one board a year but it's nice