ok here goes...tassidevils new board is now underway and we have decided to do a running commentry on the build...hopefully it will be of some intrest for you breezers...its a total hand shape something that I think is a dying trade...remember the scientist doc. Edward Sumner Miller...a great quote of his was..."the calculator is breeding mathematical illiteracy" as well as "why is it so"...anyway i think the cnc machine is breeding planer illiteracy...there are a lot of so called shapers out there that have never picked up a planer...I'm not bagging the computer shapes..( I use them myself)...but at the end of the day...you can only say you have shaped it if you have picked up the planer and MOWED SOME FOAM...when it's come out of the computer...you have only finished it off..so as old farts like me start to die off the art of hand shaping most probably will too...I hope not as an old artist in Ubud in the hills of Bali said to me many many years ago, when I told him what I do for a living...he said sufboard shapers are the true artists...he said...unlike me your sculpteurs have to be symetrical...so now that I am using the computer more and more to shape ( and my shoulders are thanking me)...I am finding it allmost theraputic to slow down...take some time and sculpt one...here is how its done![]() ......first problem I have and I need some help...how do I get text in between my images my computer illiteracy is showing allready...for now Iwill have to put all the text up here...sorry
......first problem I have and I need some help...how do I get text in between my images my computer illiteracy is showing allready...for now Iwill have to put all the text up here...sorry![]() ...photos look to be all over the shop so you will have to work it out yourselves...one is of the shed (of course)...next measure the length....then mark out width...then lay template and draw out planshape...ok I'm posting this and will see how it looks...back again tomorrow night with a little more.
...photos look to be all over the shop so you will have to work it out yourselves...one is of the shed (of course)...next measure the length....then mark out width...then lay template and draw out planshape...ok I'm posting this and will see how it looks...back again tomorrow night with a little more.
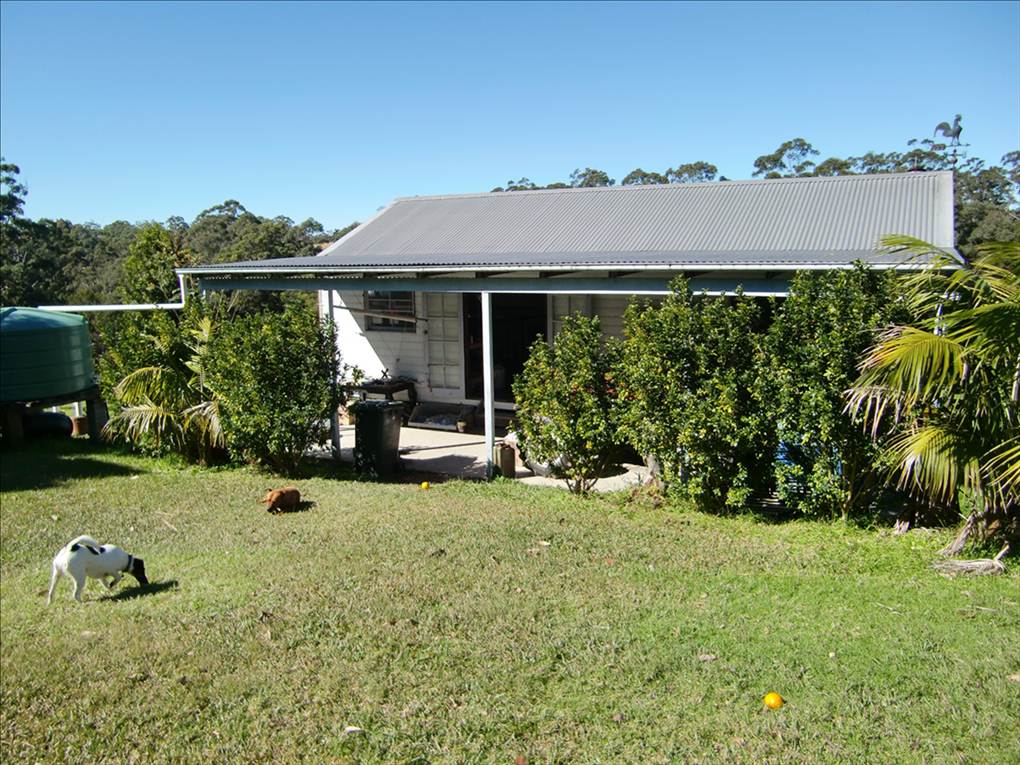
Love the work shed Arkgee . Can see why you enjoy your work - great work environment .
Boards looking good ![]()
Thats the best post I've ever seen on Seabreeze RG - legendary stuff mate , looking forward to mine even more now ![]() ..... you are one lucky lucky boy Taz!
..... you are one lucky lucky boy Taz!
Come on lads , shell out for a unique handshaped GODDARD stick - worth every single penny and true Australian 128%![]()
With the problem getting the writing between the pics
I upload my pics to see breeze , then write text and insert pics from uploaded images as needed .
Works for me and I am a complete computer illiterate [:)![]()
Nice surroundings there.Its gotta be better than a stuffy room in an industrial estate.
just hit preview to see if ya got it right mate - takes a bit of getting used to is all![]()
Get your mouse cursor between each picture RG - then type the message you want mate - before you post em up - hit the preview button to see if ya got it sweet - PM sent anyway![]()
most interesting seem i'm a hopeless shaper my hat goes off to all you old school hand shapers definately an art.
Hey RG - looks like a grunty blade on the drop saw - what you been cutting?
I am looking forward to this thread developing further ![]()
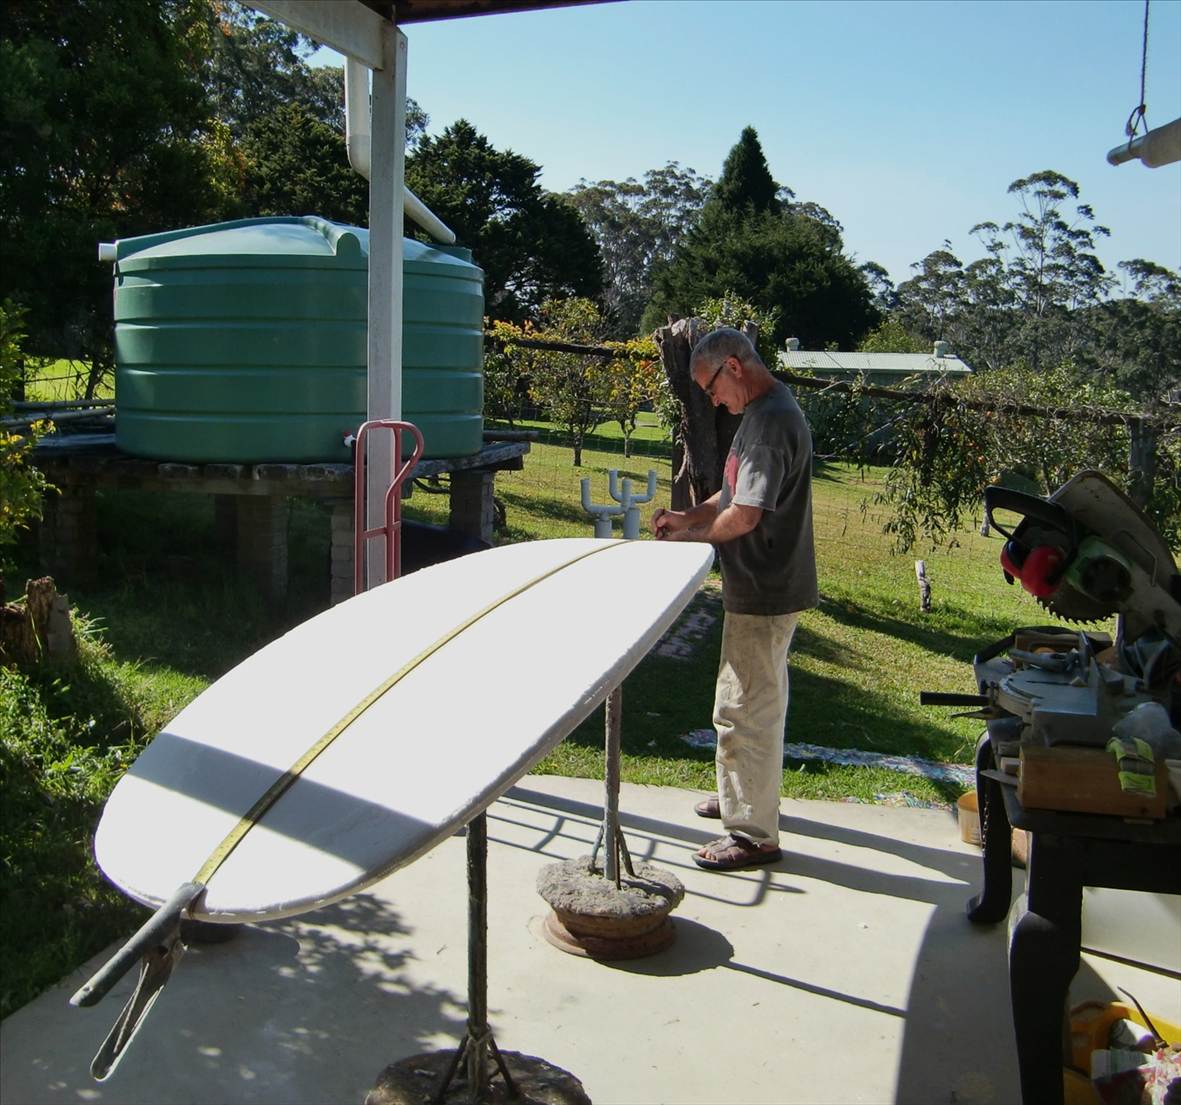
lets see if I have figured this out
with a hand saw cut out planshape
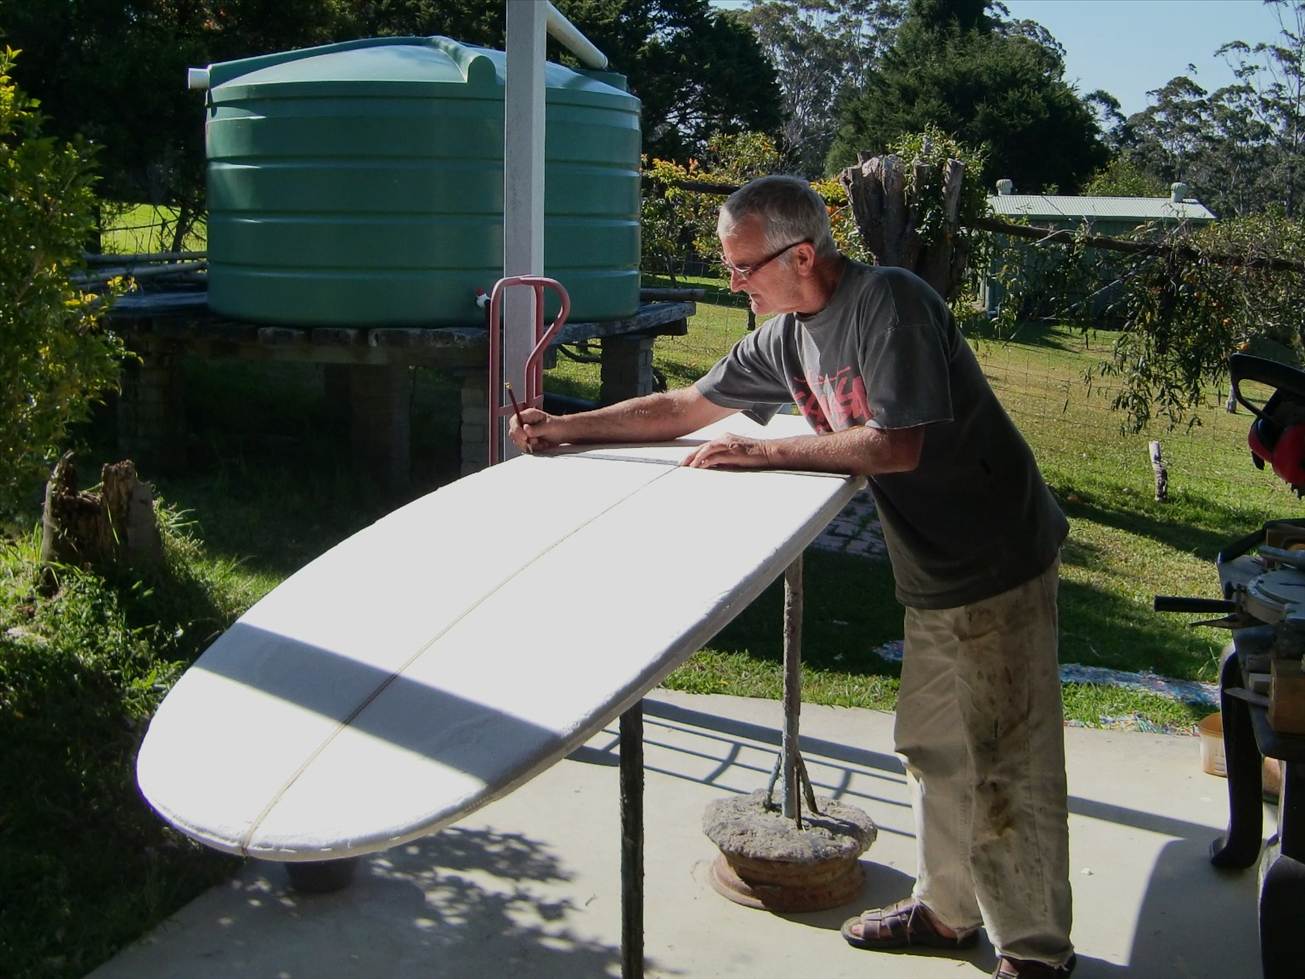
I think I have got it ![]() ....next the faithfull sureform...where would we be without the surefom..clean up the plan shape
....next the faithfull sureform...where would we be without the surefom..clean up the plan shape
finish with a sanding block making sure the plan is true
have something close that reminds you of the ocean at all times...........................go have a beer see ya tomorrow night![]()
Thanks for taking the time to post Ron - I will be looking forward to the next entry...
Have to agree with pup have to be up there with the most interesting posts I have seen yet on see breeze . Even more so for me .
Thanks for taking the time Ron . Looking forward to the updates .
That lighting setup, does that have something to do with checking rail shapes by eye and not having shadows one side, i am currently building a wood board and often notice that it looks different from different angles and light.
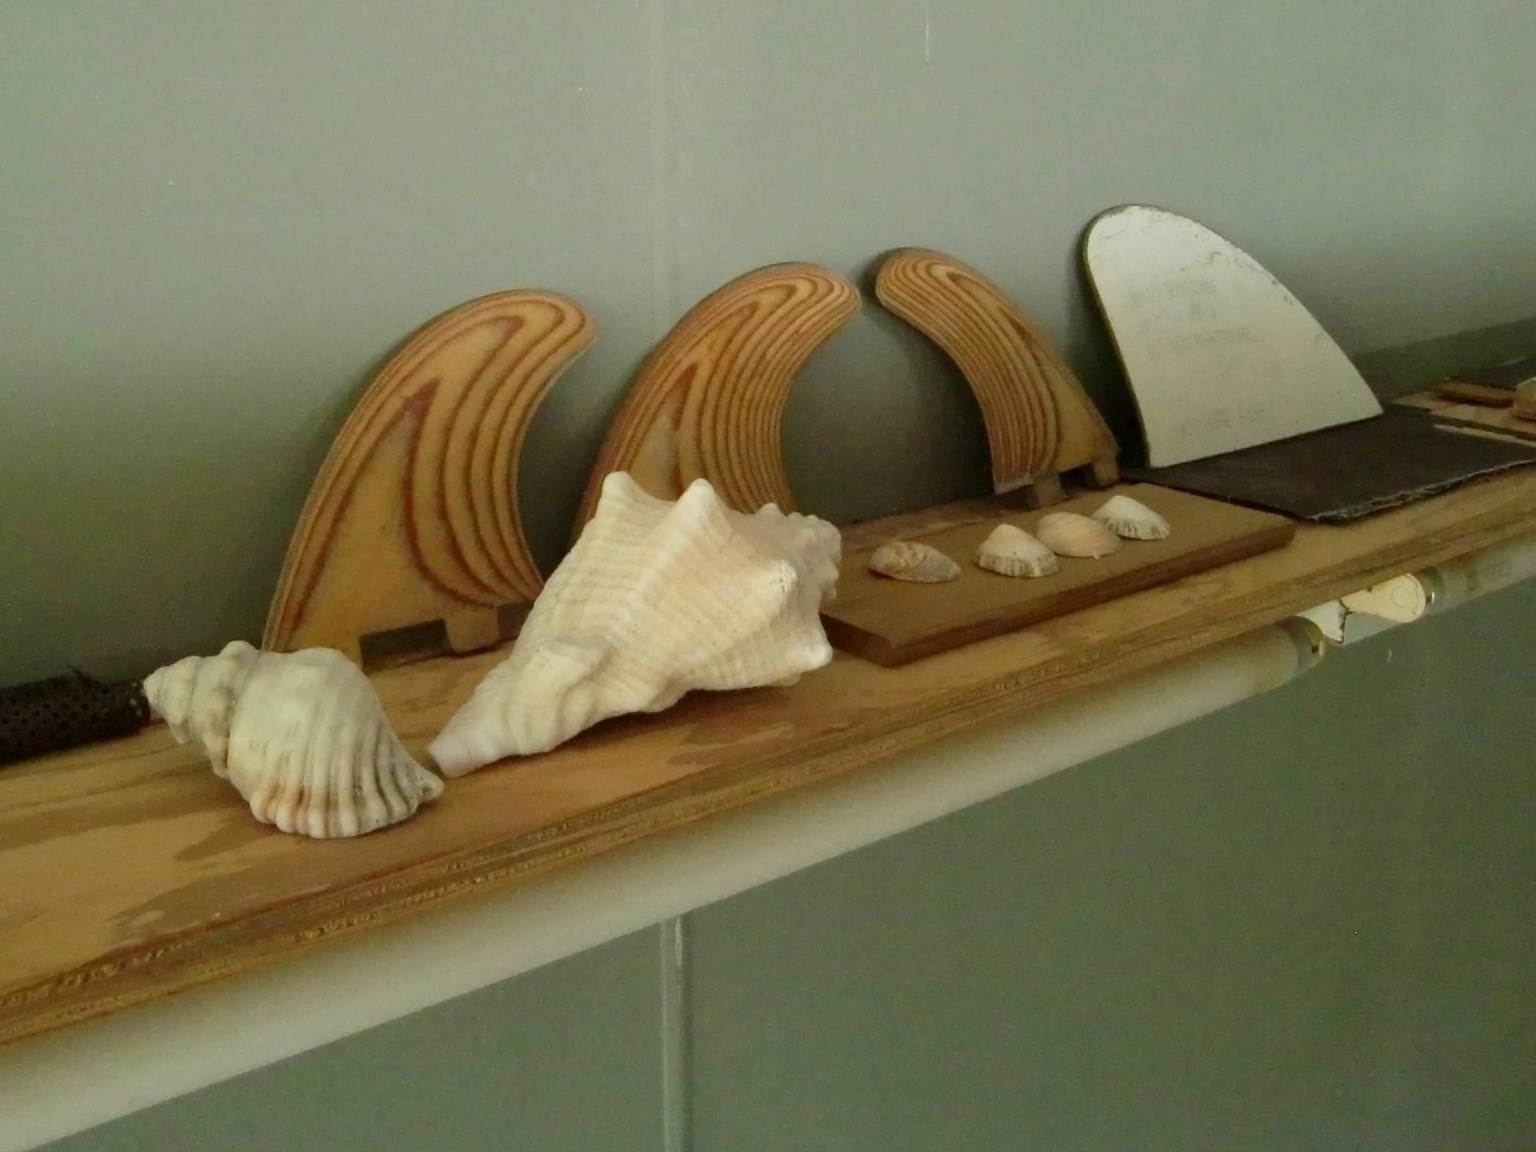
ps. thanks for the fin tips.
Great thread, thanks RG, look forward to the next update, and Tassie... 1 word... Bastard ![]()
![]()
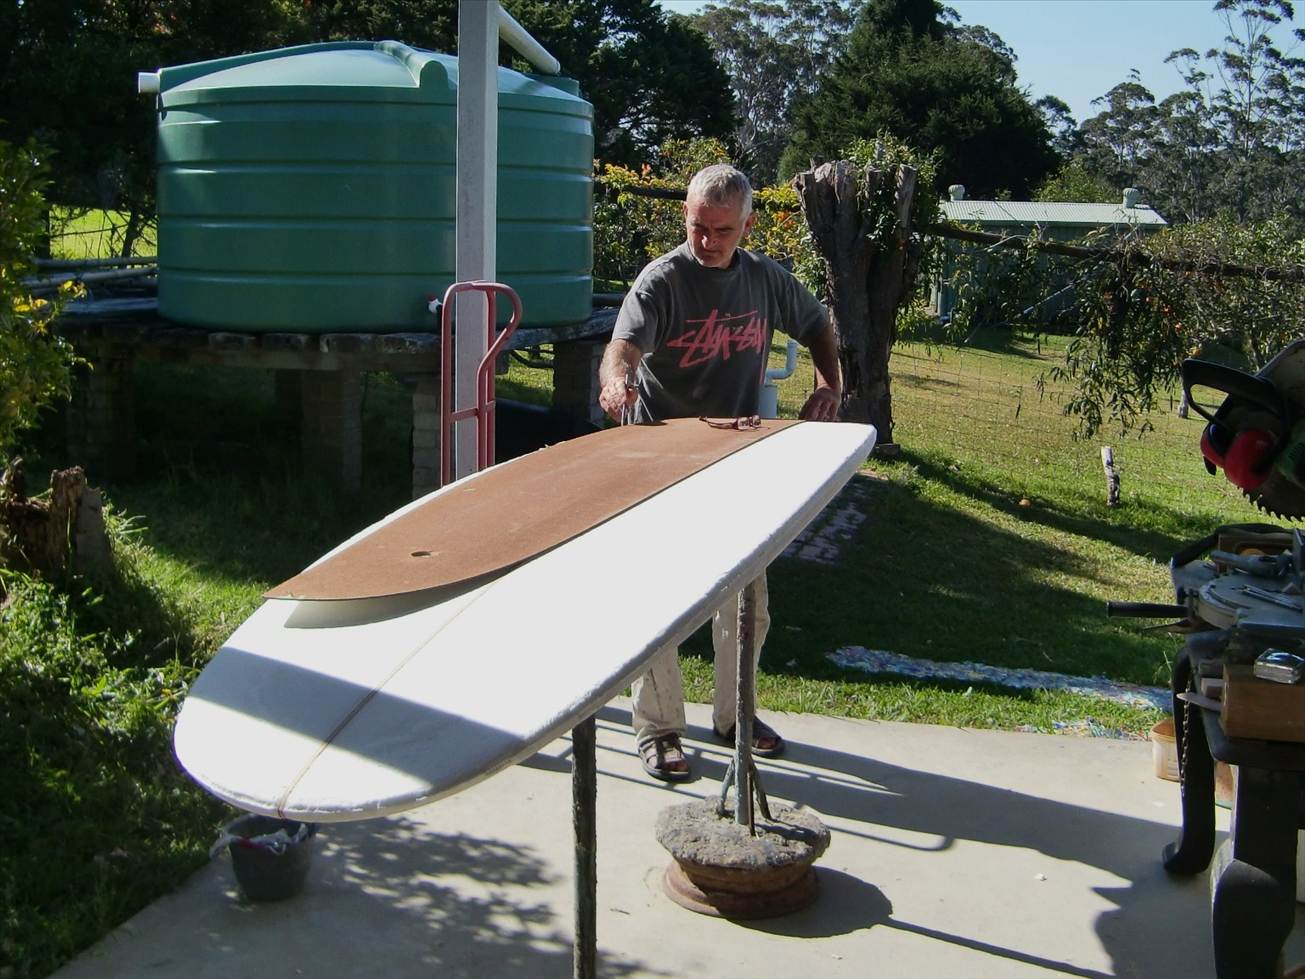
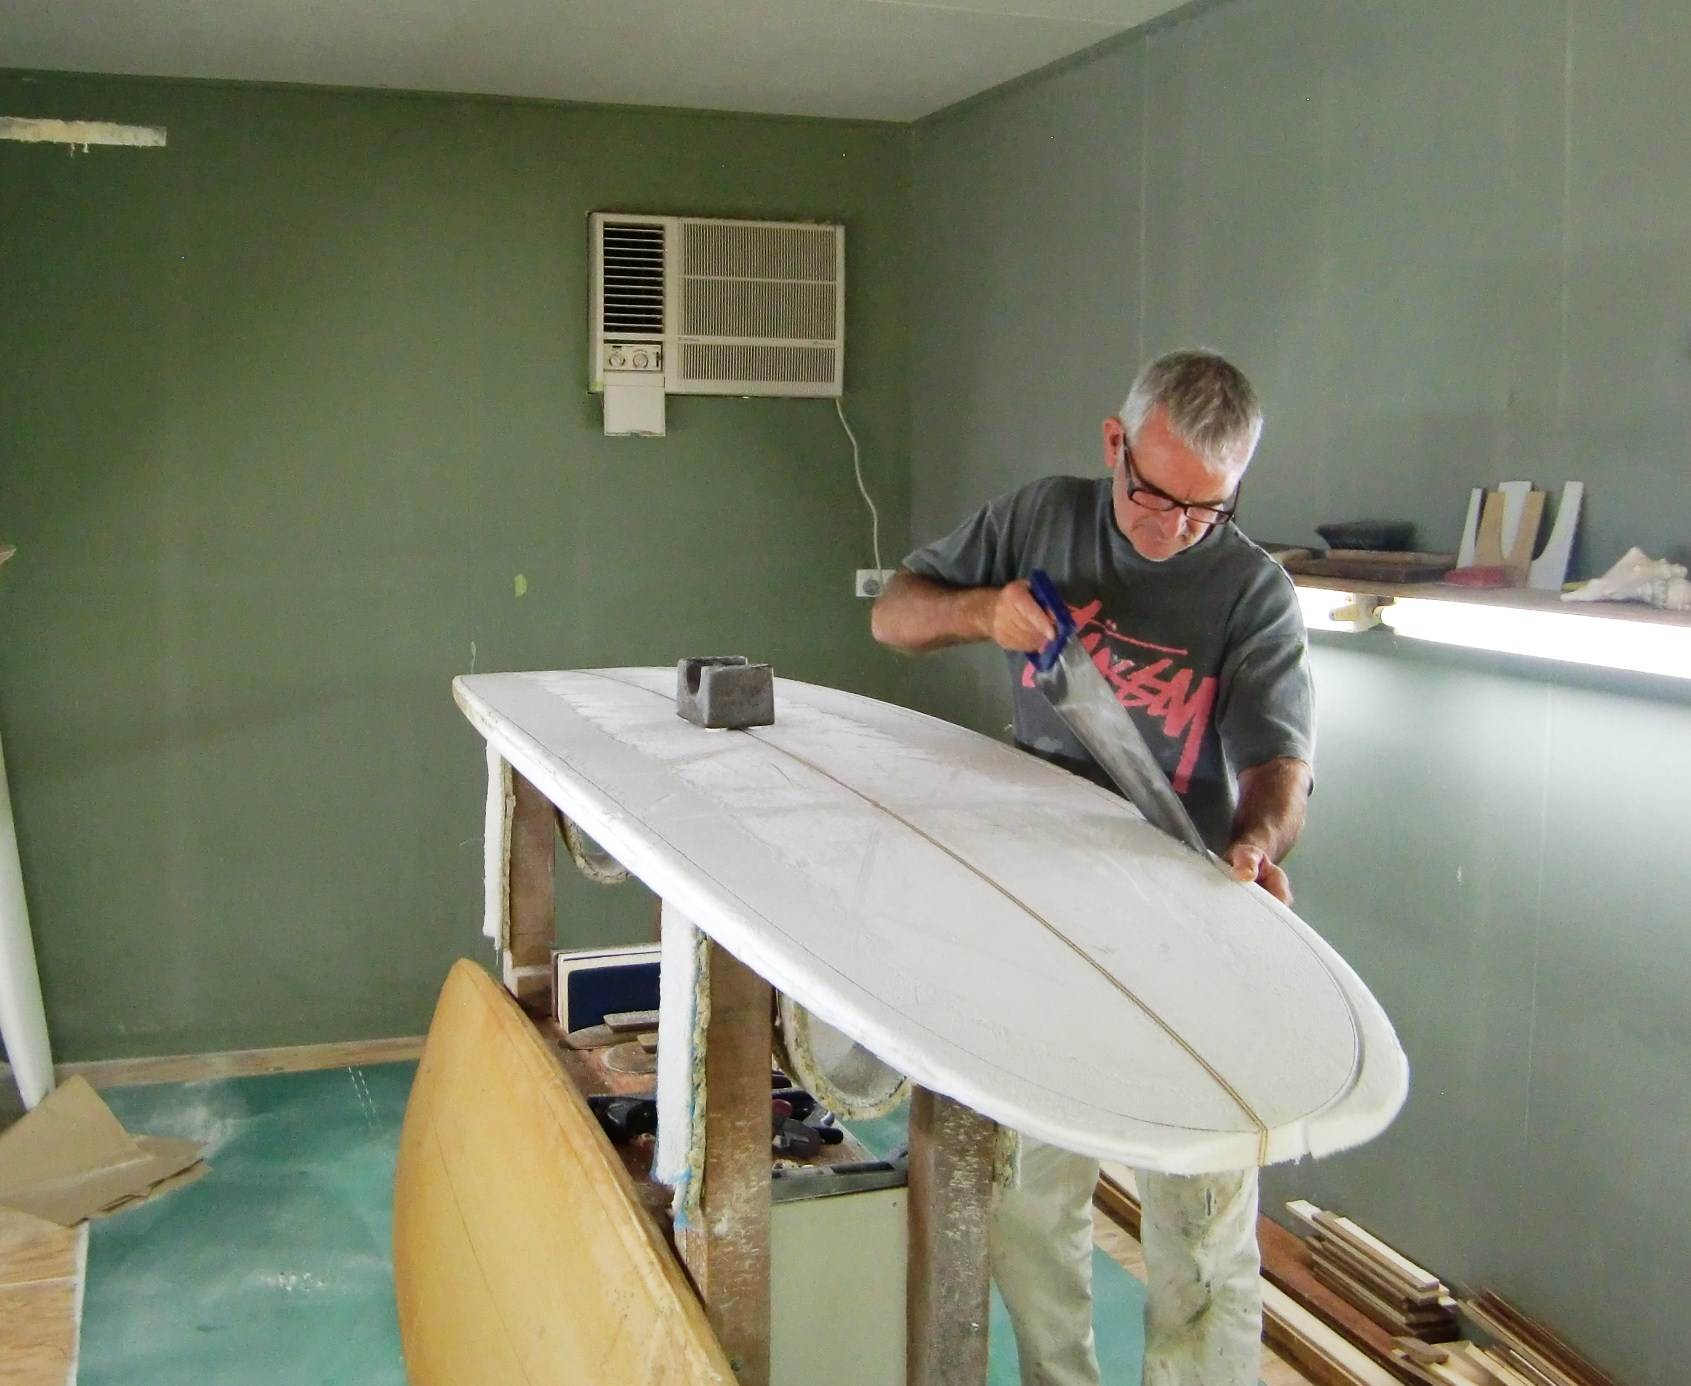
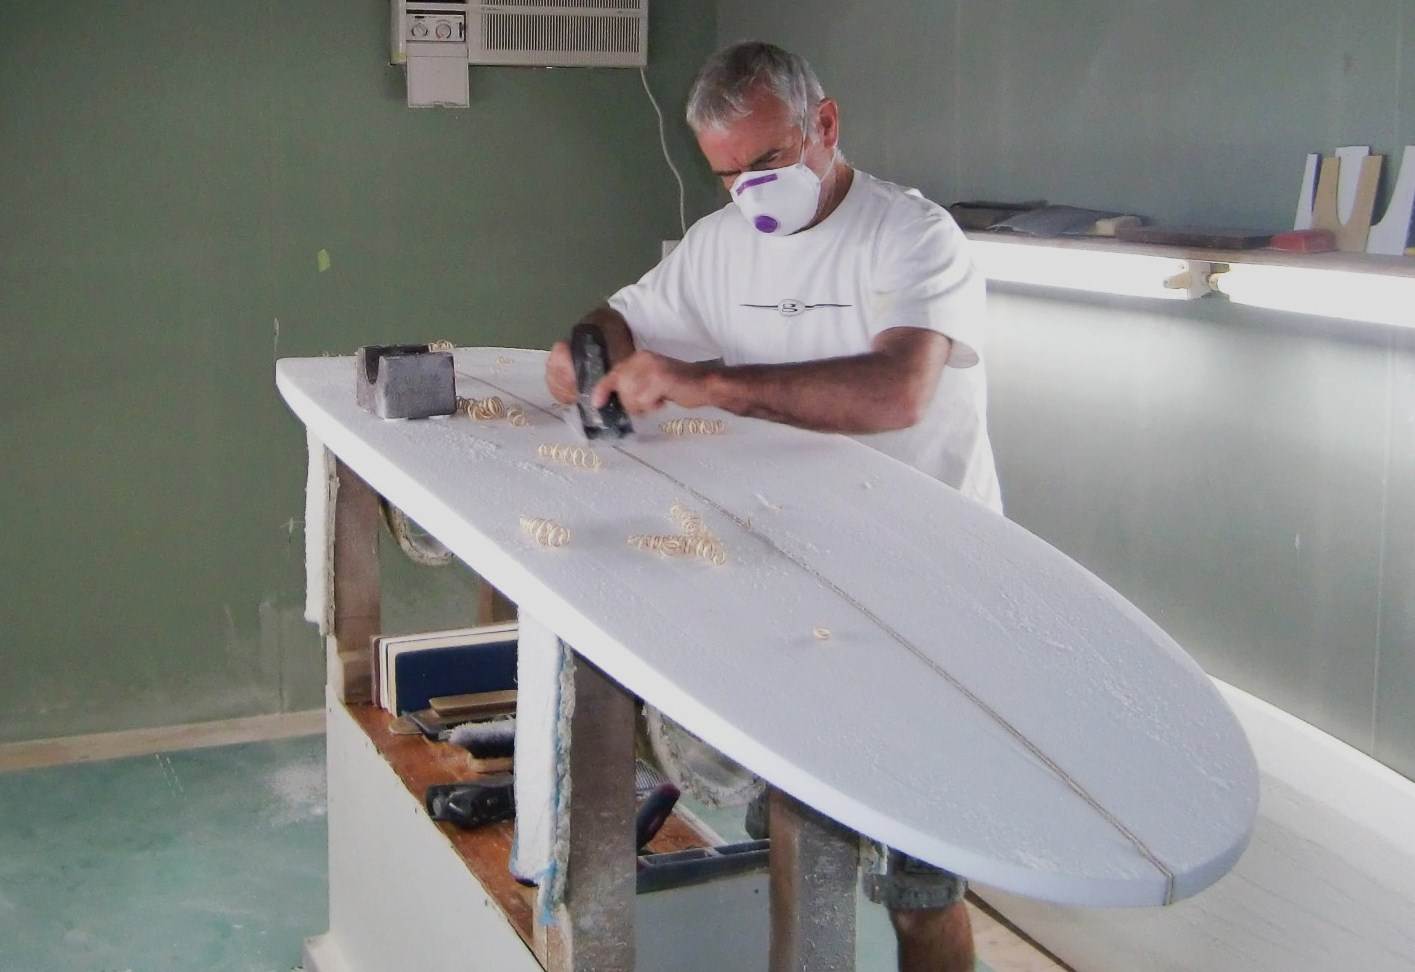
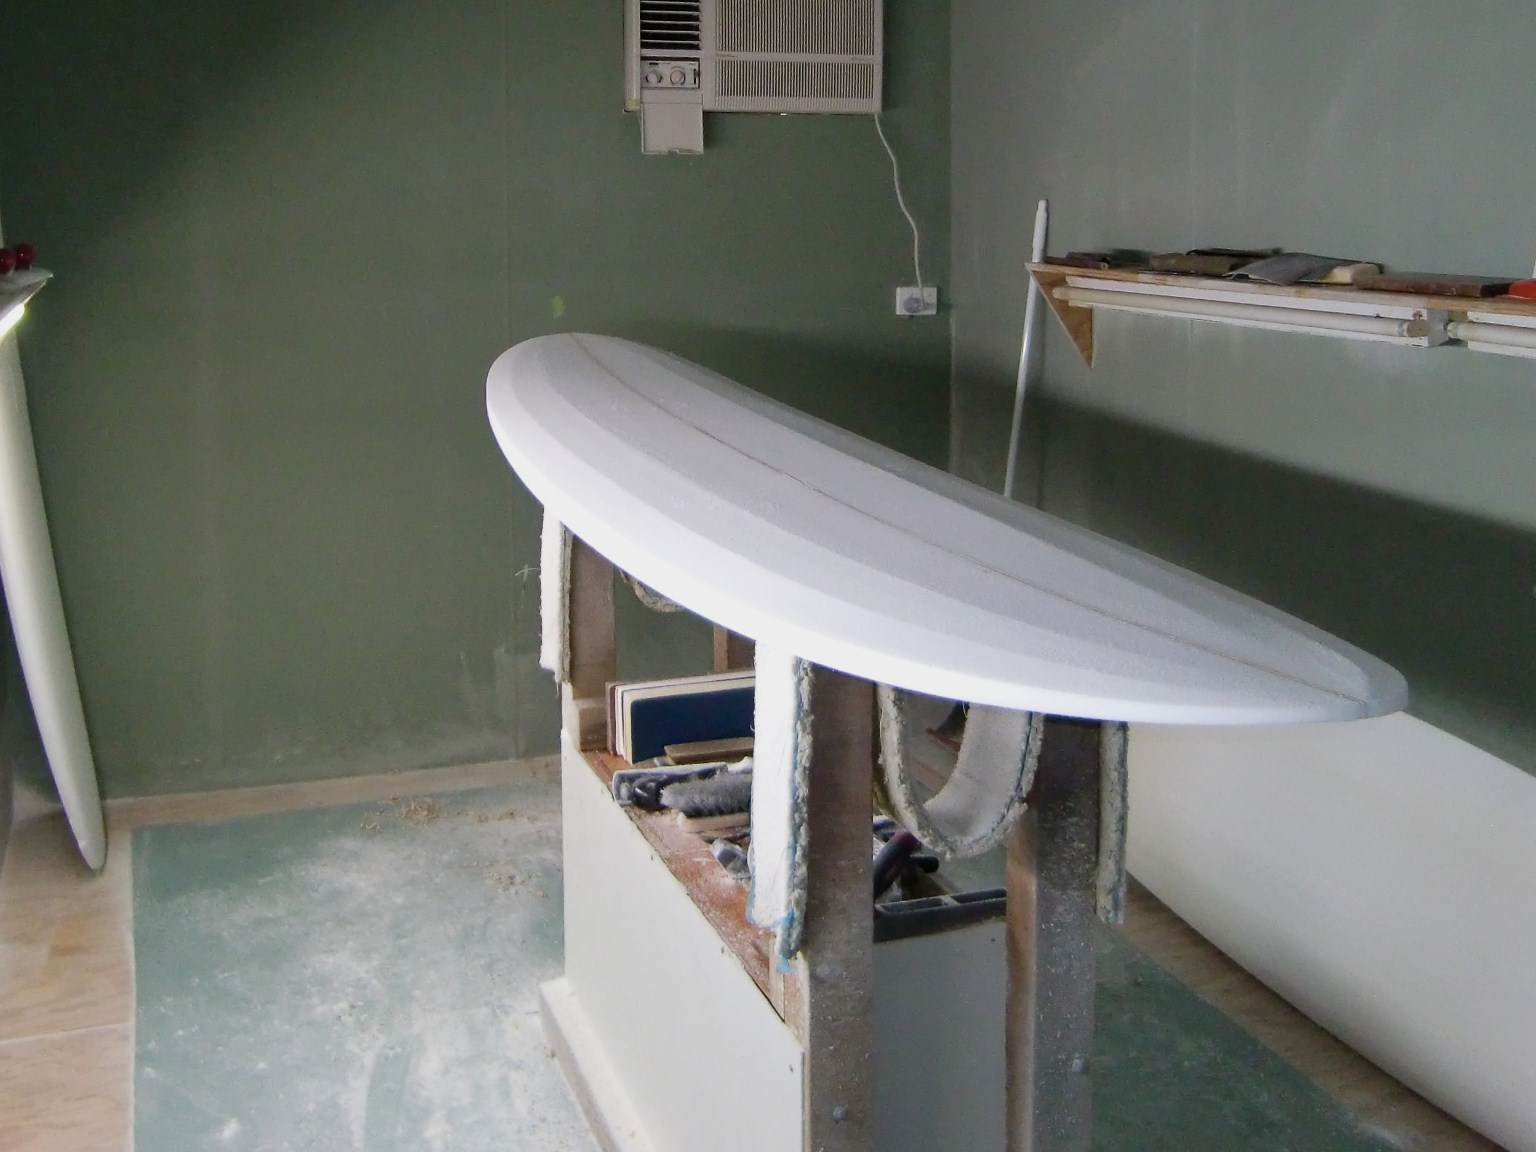
Ok time to mow some foam...I start on the bottom shape take long smooth cuts at a depth thats not overworking the planer and is comfortable to push...I rub a little parrafin wax over the bottom of my planer to make it run over the foam a little easier...when you have been doing it for a long time you get to know how many cuts, and where to put them to cut in concaves and V's...using the same blanks helps too...you get to know where the bumps and whoops are and you can just carve away not having to look too much
when your done, check the concaves and V's are all in the right place,
flip it over and start the deck...I like to do one big rail band first then another towards the centre then flat through the stringer, your creating a domed deck here,
get the calipers on it and shape down to required thickness
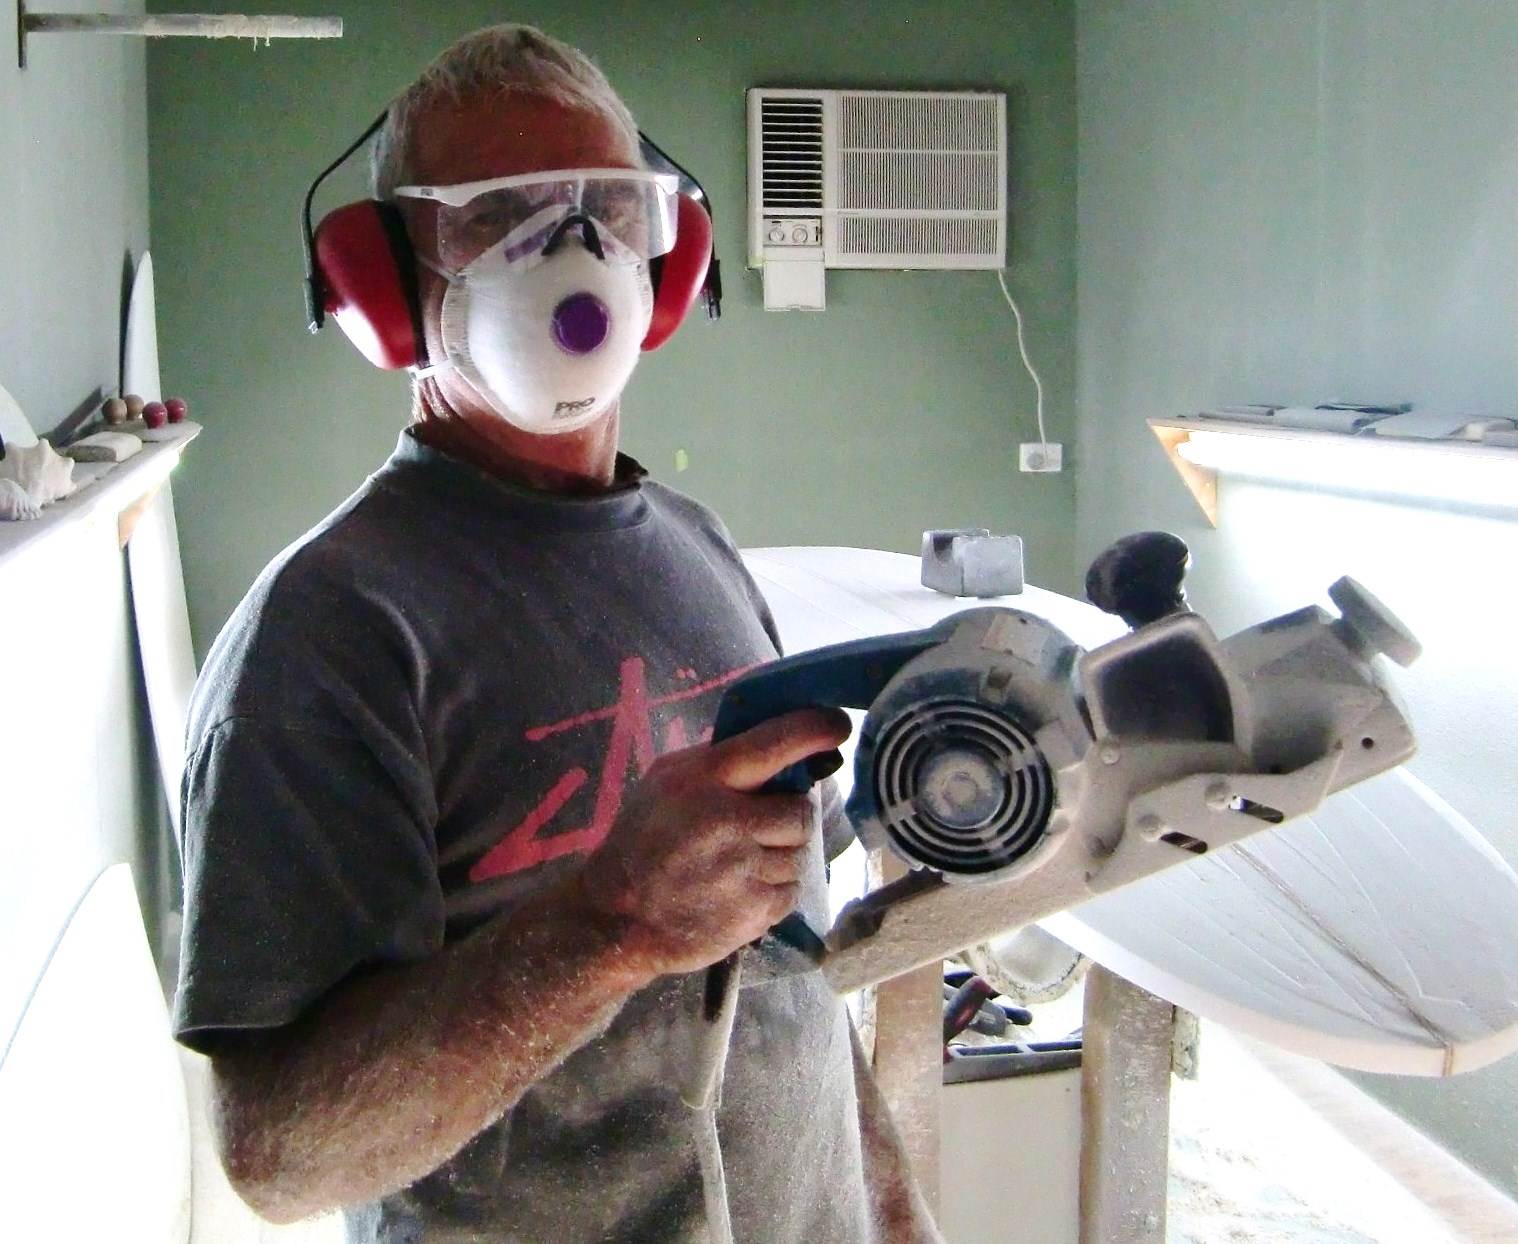
so now its roughed out and the only tool used is the planer.... this is my baby...a modified ryobi...dont even think they make em anymore...you use these things often enough and they become an extention to your arm ![]()
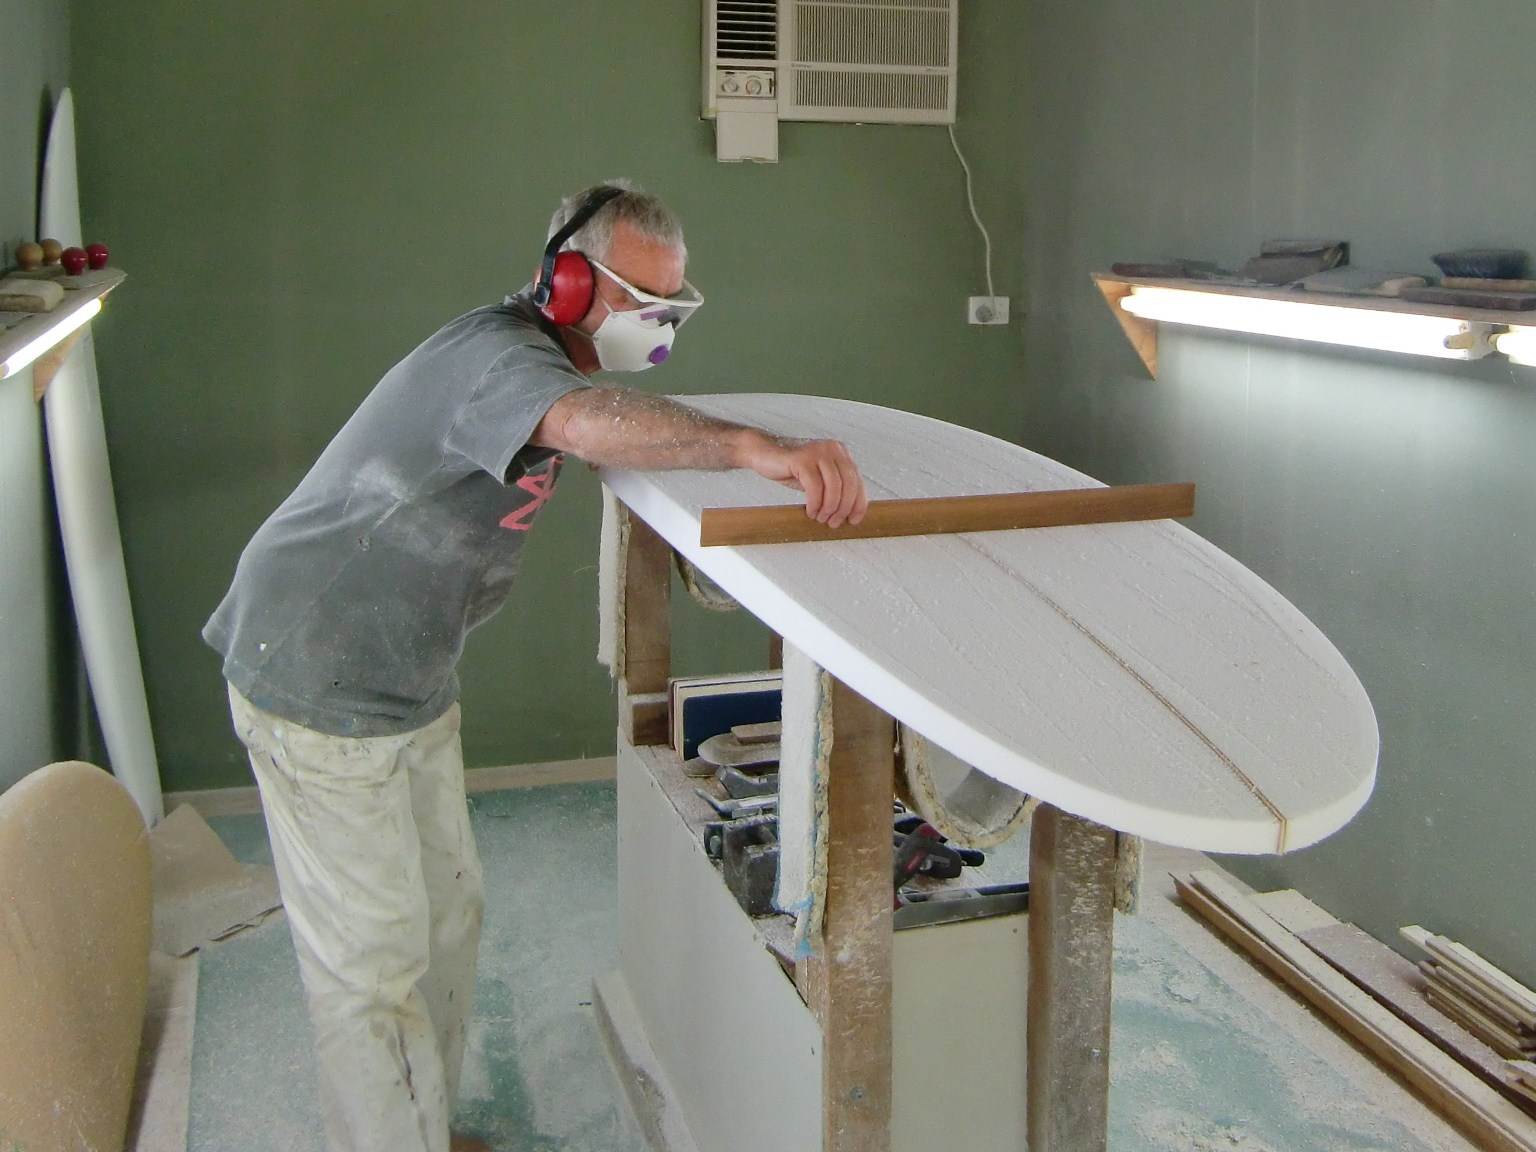
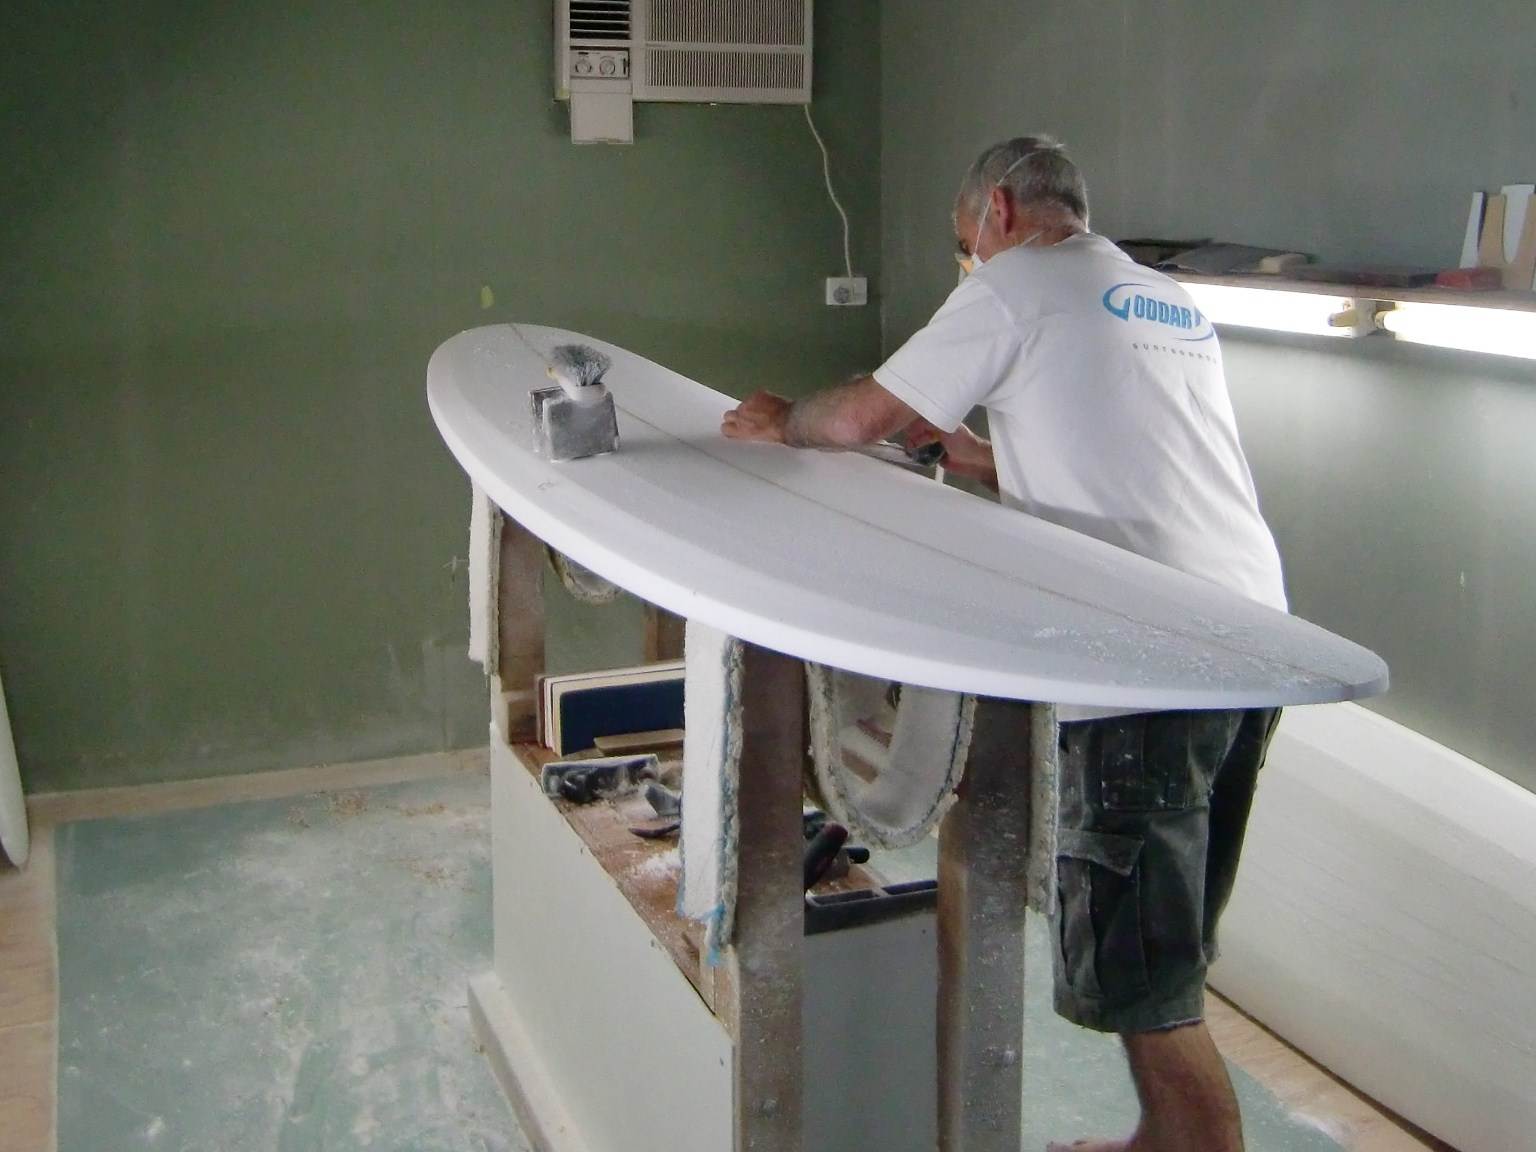
security are on thier break...next post fine shape...in these shots you can see the side lights working...best hint I can give is get the lights right... its so important...all shaping is done with shadows...long lines that cast shadows...without the shadows you dont know where you are.

^^^^^****wits thats where. i hate when a good thread gets spoilt. dosnt matter much as pup is a pretty cool hombre![]()
thanks mr goddard, am loving the thread and thanks heaps for going to the trouble of doing it. also remeber you cant have enough pics either![]()
you watching ted?![]()
Ronnie lovin those simple yet ingenious pointers , love the parafin bit and the "whoops n bumps" ... makes sense when you think about the experience/doing it with your eyes shut thing - classic stuff ... can't trust them dogs , feed em a bone or bikkies and they're off with the fairies mate eh!![]()
![]()
![]()
Great thread RG
Not sure who the red thumber is so I went through and green thumbed'm all of them to balance it out. Must be a Sydney Soccer fan.
looking forward to today's masterclass![]() can't take my eyes off this thread for long
can't take my eyes off this thread for long![]()
I have been asleep at the wheel and missed the last update - loved it even more!!! Thanks for the tips re the lighting RG. I have noted where your ones are relatively speaking and will use that as my basis.
This thread is getting better by the day!
Hey Tassie - you must be absolutely frothing watching this unfold.
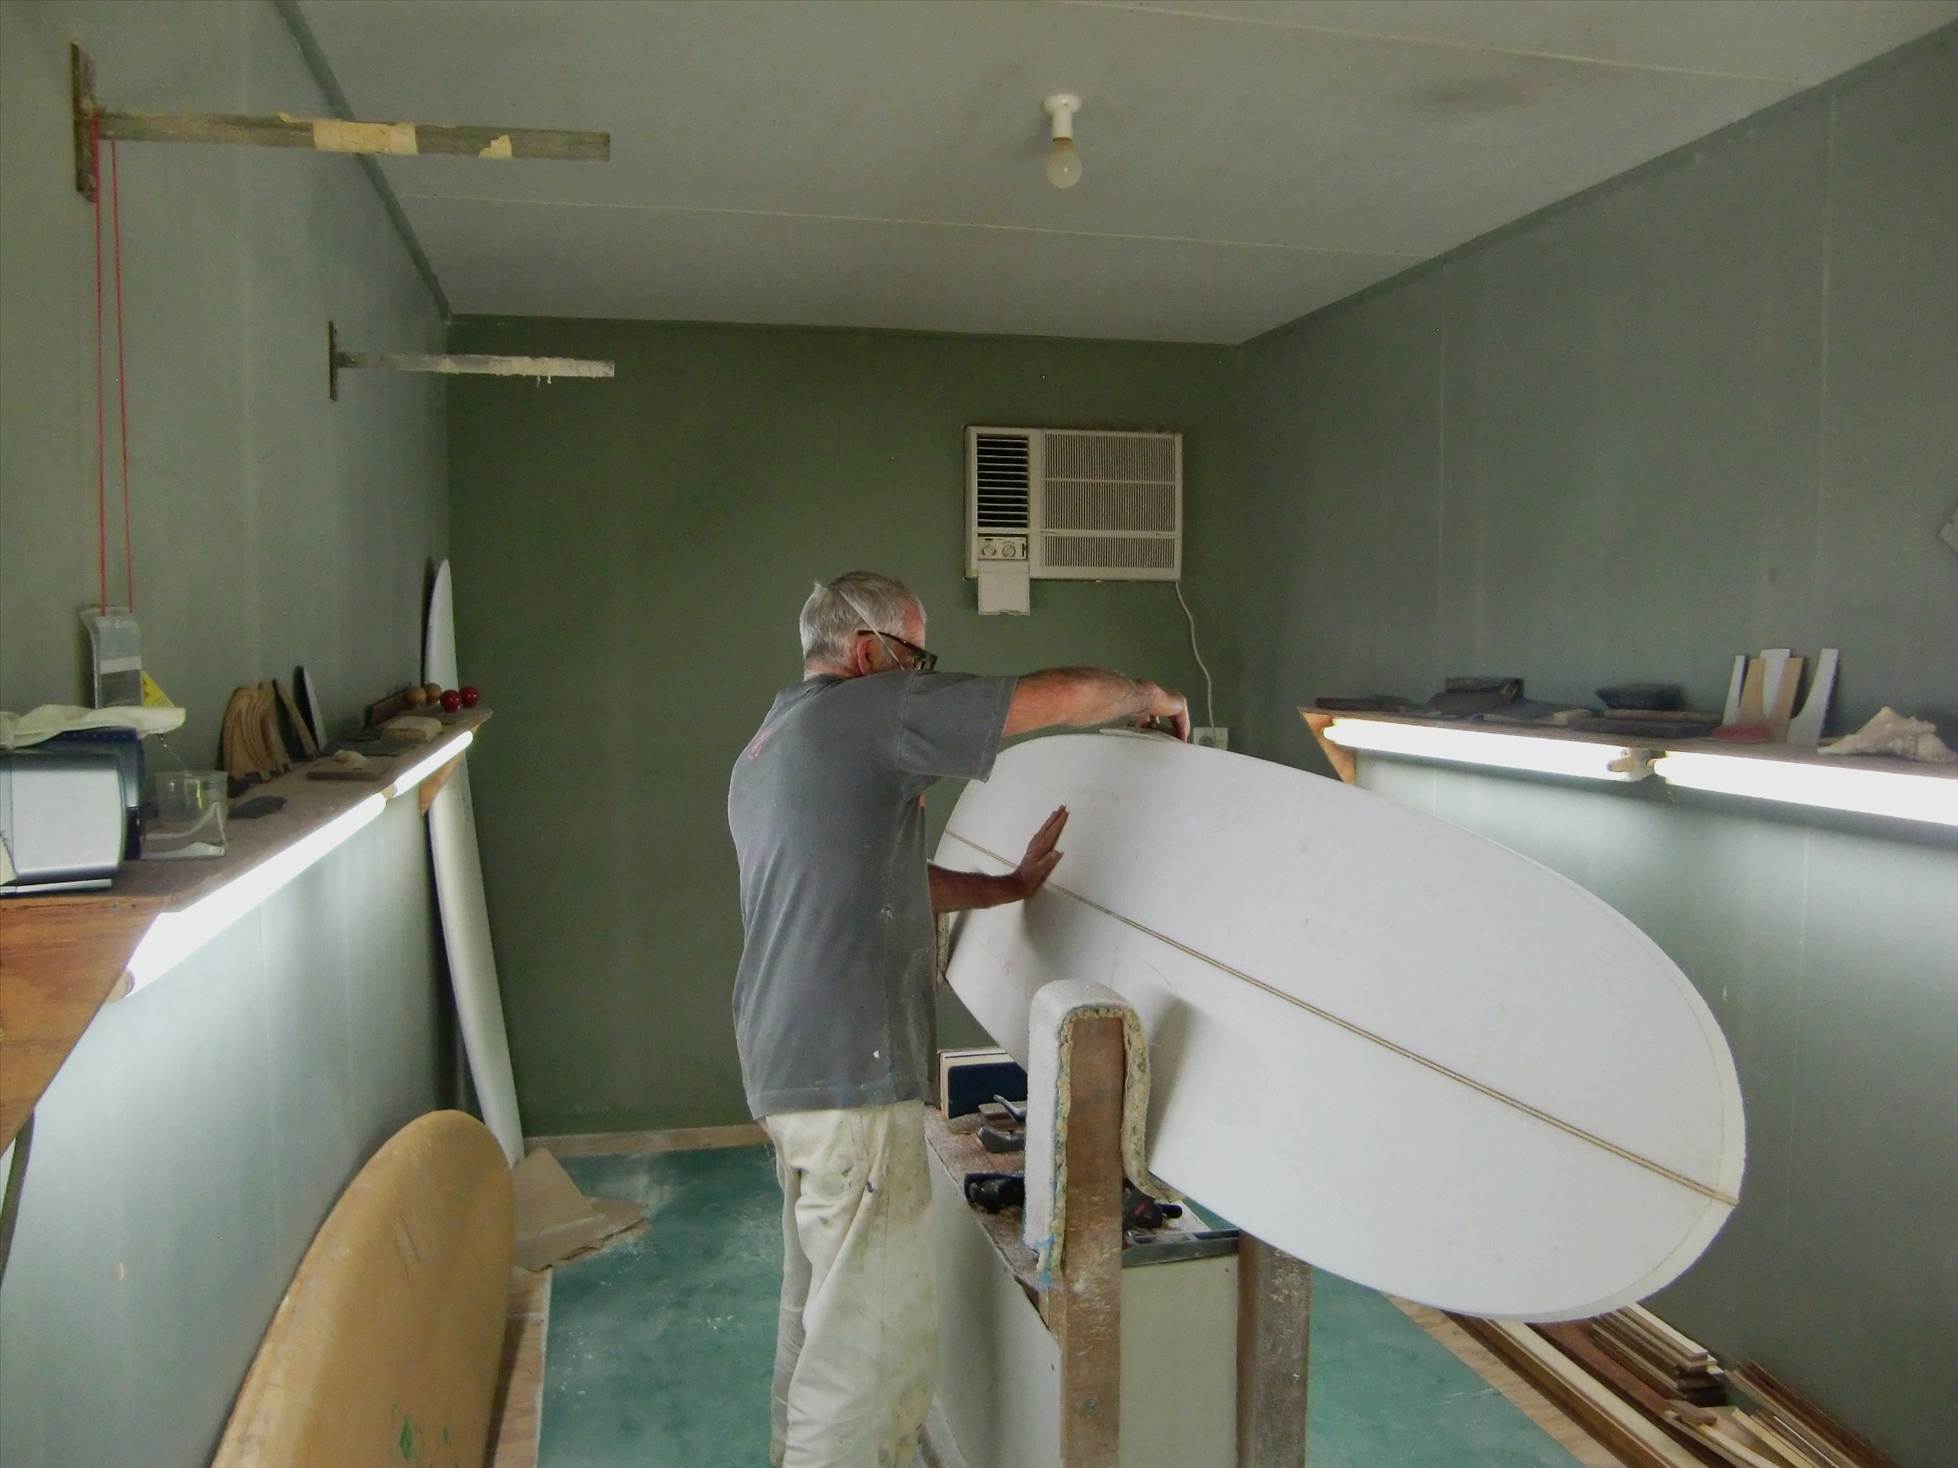
last post the board was roughed out...now its time to start fine tuning...I like to get the stringer down as accurate as I can..I figure if the stringer is right..correct curve and no bumps and whoops...everything will flow on..a number 3 hand plane is my tool of choice for this..I will use smaller planes as I go...to keep stringer down
when I'm happy with the stringer, the trusty sureform comes out and I smooth off the major highs..then I
will go to the no.3 to take it a step further
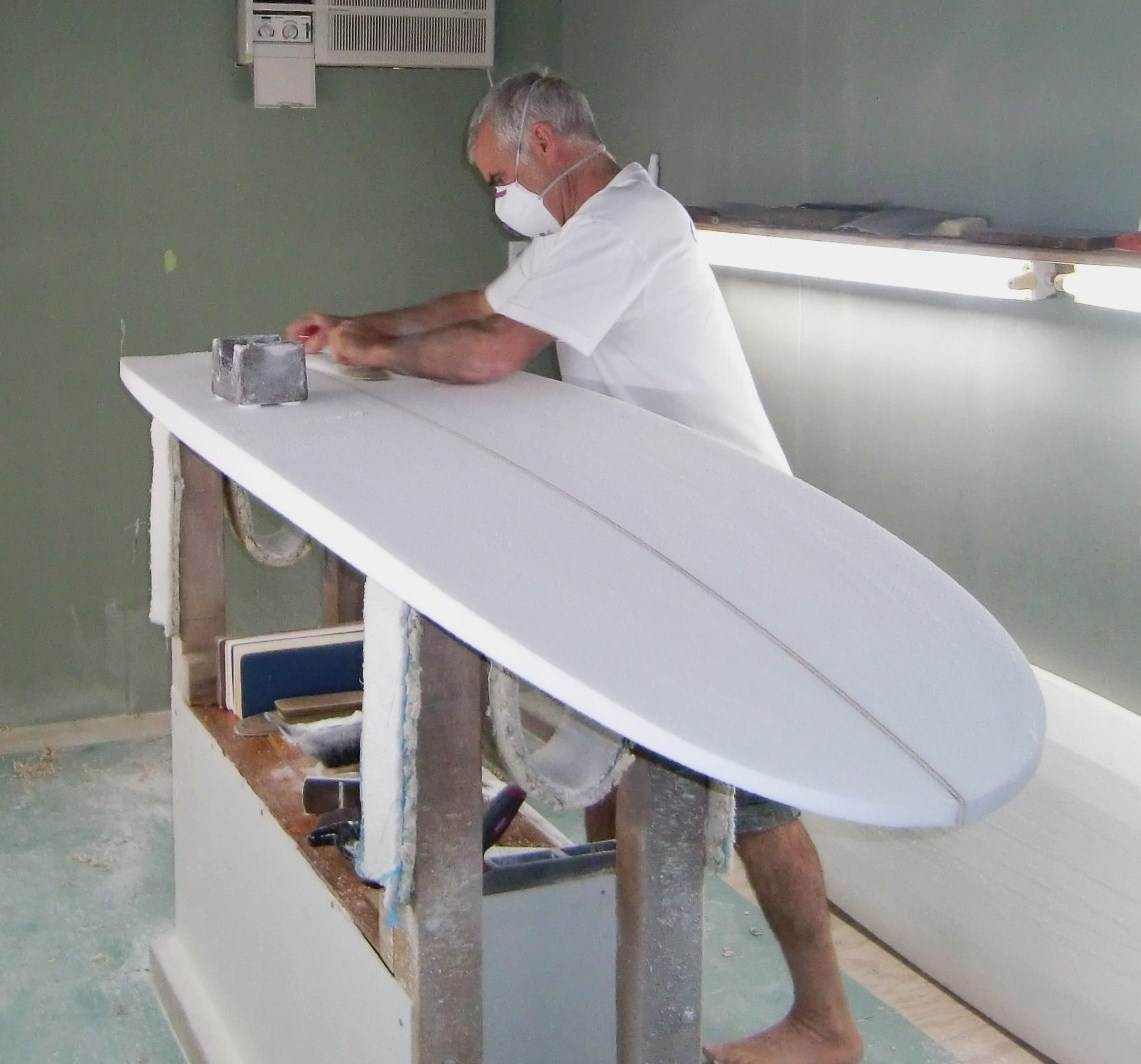
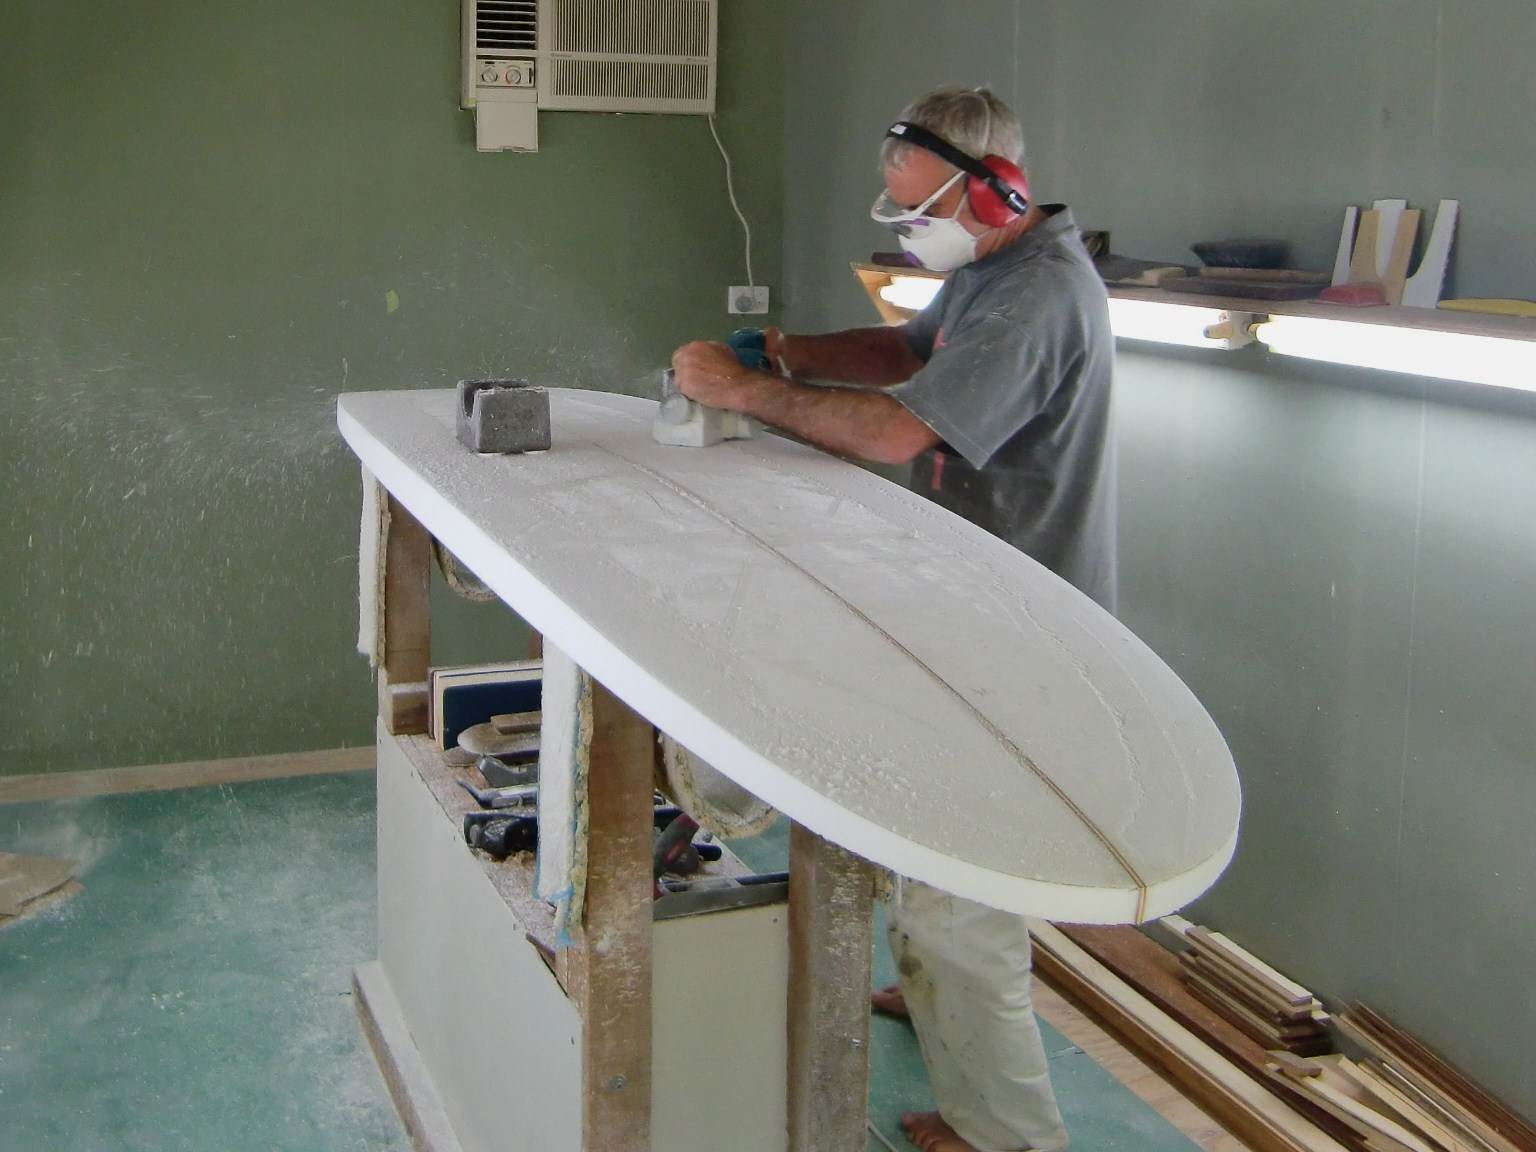
out comes a pupose built sanding block I call the torture board...a long skiny block with 40grit sanpaper stuck to it...great block for accuracy...tough on the old shoulders
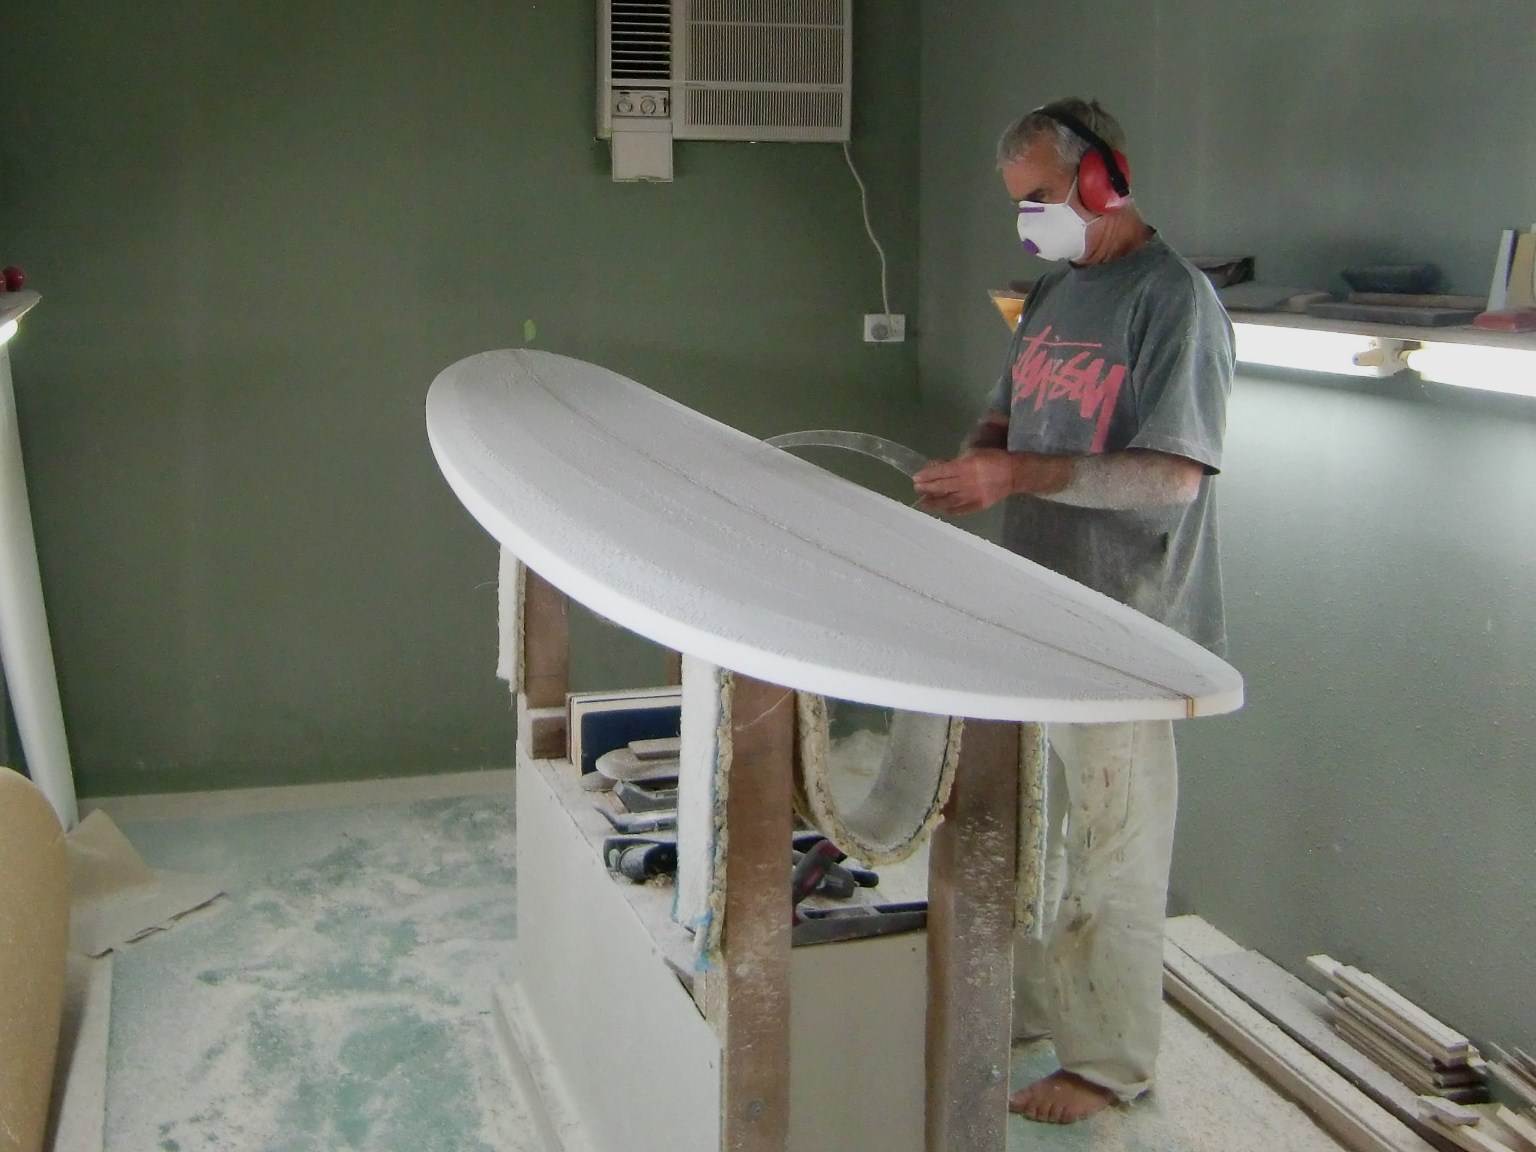
measure the concave with a neat little tool I picked up in Japan
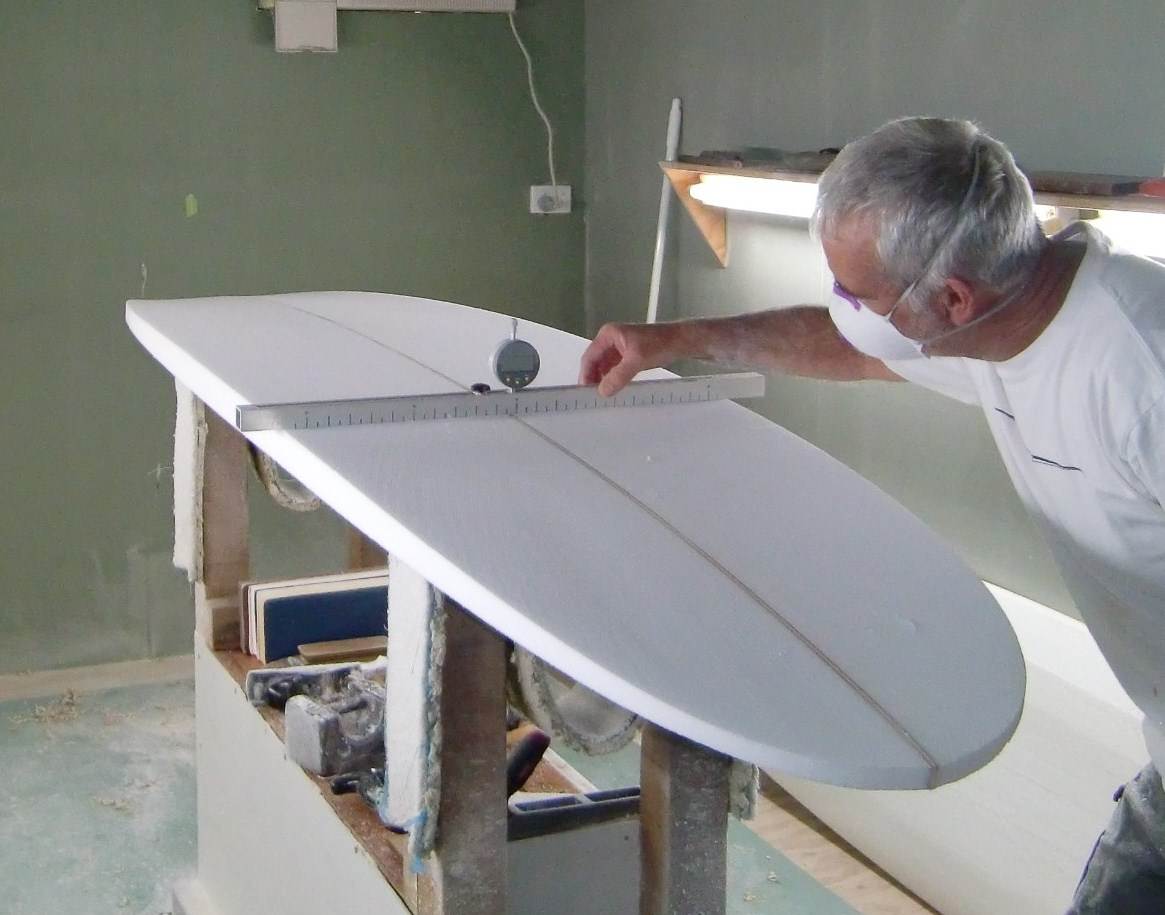
then an age old procedure called winding sticks to make sure you have no twist,
I'm happy with the bottom so it's time for the deck..I've turned off one light so you can see how easy it is to see the shadows...remember the shadows...without them you are pushing $hit up hill to get a good accurate shape,
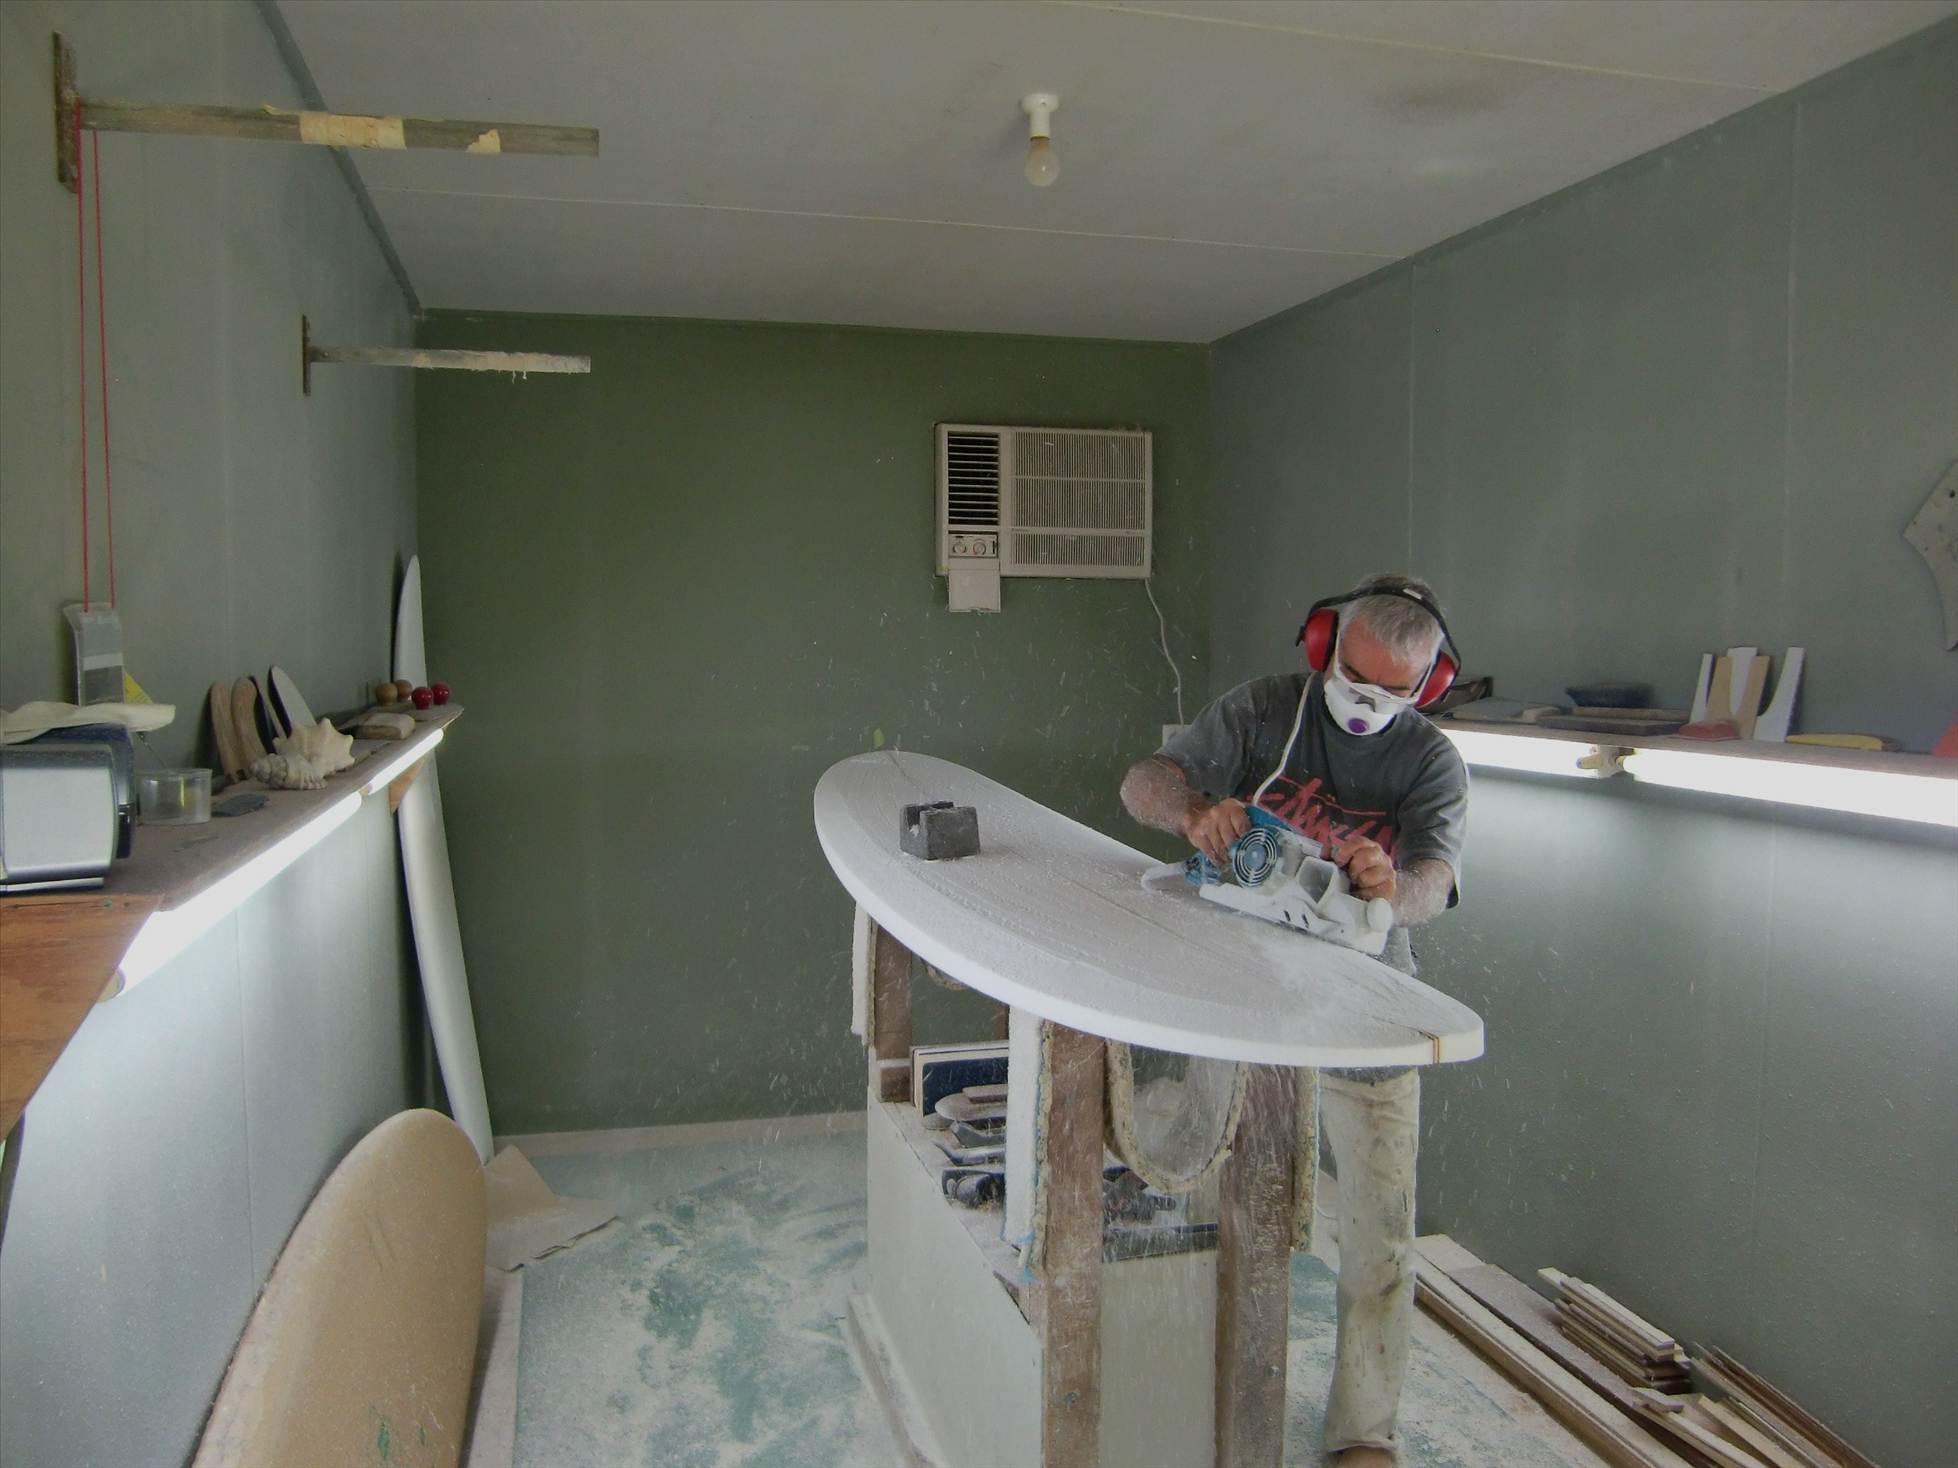
up and down the board with long smooth cuts..take a sureform and take off all the shadows...methodicaly working towards the stringer,
when you have taken as many shadows off as you can you should have a roughly domed deck..the torture board is then used to smooth out any highs...I like to use small strokes at about 45 degrees...starting from the tail and working towards the nose...rolling the torture board over as you go you should end up with a nice smooth rolled deck...the more roll the finer the rail...making sure you leave enough thickness in the rail to shape the rail you desire,

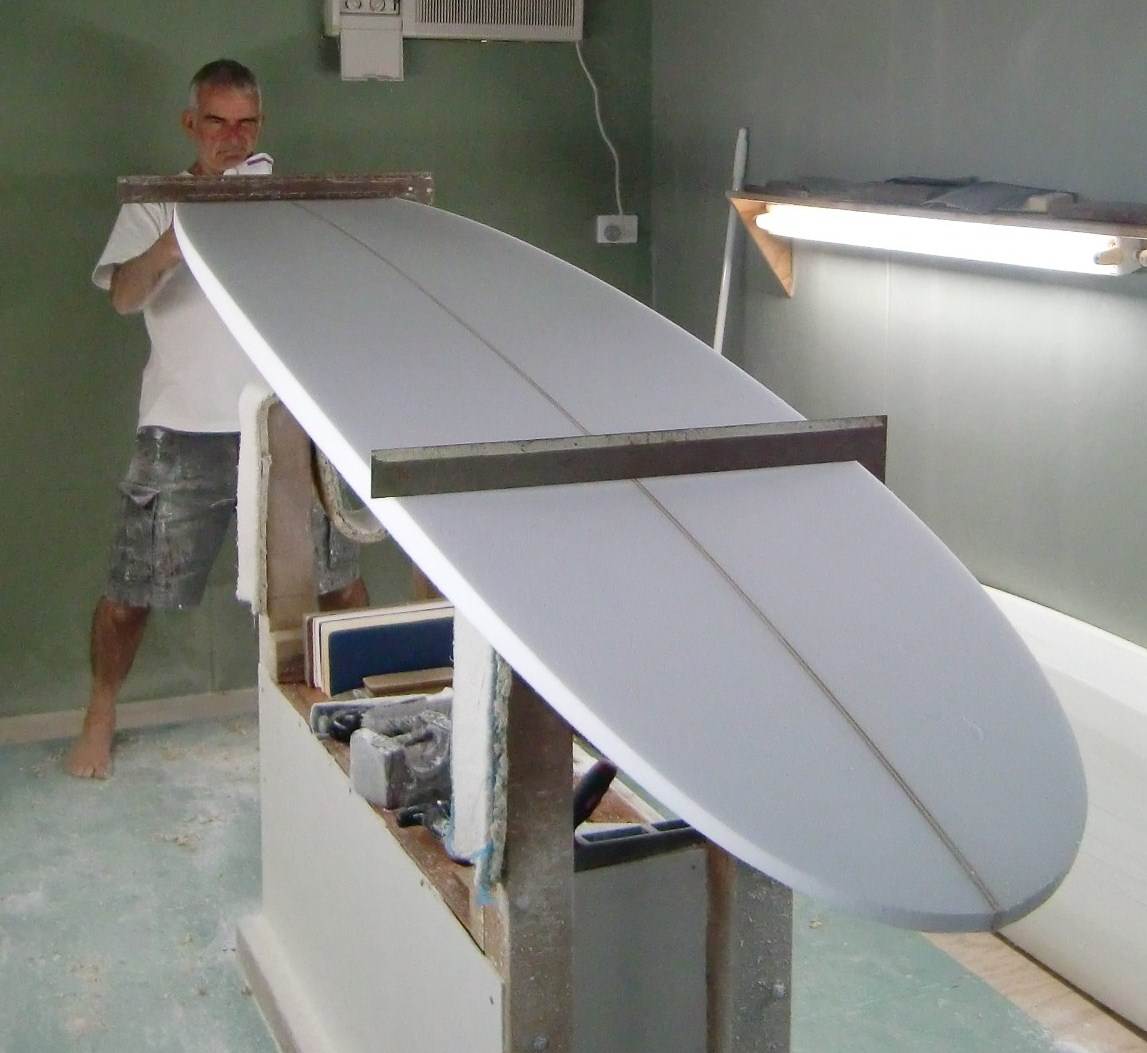
bottom shape is done and deck is rolled...next step...rails...but its beer oclock.
This is a great thread. Stoked to see someone sharing their craft.
I've been hanging out in shaping bays since I was 11, used to clean them out for $2.50 with a broom, brush and spade.
I love these dusty little rooms![]()
I vividly recall using a surform on a blank many years ago and suffering the indignity of having it topple over sideways as I held it in the centre with just one hand.
This of course left a gash in the foam that a middle aged Columbian street Ho would be proud to call her own.
Thus ended any hopes I may have harbored of a being any sort of craftsman.
I notice you hold it very carefully with 2 hands and possible even drag it towards you rather than push it away from you.