Weather | Buy&Sell | Forums |  |
Weather | Buy & Sell | Gallery | Forums | |
www.cruisersforum.com/forums/f116/switching-back-to-hank-on-for-the-headsail-117504-7.html
www.longpassages.org/Documents/Mariner%20Installation%20Brochure.pdf
www.morganscloud.com/2012/03/08/hank-on-sails/
Before you start reading walk to the fridge a get a Beer ![]()

Hi I built a tiller pilot bracket, Was quoted $80 for a raymarine bracket, thought it was a rip off, so I made one $5 of materials
and about halve an hour. Quite easy

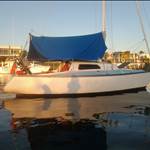
Had some photos taken inside the channel at Serua reef. Bust a stanchion getting back onto the mooring which wouldn't have been possible without the photographer lending a hand. Was blowing a good twenty knots and gusty so not concentrating too much on trimming her up but focusing on avoiding coral. Actually had far too much sail up but I wanted the pictures.]


Seems like this site does not like narrow tall pics, and you need to crop so the ratio of width to height is something like 1:1.3.
McNaughty- what is all that broken edges where you removed the window (port)? Was that part of the window, or part of the cabin side?
She looks good under sail Japie.
What type of rope do you use for your running rigging?. I need to replace my Lazy-Jacks, & was thinking of silver rope, which is what they are now. Is there anything better nowadays with UV resistance, prefer 3 strand for ease of splicing.
cheers

au.yachtworld.com/core/listing/cache/searchResults.jsp?man=Tartan+37+C+B
I would love to take mine back to this in side. The window I have out is the one in the picture here behind the heater and above the cupboard in the corner.
hi Mcnaught , is the rest of you boats interior in teak ? if not, it will be best to match the new timber to what is already there....
depending how your windows assemble , you may be able to get all the windows fitted to the fiber glass boat so they don't leak .
then refit the timber-internal lining last . as that could be purely a cosmetic finish .
Or if the window has to clamp over the lining as well when being fitted ,then you would need to fit the timber prior to the window .
spend time investigating how the system was done originally . then decide which way you will approach the job . write it down and stick to the plan you develop.
there may be a contractor near you, that is willing to have a close look at the job, and advise you on repair methods .
cheers


Very detailed and helpful H G...thank you...will shiw progress as I go...never done any glass before
![]() I cleaned and vacuumed my little boat and changed the Bukhs oil and filter and both fuel filters a and checked the gear box oil . I tidied ever thing up and secured the life lines Bolted down the bowsprirt and ran the motor for a while , Driftwood moving to western port with a stop along the way
I cleaned and vacuumed my little boat and changed the Bukhs oil and filter and both fuel filters a and checked the gear box oil . I tidied ever thing up and secured the life lines Bolted down the bowsprirt and ran the motor for a while , Driftwood moving to western port with a stop along the way ![]()
![]()
![]()
![]()
![]()
I didn't do this today. I did it a few weeks ago. What I have done today is get the photos into my computer so that I can post them here.
What you have been waiting for HG!!![]()
This is my handy work with brush and Feast Watson Exterior Clear (single pack, oil based). Five coats were applied to the tiller and four to the oars.


Part of the job was to fit a bigger diameter bolt holding the tiller extension swivel so that there is not the constant bump, bump on your hand when steering. That will give anybody hallucinations at sea.
This job also was not done today but over the last week.
The old "Clipper Sounder" had it's transducer come loose from the resin holding it to the hull which was directly below the head unit. So the readings I was getting were history as it was located behind the keel.
What you are looking for is a bit of future with your sounder by having your transducer fitted well forward in the hull.
The "Clipper" is replaced by a Garmin echo 150, which at $89 from Tackle World I thought was quite a bargain. It is only monochrome but it has dual frequency, alarms and is configurable to read feet, fathoms or metres. The fish find capability is a bonus.


There was a box of sorts over this and the bulkhead and most of the rest of the yacht had been lined with 3 mm particle board with a matte white finish. The previous owner went to a huge amount of trouble cutting it to size and shape and then glueing it in with liquid nails but buggered it up by using cheap material.
I have removed most of it and I am going to paint the glass with gloss white enamel. The VDO Sumlog is a museum piece and it is replaced with a Garmin GPS Map 72H which though it is their basic unit, it is accurate and has a map plot page. It used in conjunction with Navionics on my 9" tablet should serve my purposes cruising the Queensland coast quite adequately.

I am not going to cut anymore holes and wanted to make best use of the existing holes so I shaped up a piece of meranti from the shed to attach the new instruments to.


Notice the dome nuts on the end of the bolts fitted so that there is nothing sharp to get snagged on.
The halyard and lines bag had to be moved up a couple of inches to prevent fouling on the instruments. I did not use the swivel base for the sounder and flush mounted it to keep the plugs and sockets out of the weather. I bought the weather cover for the sounder also.
I haven't used the swivel part of the GPS mount. The power lead for the GPS is taken through the companionway and it and the GPS are taken inside when not in use so as to keep that socket out of the weather too.
You will see the temperature reading under the depth reading. As the transducer (transom mount type) is mounted inside the hull I won't get an accurate reading of water temperature but hopefully it will be sensitive enough to register changes in water temperature.


The location for the transducer had some loose and flakey paint on it so I gave it a scrape and a bit of sanding. The silicon used is Selleys neutral cure Roof and Gutter Sealant ($8) and was applied with half the nozzle cut off to give a 10 mm bead. It needs to be applied carefully so that there are no air bubbles trapped into it.
I wanted to get it as far forward as possible but also out of the way from getting knocked around. Therefore I placed just behind the main part of the locker under the forward berth.
The 6 metre cable was long enough to reach the head unit but only directly through the main cabin. I will be routing it through the lockers on the starboard side for which purpose I bought the 3 metre extension cable ($40, ouch). Today I bought a 100 pack of stick on cable mounts and zip ties ($26, ouch again) to complete the job. Overall I am really chuffed with the new gear being on the boat.
I mounted mine forward which was a big mistake because it gave crap readings as a result of all the air traveling backward from the bow. I stuck the bloody thing to the hull with Sikaflex and there is no way I can remove it. I had to buy another one!
Does anyone have any ideas for this?

I use a 40 lb plough which is forever causing chipped paint. I was thinking about gluing rubber conveyor belt material to the deck but aside from the fact that it would look crap I'm loath to glue anything to steel in case it rusts underneath.
I was toying with the idea of just building up the paint coating until it's really thick but it would still chipt. I've noticed that you can buy rubber textured coatings but have no experience with them.
Hey Cisco, maybe next time you have some filler left over it would be worth digging some of that core back and sealing.
I'm sure the previous owner must have put clear silicon on maybe.
It could just be paranoid composite boat owner tendencies.